

Insights, ideas and inspiration. A go to wisdom hub right here.
Featured Posts


Tutorials
7 Min Read

Latest Posts
General
10 min read
The Ultimate Enterprise WordPress SEO Checklist 2026 (Part 1)
Introduction
If you're running an enterprise website on WordPress, mastering SEO in 2026 isn’t optional; it’s essential.
As Google’s algorithms evolve and user expectations rise, enterprise websites require a streamlined, scalable SEO approach.
This is a three-part blog series created to help enterprise websites running on WordPress take their SEO to the next level.
In Part 1, we’re focusing on the essential groundwork every enterprise site needs to get right. Here’s what we’ll cover:
- How to set up key tracking and analytics tools like GA4, Google Search Console, GTM, and Site Kit
- What to look for in an SEO-friendly WordPress theme that won’t slow you down
- How to carry out enterprise-level keyword research and map keywords to your customer journey
- Ways to avoid keyword cannibalization so your pages don’t compete with each other
Checklist for Enterprise WordPress SEO Setup
Laying the groundwork is the first and most important step in any SEO strategy. Here’s how to configure your enterprise WordPress setup to support long-term growth and scalability.
1. Set Up Tracking & Analytics Tools
Data is the foundation of every successful SEO strategy. Without proper tracking, you're making guesses, not decisions.
In 2026, data helps you understand what’s working, what needs improvement, and how users are engaging with your website.
Install Google Tag Manager (GTM)

Screenshot 1: Google Tag Manager Platform
Google Tag Manager is a free tool that lets you manage all your tracking codes from one place. Whether you’re adding Google Analytics, heatmaps, or advertising pixels, GTM gives you control without touching your site’s core files each time.
Start by installing the GTM code. If you're using WordPress, a plugin like GTM4WP simplifies the process.
For other platforms, you can manually insert the container snippets into your site’s header and body sections. Once installed, GTM becomes the central location to manage all your tracking tags.
Key Benefits:
- Centralizes all tracking and marketing tags in one place
- Allows non-developers to deploy or update tags without touching code
- Reduces errors caused by manual tag insertion
- Speeds up implementation for marketing and analytics teams
- Makes ongoing SEO campaigns easier to scale and test
Set Up Google Analytics 4 (GA4) for WordPress

Screenshot 2: Setting Up Google Analytics 4 (GA4) for WordPress
Google Analytics 4 is Google’s latest analytics platform that offers event-based tracking, user-centric data, and advanced reporting capabilities designed for modern SEO and privacy standards.
You can create a GA4 property through your Google Analytics account. Setup can be done using the Google Site Kit plugin for WordPress or by adding the GA4 Measurement ID within Google Tag Manager.
Key Benefits:
- Provides deeper insights into user behavior across devices and platforms
- Tracks custom events such as scroll depth, video views, or clicks
- Supports privacy-friendly measurement aligned with 2025 standards
- Offers predictive metrics and enhanced engagement reports
- Helps identify high-performing pages and drop-off points
Configure Google Search Console (GSC)
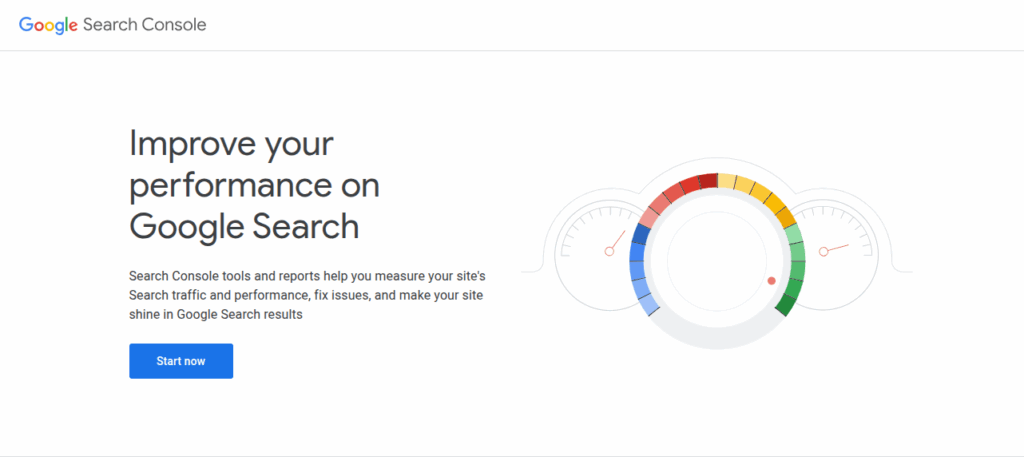
Screenshot 3: Configure Google Search Console (GSC)
Google Search Console provides visibility into how your website appears in Google Search, including performance metrics, indexing status, mobile usability, and technical SEO reports.
To access Search Console data, you must verify site ownership. This can be done using a DNS record, an HTML tag placed in your website header, or by uploading a verification file. Once verified, submit your XML sitemap to assist Google in indexing your pages efficiently.
Key Benefits:
- Shows which search queries drive traffic to your website
- Tracks clicks, impressions, and average keyword positions
- Identifies crawl errors, broken links, and mobile issues
- Helps you improve technical SEO and indexing accuracy
- Keeps your website aligned with Google’s latest guidelines
Link Search Console with Google Analytics 4
When you connect Google Search Console with GA4, you bring together two powerful perspectives. Search Console shows how people find your site through Google, while GA4 reveals what they do once they arrive.
In GA4's Admin settings, you can link your Search Console property. This allows you to view search performance data like top queries, click-through rates, and impressions directly inside your analytics dashboard.
Key Benefits:
- Helps connect keyword performance with on-site behavior
- Allows cross-analysis of impressions, clicks, and engagement
- Improves SEO planning using unified, real-time data
Install and Configure an SEO Plugin
SEO plugins help manage technical and on-page SEO elements such as meta tags, schema, XML sitemaps, content readability, and more, all from your WordPress dashboard.
Yoast

Screenshot 4: Yoast Plugin Website
A widely used plugin for beginners and professionals. It assists with metadata, content analysis, canonical URLs, XML sitemap creation, and breadcrumb configuration.
Key Benefits:
- Gives real-time feedback on SEO and readability as you write content (Paid version)
- Automatically generates XML sitemaps for better indexing
- Manages meta descriptions, canonical tags, and breadcrumbs
- Supports schema markup and integrates with WooCommerce and local SEO modules
- Easy for beginners to use with detailed guides and onboarding
RankMath

Screenshot 5: RankMath Plugin Website
A powerful and lightweight plugin designed for advanced on-page SEO, rich snippets, schema, and automation.
Key Benefits (Free and Paid Version):
- Allows you to optimize for multiple focus keywords in each post
- Includes a powerful schema generator with support for rich results
- Offers automatic image SEO, redirections, and 404 monitoring
- Compatible with WooCommerce and integrates SEO with product listings
- Built-in content AI tools help improve keyword targeting and structure
All-in-One SEO (AIOSEO)
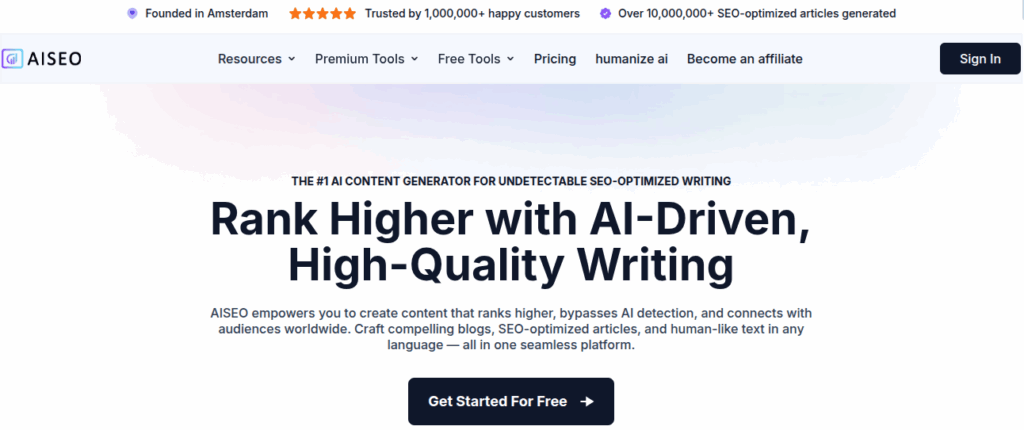
Screenshot 6: All-in-One SEO Plugin Website
AIOSEO is built for users who want more advanced control over technical SEO. It offers strong support for enterprise-level needs, especially for e-commerce and content-heavy websites.
Key Benefits:
- Helps identify SEO issues through a built-in site audit tool
- Supports advanced sitemaps for video, news, and WooCommerce products
- Allows detailed control over robots.txt, meta tags, and canonical settings
- Features local SEO tools for multi-location businesses
- Integrates with social media previews and schema for better sharing
Install and configure the Google Sitekit plugin.
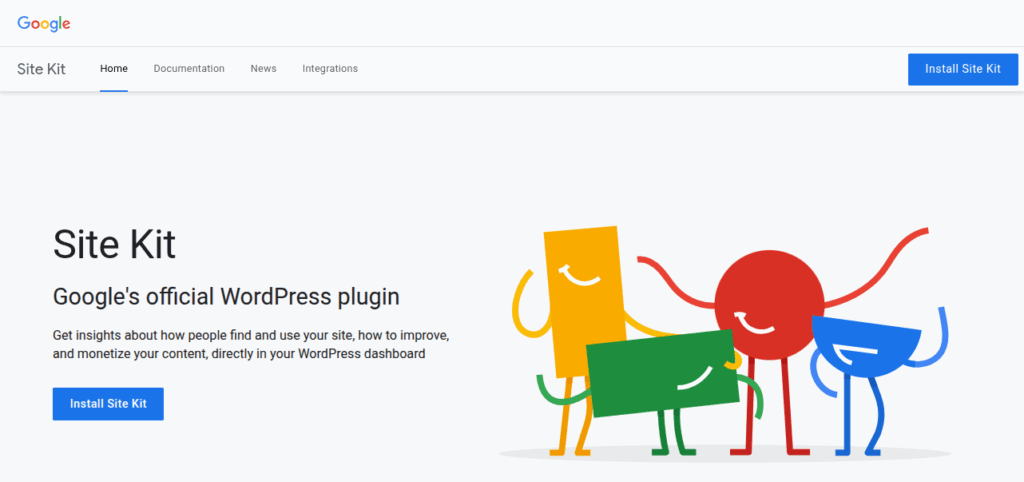
Screenshot 7: Google SiteKit Plugin For Wordpress
Sitekit: Site Kit provides a central dashboard to connect and view data from Google tools like Analytics, Search Console, PageSpeed Insights, and AdSense right from your WordPress admin panel.
Key Benefits:
- Shows real-time performance data for traffic and search visibility
- Helps monitor page speed and Core Web Vitals in one place
- Tracks earnings from Google AdSense without leaving your site
- Makes it easy to set up and verify Google services without code
- Ideal for beginners who want a simple overview of key metrics
2. Choose an SEO-Friendly WordPress Theme
Picking the right theme is more than just about design; it affects your site speed, mobile experience, SEO rankings, and how Google crawls your content.
Here’s what to check:
- Prioritize Site Speed: Select a theme that loads quickly, even before adding plugins, images, or additional design elements.
- Go for a Clean, Lightweight Code:
- Avoid themes that are cluttered with sliders, animations, pop-ups, or unnecessary built-in builders.
- Look for themes that use simple, efficient code with minimal CSS and JavaScript, as this will help Google crawl your site better and keep load times fast.
- Make Sure the Theme is Mobile-Responsive: Your theme should adjust automatically for phones, tablets, and desktops. As Google uses mobile-first indexing, this is non-negotiable.
- Start with a Vanilla theme: If you're technically inclined or have developers on your team, it's best to start with a vanilla, minimalist, and lightweight theme that's optimized for performance. These themes offer a clean slate for custom development without unnecessary bloat.
- Secure & Regularly Updated: Go with a theme that’s actively maintained, updated frequently, and follows WordPress coding standards.
3. Perform Enterprise Keyword Research
If you want your website to rank and bring in the right audience, you need to target keywords that show both search demand and user intent.
Build a database of High-Intent & Long-Tail Keywords.
Start by creating a keyword list that focuses on two things:
- High-Intent Keywords: Terms that show the user is ready to take action (like buy, sign up, or inquire).
- Long-Tail Keywords: Longer search phrases (usually 4 or more words) that are more specific and often less competitive.
Look for keywords that balance volume and difficulty, which have
- Keywords with decent search volume and low-to-medium difficulty
- Terms that show clear search intent (informational, transactional, etc.)
- Niche or long-tail terms that align with your target audience
These keywords are
- Easier to rank due to lower keyword difficulty
- Increases the chance of attracting users farther along the buying journey
- Enables precise targeting for specialized topics
Analyze Competitor Keywords to Find Gaps
If your competitors are ranking for keywords that you’re not, you’re missing out on traffic. Here’s how you can leverage your competitor’s keywords:
- List Your Top Competitors: Start by making a list of your top competitors; these could be websites that consistently outrank you for important search terms in your industry.
- Use Keyword Research Tools: Tools like Ahrefs, SEMrush, or Ubersuggest to see the terms your competitors rank for, but you do not.
- Look for:
- Keywords where your competitor ranks in the top 10 or 20 positions
- Keywords relevant to your business, products, or services
- Long-tail or niche keywords with lower competition
Key benefits of competitor keyword analysis include
- Reveals untapped keyword opportunities
- Helps you target high-value niche terms
- Keeps you competitive in crowded verticals
4. Map keywords to buyer journey stages.
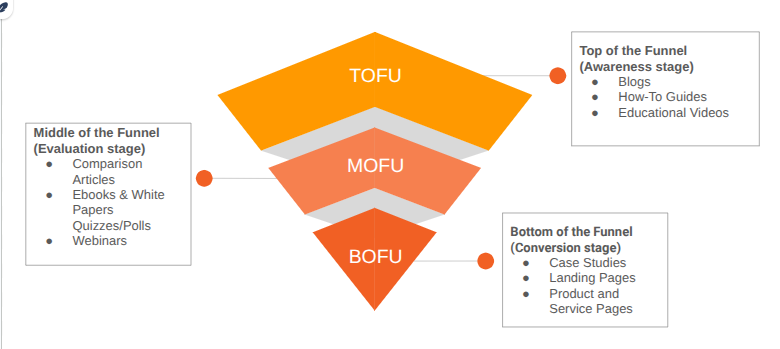
Figure 1: Content Funnel
Create funnel-aligned content
Top of the Funnel (TOFU): Awareness content, such as blogs, articles, how-to guides, and educational videos.
Middle of the Funnel: Comparative or educational content, e-books, white papers, quizzes, polls, or webinars.
Bottom of Funnel (BOFU): Product and service pages, keyword-based landing pages, location pages (to capture local search intent), or case studies.
Few Tips
- Build topic clusters and pillar pages: Organise related articles around a core page to strengthen topical relevance and increase chances of ranking for broader and related search queries.
- Apply Google’s E-E-A-T framework: Showcase expertise, real experience, author credibility, and trustworthiness—especially on product, health, or financial pages.
- Publish content consistently: Keep your site fresh and authoritative by maintaining a steady publishing schedule that aligns with your content strategy.
5. Setting Up Keyword Rank Tracking
Regularly monitor keyword performance in SERPs
Consistently tracking your keyword rankings in search engine results pages (SERPs) is essential for understanding how your content is performing over time.
Track rankings to:
- See which keywords are improving or dropping in rank.
- Spot seasonal changes, new opportunities, or sudden drops that may need attention.
- Measure the impact of your optimizations, content updates, and backlink strategies.
- Facilitates iterative improvements and strategy adjustments
Tools for rank tracking:
6. Avoid Keyword Cannibalization
Keyword cannibalization happens when two or more pages on the same site, including across subdomains, focus on the same or very similar search terms and intent.
When multiple pages compete for the same keyword:
- Google receives mixed signals, making it unclear which page should rank, often resulting in inconsistent SERPs
- SEO authority gets split between pages
- None of the competing pages may perform well because they’re all undercutting each other’s potential.
Here’s how to fix and avoid this problem:
- Map one primary keyword per page: Make sure each important keyword has just one target page.
- Review existing content: Go through your site and check for overlapping topics or duplicate targeting.
- Consolidate pages if needed: If two pages cover the same topic, combine them into one strong, SEO-optimized page.
- Improve internal linking: Link other related pages back to your main target page for that keyword.
Key benefits of avoiding Keyword Cannibalization
- Prevents dilution of page authority:
- When you have multiple pages targeting the same keyword, your internal links and backlinks get split across them.
- This weakens each page because none of them gets enough SEO power to rank well.
- By focusing all your links and authority on one main page, you give it the best chance to rank higher.
- Clarifies search engine signals on the page's purpose:
- When Google sees multiple pages about the same keyword, it gets confused about which one is most relevant.
- By keeping one page per keyword, you send Google a clear signal: “This is the page that should rank for this topic.”
- Supports stronger ranking performance:
- When your SEO signals aren’t divided, your most relevant page performs better, drives more organic traffic, and gives users exactly what they’re looking for.
- This also increases your chances of getting clicks, leads, or conversions from searches.
Conclusion
Setting up your enterprise WordPress site for SEO isn’t about quick wins; it’s about building a strong, scalable foundation. In this first part, we’ve covered how to get your tracking tools in place, pick the right theme, plan your keyword strategy, and avoid pitfalls like keyword cannibalization.
With these basics sorted, your site is already on the right path to outperform competitors and stay aligned with SEO best practices.
Next up in Part 2, we’ll dive into the more advanced strategies like on-page SEO techniques, building a smart internal linking structure, and fine-tuning technical elements to help your site perform at its absolute best.
Plugins
15 min read
Best AI plugins for WordPress in 2026
Introduction
In an era where technology and AI are transforming various fields, it is no surprise that WordPress has adopted this trend. AI plugins and services for WordPress have revolutionized the way website owners and content creators operate. These WordPress tools leverage AI and machine learning to boost productivity, content quality, and user experience.
AI plugins and services for WordPress are made to automate tasks, give data-driven insights, and help with content optimization. Using such AI plugins enables you to work smarter, not harder.
Understanding AI Plugins and Services
Before we begin, let us understand the buzz around AI in WordPress.
WordPress AI plugins and services provide AI-powered features, automate activities, and provide data-driven insights to WordPress websites. These tools boost website performance, content production and management, and user engagement.
WordPress AI plugins and services seamlessly integrate with WordPress websites, usually through the use of APIs (Application Programming Interfaces) or custom plugins.
To use these AI Plugins, just install and activate them. Yes, it’s as easy as installing other plugins!
Why Use AI Plugins on WordPress in 2026?
AI tools help with everyday tasks, enhance your content, and create a smoother, more enjoyable experience for your visitors. Let’s break down how they can practically help your site.
- Enhance the Quality of Your Content: Crafting high-quality content requires time, but AI tools can streamline the process and make it more effective.
- Fix Mistakes Automatically: Plugins like Grammarly help catch typos, grammar issues, and unclear sentences.
- Suggest Better Phrasing: AI can recommend how to improve sentence structure, word choice, and tone.
- Provide Content Ideas: Based on trending topics or keywords, some AI tools suggest what to write about next.
- Save Time on Routine Tasks: Running a website comes with repetitive tasks that eat up your time. AI plugins can help with:
- Generating First Drafts: AI can write basic versions of blog posts, product descriptions, or email replies. You just need to review and refine them.
- Scheduling and Publishing Posts: Some tools allow you to set posts to go live automatically at the best time.
- Finding Relevant Content: AI can search the web and suggest articles, videos, or images to include in your site, saving you hours of manual effort.
- Make Your Website Easier to Find (SEO Help): Getting your content seen on Google or Bing is important, and AI plugins can help with that, too.
- Keyword Suggestions: AI tools help you find the right keywords to target so your content ranks better.
- SEO Recommendations: They suggest ways to improve meta descriptions, headings, and page structure for search engines.
- Content Optimization: You’ll get real-time tips to enhance content readability and keyword use, both of which help with SEO.
- Offer Better User Support, 24/7/: Visitors appreciate fast answers, and AI chatbots make that possible.
- Instant Replies to Common Questions: Chatbots can help users find pages, ask about products, or resolve basic issues—even when you're offline.
- Improved Navigation and Experience: A well-set-up chatbot can guide visitors through your site, making it easier for them to find what they need.
- Grow with Confidence (Scalability): Whether you're starting a small blog or growing an online store, AI tools can scale with your needs:
- Handles More Work as You Grow: As traffic increases, AI helps you manage more content, more interactions, and more data without extra workload.
- Flexible for Different Website Sizes: Whether you're a one-person team or part of a company, AI tools adjust based on how simple or complex your site becomes.
- Cost-Efficient and Budget-Friendly: Hiring writers, editors, developers, and support agents can be expensive. While AI can’t fully replace people, it reduces the need for multiple tools or external help:
- Fewer Tools Needed: Many AI plugins combine multiple features into one solution.
- More Done, Less Spent: With fewer manual tasks to handle, you can focus your time and resources on areas that grow your site faster.
Note: While there are many varied benefits of AI in WordPress, we are focusing only on its benefits for content creation in this blog post.
Must-Try AI Plugins For Content and Image Generation
WP Wand
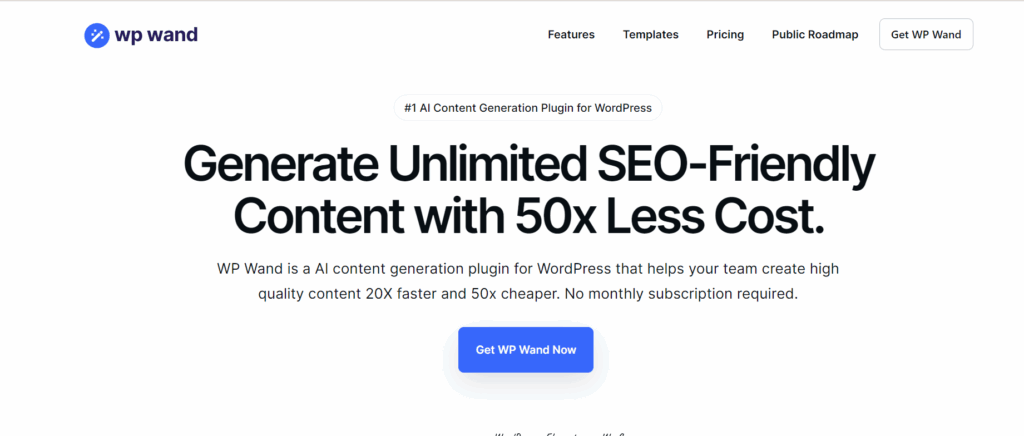
Screenshot 1: WP Wand Website Dashboard
WordPress's powerful AI content-generating and writing assistant plugin is WP Wand. High-quality, engaging content is easily generated without breaking the bank using complex algorithms and OpenAI's popular models like ChatGPT, GPT-3.5, GPT-4, DaVinci, and more.
WPWand integrates with Gutenberg Editor, Classic Editor, Elementor Page Builder, and WooCommerce to improve writing. It's seamless AI writing experience lets you write any content.
Develop a lengthy blog article in under two minutes or produce several posts with our Bulk article Generator.
WP Wand now supports Rank Math and Yoast SEO to boost SEO.
Stop straining to find content ideas, spending hours on research, and gazing at an empty screen. WPWand's technology is there to handle that. WP Wand can help you write articles, blog posts, marketing copy, social media postings, email content, and product descriptions.
Key Features:
- While you can freely use ChatGPT, it comes with its drawbacks of brief and unedited content. WP Wand overcomes this downside by providing long, useful content and ready-to-use formatting.
- With ChatGPT being integrated with Gutenberg, WP Wand makes writing smarter and faster than ever.
- Image generation is also provided in this plugin.
- Comes with 40+ ready-to-use templates for content creation.
- More than 42 languages are supported.
- Create bulk posts at a time in the pro version.
You can learn about the pricing structure of WP Wand here.
Getting Started With WP Wand
- Enter the OpenAPI key to start using the plugin.
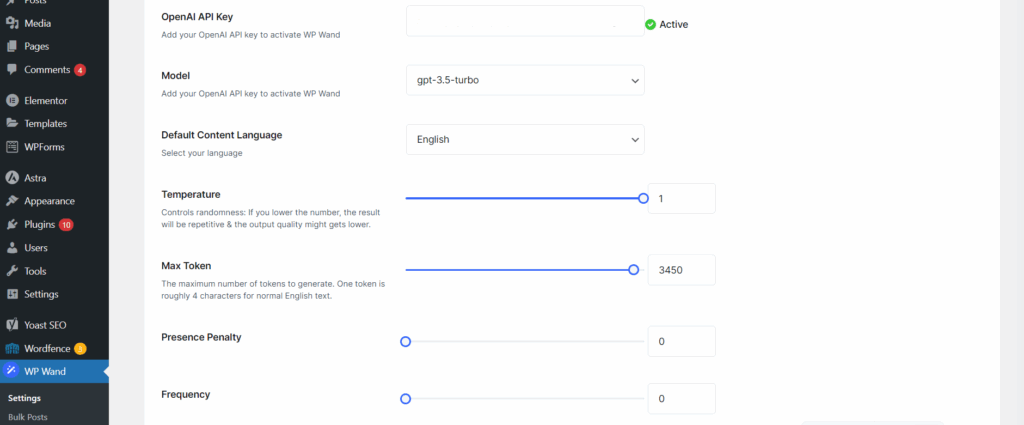
Screenshot 2: Enter the OpenAPI Key
- Once added, WP Wand’s AI features are ready to go, right from your dashboard.
- Once installed, WP Wand blends into your existing editor—whether you’re using Gutenberg, Classic, or Elementor.
- You’ll find the AI Assistant and ready-made templates added right where you work, so you can start generating content without switching between tools or tabs.
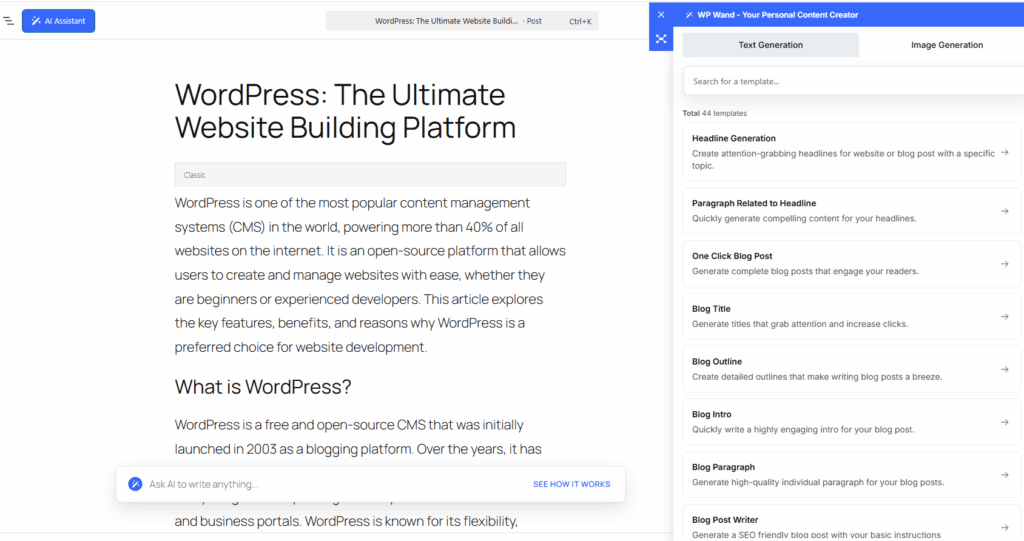
Screenshot 3: WP Wand AI Assistant and Templates Added to Your Integrated
WP AI CoPilot
Screenshot 4: WP AI CoPilot Website Dashboard
WP AI Co-Pilot, the most powerful WordPress AI content writer plugin, will transform your content generation and user engagement. A robust plugin that makes use of GPT-3, OpenAI's state-of-the-art language model. This WordPress plugin lets you easily write high-quality articles, eliminating human effort and saving time. This plugin works for OpenAI writers and GPT-3 article generators. AI content Writer for WordPress overcomes writer's block and streamlines article writing.
Key Features:
- The plugin provides personalized prompts according to your needs and interests in your content.
- The plugin is GPT AI-powered.
- Useful for rephrasing content.
- Generate Meta titles, meta descriptions, and SEO-optimized content.
- Useful for generating captions for social media.
- Helpful for drafting an outline for the blog.
To learn about the pricing plan of WP AI Co-Pilot, click here.
Getting Started With AI CoPilot
- Enter the OpenAPI Key to start using the plugin.
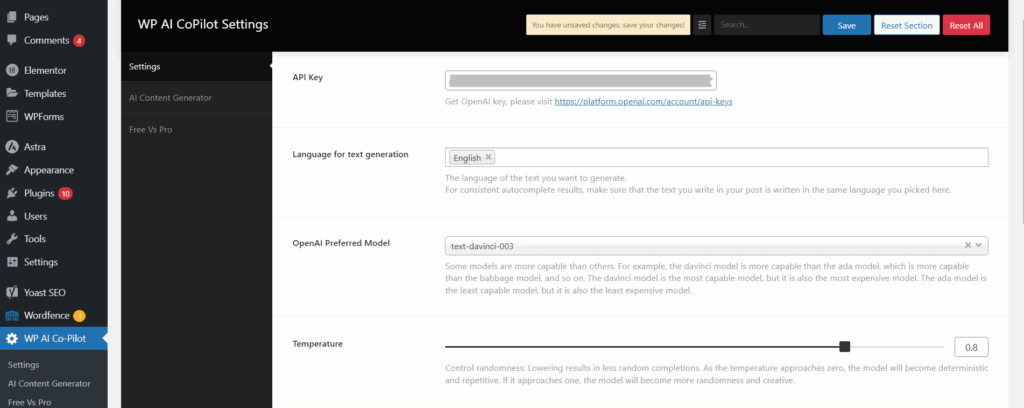
Screenshot 5: Enter the OpenAPI Key
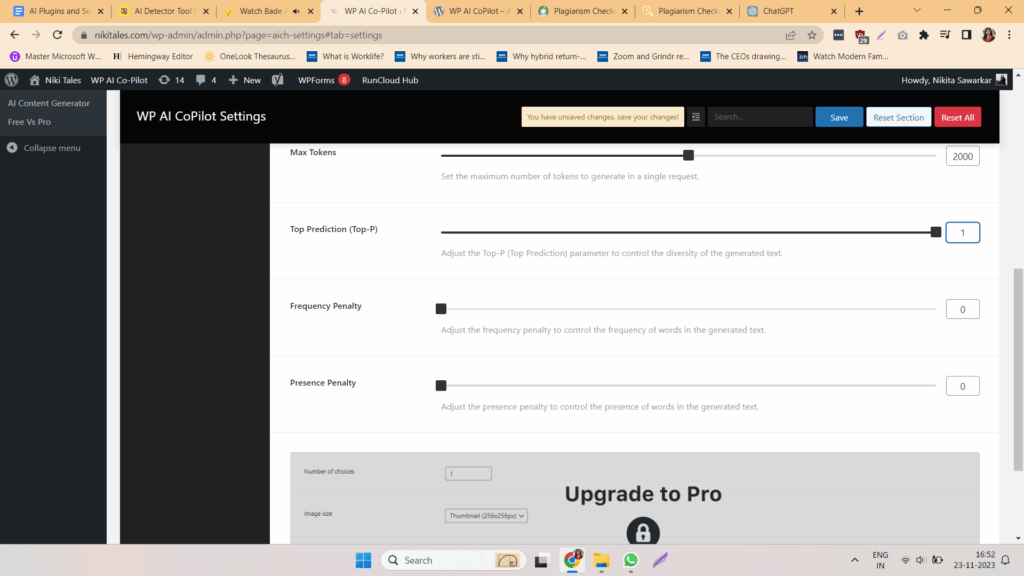
Screenshot 6: WP AI CoPilot Settings
- Next, you can select the prompt language you’d like to work in and perfect if you’re writing for an international audience or managing multilingual content.
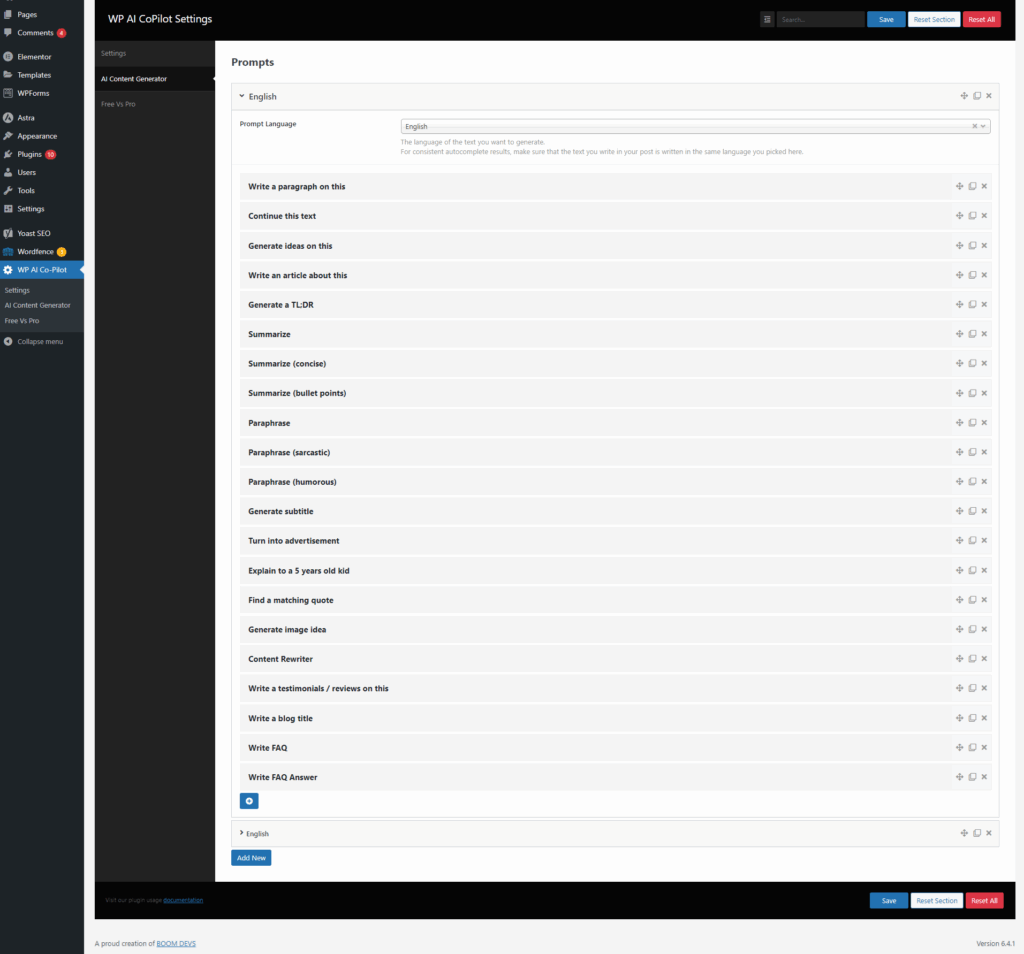
Screenshot 7: Content Generation Options
Let’s explore one of the most popular tools, "Write a Paragraph on this". Simply enter your prompt or title, and CoPilot will generate a meaningful paragraph based on your input.
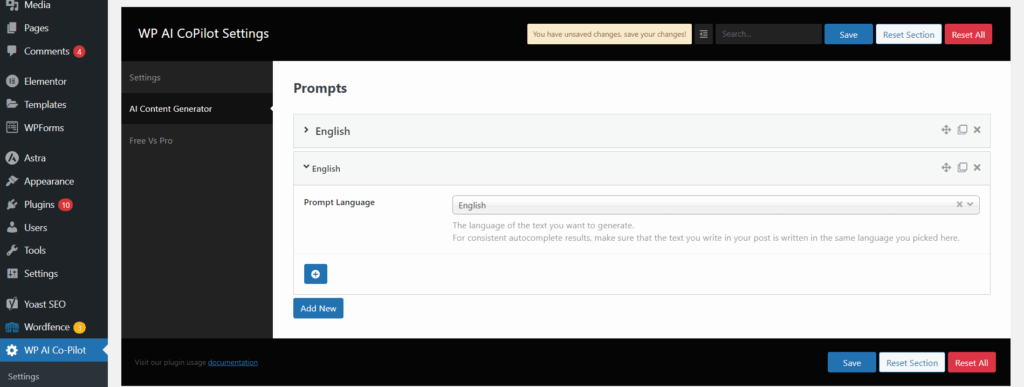
Screenshot 8: Select Prompt Language
- Once set up, you’ll have access to a wide range of content tools right inside your editor. WP AI CoPilot offers options.
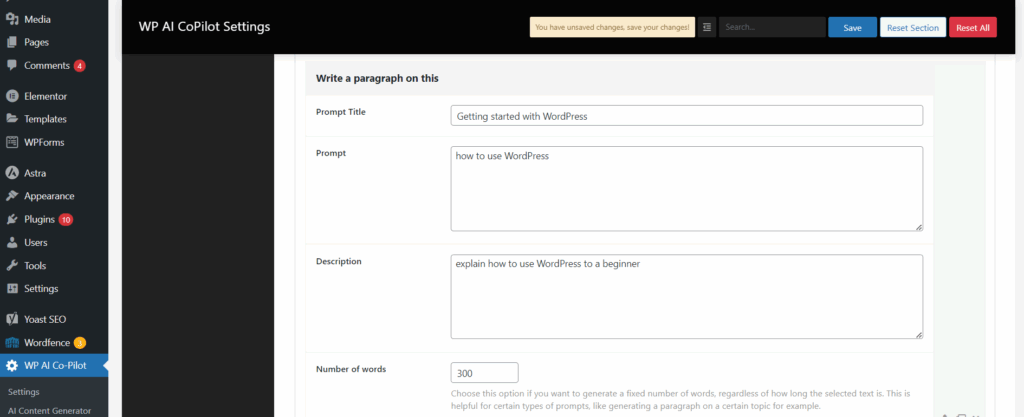
Screenshot 9: Enter prompt title
For advanced features like choosing your tone of voice, defining your audience, adding custom fields, and unlocking more creative control, you can upgrade to the Pro version.
AI Bud WP
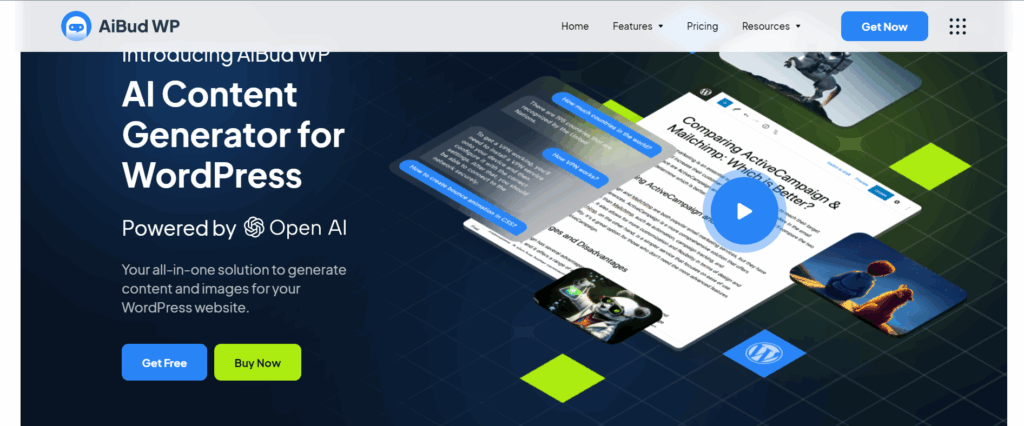
Screenshot 10: AI Bud WP Website Dashboard
AiBud WP WordPress plugin helps you write captivating blog articles with SEO titles and product descriptions, generate AI images, proofread your content, and translate into more than 30 languages. An AI-powered, user-friendly tool simplifies content creation, eliminating the effort involved.
Key Features:
- Quickly generates brief content according to your tone and style.
- You can make a list of topics and then use one click to make multiple posts or pages.
- Virtual Chatbot to help you with everything. To create a customized brand assistant, train your chatbot using datasets and related responses.
- Generate realistic images according to the prompt and type (cartoon, vector, etc)
- The Playground has a prompt section where users can offer AI instructions and learn about its capabilities.
To learn about the pricing plans of AiBud WP, click here.
Getting Started With AI Bud WP:
- Install and Activate the AI Bud WP Plugin.
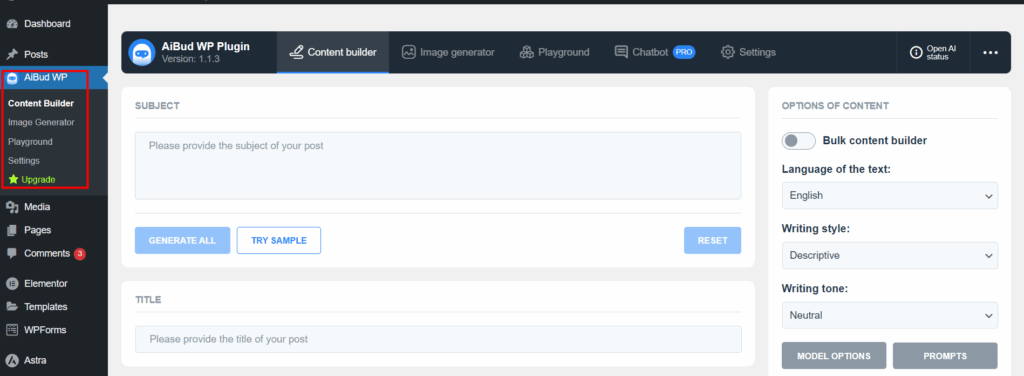
Screenshot 11: AiBud WP Plugin when Activated
- Go to settings and enter the OpenAPI key to use the plugin.
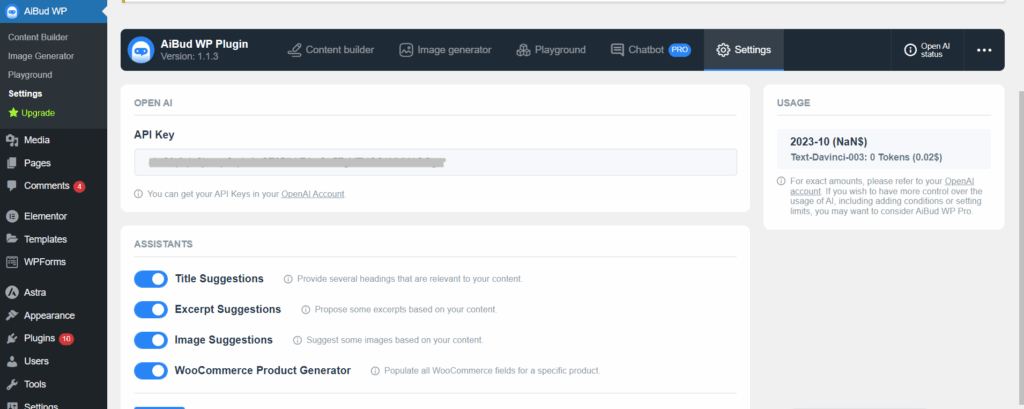
Screenshot 12: Enter API Key
- To generate the content, enter keywords or the subject title of the topic.
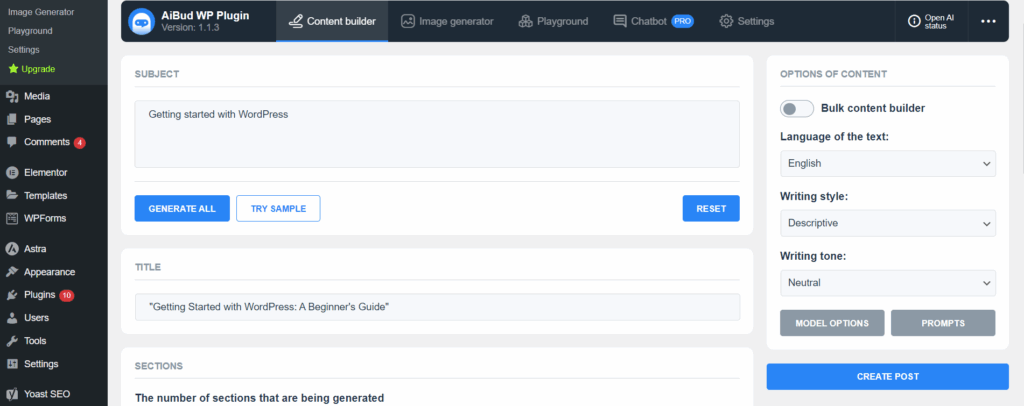
Screenshot 13: Enter Subject Title
- Before generating content, you can control how detailed it is:
- Choose how many sections you want
- Select the number of paragraphs per section
- Automatically generate an excerpt if needed
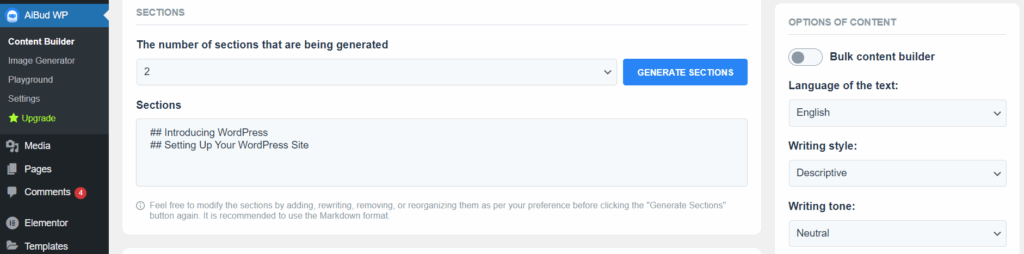
Screenshot 14: Select the number of sections to be generated
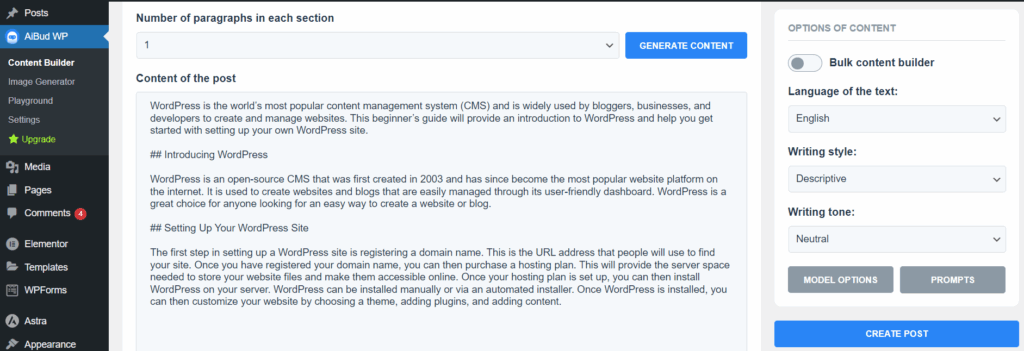
Screenshot 15: Select the number of paragraphs to be generated
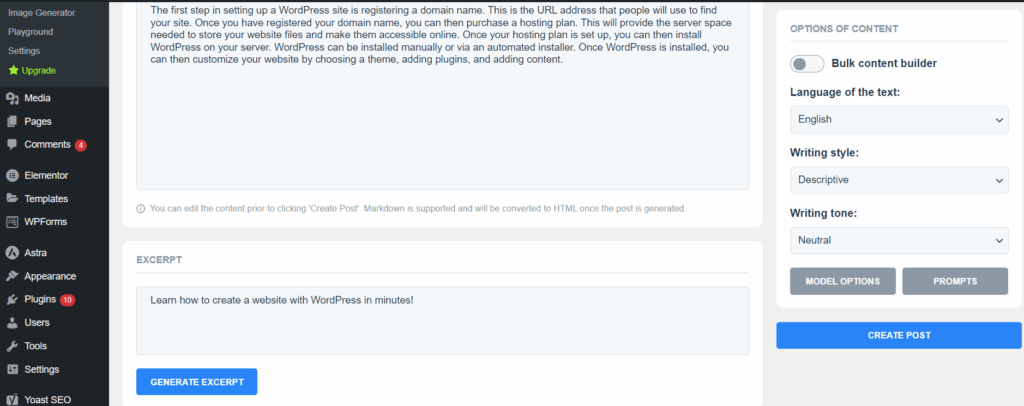
Screenshot 16: Generate Excerpt
- Before finalizing your post, you can fine-tune the output by selecting:
- Preferred language
- Desired writing style
- Tone of voice (formal, casual, informative, etc.)
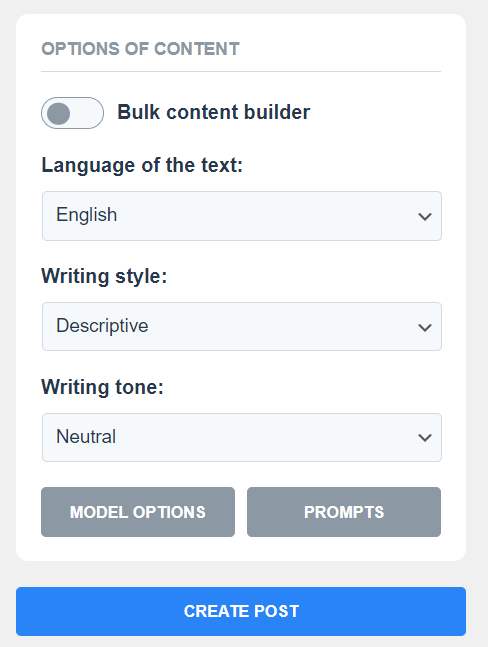
Screenshot 17: Options for Creating a Post
- The plugin also lets you create AI-generated images right from WordPress.
- Head over to the Image Generator tab, and simply describe the kind of image you want to generate. The AI will create visuals based on your prompt.
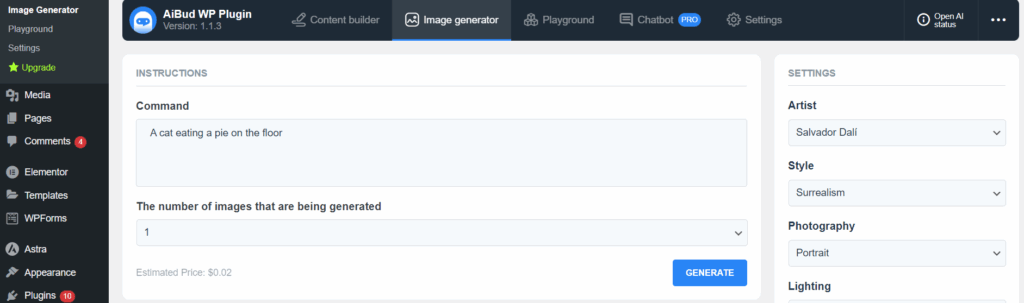
Screenshot 18: Describe the image to be generated in the Command Section
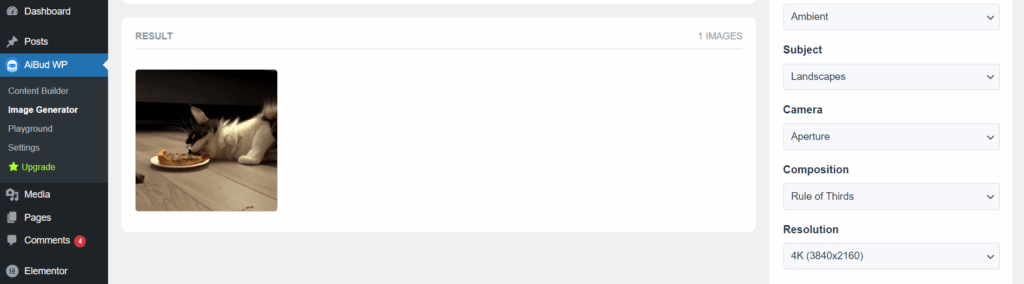
Screenshot 19: Image Generation Result
- You can also customize your images by adjusting options like:
- Camera angle
- Size and aspect ratio
- Lighting
- Resolution
- Composition and more
- With the help of the robust Playground section, you can have live conversations with the AI to learn more about its capabilities.
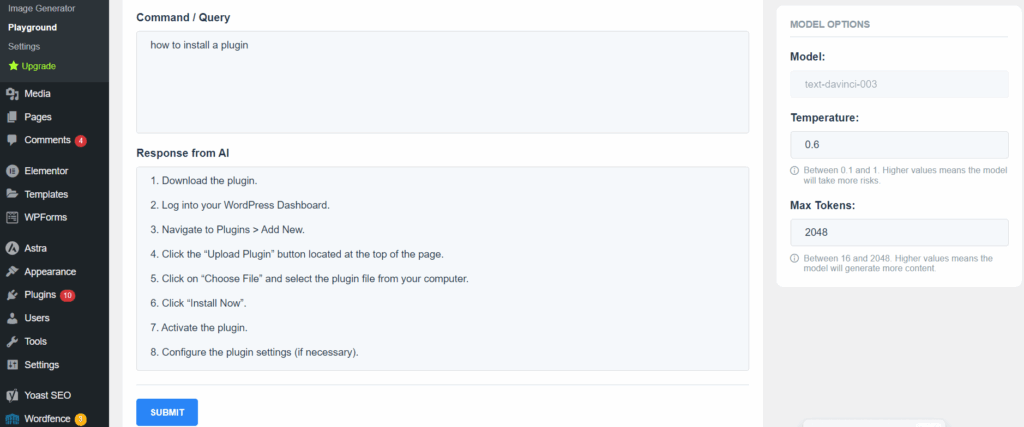
Screenshot 20: Playground Section of the Plugin
- A prompt response will be provided to any inquiry you enter.
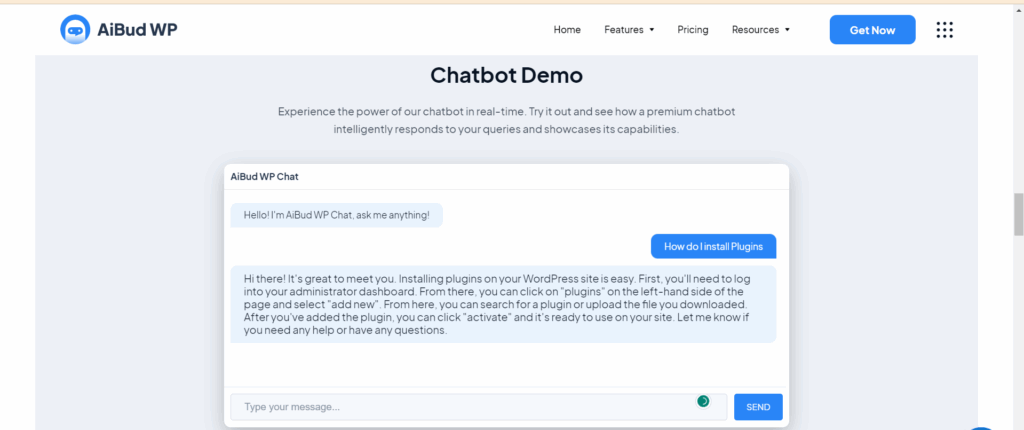
Screenshot 21: ChateBt Demo
Supreme AI
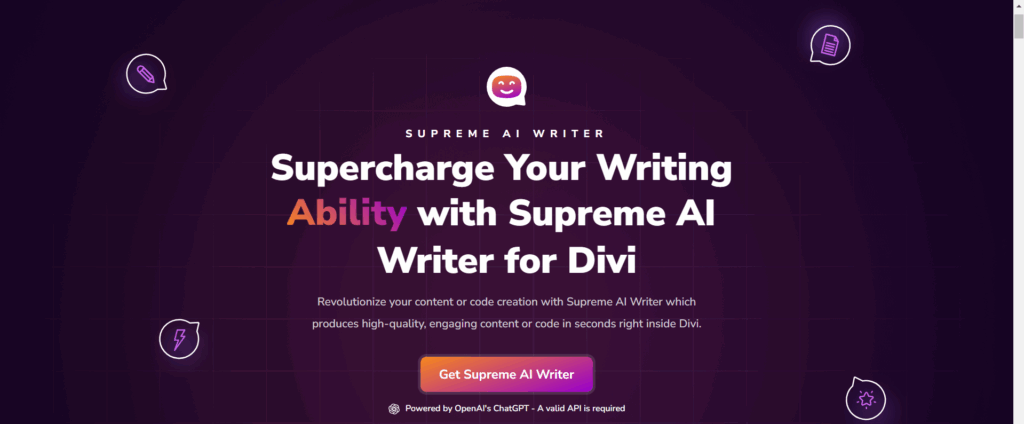
Screenshot 22: Supreme AI Plugin Website
DIVI Supreme AI Writer is a revolutionary plugin that uses AI to transform content creation. It is a plugin developed by Divi Builder. Just a few clicks can produce stunning, engaging content that will leave the readers stunned. All you need to do is provide a brief description or outline of what you want to write about, and the magic begins!
Note: This plugin can only be used if you have Divi Builder.
Key Features:
- More than 20 tones are available to write the content according to the tone you select
- Around 19 styles of writing to choose from
- Provides temperature control settings. It is possible to change the temperature to change how original and novel the result of an AI system is. Lower temperatures produce more predictable outputs, whereas higher temperatures produce more creative and innovative outputs.
- Choose how many words of content you require.
- Integrating with Divi Builder allows you to code through AI.
You can get Supreme AI Writer for $29 per year.
AI Power
Screenshot 23: AI Power Plugin
AI Power is a powerful WordPress plugin that uses OpenAI's GPT language model to generate high-quality website content, pictures, and forms. Content Writer, Auto Content Writer, Image Generator (DALL-E and Stable Diffusion), WooCommerce Product Writer, Audio Converter, hundreds of prompts and forms, and AI Training are included in this plugin.
Key Features:
- Along with content and image generation, this plugin generates smart forms using AI for your website.
- An AI-powered chat widget to engage your customers visiting your site.
- AI-powered WooCommerce integration, which helps you write product descriptions and generate recommendations, reviews, and images.
- Using advanced GPT models, this plugin turns spreadsheet data into engaging, well-structured material.
- Convert audio to text using Whisper.
- More than 40 languages are supported.
To learn about the pricing plans of the AI Power plugin, click here.
To read the documentation about AI Power, click here.
Getting Started With AI Power Plugin:
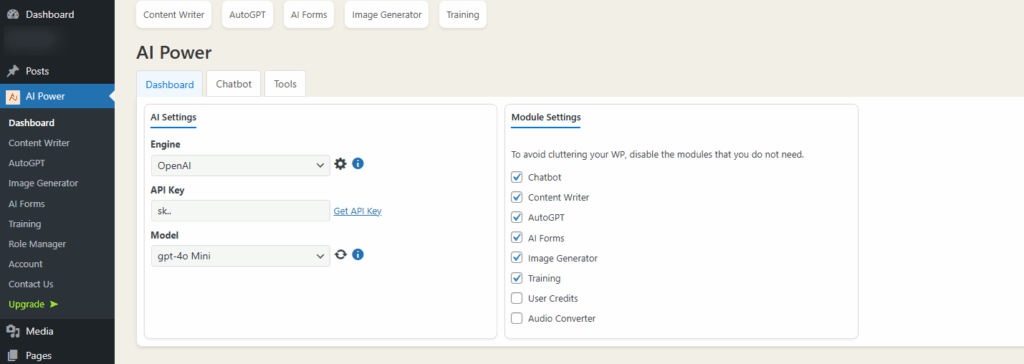
Screenshot 24: AI Power Plugin Dashboard
With this plugin, you can enhance your content writing, image generation, tone and style of writing, and much more!
Once installed and activated, the plugin is integrated into the Post.
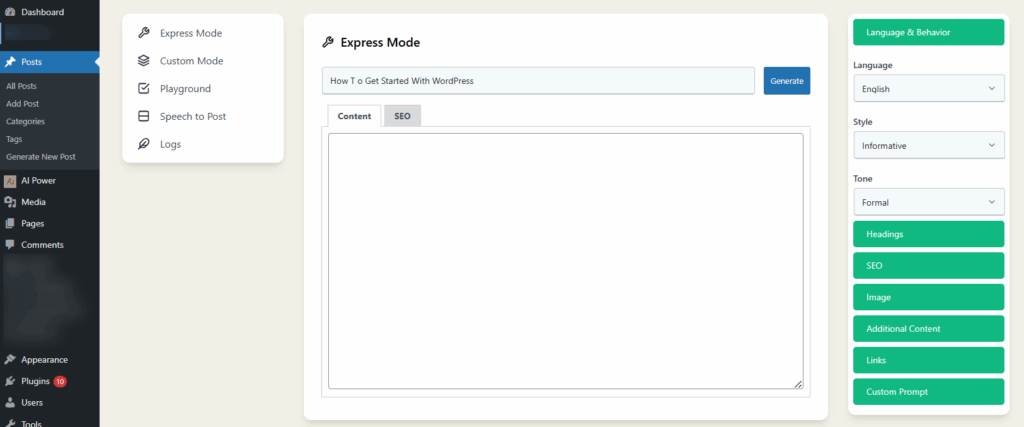
Screenshot 25: AI Power Integrated with the Post to generate automated content by providing keyword/ title
AI Mojo
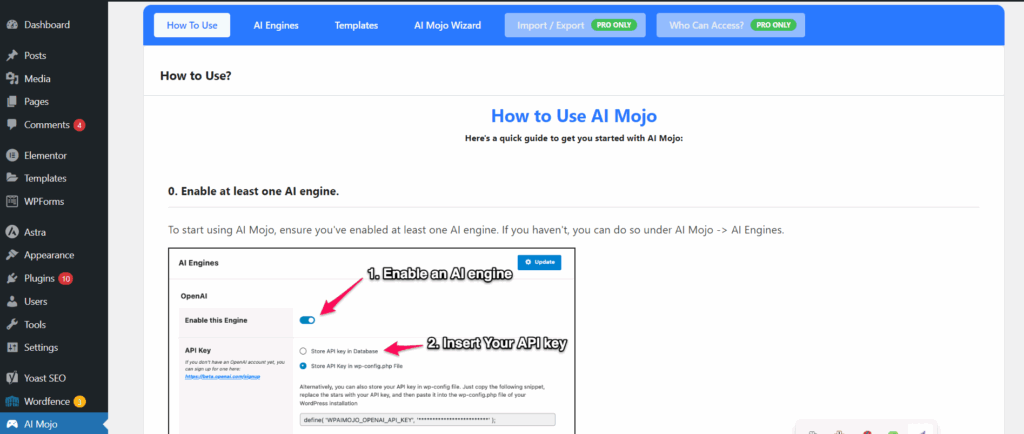
Screenshot 26: AI Mojo Plugin
AI Mojo recognizes itself as a Bring Your Key (BYOK) plugin, meaning you must possess an Open API key or AI21 key to use this plugin.
Key Features:
- Write introductions, conclusions, and more for your articles.
- Rewrite, shorten, or paraphrase existing content matter.
- Utilize the AI Mojo Wizard to produce an entire article.
Currently, this plugin is completely free.
Getting Started With AI Mojo
- Once installed, just enter your OpenAI key, and you’re all set to use the plugin. Yes, AI Mojo is completely free to use!
- Although AI Mojo doesn’t support image generation, it shines when it comes to writing content. It's an intuitive wizard that guides you step-by-step through the content creation process.
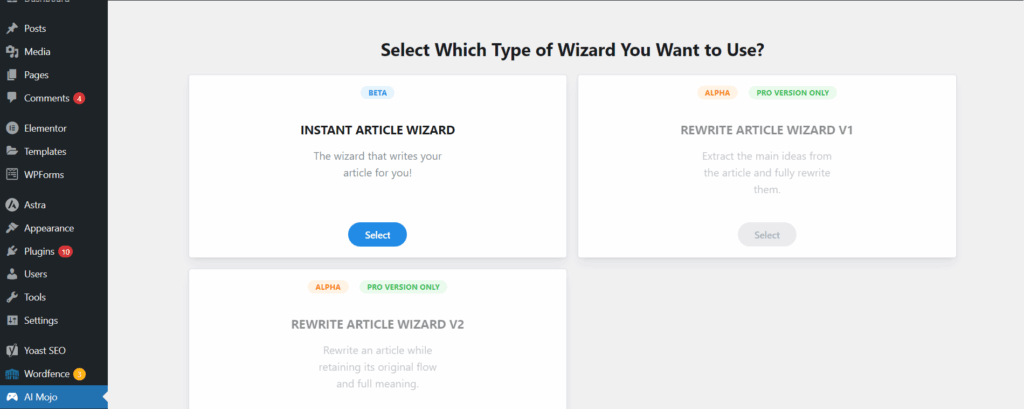
Screenshot 27: AI Mojo Wizard
- Start by entering the topic or subject you want to write about. AI Mojo will take care of the rest.
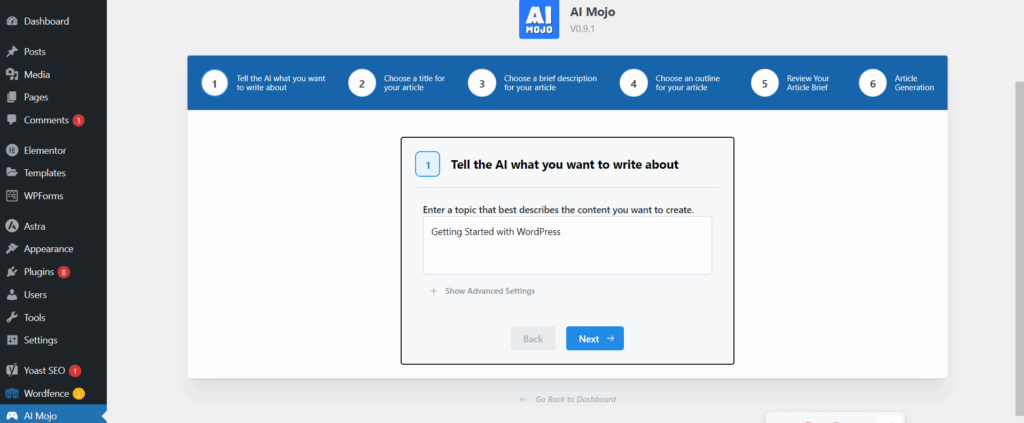
Screenshot 28: Write the topic title you want to write about
- Don’t worry if you are unable to come up with a final title for your blog; AI Mojo can help you with that, too. Just choose which title suits you the best.
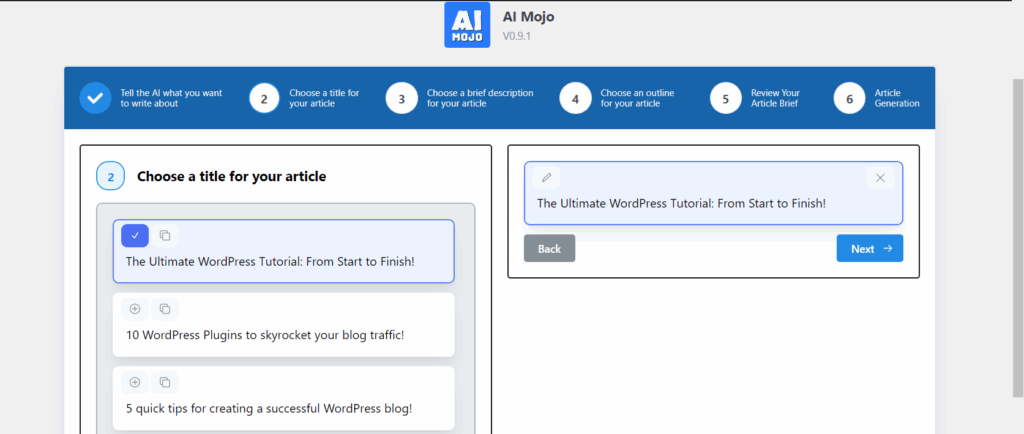
Screenshot 29: Choose a title for your blog
- Next, the plugin will create a few short descriptions for your article. You can select the one that aligns with your content direction.
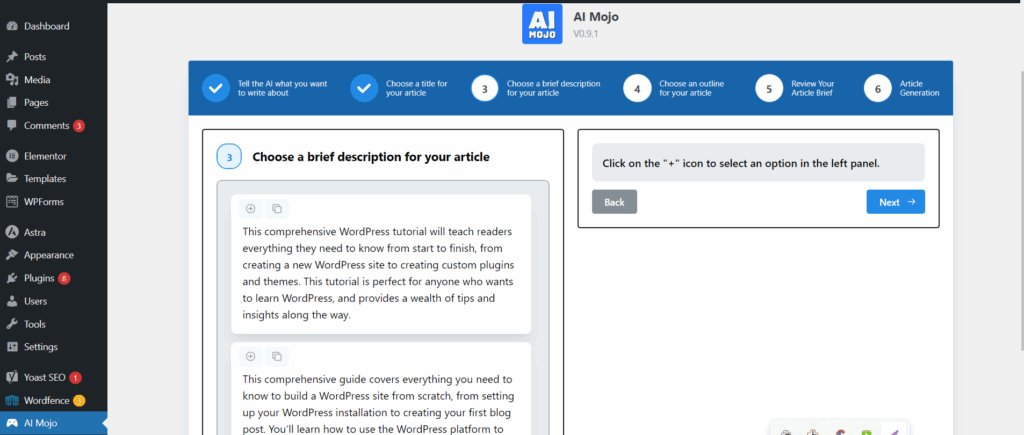
Screenshot 30: Choose Description
- Now, pick an outline that structures your blog post. This helps keep your content organized and easy to read.
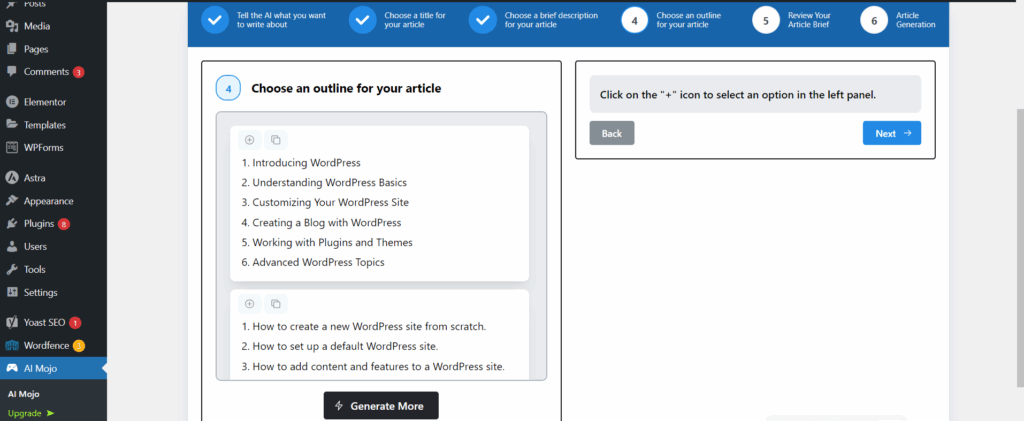
Screenshot 31: Choose Outline
- Before moving forward, you can review the article brief generated so far. It’s a great way to confirm everything is on track.
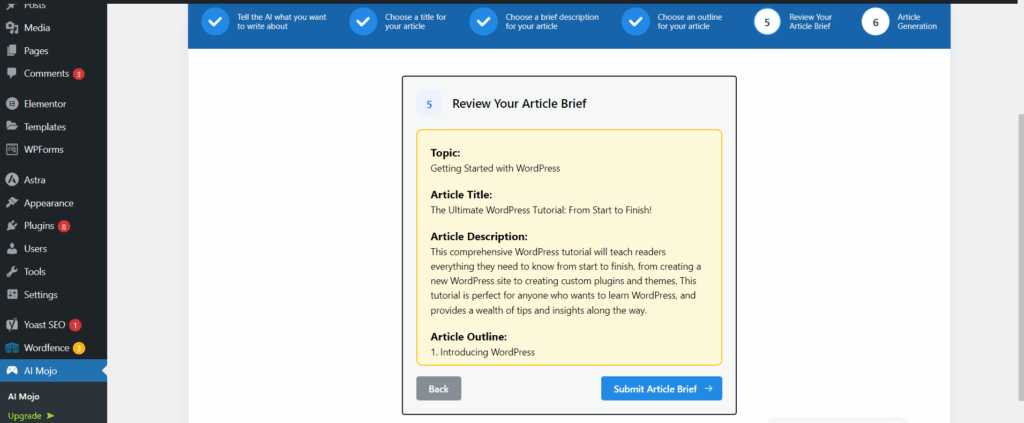
Screenshot 32: Review your article Brief
- AI Mojo will now generate a full draft based on your chosen inputs—ready to edit, polish, and publish!
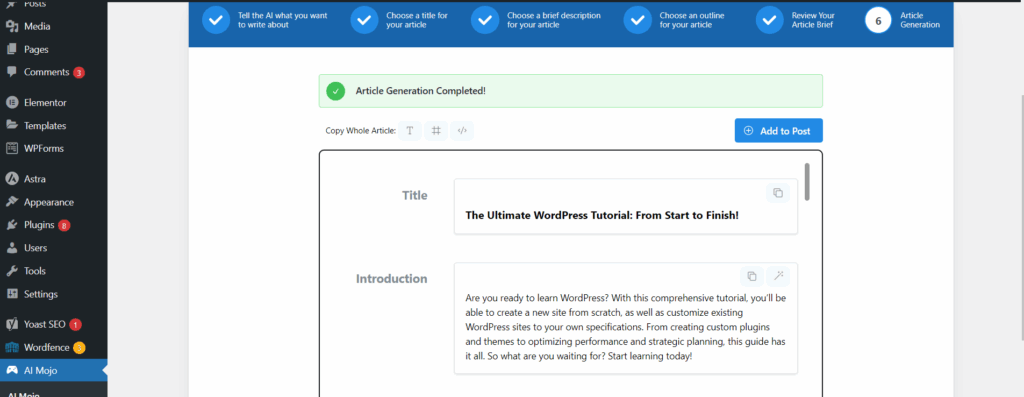
Screenshot 33: Generated Content
- You can also access AI Mojo right inside the WordPress post editor. Just click the AI Mojo icon to launch the writing assistant anytime while creating content.
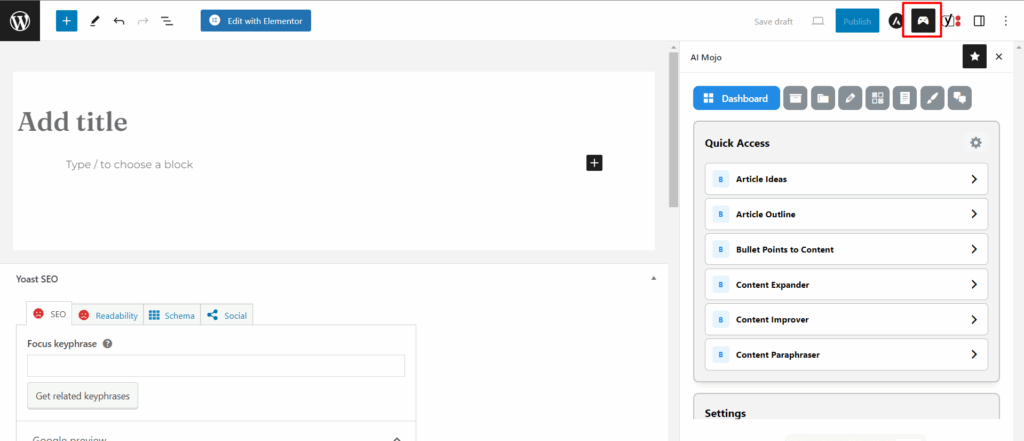
Screenshot 34: Click on the marked icon to open AI Mojo options
AI Writing Assistant
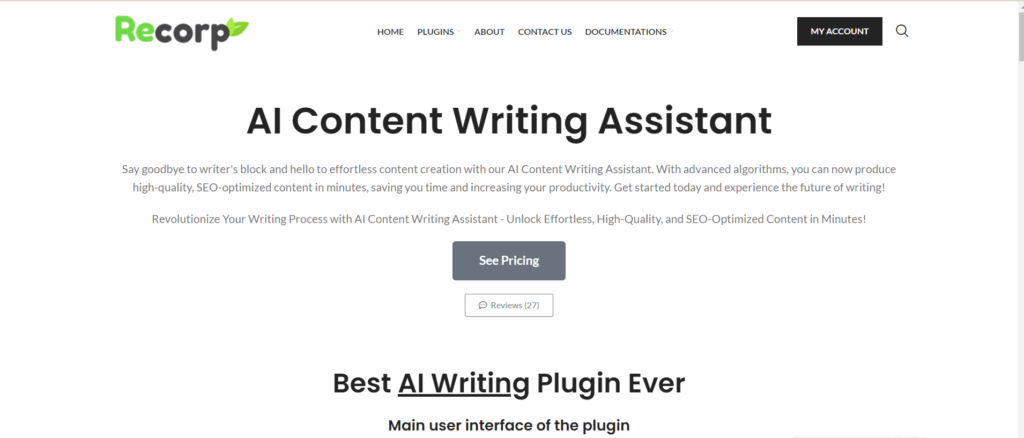
Screenshot 35: AI Content Writing Assistant Plugin Website
AI Content Writing Assistant is here to save you time and effort while helping you create visually beautiful images and engaging content. Its simple interface lets you generate content on any topic and customize graphics.
Before you begin, you need to enter the OpenAPI key to use this plugin. Additionally, you can save the settings of the plugin for API, content, and general settings, such as assigning user roles.
Key Features:
- Content and Image generation
- Scheduling of your content
- SEO Optimizer
- Comes with 16 Content Structures, 20 writing styles, and 41 writing tones
To learn about the pricing of the AI Writing Assistant, click here.
Getting Started With AI Content Writing Assistant:
- Once the plugin is installed, head over to the settings section. You’ll find different tabs like API Settings, Content Settings, and General Settings. These let you control how your content is created and formatted.
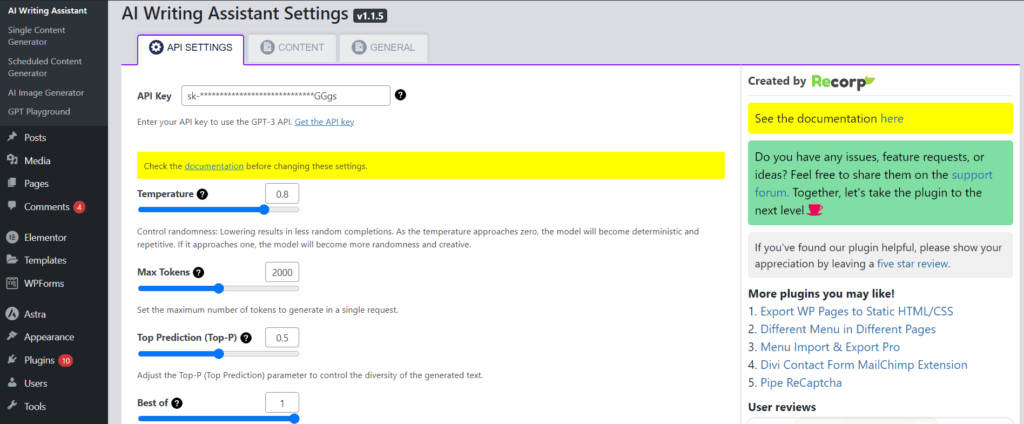
Screenshot 36: API Settings for AI Writing Assistant
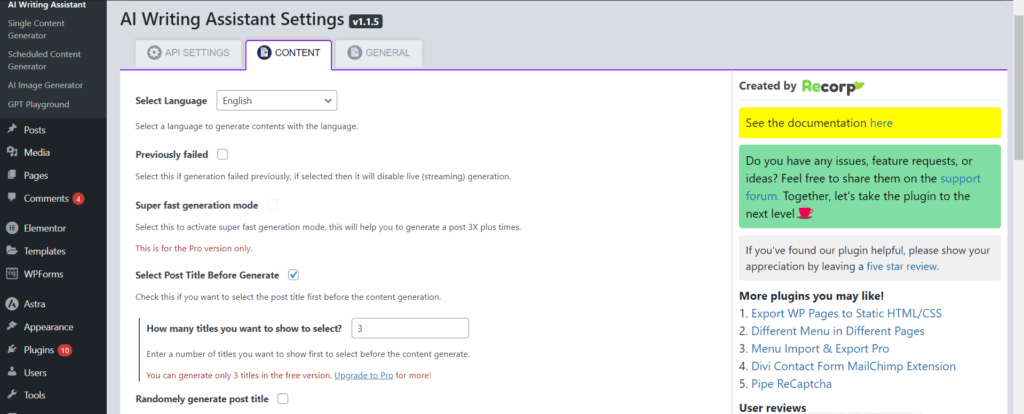
Screenshot 37: Content Settings for AI Writing Assistant
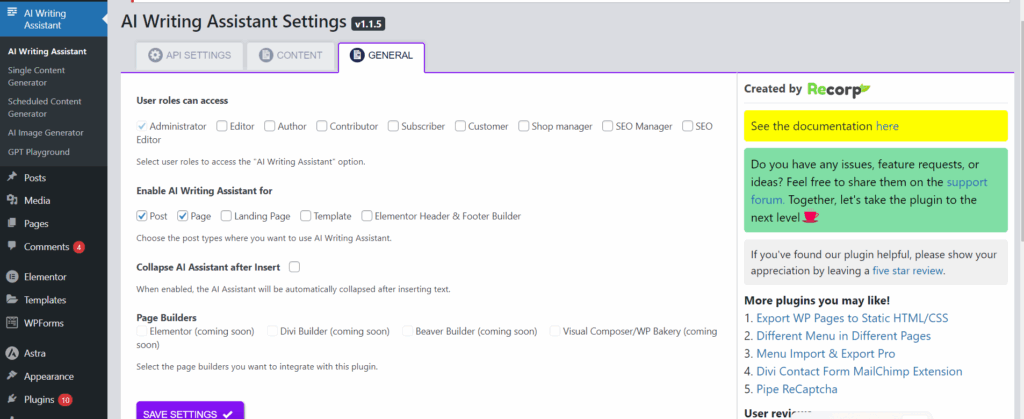
Screenshot 38: General Settings for AI Writing Assistant
- To get started, enter your topic or prompt in the text box and click on Generate. The assistant will quickly create a complete blog draft for you.
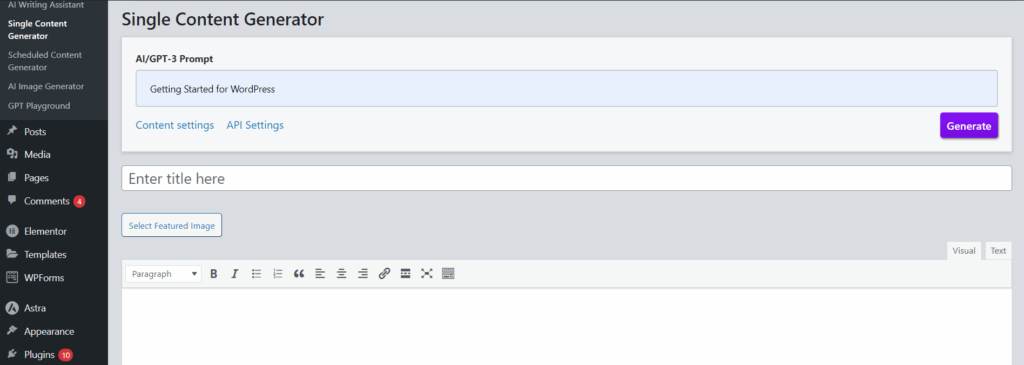
Screenshot 39: Enter the prompt and click on Generate
- You’ll be given a few title suggestions to choose from. Pick the one that best matches your post’s theme.
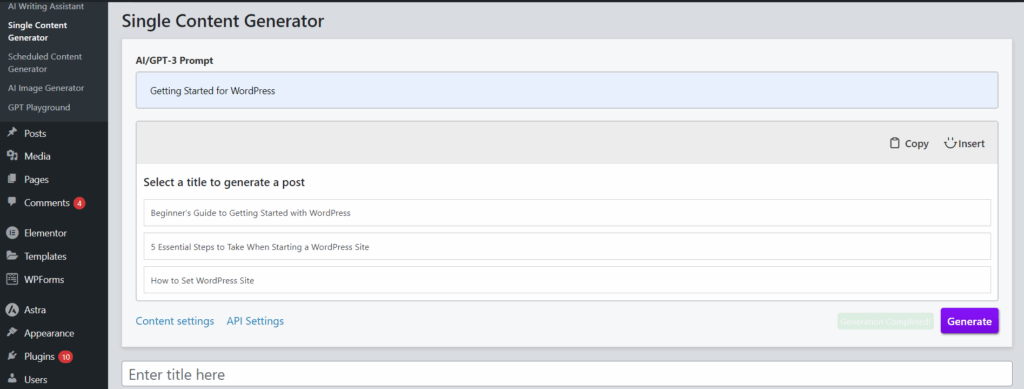
Screenshot 40: Select a Title for Blog Post
- Once the content is ready, you can simply copy and paste the title and body into the post section below, just like creating a regular WordPress post.
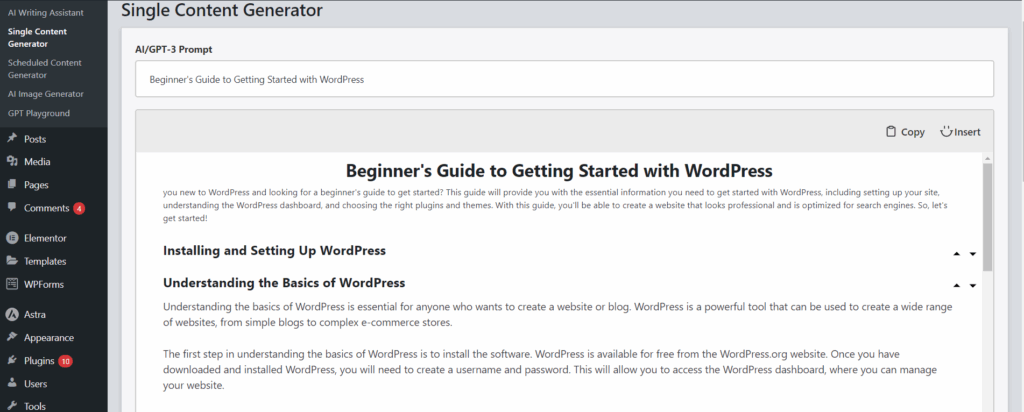
Screenshot 41: Viewing generated content
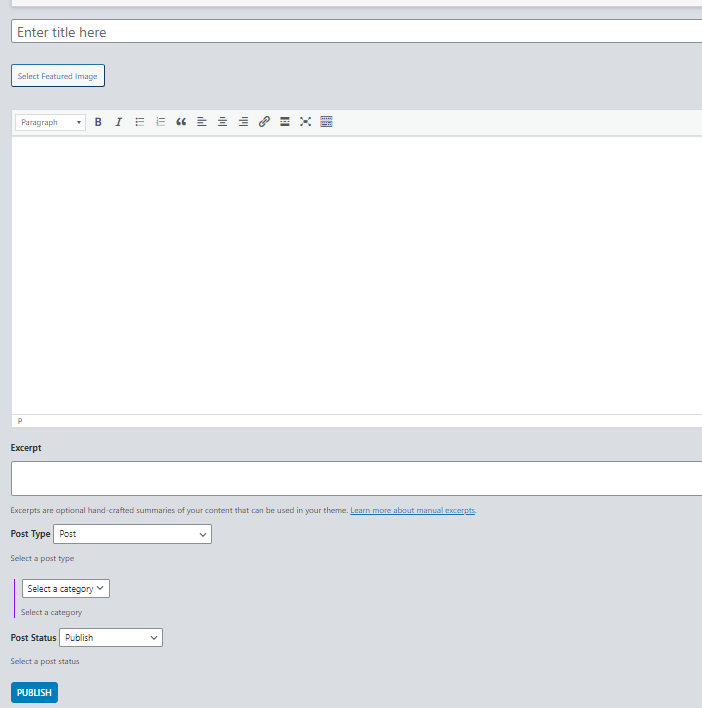
Screenshot 42: Publishing your Post
- Want to publish later? Use the Scheduled Content Generator to set the date and time you want your post to go live.
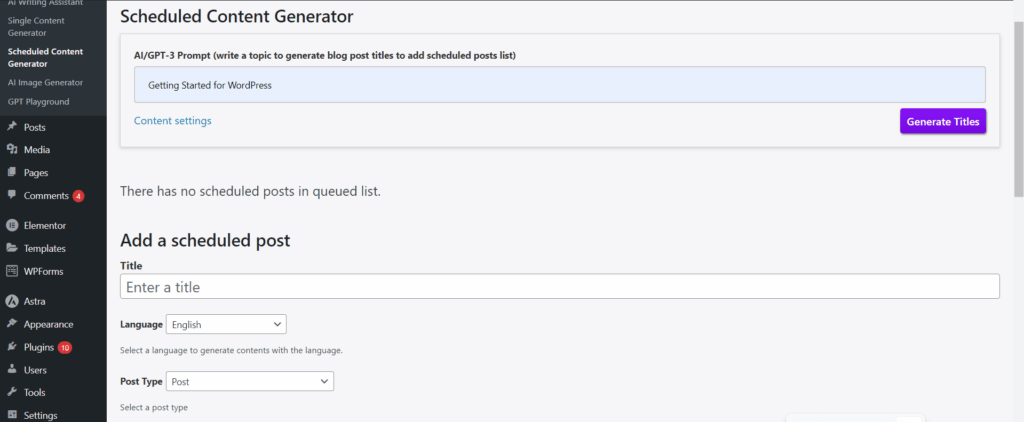
Screenshot 43: Scheduled Content Generator
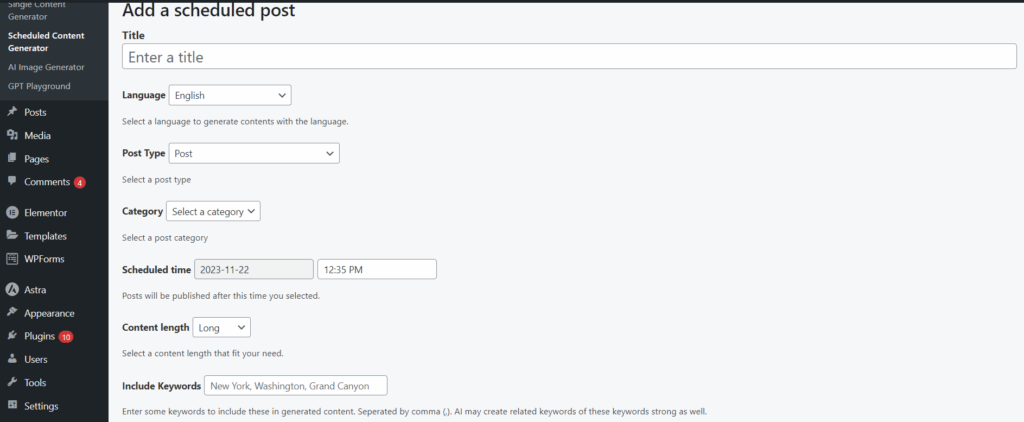
Screenshot 44: Add a Scheduled Post (1)
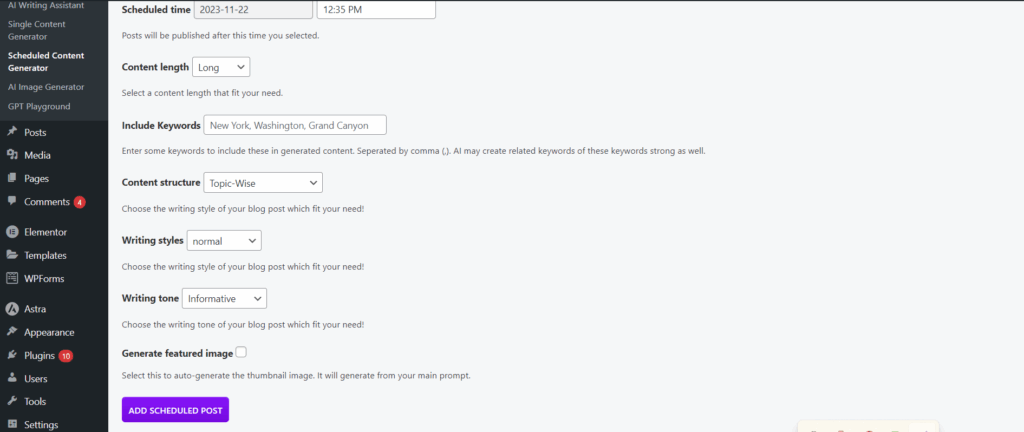
Screenshot 45: Add a Scheduled Post (2)
- The plugin also includes an AI Image Generator. Just enter a short description of the image you want, and the assistant will create it for you.
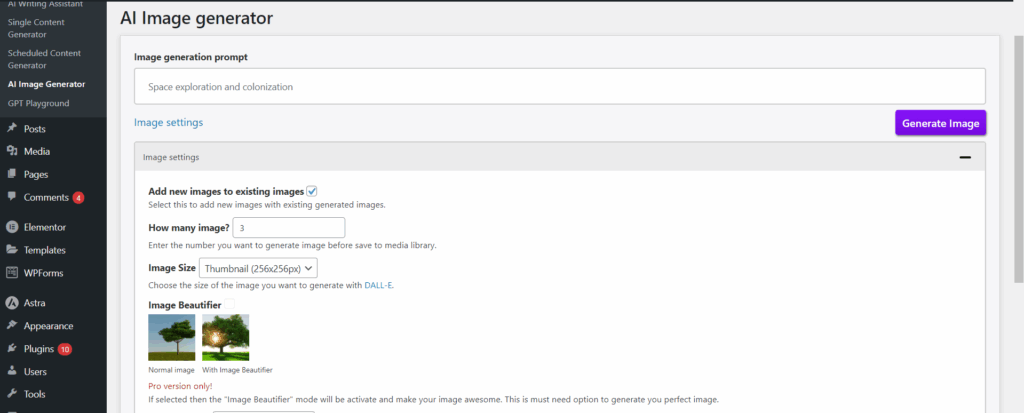
Screenshot 46: AI Image Generator
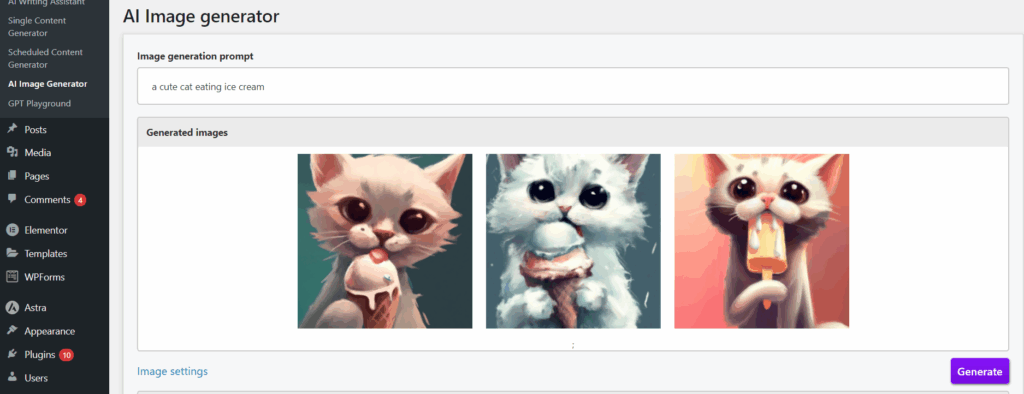
Screenshot 47: Image Generation Result
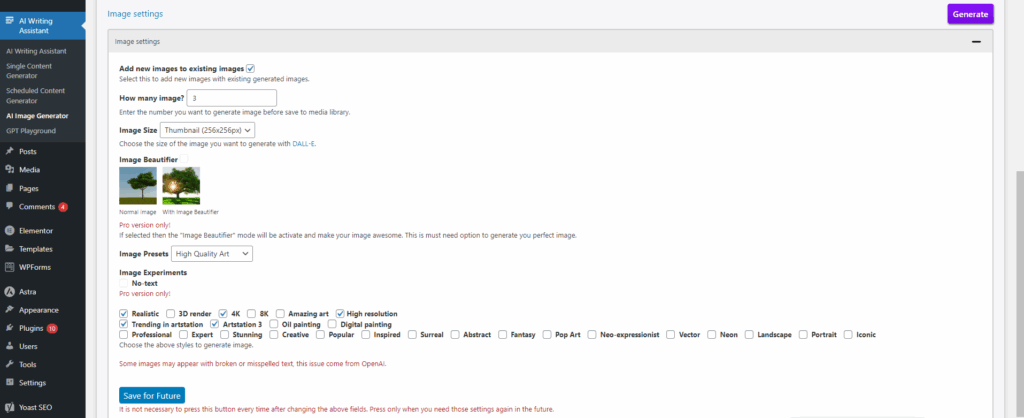
Screenshot 48: Image Generation Settings
Imajinn
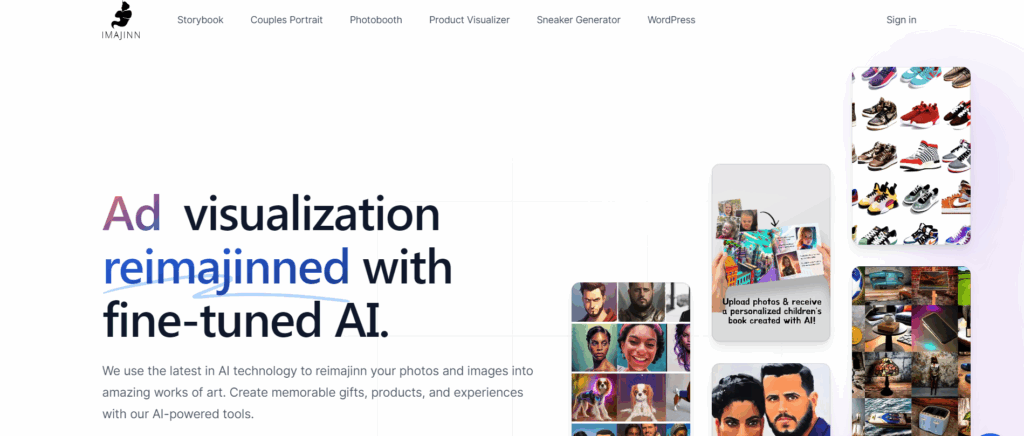
Screenshot 49: Imajinn Plugin Website
The Imajinn plugin is used solely for image creation. Imajinn allows you to create visuals for anything using only your imagination, much like Stable Diffusion, DALL-E 3, and Midjourney. Imajinn is capable of creating a stunning picture for you in a matter of seconds based on the prompt you provide.
Key Features:
- Varied options to create an image, such as selecting image style, artist style, and style modifier.
- AI-based facial restoration to improve hues and restore facial details while maintaining a high degree of authenticity and realism.
- For support with any theme maker, you can make images outside of Gutenberg itself.
- Does not require an API Key.
- Use the image freely, without license fees.
- You don't have to worry about licencing problems when you use the generated images.
Currently, the plugin is free.
Getting Started With Imajinn:
- Once the plugin is installed and activated, you’ll find Imajinn conveniently located under the Media section in your WordPress sidebar.
- To begin using the plugin, you’ll need to log in with your Imajinn account or sign up for a new one if you haven’t already.
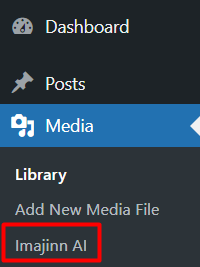
Screenshot 50: Imajinn Plugin In WordPress
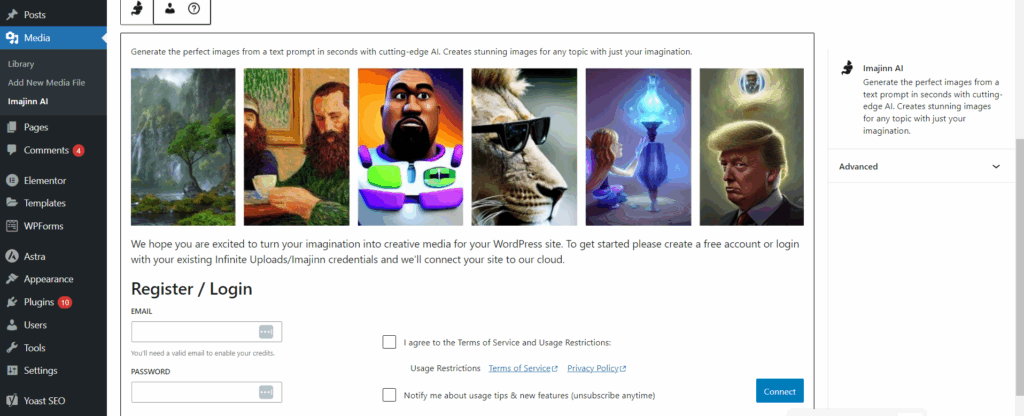
Screenshot 51: Enter the Login details
- You’re all set! In the prompt section, just type a short description of the image you want, like “sunset over mountains with birds flying”, and Imajinn will create it in seconds.
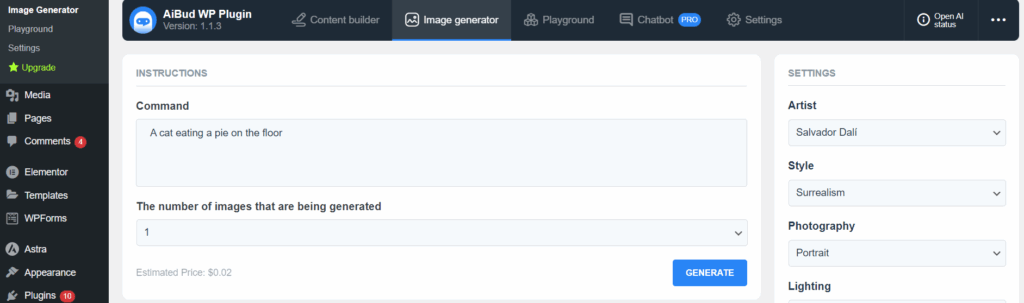
Screenshot 52: Describe the Image
Imajinn is perfect for bloggers, content creators, and marketers who need quick, original visuals without switching between tools. Let the creativity flow, right inside your WordPress dashboard!
Conclusion:
Using AI plugins on WordPress has become one of the easiest ways to work smarter. Whether you're writing blog posts, managing a website, or creating content for clients, these tools can make your work a lot easier.
Tasks that used to take days now take just a few hours, and the quality often turns out even better. You don’t need to be a tech expert to use them; they’re built to make things simple. Let the AI plugins handle the heavy lifting so you can focus on building content that connects with your audience.
Tutorials
16 min read
How to Add a Table of Contents in WordPress with the Easy Table of Contents Plugin
Introduction:
Ever landed on a long blog post and felt lost scrolling through it? That’s where a Table of Contents (ToC) comes in handy. It helps your readers jump straight to the part they’re looking for, making your content easier to read and more user-friendly.
In this guide, we’ll walk you through how to add a Table of Contents to your WordPress posts using a simple plugin, Easy Table of Contents, with no coding required.
Why Should You Add a Table of Contents to Your WordPress Site?
Adding a Table of Contents isn’t just about looks; it comes with real benefits for both readers and search engines:
- Provides Readers with a Quick Overview: Visitors can instantly see what your page covers, without needing to scroll endlessly.
- Improves Navigation: With clickable links, users can easily jump to the section they're interested in. It’s especially helpful on long posts or mobile devices.
- Boosts SEO Potential: A ToC adds internal links and keyword-rich headings, which help search engines understand your content better.
- Can Help You Win Featured Snippets: Google often pulls ToC links into featured results, giving your page more visibility and a higher click-through rate.
- Enhances User Experience: A well-structured page with a ToC feels more professional, keeps users engaged longer, and makes your content easier to scan.
Step 1: Create a Sample Blog Post to Demonstrate ToC
Let’s create a sample blog post so you can see exactly how the Table of Contents works in action. Here’s a post structure we’ll use:
- The main title of the page should use an H1 tag.
- Section headings beneath the title should use H2 tags.
- For sub-points or nested sections under each H2, use H3 or H4 tags as needed to maintain a logical content hierarchy.
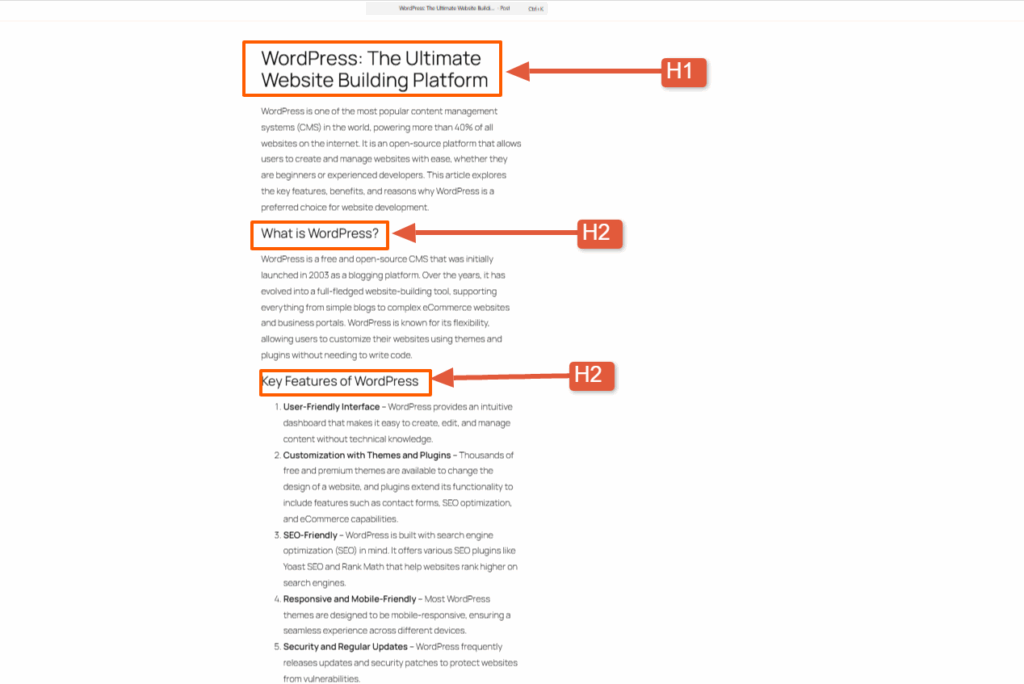
Screenshot 1: Sample Post Created in WordPress
Step 2: Installing the Easy Table of Contents Plugin
Let’s get started by installing the plugin.
- Log in to your WordPress Dashboard
- Navigate to Plugins > Add New
- Type Easy Table of Contents in the search bar.
- Click Install Now next to the plugin name
- After installation, click Activate
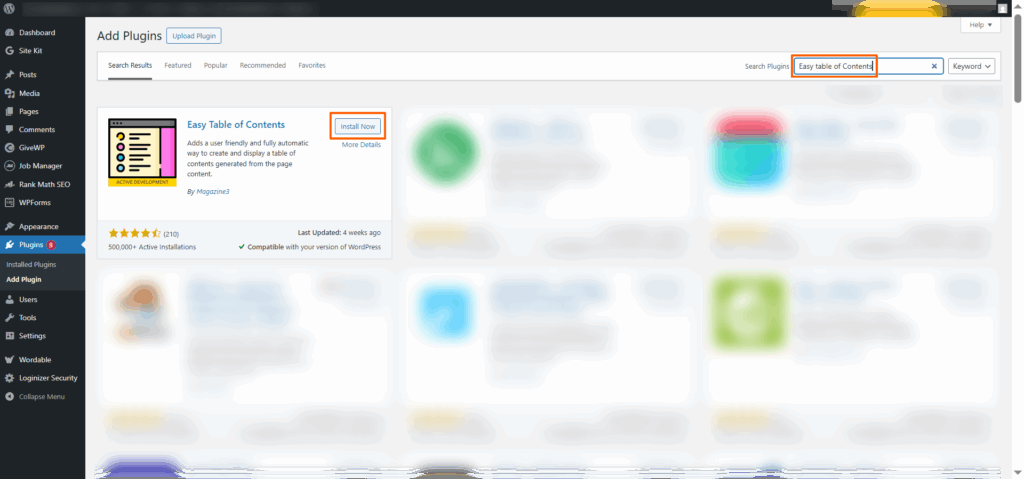
Screenshot 2: Install and Activate the Easy Table of Contents Plugin
Step 3: Navigating to the Plugin Settings
Once you have installed the plugin, navigate to the Settings Section of the Easy Table of Contents plugin. You’ll see multiple sections to customize the appearance of your Table of Contents (ToC).
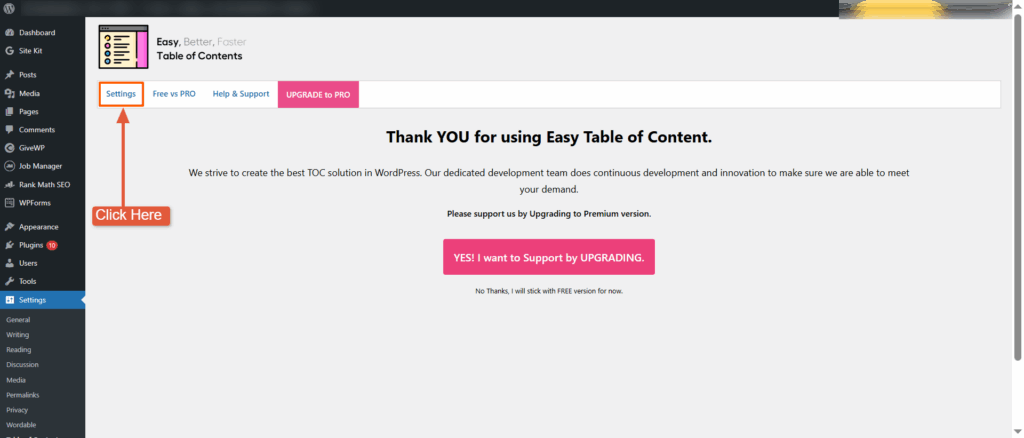
Screenshot 3: Settings Section of Easy Table of Contents Plugin
Step 4: Configuring General Settings
In the general settings, you can configure where and how the Table of Contents (ToC) appears.
- Enable Support:
- With this option, you can choose to display the ToC on:
- Regular blog posts
- Static pages
- Or any custom post types your site may be using
- Just tick the checkboxes that match your needs. For most bloggers, enabling it on posts is a great start. If you’re writing long-form content on pages, too (like guides or case studies), go ahead and enable it there as well.
- With this option, you can choose to display the ToC on:
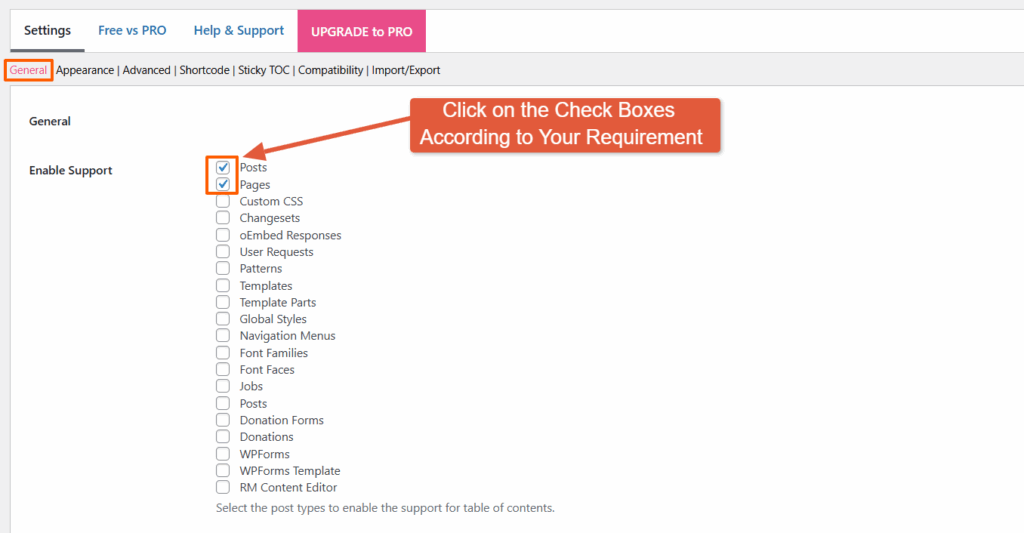
Screenshot 4: General Settings Panel Enable Support Options
- Auto Insert: When Auto Insert is enabled, the plugin automatically adds the Table of Contents to every new post or page that meets the criteria, eliminating the need for manual insertion each time.
- You can choose multiple options to auto-insert the Toc in different post types.
- If you prefer more control and want to decide on a case-by-case basis, you can leave this setting off and insert the ToC manually (we'll cover that later). But if you know you’ll want a ToC in every post, enabling this option is a great set-it-and-forget-it move
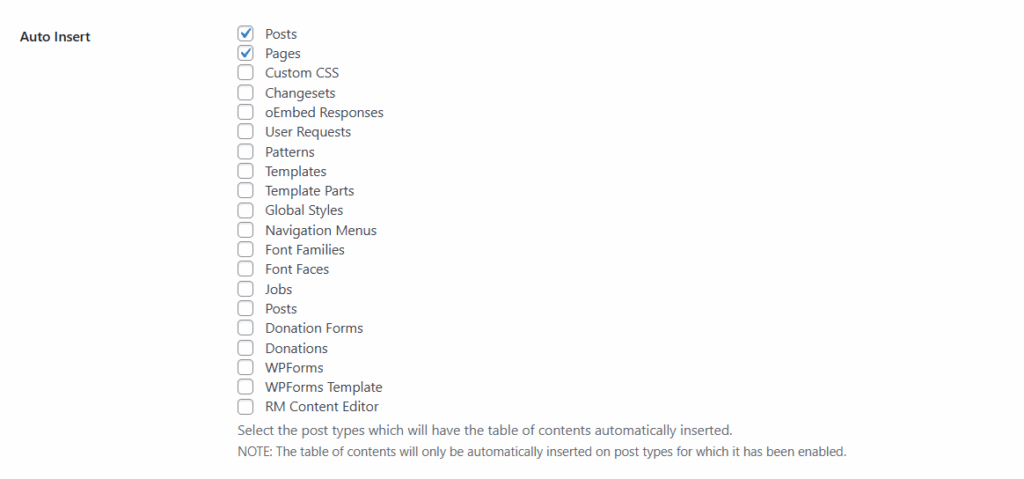
Screenshot 5: General Settings Panel Auto Insert Option
- Position: This setting lets you pick where the Table of Contents appears within your content.
- Here you will find these options:
- Before first heading (Recommended): This places the ToC right before your first H2 heading, which feels natural and helps guide the reader before they dive into your content.
- After the first heading, the ToC appears immediately after your first heading. This is helpful if you want to kick things off with a strong title and then let readers navigate.
- After the first paragraph, insert the ToC after your opening paragraph. It works well when you want to lead with a quick intro and keep things tidy before showing the ToC.
- After image: Ideal for image-heavy posts or tutorials. The ToC won’t interrupt the visual flow and appears only after a specific number of image is displayed.
- After number: If your content uses numbered lists or data early on, this option places the ToC after the numerical item that you have specified, though it’s a bit niche and less commonly used.
- Top: Inserts the ToC right at the top of the post, even before your introduction. It grabs attention but may feel a bit abrupt if your intro is important for context.
- Bottom: Places the ToC at the end of your post. Not very helpful for navigation, but can still be useful as a recap.
- For most blogs, “Before first heading” works best as it provides a nice flow, giving the reader a preview of what's coming without disrupting the intro paragraph.
- Here you will find these options:
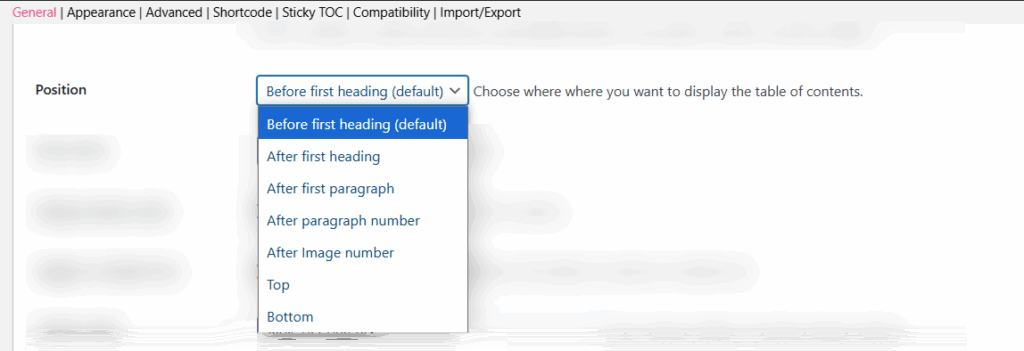
Screenshot 6: General Settings Panel Table of Content Position Options
- Show When [X] Headings Are Present: Displays the ToC after the set number of headings (e.g., 2). Keeps shorter posts clean.
- Display Header Label: Adds a title above the ToC, like “Table of Contents,” which is helpful for clarity.
- Toggle on Header Text: Let users click the header to expand or collapse the ToC, which is useful for long lists.
- Header Label: Customize the ToC title (e.g., “Contents” or “On This Page”) to match your tone.
- Header Label Tag: Choose the HTML tag for the ToC title (like div, h2, etc.), mostly for styling or SEO.
- Toggle View: Enables a Show/Hide button for the entire ToC.
- Initial View – Hide by Default: Starts the ToC in a collapsed state. Great for keeping layouts minimal.
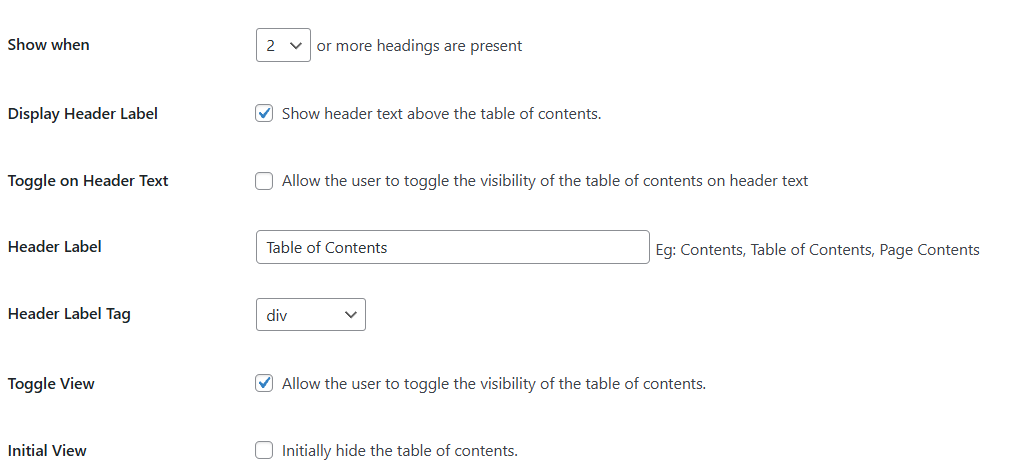
Screenshot 7: General Settings Panel Table Behavior & Display Options
- Show as Hierarchy: Displays nested headings to reflect your content structure.
- Counter: Adds numbering (1.1, 1.2, etc.) in various formats.
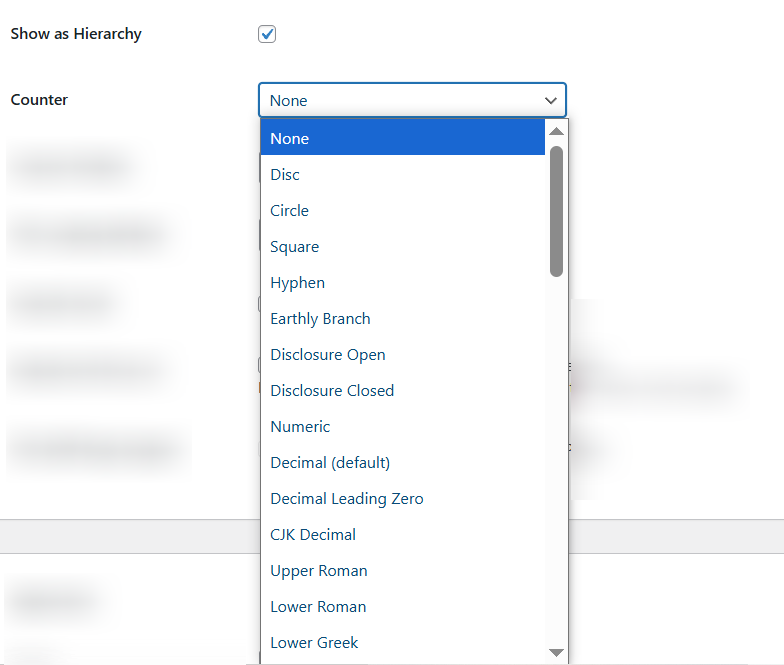
Screenshot 8: General Settings Panel Hierarchy and Counter Options
- Counter Position: lets you decide where the numbers appear — inside or outside the ToC items.
- TOC Loading Method: The Default is JavaScript, which loads the ToC smoothly without slowing down your site. Best left unchanged.
- Smooth Scroll: Ensures smooth navigation when clicking ToC links. Recommended to keep ON.
- Exclude href from URL: This prevents the section links from modifying the URL and works only when Smooth Scroll is enabled.
- AMP Page Support: Choose whether you want to show the ToC on AMP (mobile-optimized) pages.
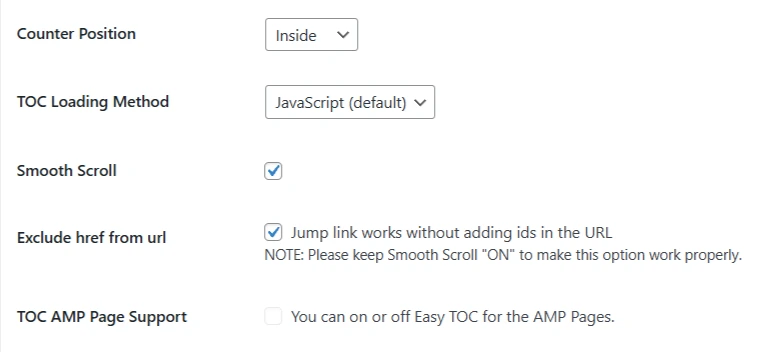
Screenshot 9: General Settings Panel Functionality & Scroll Behavior Settings
Step 5: Configuring Appearance Settings
Customize how the Table of Contents looks to match your site’s style and layout..
- Width: Set the box size to match your preferences.
- Alignment: This option allows you to choose how the ToC aligns within the page. The default is "None", but other options include left, right, and center.
- Heading Text Direction:
- Select the direction your headings appear in.
- Left to Right (LTR) is standard for most languages; Right to Left (RTL) supports languages like Arabic or Hebrew.
- Enable Wrapping: Allows long headings to break into multiple lines instead of overflowing or being cut off.
- Heading Padding: Adjust the space around the Table of Contents by setting padding values for top, bottom, left, and right in pixels.
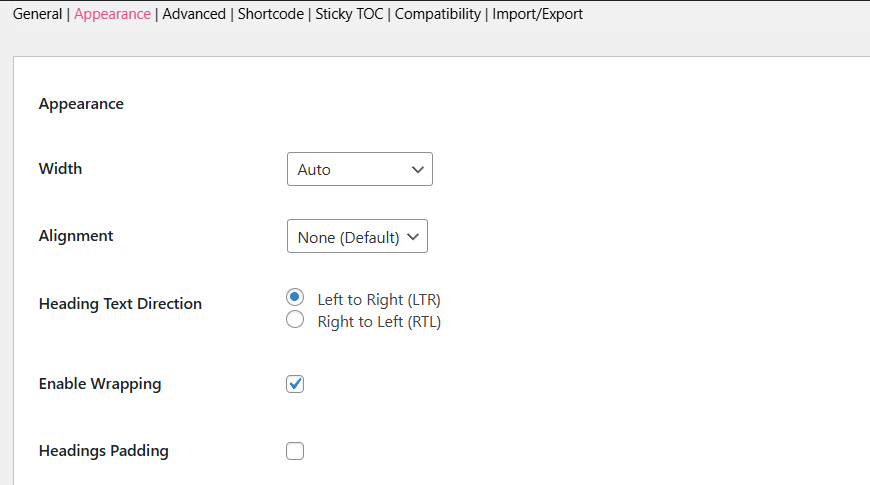
Screenshot 10: Appearance Settings Panel Width and Alignment Options
- Font Options: Change the font size and weight for the ToC content.
- Title Font Size: Controls the size of the ToC heading (e.g., “Table of Contents”).
- Title Font Weight: Sets how bold the heading appears.
- Font Size: Adjusts the body font of the ToC links.
- Font Weight: Sets the boldness of the regular link text.
- Child Font Size: Adjusts the size of subheading text in the ToC.
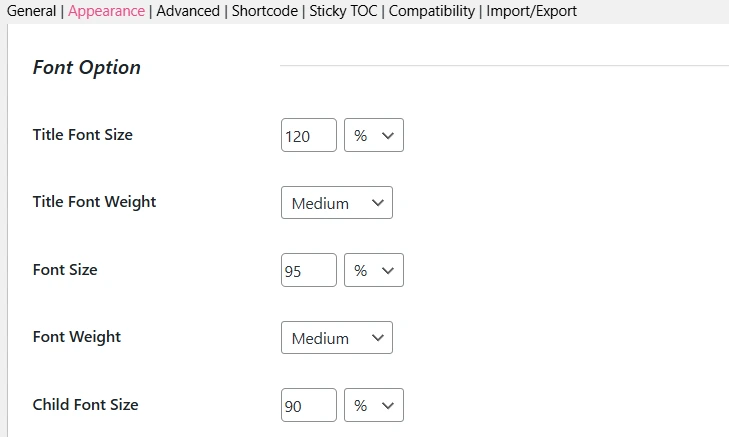
Screenshot 11: Appearance Settings Panel Font Options
- Theme Options: Choose from preset themes like Grey, Light Blue, White, Black, Transparent, or Custom. These themes affect only the ToC inserted in your post content, not the widget version.
- Custom Theme Settings: (Only applies if you select "Custom" as your theme.)
- Background Color: Sets the ToC box background.
- Border Color: Adds a border color around the box.
- Title Color: Changes the color of the ToC heading text.
- Link Color: Sets the default link color for ToC items.
- Link Hover Color: Changes the link color when a user hovers over it.
- Link Visited Color: Displays a different color for links that have already been clicked.
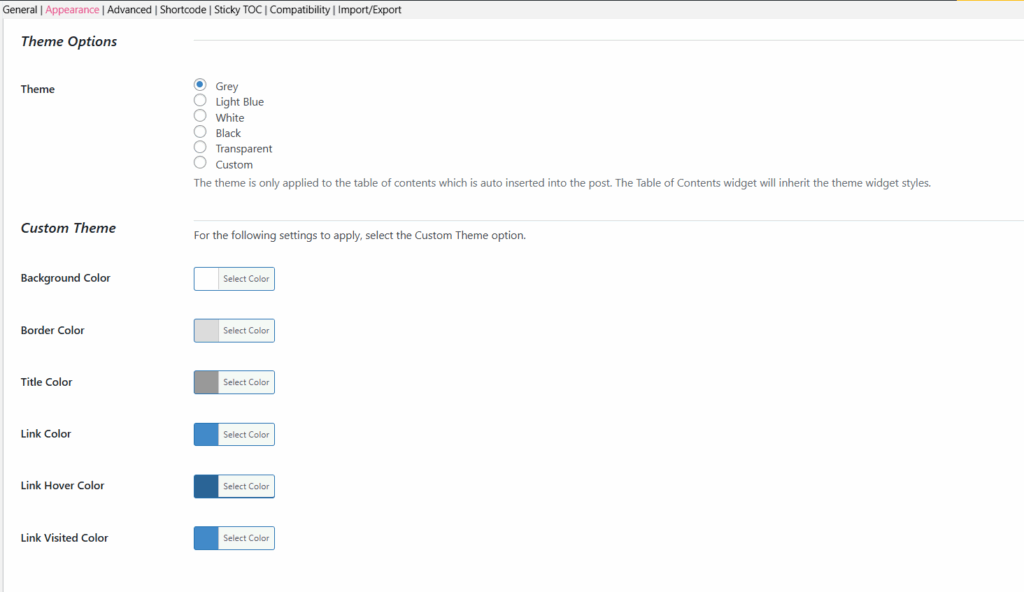
Screenshot 12: Appearance Settings Panel, Theme and Custom Theme Options
Step 6: Configuring Advanced Settings
These setting options help you fine-tune how and where your Table of Contents works across different types of pages and devices.
- Lowercase: Converts all anchor links (the clickable section links) to lowercase. This helps maintain consistency and avoid issues with case-sensitive URLs.
- Hyphenate: Replaces underscores (_) with hyphens (-) in anchor links. For better SEO and user experience, use hyphens in your URLs.
- Homepage: Enables the Table of Contents on posts or content displayed on your homepage (if supported).
- Category: Displays the ToC in the description area of category archive pages.
- Tag: Adds the ToC to the description section of tag archive pages.
- Product Category: If you’re using WooCommerce, this setting shows the ToC in product category descriptions.
- Custom Taxonomy: Allows the ToC to appear in the description of any custom taxonomy pages you’ve set up.
- Device Target: Lets you choose which devices the ToC will be shown on (desktop, tablet, mobile, or all). Ideal for controlling visibility based on screen size.
- Load JS In: Specifies where the plugin loads its JavaScript. The default is “Footer” to help improve page load speed.
- CSS: Disables the plugin’s default styles if you want to use your own custom CSS. Keep this unchecked unless you're styling the ToC manually.
- Inline CSS: Helps boost performance by embedding the ToC styles directly into the HTML, reducing extra HTTP requests and improving page load speed.
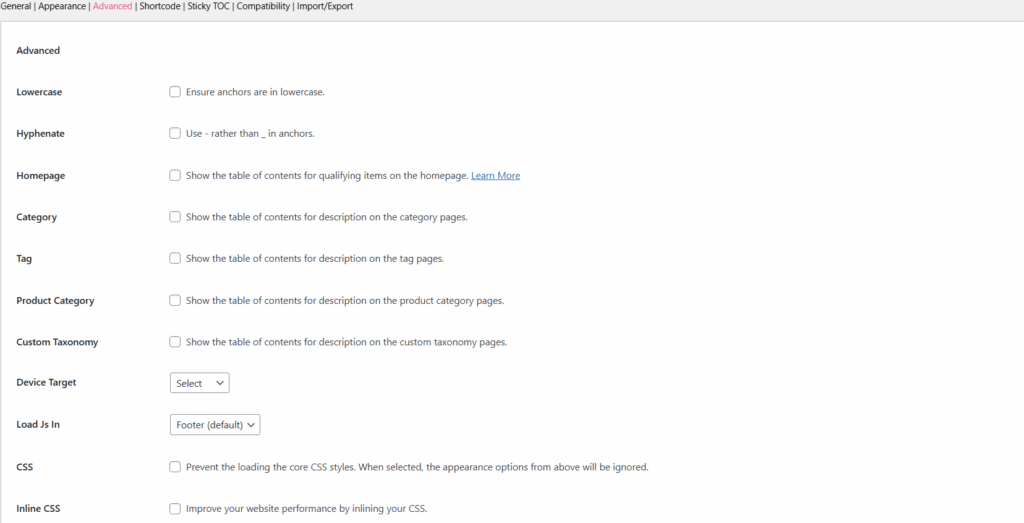
Screenshot 13: Advanced Settings Panel
- Headings (H1–H6): You can choose which heading levels should be included in the ToC.
- By default, most users include H2 and H3, since H1 is usually the post title and already visible at the top.
- For more detailed posts, you might also include H4–H6.
- Simply check or uncheck the heading levels based on how your content is structured.
- Exclude Headings: Allows you to leave out specific headings from the ToC manually. Just enter the exact heading text or use wildcards to skip similar ones.
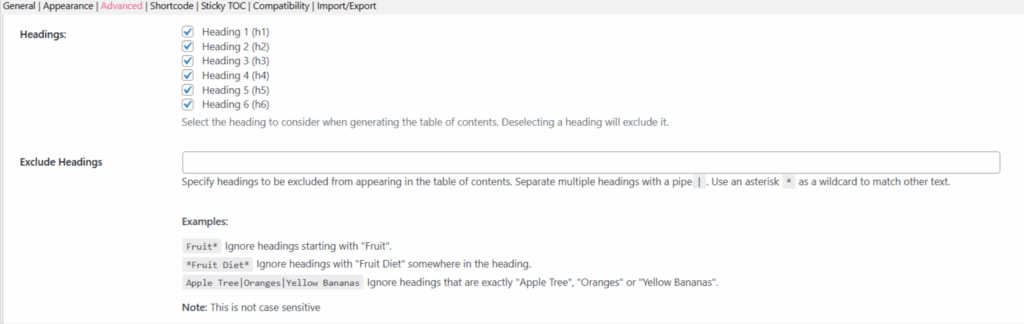
Screenshot 14: Advanced Settings for Headings Panel
- SiteNavigation Schema: Adds structured data to your Table of Contents so search engines can better understand your page layout. It can improve how your content appears in Google search results.
- Smooth Scroll Offset (Desktop): If your site has a sticky menu or admin bar at the top, this setting prevents headings from being hidden when users click ToC links. A value of 30px is good for most setups.
- Mobile Smooth Scroll Offset: Works the same as the desktop offset, but for mobile devices. Adjust it if your mobile menu covers content when scrolling to sections.
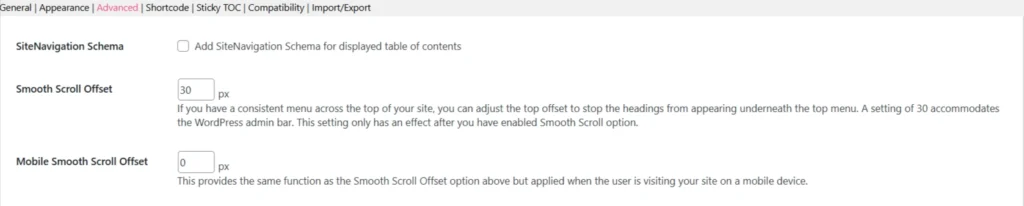
Screenshot 15: Advanced Settings Panel Site Navigation Schema & Scroll Offset
- Limit Path: This feature helps display the Table of Contents only for specific sections of your site.
- Just enter the path (starting with /) where you want the ToC to appear.
Example: /blog/, /docs/, /resources/guide/ - Great for keeping the ToC limited to certain areas like documentation or blog posts.
- Just enter the path (starting with /) where you want the ToC to appear.
- Exclude by Matching URL/String: This hides the ToC on specific pages based on URL patterns.
- Just enter part of the URL (one per line), and the plugin will skip adding a ToC to any matching pages.

Screenshot 16: Advanced Settings Panel Path Options
- Default Anchor Prefix: If your headings use non-English or special characters, this setting adds a fallback prefix to the anchor links (like i, toc_, or _) so they still work properly.
When left empty, numbers will be used instead. - Default Anchor Prefix For All: Forces the use of the anchor prefix even if your headings use standard characters. Useful for consistent URL structure.
- Widget Affix Selector: This option lets you pin the Table of Contents widget in your sidebar. You’ll need to enter the class or ID of your theme’s sidebar manually, for example, .widget-area or #sidebar. This keeps the ToC visible while scrolling.
- Add Request URI: Adds the current page’s URL before the anchor link (e.g., /post-name#section). Useful for internal navigation consistency.
- Add Self Reference Link: Adds the full URL before anchor links (e.g., https://yourdomain.com/post#section). This is handy for copying or sharing direct links to specific sections.
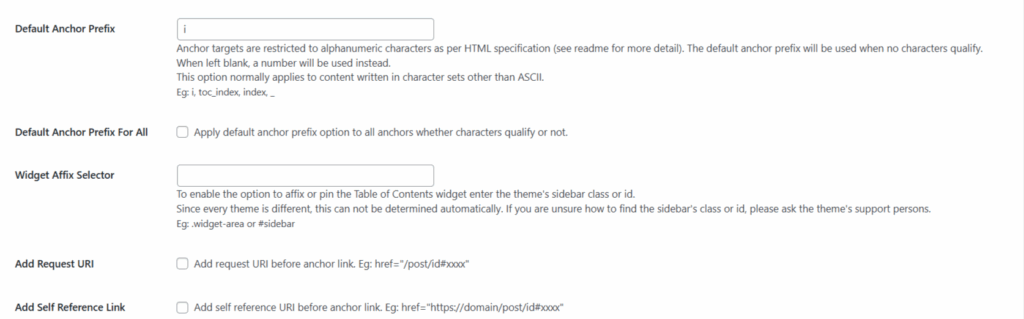
Screenshot 17: Advanced Settings Panel Anchor & Widget Options
- Remove ‘:’ from TOC Title: Takes out the colon (:) that appears after the Table of Contents title, which is useful if you prefer a cleaner look.
- Show Page Title in TOC: Adds the page or post title as the first item in the Table of Contents. Helpful for long-form content or reports.
- Disable TOC in REST API: Stops the Table of Contents from appearing in REST API responses that are typically useful for developers or headless WordPress setups.
- Generate TOC Link IDs: Turn this on if you’re manually adding the ToC using a shortcode ([ez-toc]) in templates, sidebars, or PHP files. Ensures the anchor links still work.
- Fix Out of Memory / 500 Error: Enables a workaround for memory or server errors that might happen when using page builders like DIVI with the TOC shortcode.
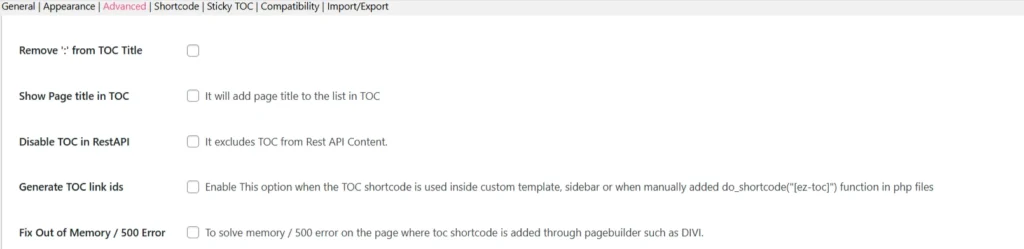
Screenshot 18: Advanced Settings Panel Miscellaneous Settings
- Preserve Line Breaks: Keep the original line breaks from your headings in the Table of Contents, great for keeping formatting consistent.
- Ajax Load More: Ensures the ToC toggle works correctly with infinite scroll or content loaded via Ajax. Helpful for dynamic blogs or news sites.
- Display No Heading Text: Shows a fallback message when a heading is missing, so the ToC still makes sense even if some titles are empty.
- Shorten Heading: (Disabled by default) – If enabled, this would shorten long headings in the ToC to make it more concise.
- Remove TOC Links: Removes clickable anchor links from the Table of Contents, turning it into a plain list, which is ideal if you want a non-clickable overview.
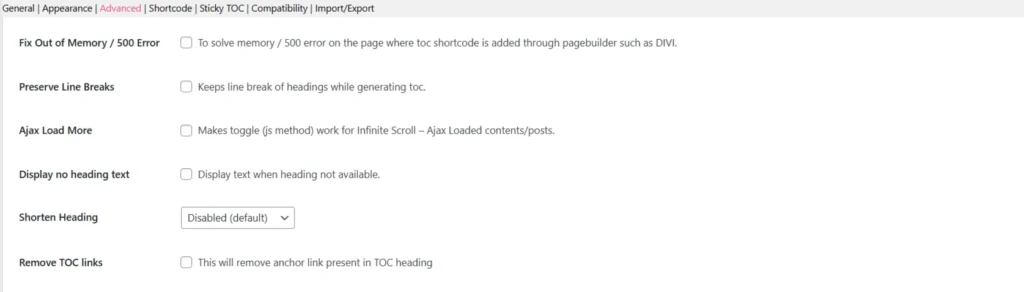
Screenshot 19: Advanced Settings Panel, Additional Functionality Settings
Step 7: Configuring Shortcode Settings
- If you want more control over where the Table of Contents appears, instead of relying on auto-insert, you can manually add it using the shortcode: [ez-toc]. Just paste it anywhere in your post or page where you'd like the ToC to appear.
- Common Shortcode Customizations: You can customize the ToC using these optional attributes:
- [header_label="Contents"] – Set a custom title for your ToC.
- [display_header_label="no"] – Hide the title completely.
- [toggle_view="no"] – Removes the expand/collapse toggle.
- [initial_view="hide"] – Keeps the ToC collapsed when the page loads.
- [display_counter="no"] – Beside each ToC item, it turns off numbering
- [post_types=" post, page"] – Use the ToC on specific content types.
- [post_in="12,45"] – Show the ToC only on certain post/page IDs.
- [device_target="desktop"] – Choose where to show the ToC (desktop or mobile).
- [view_more="5"] (PRO) – Show limited headings at first, expand on click.
- [class="custom_toc"] – Lets you add your own custom CSS class for styling.
- [exclude="Test"] – Exclude headings that contain the word “Test.”
- [heading_levels="2,3"] – Will let you include only h2 and h3 headings in the ToC.
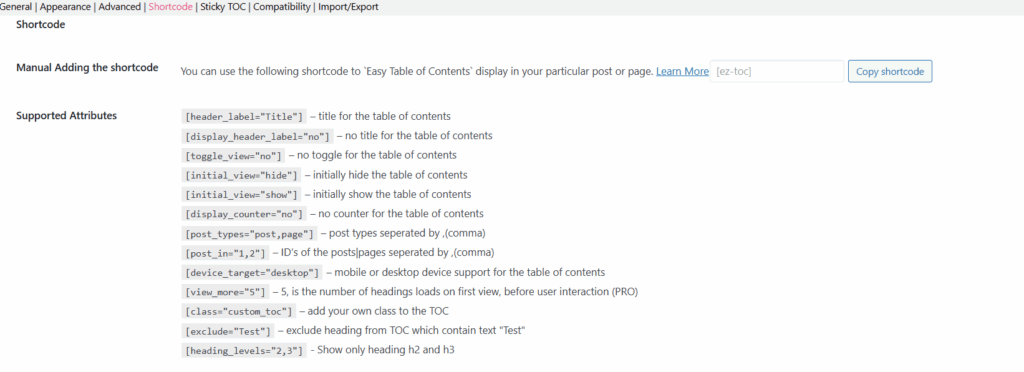
Screenshot 20: Shortcode Settings Panel for Manual Addition of Toc
- Manual ToC Widget Shortcode: If you’d like to display the Table of Contents in your sidebar or widget area, you can use this shortcode:[ez-toc-widget-sticky]. Simply add it into a Text or Shortcode widget in your WordPress sidebar to make the ToC stick and stay visible while users scroll through your content.
- Auto Insert Option (No Shortcode Needed): If you prefer not to use shortcodes at all, the plugin also supports automatic insertion.
- Just go to: WordPress Dashboard > Settings > Table of Contents > General Settings > Auto Insert.
- From there, you can enable the plugin to automatically add the ToC to posts, pages, or custom post types — no shortcode required during editing. This is the easiest option for beginners.

Screenshot 21: Shortcode Settings Panel for Manual Addition of Widget Shortcode and Auto Insert Options
- Add a Sitemap Manually in WordPress: If you prefer adding a sitemap manually, the Easy Table of Contents plugin provides simple shortcodes. These shortcodes let you list all your pages, posts, or categories in an organized format on any WordPress page with no extra tools or coding required.
- Manual Adding Sitemap Shortcode: Use this shortcode [ez-toc-sitemap] that adds a full sitemap with all pages and categories to your WordPress page with no coding needed.
- Manual Adding Sitemap Pages Shortcode: Use this shortcode [ez-toc-sitemap-pages], which creates a sitemap that only includes pages, without categories or posts.
- Manual Adding Sitemap Categories Shortcode: Use this shortcode [ez-toc-sitemap-categories] to create a sitemap listing only categories.
- Manual Adding Sitemap Posts Shortcode: Use this shortcode [ez-toc-sitemap-posts] to generate a sitemap of all posts.
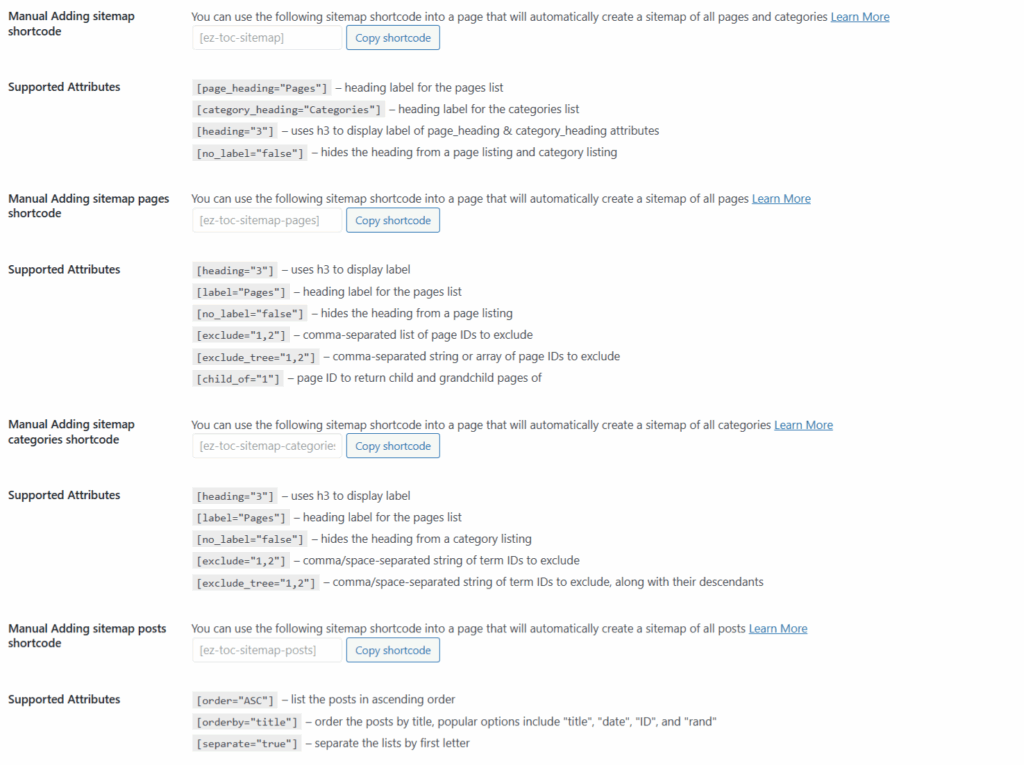
Screenshot 22: Shortcode Settings Panel for Adding a Sitemap Manually in WordPress
Step 8: Enabling Sticky TOC
The Sticky TOC feature keeps the Table of Contents visible on the screen as users scroll down your post or page. It "sticks" to a position usually on the side, so readers can easily jump to any section without scrolling back up.

Screenshot 23: Sticky ToC Settings
Step 9: Compatibility Options
These options ensure the Table of Contents works smoothly with popular third-party plugins and page builders. When enabled, they include special content types in the ToC that might otherwise be skipped.
- Created by Mediavine: If you’re using Mediavine’s Recipe Card plugin, enabling this option will automatically include the recipe headings inside the Table of Contents, which is great for food bloggers!
- GoodLayers Core Builder: If your site uses the GoodLayers page builder, this setting makes sure that all headings added via the builder are detected and shown in the TOC.
- Molongui Authorship: This ensures compatibility with the Molongui Authorship plugin, allowing proper ToC display even when author-specific content is involved.
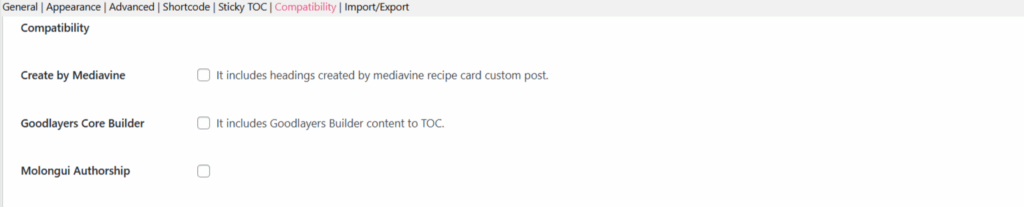
Screenshot 24: Compatibility Options
Step 10: Configuring Import/Export Settings
This section helps you save, restore, or transfer your Easy Table of Contents (ETOC) settings easily between websites or backups.
- Import/Export Settings: This section helps you save, restore, or transfer your Easy Table of Contents (ETOC) settings between websites or backups.
- Export Settings: Click Export to download your current ETOC settings as a .json file. This is useful for creating backups or applying the same configuration to another website.
- Import Settings: This lets you restore your saved preferences. Just click "Choose File," upload your .json file, and the plugin will automatically apply your previous setup.
- Delete Data on Uninstall: Enable this option to completely remove all plugin data, including settings, when uninstalling Easy TOC.
- Only enable this if you’re sure you won’t need the settings in the future.
Finally, click the "Save Changes" button to apply your settings. Your Table of Contents is now fully configured and ready to appear on your posts or pages.
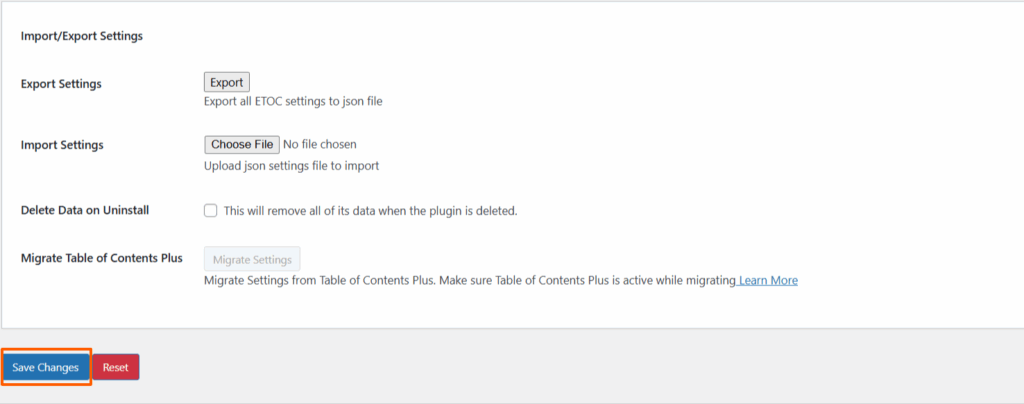
Screenshot 25: Configuring Import/Export Settings and Saving the Changes
Step 11: Preview the Table of Contents on Your Post
To make sure everything is working:
- Open the sample post you created earlier.
- Scroll to the top of the content section.
- You should see the Table of Contents automatically displayed based on the headings in your post.
If it doesn't appear, double-check that the post type is enabled in the plugin settings and that you have used proper heading tags (H2, H3, etc.).
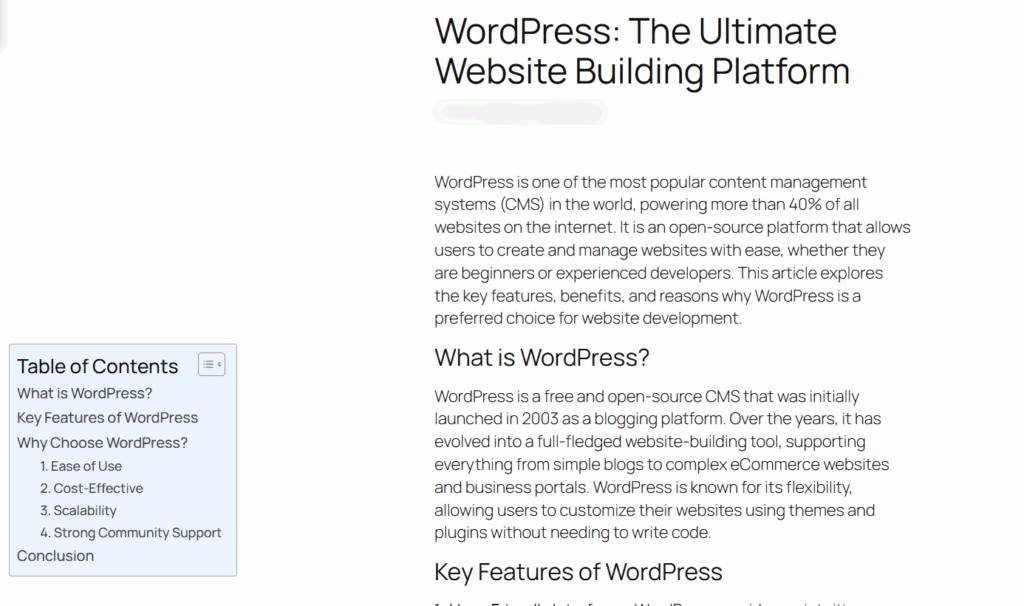
Screenshot 26: Table of Contents Added to the Post
Conclusion
Adding a Table of Contents to your WordPress site doesn’t have to be complicated. With the right plugin and a few easy settings, you can instantly make your content more organized, reader-friendly, and optimized for SEO.
Now that you know how to do it, give it a try! Whether you're writing blog posts, tutorials, or guides, a simple ToC can make a big difference in how your content is experienced.


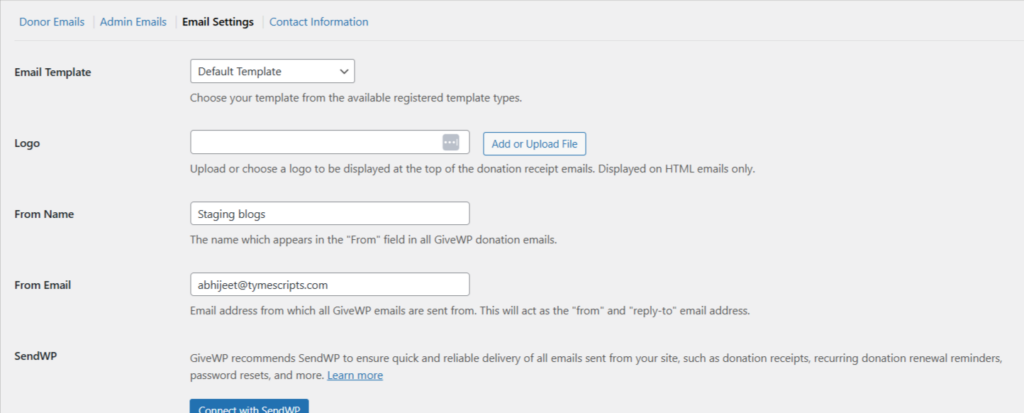
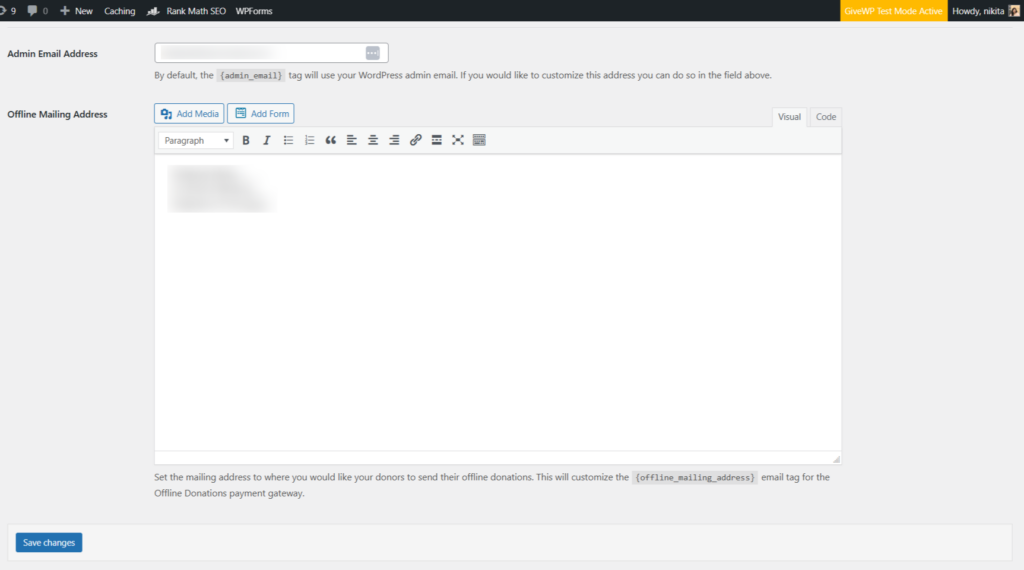
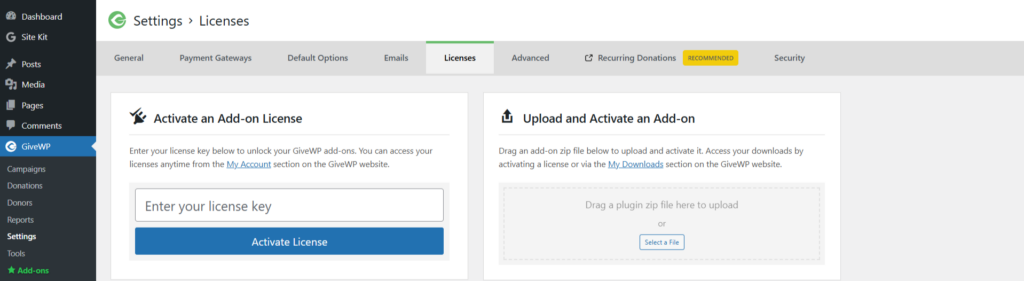
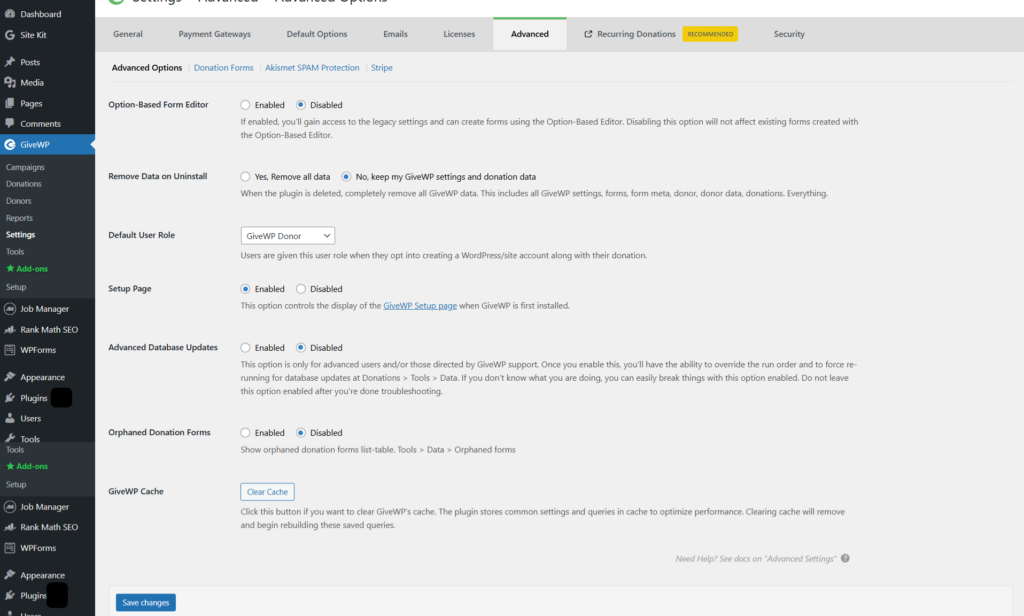


Tutorials
8 min read
How to Create a Job Portal in WordPress Using the WP Job Manager Plugin
Every company today needs a strong careers page. It’s not just about listing open roles, it’s about showing job seekers that your business is growing and worth joining.
But here’s the catch: if your listings aren’t easy to find or don’t show up in search results, you might be missing out on great candidates without even realizing it.
That’s where WP Job Manager can make a real difference.
It’s a simple, lightweight WordPress plugin that lets you add a fully functional job board directly to your website without the need for coding or technical setup. Moreover, job listings get easily noticed by search engines like Google, meaning your openings have a better chance of showing up where candidates are searching.
Ready to get started?
Why WP Job Manager Is Worth Adding to Your Website
If you're running a company website and want to attract real traffic to your job listings, it's not enough to simply post open roles and hope for the best. WP Job Manager helps you turn your careers page into a functional, easy-to-manage job board that people can find and use. Here are some clear reasons why it works so well:
- Search-Friendly Listings: Each job post is structured using Google Job Schema, which makes it easier for Google to index and show in search results, including Google Jobs. That means more visibility without needing to pay for external listings.
- Custom Job Pages That Get Clicks: Every job has its page, making it easier to share and easier for candidates to apply. These pages also help your site rank better over time.
- No-Code Job Posting for HR: Easily manage job applications with a page on your site, no admin access needed. Your team can post and update jobs directly from the front end, without any technical skills required.
- Flexible Fields for Any Role: Whether you’re hiring for tech, design, operations, or remote positions, you can customize each listing to include the exact details you want.
- Built-In Filtering and Search Tools: Candidates can sort by location, category, or type of job, helping them find what fits—and apply faster.
- Easy to Manage and Expand: You get a basic job board out of the box, and can add more features later, like resume uploads, job alerts, or applicant tracking, as your hiring needs grow.
Step 1: Install and Activate the WP Job Manager Plugin
- Go to the WordPress Dashboard.
- Go to Plugins > Add New > WP Job Board Plugin
- Install and Activate
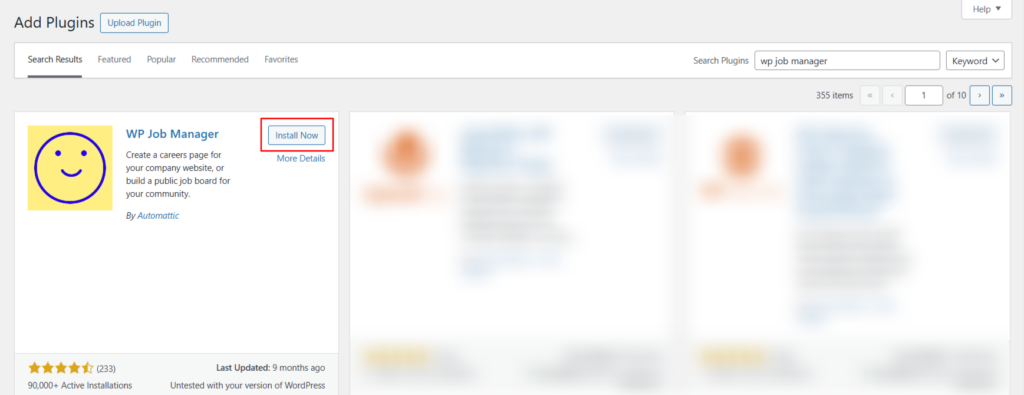
Screenshot: WP Job Manager
Step 2: Run the Setup Wizard
Go to WP Jobs Manager and click on Run Setup Wizard
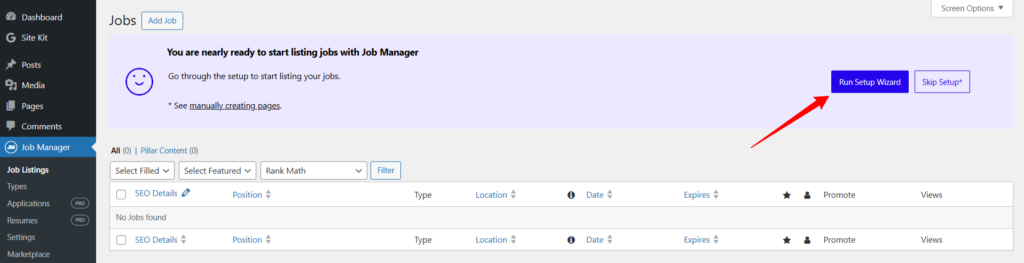
Screenshot: Click on Run Setup Wizard
You’ll see a checkbox asking if you’d like to help improve the plugin by allowing it to collect anonymous usage data. Optional, but it’s a nice way to support the developers behind the scenes.
At this stage, you can either:
- Click “Start Setup” to let the plugin do all the work for you (highly recommended if you're new), or
- Click “Save and Skip Setup” if you prefer to configure everything manually using shortcodes (great for advanced users or custom designs)
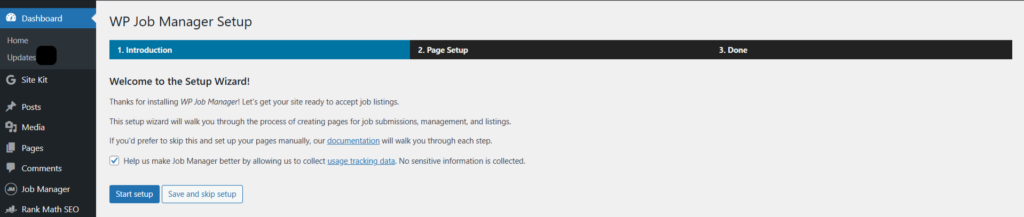
Screenshot: Run Setup Wizard
Once you hit “Start Setup” in the wizard, the next screen brings you to the Page Setup section.
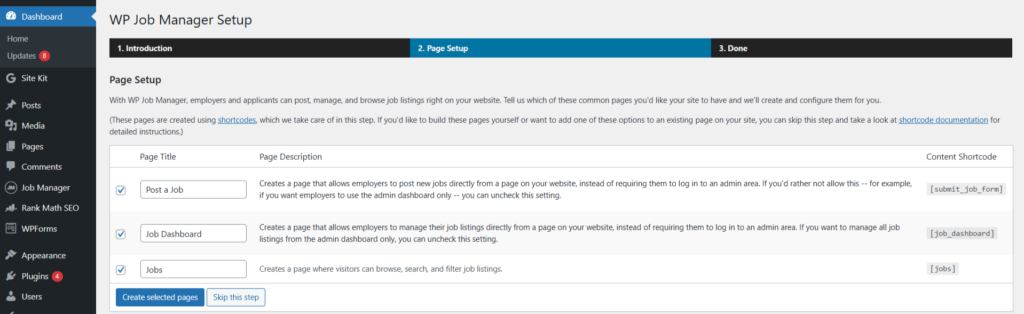
Screenshot: Page Setup
You don't have to make pages and add shortcodes by yourself (unless you want to later). WP Job Manager can automatically create three important job board pages for you.
Post a Job
This page uses the [submit_job_form] shortcode to allow employers to submit job listings directly from the front end of your website. This eliminates the need to give them access to the WordPress admin dashboard.
This is Perfect for multi-employer sites or directories.
Job Dashboard
Adds a [job_dashboard] page where employers can view, edit, and manage their listings again, all from the front end.
This creates a smoother, more polished experience for job posters.
Jobs
This one’s for your site visitors. It shows job listings using the [jobs] shortcode. People can look through jobs, search, and filter them easily.
By default, all three pages are selected. For most people, that’s the best choice. Just click “Create selected pages,” and WP Job Manager will set them up for you right away.
If you want to do it your way (like using a custom layout), you can skip this step and add the shortcodes yourself later.
We are going with all three selected pages.
The next final screen is all about giving you quick access to the next steps so you can hit the ground running.
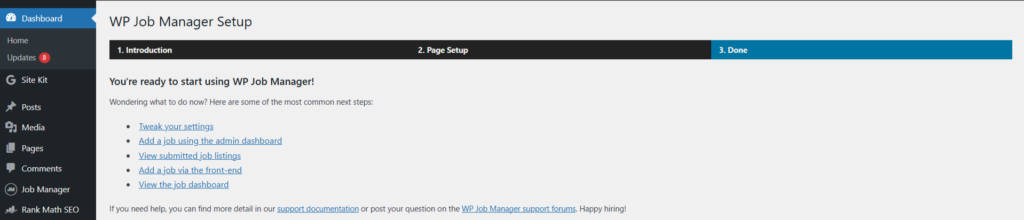
Screenshot: Final Step of Setup
What can you do now?
Tweak your settings: Customize listing behavior, duration, and fields.
Add a job using the admin dashboard: Manually add job listings via the WordPress backend.
View submitted job listings: Check active/pending jobs.
Add a job via the front-end: Test the user job submission form.
View the job dashboard: Preview the front-end employer dashboard.
Step 3: Add a Job
Once you have finished the setup, go to Job Manager> Job Listings> Add New Job.
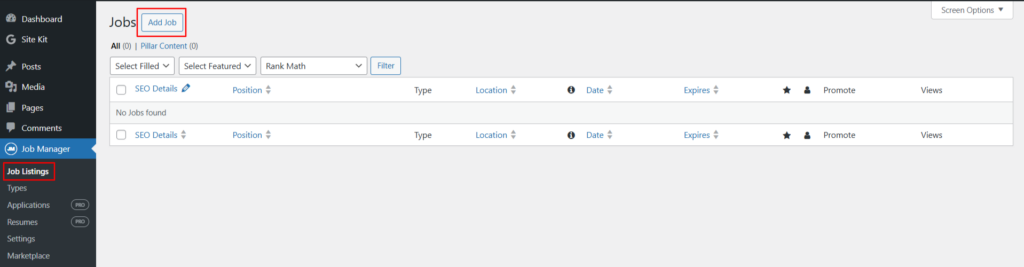
Screenshot: Select Add Job
You’ll be directed to the new window, the classic editor of WordPress. Here, you have to add a job description.
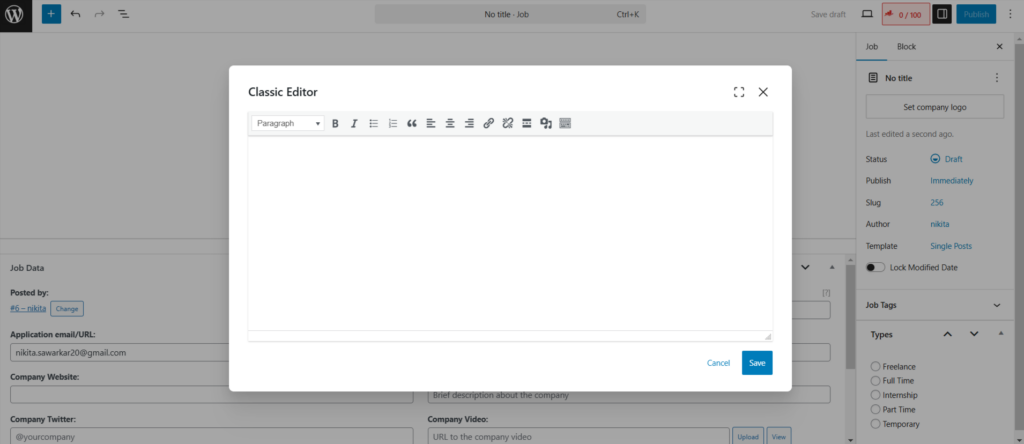
Screenshot: Add Job Description Here
Next, fill in the job title, location, company details, job description, and other such details. Select the job type and upload a logo if needed. You can also add job tags and job types: Freelance, Full Time, Internship, Part Time, and Temporary.
Once done, click “Publish” to make the job listing live.
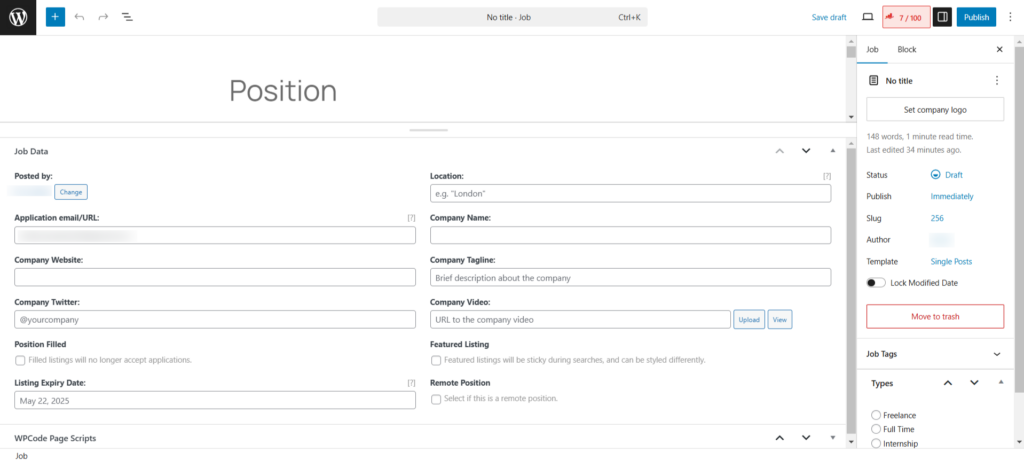
Screenshot: Add other Required Details
After publishing, click on the View tab to view your published job listing.
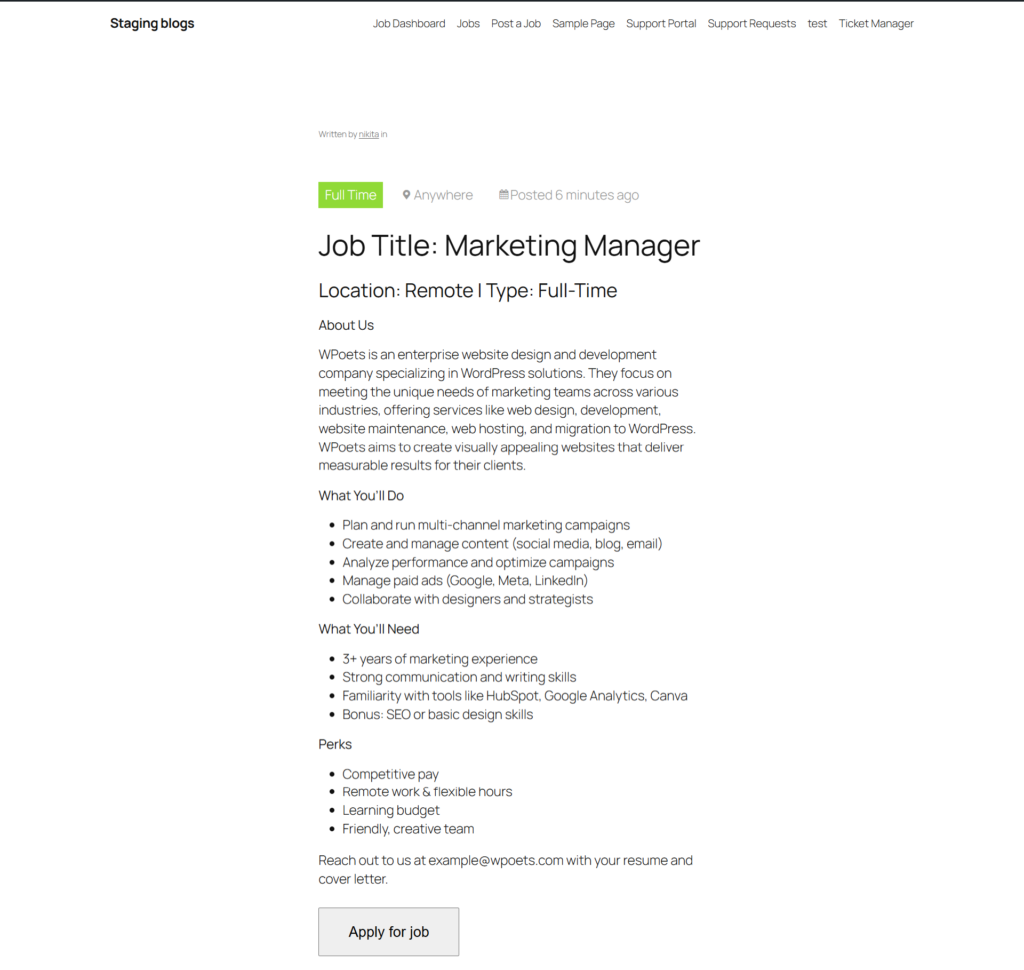
Screenshot: Published Job Listing
You can also see your job listing on the dashboard.
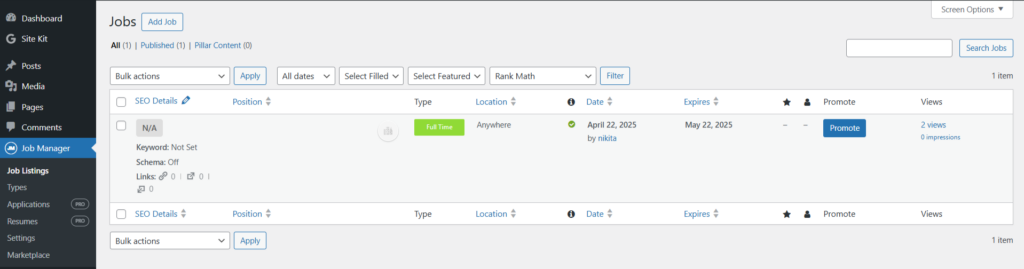
Screenshot: Job Listing Board
Step 4: Add a Job Type
To add a new job type,
- Enter the job type name (e.g., "Contract").
- Add a slug (URL-friendly version, like contract).
- Optionally, add a description or select a parent type.
- Choose the Employment Type from the dropdown.
- Click "Add New Job Type".
These types help organize job listings and let users filter them easily.
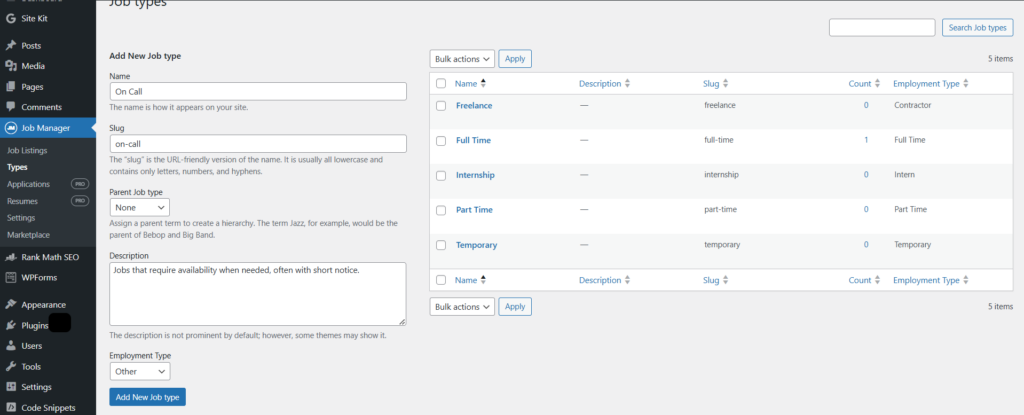
Screenshot: Add Job Type
Step 5: Add Applications (Pro Feature)
The Applications Pro feature ($79/year) allows employers to manage job applications directly on their dashboard.
It enables candidates to apply using a built-in form, and lets employers view, save, rate, and comment on applications privately.
This streamlines the hiring process and keeps everything organized within the site.
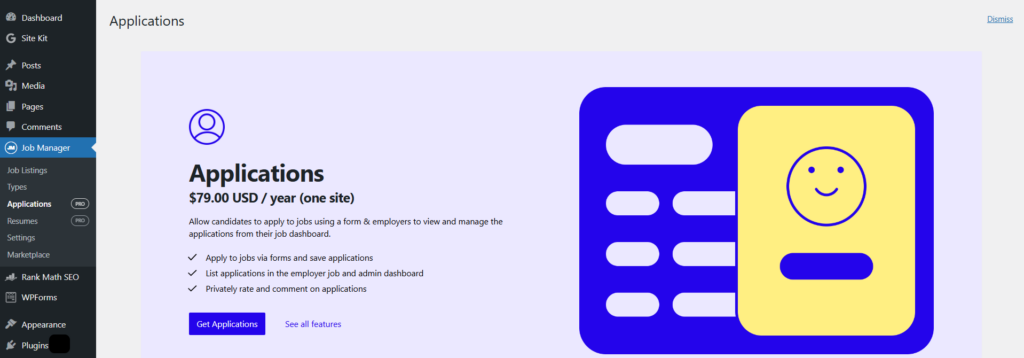
Screenshot: Add Applications
Step 6: Add Resumes
The Resume Manager feature ($49/year) adds a resume submission form to your site, letting candidates post resumes and apply to jobs using them.
Employers can manage resume listings from the WordPress dashboard, restrict access by user roles, and control who can view candidate contact details.
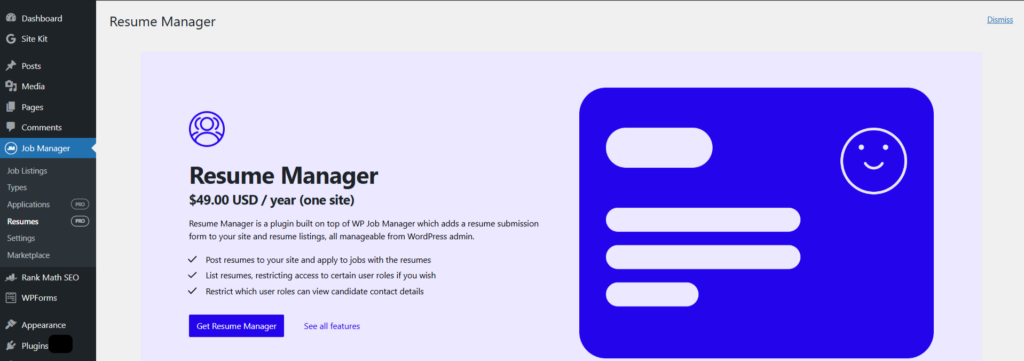
Screenshot: Resume Manager
Step 7: General Settings
Under settings, go to general settings.
The General Settings tab allows you to configure key plugin options.
You can change the date format (regular or relative), turn on job stats to track visitors, and add a Google Maps API key to show locations.
You can also choose to:
- Delete all data when you uninstall the plugin
- Skip the trash and delete job listings right away
- Turn on usage tracking to help make the plugin better
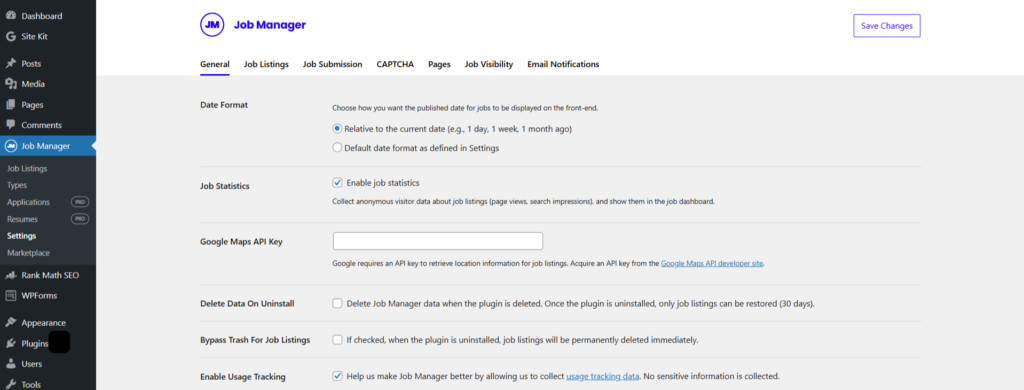
Screenshot: General Settings
Step 8: Settings > Job Listings
The Job Listings Settings control the appearance and functionality of job listings, including:
- Setting the number of jobs per page, choosing pagination style (load more/page numbers)
- Showing or hiding filled & expired jobs
- Enabling job categories/types (with multi-selection)
- Displaying remote job and salary information
- Showing or hiding location addresses
- and removing shortcodes from descriptions.
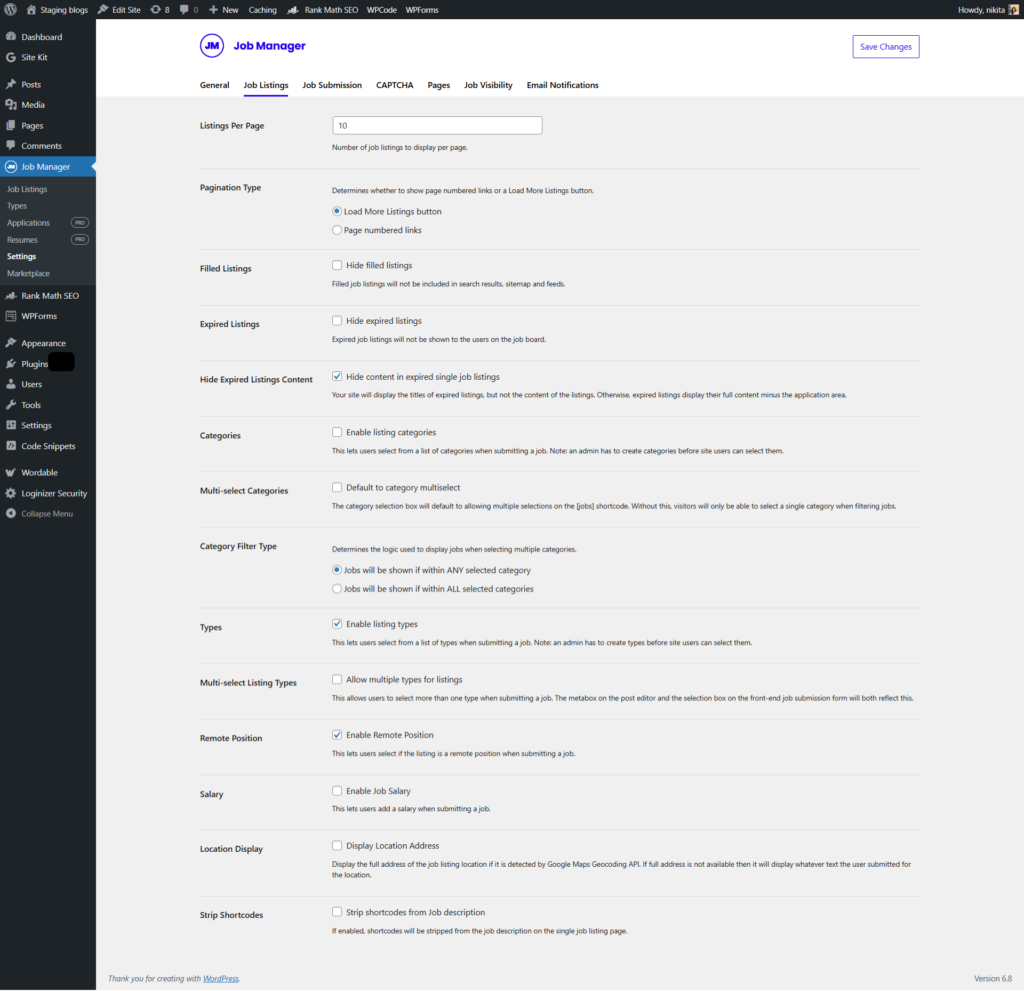
Screenshot: Job Listings
Step 9: Settings > Job Submission
The Job Submission Settings control how users submit/manage job listings. Users can be required to log in, create accounts during submission, and schedule listings.
Admins can review/approve submissions and edits, and control user editing permissions.
Other settings include listing duration, renewal options, posting limits, application methods (email/link), and terms & conditions agreements.
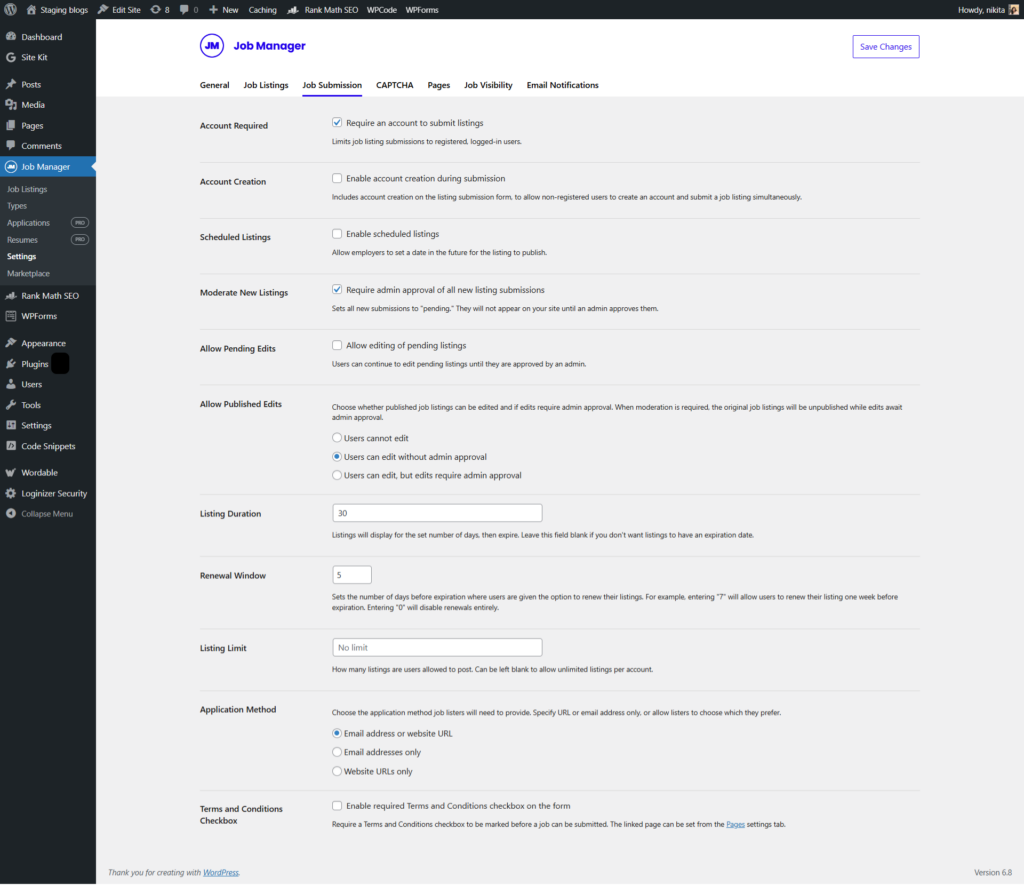
Screenshot: Job Submission
Step 10: Settings > Captcha
The CAPTCHA settings configure spam protection for job submissions.
You can customize the field label, choose reCAPTCHA v2 or v3 (requiring separate API keys), input the Site and Secret Keys, and enable CAPTCHA on the job submission form.
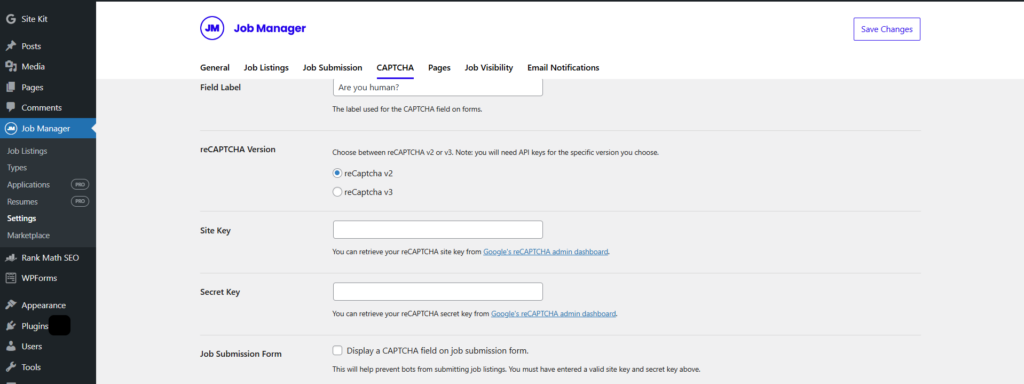
Screenshot: Captcha
Step 11: Settings > Pages Tab
The Pages tab links WP Job Manager's functions (job submission, dashboard, listings) to specific WordPress pages using shortcodes. Ensure the correct shortcodes are on their corresponding selected pages for proper functionality.
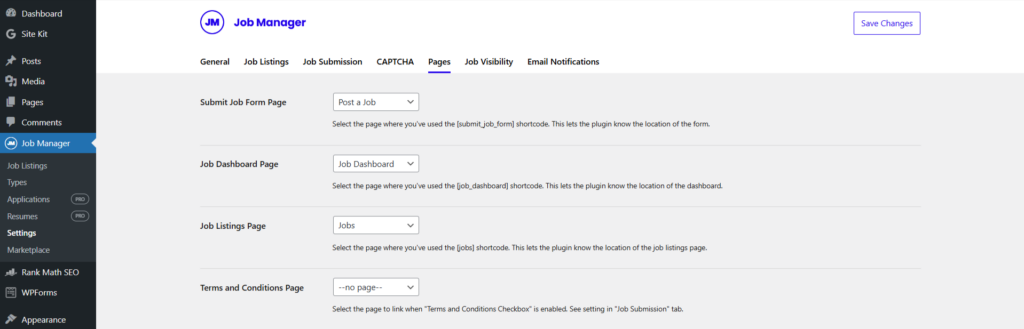
Screenshot: Pages Settings
Step 12: Settings > Job Visibility
The Job Visibility tab in WP Job Manager controls who can browse the general job list and view the details of individual job postings.
You can set these capabilities to "Everyone (Public)" or restrict access to specific user roles.
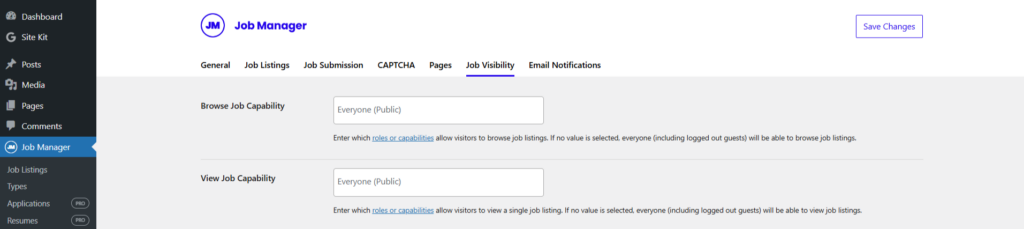
Screenshot: Job Visibility
Step 13: Settings > Email Notifications
The "Email Notifications" tab in WP Job Manager lets you configure automated email alerts. Specifically, it allows you to enable notifications to the administrator for new or updated job listings, and also set up notifications regarding expiring job listings.
You can choose the email format (plain text or rich text) for these notifications.
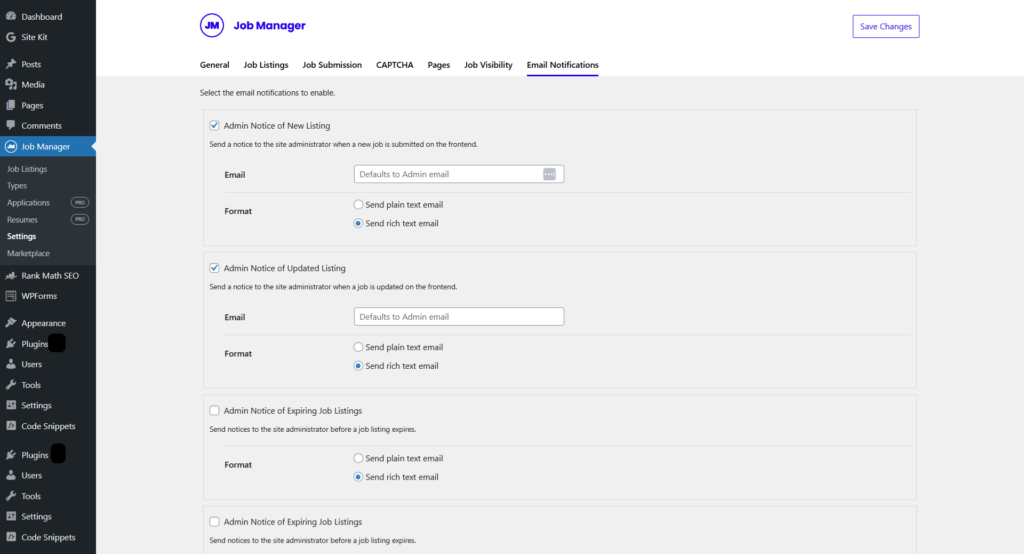
Screenshot: Email Notifications Settings
Step 14: Settings > Marketplace
The Marketplace allows users to manage installed plugins by activating, deactivating, updating, and deleting them. Users can also search for and install new plugins to extend WordPress functionality.
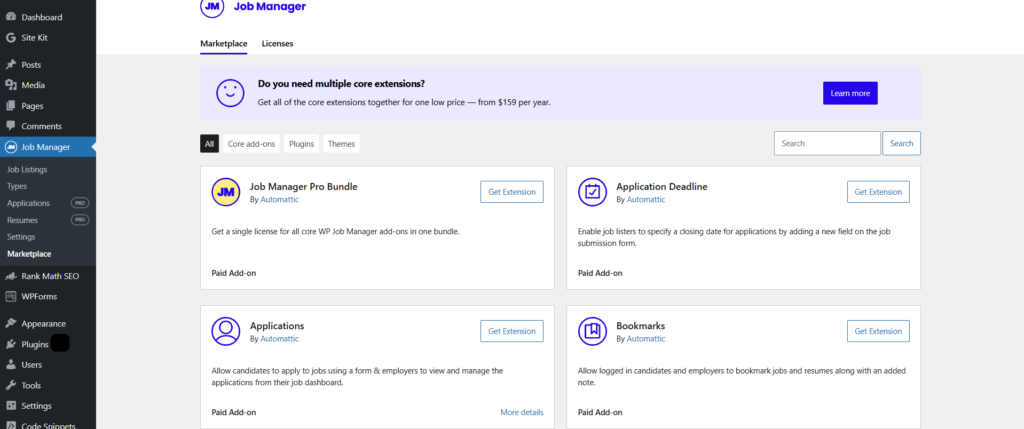
Screenshot: Marketplace
Conclusion
By adding WP Job Manager to your website, you're not just creating a job board—you're transforming your site into a powerful recruitment tool. With an intuitive interface that’s easy for both employers and job seekers to use, it streamlines the hiring process and helps you connect with a wider pool of qualified candidates.
Don't let great talent slip away. Enhance your careers page with WP Job Manager and make your company stand out as a top destination for professionals on the hunt for new opportunities.
Now it's your turn to install the plugin, configure your settings, and watch your job portal come to life!

Tutorials
7 min read
How to Integrate Digital Asset Management (DAM) in WordPress Using Cloudinary Plugin
If you've ever struggled to find an old image buried deep in your WordPress media library or felt frustrated by slow-loading media files, you're not alone! Managing digital assets like images, videos, graphics, or documents can quickly become chaotic, especially as your website grows.
This is where Digital Asset Management (DAM) comes in.
DAM (Digital Asset Management) is like an intelligent, highly organized media library that helps businesses store, organize, search, and distribute digital content efficiently.
In this blog, we will understand what is DAM and learn how to integrate it into WordPress.
Understanding Digital Asset Management (DAM)
What is DAM?
Digital Asset Management (DAM) is a centralized system for storing, organizing, retrieving, and sharing digital files like images, videos, audio, PDFs, and design assets.
DAM is a structured system built for businesses, marketers, content creators, and website managers. Unlike traditional storage methods, where files are placed in folders without organization, DAM automatically categorizes, tags, and optimizes assets. This makes finding, managing, and using digital files easier.
Key Features of a DAM System:
- Metadata & AI Tagging: Assigns keywords, descriptions, and categories automatically
- Advanced Search & Filtering: Search for files instantly using tags, dates, file types, and more
- Version Control: Keeps a history of edits so you never lose an original file
- Cloud-Based Storage: Securely store assets without overloading your WordPress site
- Collaboration Tools: You can share, edit, and approve assets across teams
- CDN Optimization: Ensure fast-loading images and videos for a better website experience
How DAM Systems Work
Upload & Organize
When you upload a file to a DAM system, it is sorted automatically instead of placing it in a general folder. The system organizes it by type, like images, videos, or documents. It also adds tags and metadata, making searches easier. Some DAM systems even use AI to recognize objects or faces in images, helping users find files quickly.
Search & Retrieve
Searching a file in a large collection can take time, but a DAM system makes it simple. Instead of searching through many folders, users can find files using keywords, tags, or filters. Some systems even let you search by image content, making it even faster.
Optimize & Deliver
A DAM system can optimize files, too! Images and videos are adjusted automatically to make them responsive. The system compresses files to keep quality high while reducing load times. Many DAMs use a Content Delivery Network (CDN) to load media faster, thus improving website performance.
Manage & Share
Sharing and teamwork are easy with DAM systems. Users can create download links and set permissions so only certain people can edit or access files. They also offer analytics to track which files are used most, helping businesses update or improve their assets.
Why Integrate DAM with WordPress?
I know you are wondering why use DAM when WordPress already has its built-in media library. But here’s the catch, the built-in media library works fine for small websites. However, when your site grows, especially if you manage an eCommerce store, a content-heavy blog, or a media-rich portfolio, you may experience limitations.
These may include the absence of advanced search, version control, performance optimization, proper organization, and secure file access.
By integrating DAM with WordPress, you are able to streamline your workflow, improve website performance, and make managing media assets effortless.
What You’ll Gain with DAM Integration
Integrating a DAM system with WordPress brings a noticeable boost in performance, organization, and collaboration.
- Better Organization: AI-powered tagging, metadata, and smart search filters make it easy to manage and locate assets.
- Faster Page Speed: Optimized media is delivered via global CDNs, improving load times across all devices.
- Easy Collaboration: Teams can securely access, update, and share assets without the risk of overwriting files.
- SEO Benefits: Automatic image optimization and detailed metadata improve search engine visibility.
- Scalability: Easily handle large volumes of digital assets without slowing down your WordPress site.
DAM vs. WordPress Media Library: What’s the Difference?
At first glance, the WordPress Media Library and a Digital Asset Management (DAM) system might seem similar as they both store and manage media files.
However, they serve very different purposes. The WordPress Media Library is a basic file storage tool. A DAM system is a fully-featured solution for organizing, optimizing, and distributing digital assets efficiently.
Let's compare!
| Features | WordPress Media Library | Digital Asset Management (DAM) |
| Storage & Organization | Stores media files in a simple folder structure. | Provides advanced organization with metadata, tags, categories, and AI-powered search. |
| Search & Retrieval | Basic search based on file name and upload date. | AI-powered search with metadata, keywords, file type, and even visual recognition. |
| Version Control | No version control; overwriting files can cause loss of old versions. | Tracks changes, allows access to previous versions, and prevents accidental overwrites. |
| File Management | Files are uploaded directly to WordPress and stored in /wp-content/uploads/. | Stores files in a cloud-based or on-premises DAM system and integrates with WordPress. |
| File Sharing & Collaboration | Limited; files must be manually shared via links. | Built-in sharing, collaboration, and approval workflows. |
| CDN & Performance | Relies on WordPress caching and third-party plugins for performance. | Often includes a built-in CDN (Content Delivery Network) for faster loading times. |
| SEO Optimization | Manually add alt text, captions, and descriptions. | Automated SEO-friendly metadata tagging and optimization. |
| Security & Compliance | Limited security options; media files may be accessible via direct URLs. | Advanced security, DRM (Digital Rights Management), watermarking, and access restrictions. |
| Automation & AI Features | No AI features. | AI for auto-tagging, facial recognition, smart cropping, and automated workflows. |
Which One Should You Use?
If you only need to upload and manage basic media files, the WordPress Media Library is enough.
If you deal with large volumes of digital assets, need better search and collaboration, or want automation, DAM is the better choice.
The ideal setup is integrating DAM with WordPress, which gives you advanced asset management while keeping WordPress lightweight and optimized.
Guide to Integrating DAM with WordPress with Cloudinary
Cloudinary is a powerful Digital Asset Management (DAM) system that helps optimize, store, and deliver media files efficiently.
Step 1: Create a Cloudinary Account
Go to Cloudinary’s Website: Visit Cloudinary and click on Sign Up.
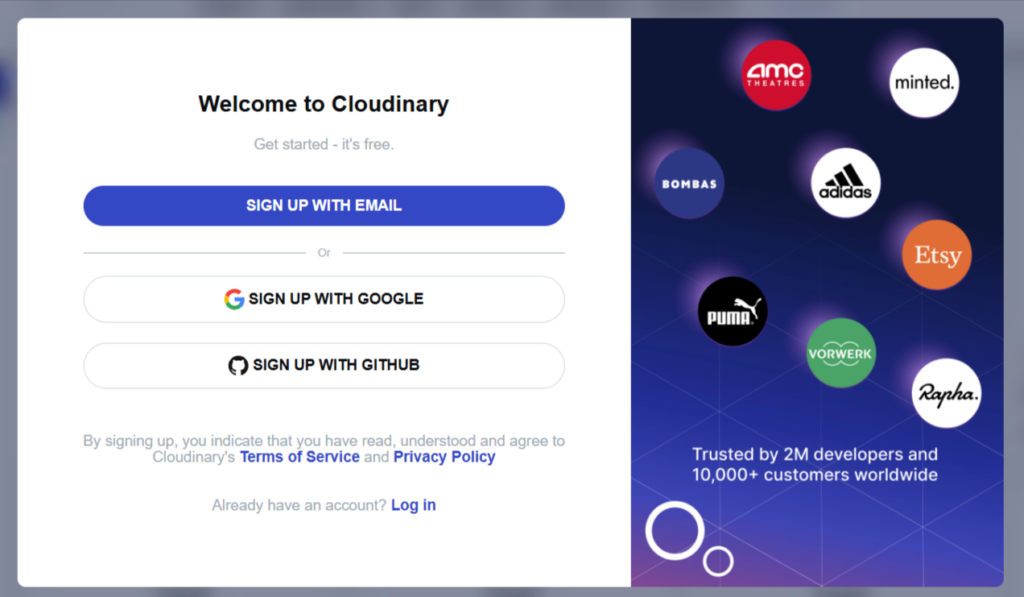
Screenshot: Sign up with Email
Choose your preferences with the usage.

Screenshot: Choose Your Interest
Collect the API key and Secret Key from the Cloudinary Dashboard.

Screenshot: Go to API Keys
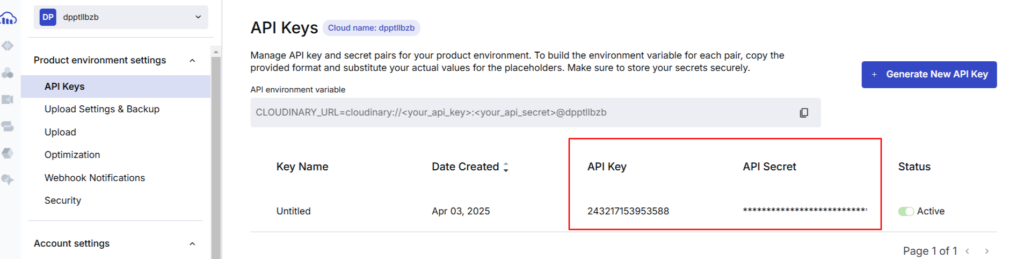
Screenshot: API Key Details
Step 2: Install and Configure the Cloudinary WordPress Plugin
Go to WordPress Dashboard> Plugins> Add New> Cloudinary
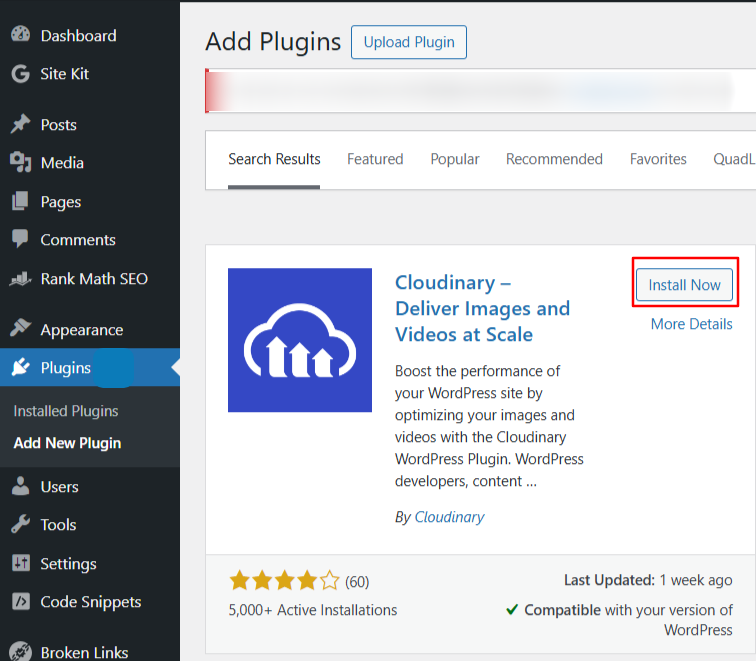
Screenshot: Add Cloudinary Plugin
Open Cloudinary Setup.
If you already have an account, go to the Next step. If you don't have an account, you can create one from here, too.
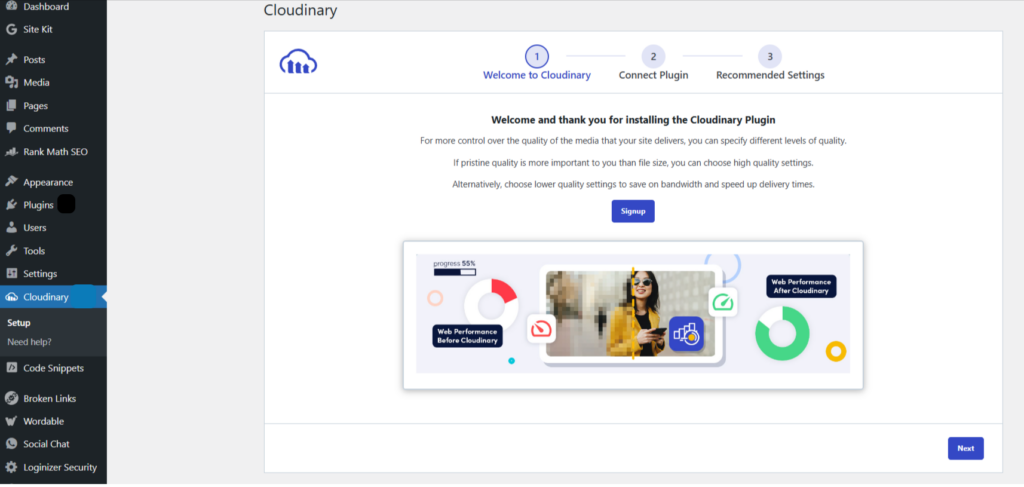
Screenshot: Cloudinary Setup
Connect Plugin by entering Cloudinary API environment variable, which you can get from Cloudinary console.
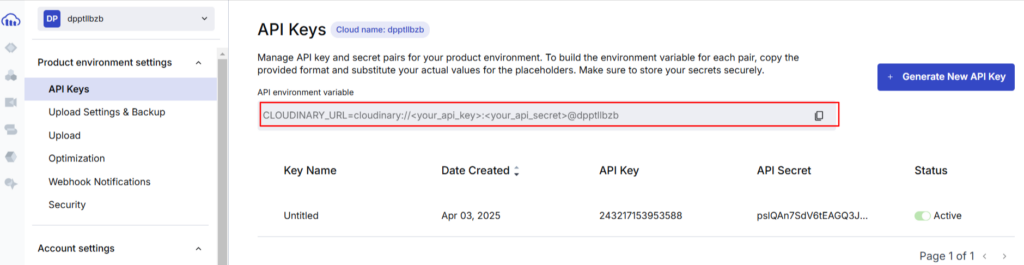
Screenshot: Copy API Environment Variable from Console
Now, to paste this variable, you have to add API key and API secret Key in the variable itself as shown:
CLOUDINARY_URL=cloudinary://<your_api_key>:<your_api_secret>@dpptllbzb
Now replace <your_api_key> with Cloudinary API key and <your_api_secret> with Cloudinary API Secret Key.
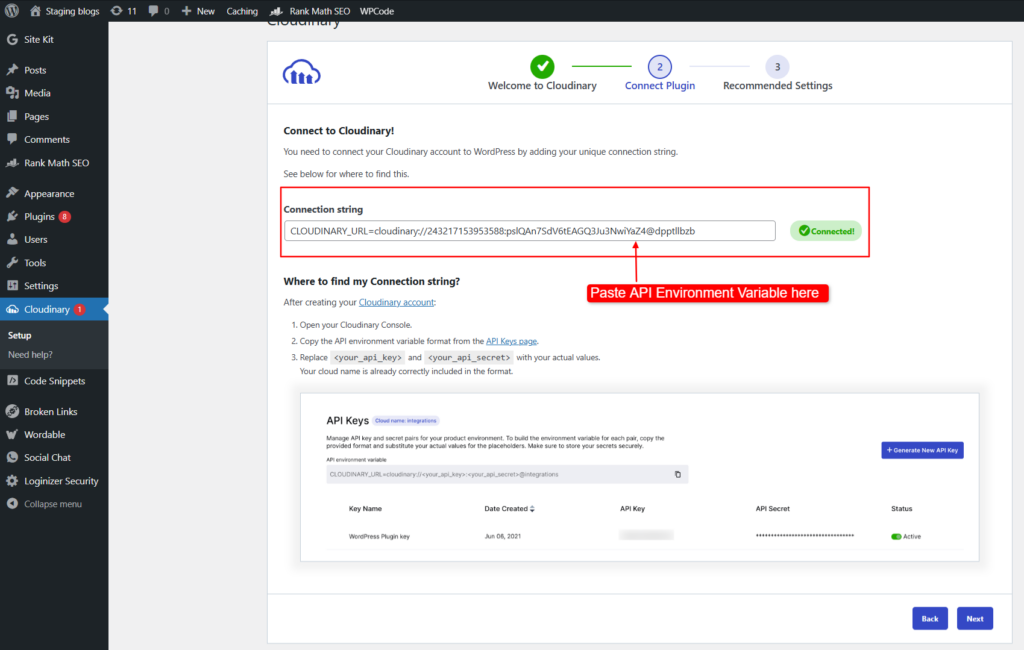
Screenshot: Paste API Environment Variable here
Click on Next.
You can now choose the recommended settings of Cloudinary.
To do so, first click on the Lock icon to make the changes.
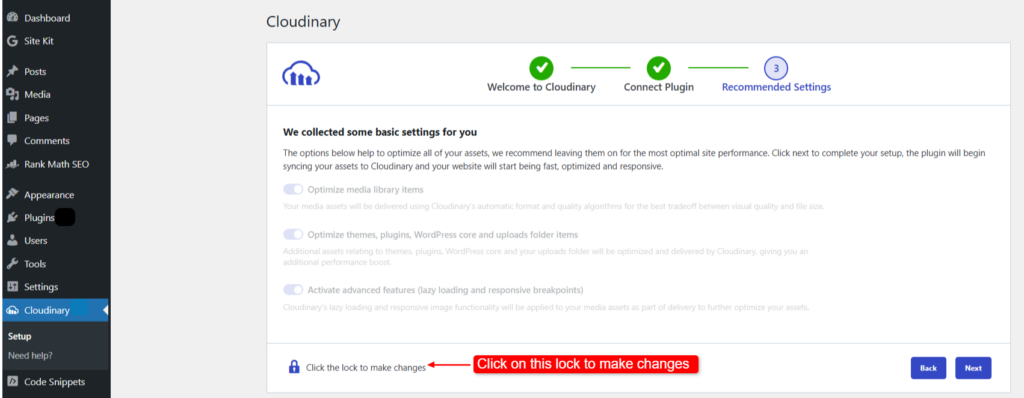
Screenshot: Recommended Settings
And you are done with the Plugin Settings!
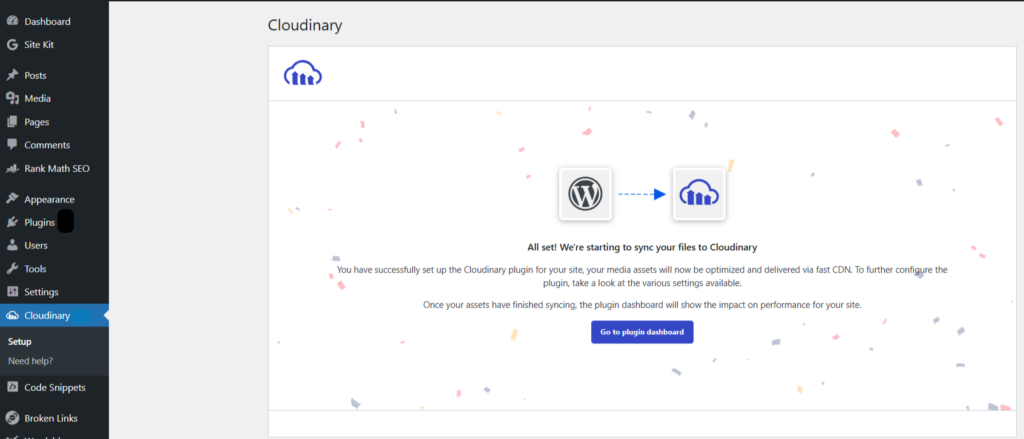
Screenshot: Plugin Settings Complete
Step 3: Cloudinary Settings
Go to WordPress dashboard> Cloudinary> General settings
General Settings in Cloudinary manage how media assets sync, store, and deliver between WordPress and Cloudinary for optimized performance and flexibility.
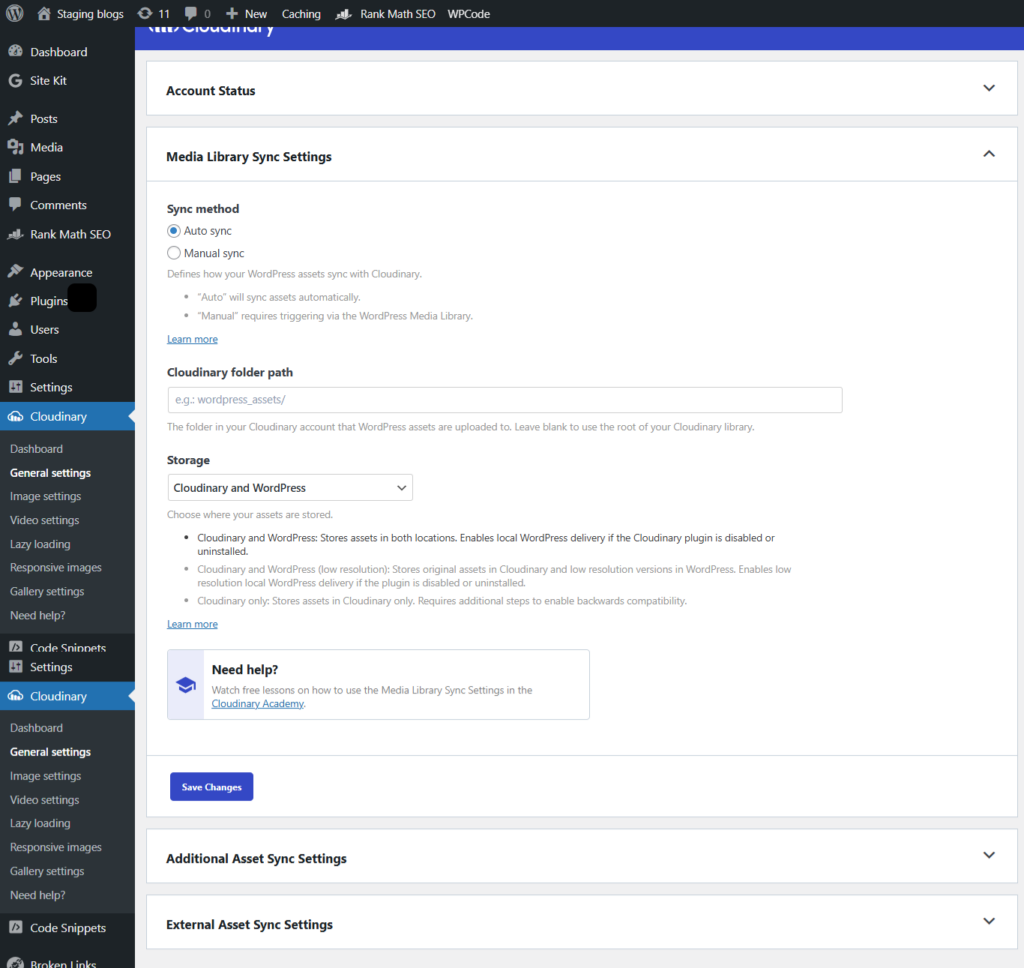
Screenshot: General Settings
Go to Image Settings to optimize, transform, and deliver images efficiently by adjusting format, quality, and other global transformations for better performance and responsiveness.
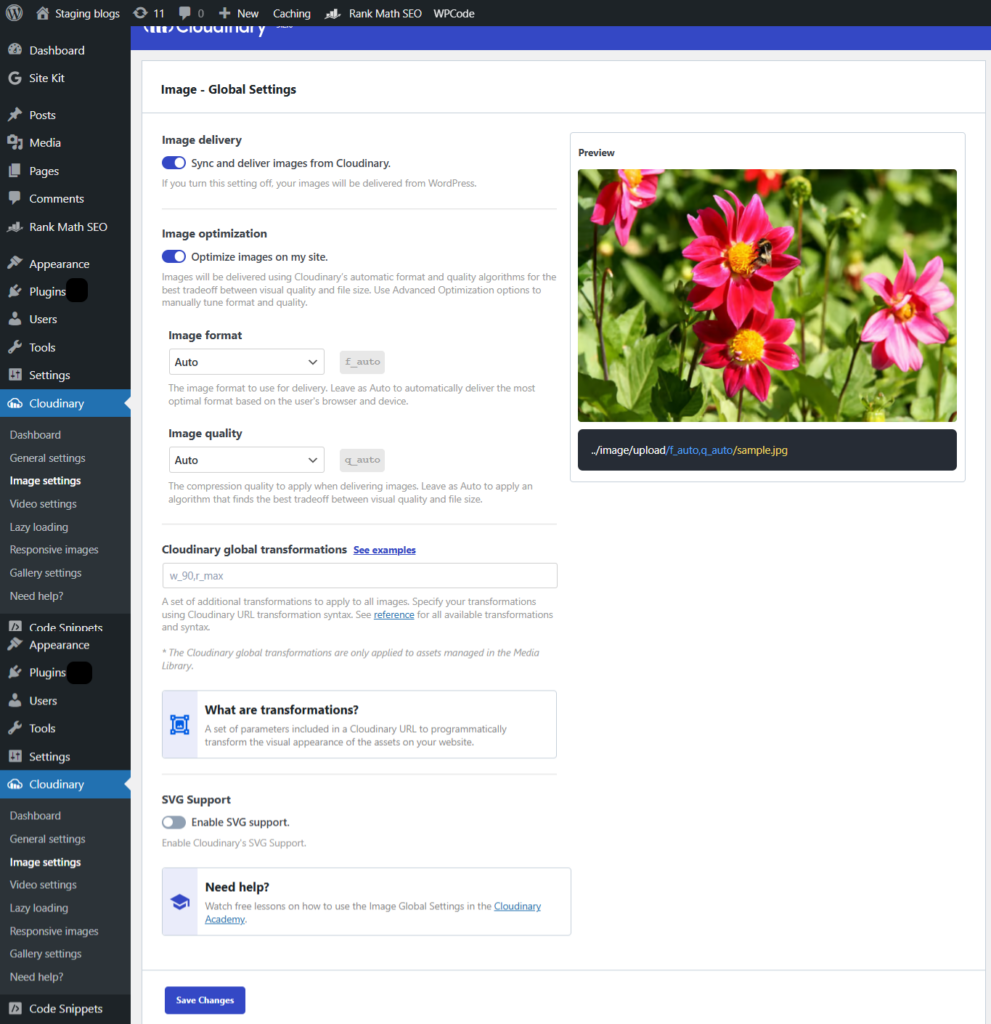
Screenshot: Image Settings
Video Settings in Cloudinary control video delivery, optimization, format, quality, and transformations to enhance performance and playback across devices.
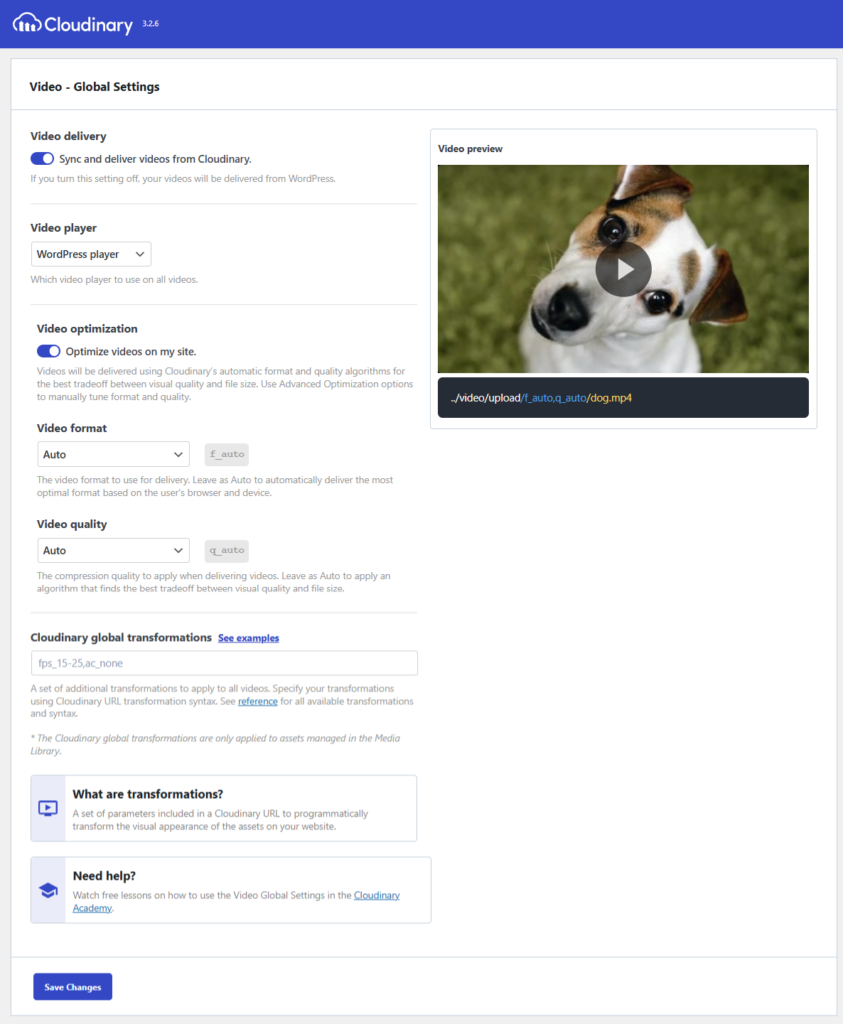
Screenshot: Video Settings
Lazy Loading Settings enable optimized loading of images and videos by deferring their loading until they are needed, improving page speed and performance.
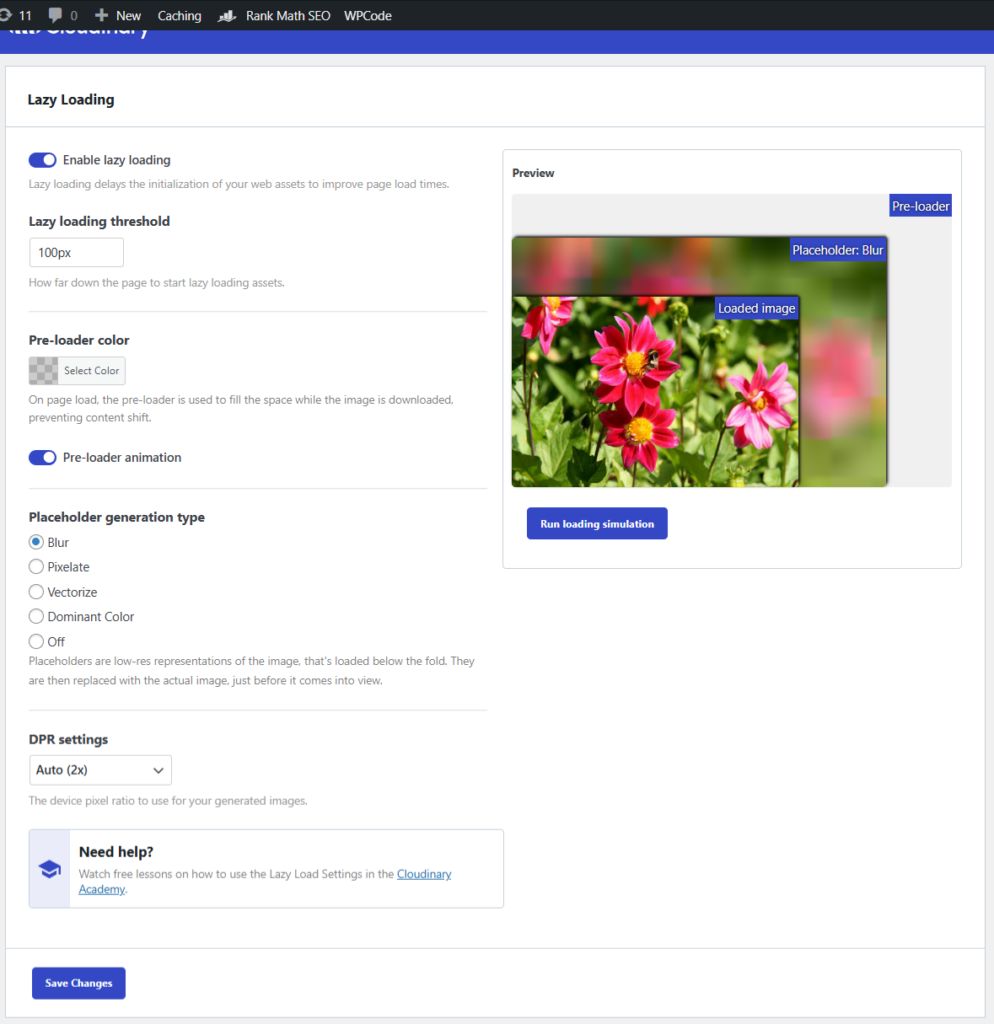
Screenshot: Lazy Loading
Responsive Image Settings automatically generate multiple image sizes based on breakpoints to optimize loading across different screen sizes, enhancing performance and user experience.
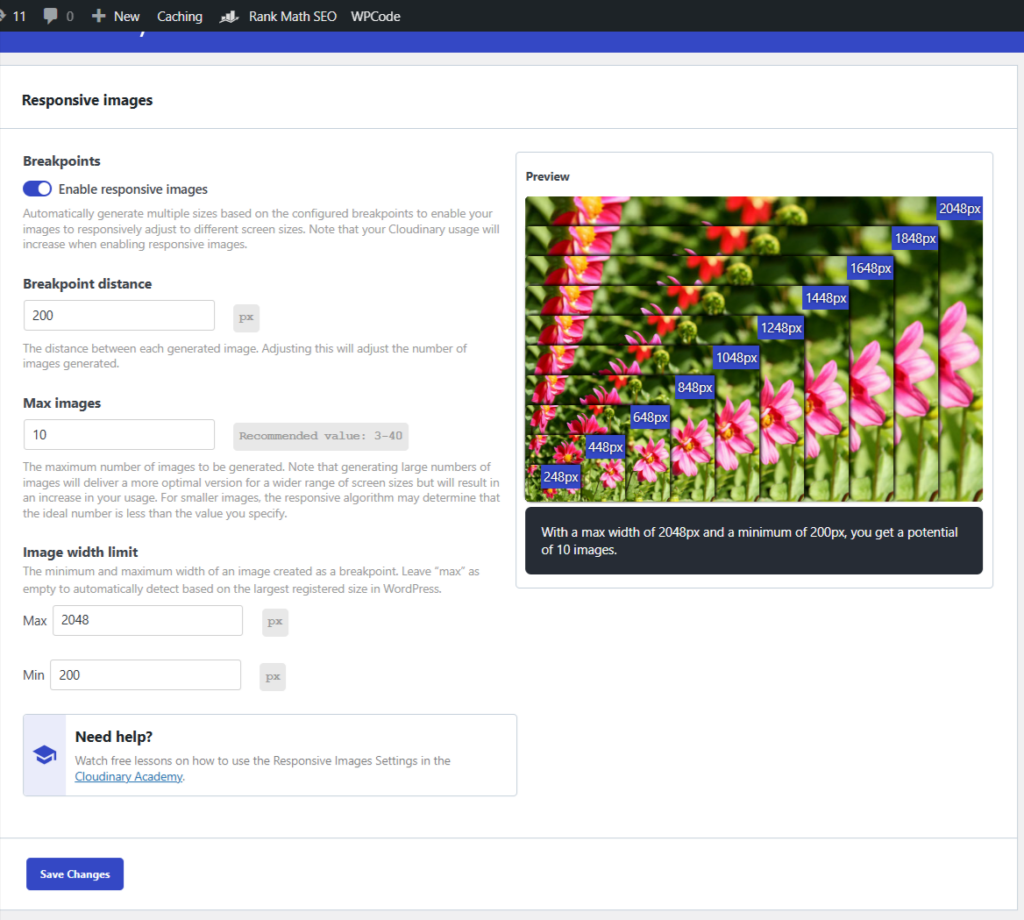
Screenshot: Responsive Image settings
Gallery Settings allow customization of gallery layouts, color palettes, transitions, and display parameters to enhance visual presentation on posts and pages.
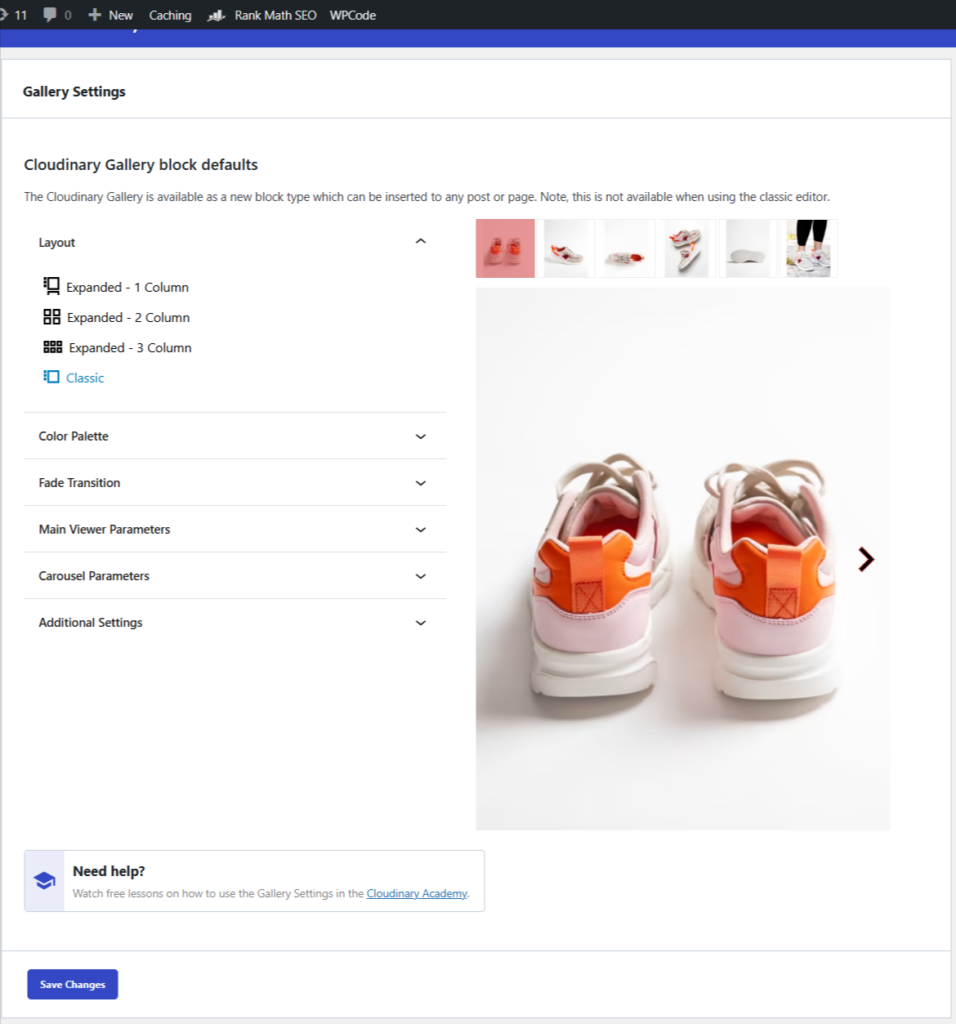
Screenshot: Gallery settings
That’s it! You are all set to use Cloudinary DAM!
Now, while using the WordPress Editor, when you add an image, you can see the Cloudinary option.
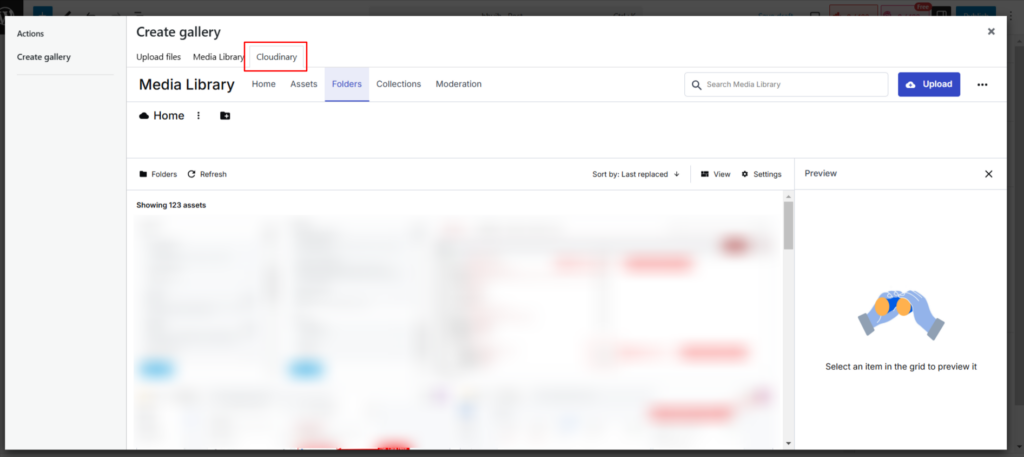
Screenshot: Cloudinary Option While Uploading Media
Conclusion
Integrating Cloudinary with WordPress makes managing media files easier, faster, and more efficient. It keeps your site organized, speeds up loading times, and improves SEO by delivering optimized images and videos through a global CDN.
With your Digital Asset Management (DAM) now in place, you can handle high-quality media without slowing down your website!
Tutorials
9 min read
How to Install Factors AI on WordPress With and Without Plugins
Whether you own a blog, an online store, or a corporate site, having a website means wanting to know as much about visitor analytics data as possible. It's essential to track how many visitors are there, from where they are coming, what activities they are doing on your website, and how to enhance their website visit.
Oh! Don't worry; Factors AI tackles all of these questions.
With the help of an advanced analytics tool like Factors AI, you can now understand more than just visitor counts. It allows you to know where interactivity dips and what keeps customers engaged. The insights offered definitely help you exercise better judgment, which leads to improving your metrics and customer experience.
Integrating Factors AI with WordPress can be done in two ways:
- With Plugin: Simply download the plugin and enjoy all that Factors AI has to offer, no coding required!
- Without Plugin (Custom Code): This one is a bit more tricky but preferred by users who love having a leaner version of their websites, and it is customizable.
In this guide, let us explore both methods step by step.
Pre-requisites
Before you can install Factors AI on your WordPress website, there are a few things you’ll need to have ready.
A Factors AI Account
You begin by creating an account at Factors AI. If you don’t have an account yet, here’s how you can create one:
- Go to the Factors AI website.
Screenshot 1: Factors AI Website
- Click the Log in button. If you already have an account, enter your login credentials. If you don’t have an account, click on Sign up.
Screenshot 2: Create an Account at Factors AI
- Enter your email address. Make sure you only use your work email, as Factors AI does not accept personal email addresses.
- Follow the setup instructions, like filling out your name and phone number to create your account.
Connect Factors AI with Your Website
Next, you have to connect your website to Factors AI.
Create a New Project: This tab will gather information about your Project Name, display by default your company’s domain, and your preferred time zone. You can also upload your company’s logo to get a more professional look. Click on Create and continue to proceed.
Screenshot 3: Enter your Company Details
Connect With Your Website: This step is about integrating Factors AI with your website so that it can start tracking visitor activity. You have three ways to do this:
- Using Google Tag Manager (GTM): Recommended (Easier)
- Manual Setup: Adding the script directly to your site’s code
- Using a Customer Data Platform (CDP) like Segment or RudderStack
Screenshot 4: Ways to Connect Factors AI with Your Website
You can select any one option to connect your website.
We’ll cover connecting your website to Factors AI in the coming sections of the blog.
Method 1: Installing Factors AI With WPCode Plugin
For this, go to your WordPress Admin Dashboard.
Install the WPCode plugin, which allows for the insertion of code snippets.
Go to Code Snippets> Add Snippet > Add Your Custom Code (New Snippet) > Select Javascript > Add Factors SDK.
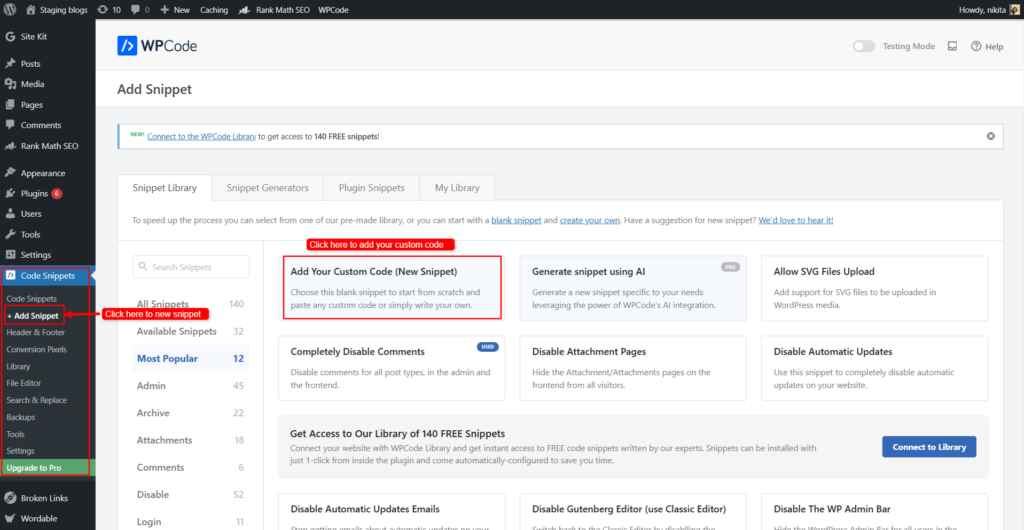
Screenshot 5: Select Add Snippet
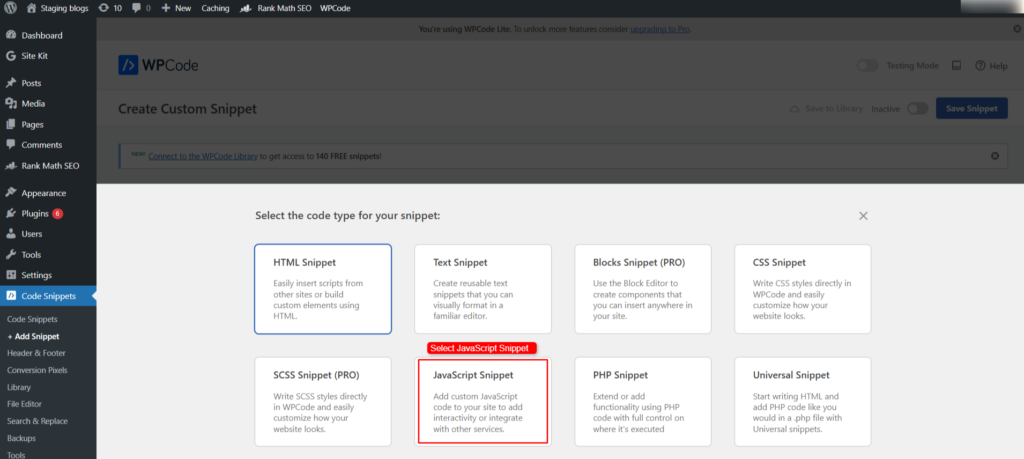
Screenshot 6: Select Javascript Snippet
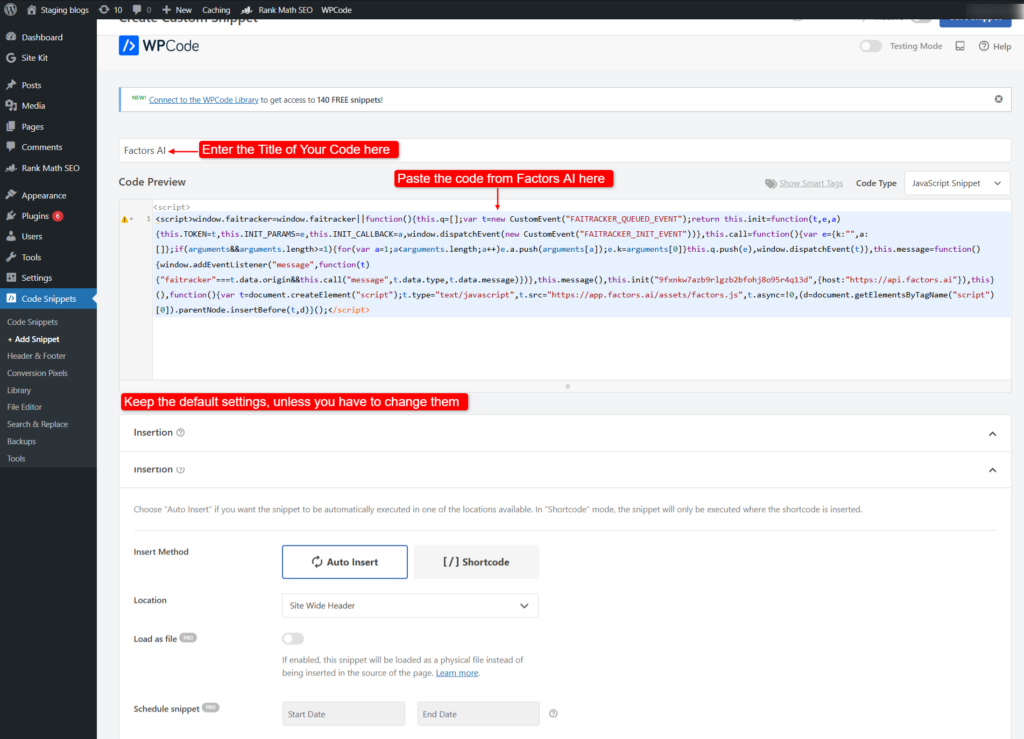
Screenshot 7: Add Factors SDK
Make sure the button is Active.

Screenshot 8: Set the Active Button
Click on Save Snippet.
Go back to the Factors AI website- Connect with Your Website page.
Please click 'Verify Now' to verify the connection of your website to Factors AI, irrespective of the integration method used.
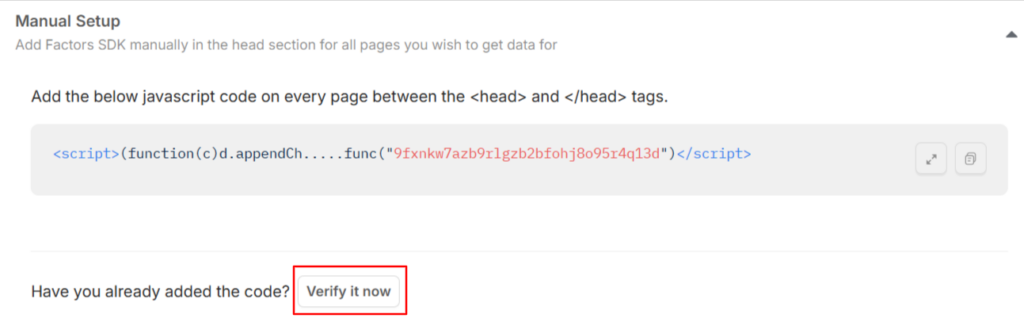
Screenshot 9: Click on Verify it Now
You’ll get the message “Verified. Your script is up and running.”
Screenshot 10: Script is Verified
Click on Connect and Continue.
Method 2: Installing Factors AI on your WordPress Without a Plugin (manually adding code)
You already have the Factors SDK code. Now, just manually place this code in your website’s header section.
Here are a few things to keep in mind when manually adding code:
- Use a Child Theme: It's best to add the FActors AI code to your child theme instead of the parent theme. If you don't have a child theme installed, follow this tutorial to create one.
- Back Up Your Website: Before making any changes, always back up your site. Check out this blog on how to back up a WordPress website. At a minimum, create a copy of your child theme's header.php or functions.php file since these will be modified. This ensures you can restore your site if anything goes wrong.
- Technical Expertise Recommended: Manual code installation is recommended only if you have the necessary technical skills to handle the code.
Option 1) Installing Factors AI by adding SDK to the header.php file (recommended for developers)
Note: This method will work only on Legacy Themes and not on Block Editor Themes.
- Access your website's WordPress dashboard. Go to Appearences> Theme File Editor.
Screenshot 11: Select Theme File Editor
- Locate the header.php file in the right sidebar (choose header.php of the child theme).
Screenshot 12: Locate header.php file
- Paste the copied SDK code snippet just before the closing </head> tag.
Screenshot 13: Insert Script
- Save the changes and publish or update your website to ensure the SDK is active.
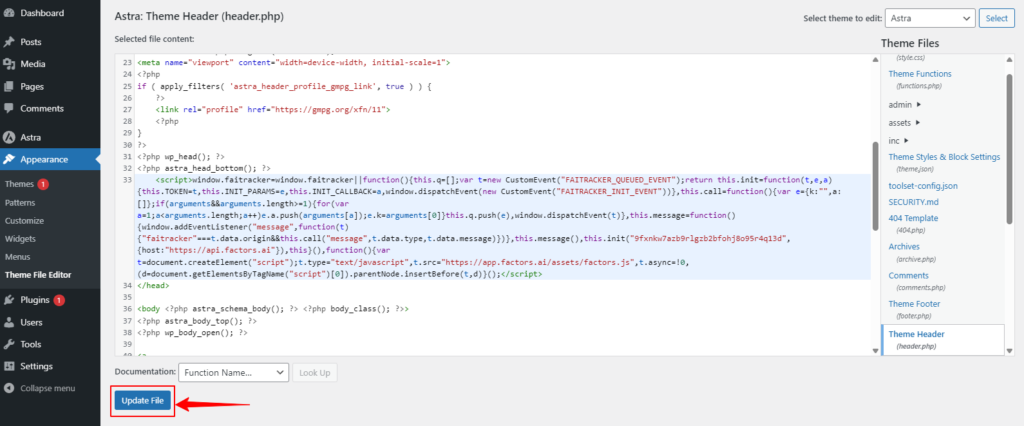
Screenshot 14: Update File
After installation, complete the verification process by following the same procedure as mentioned above.
Option 2) Adding the Factors AI Code via the functions.php File (Best for Developers)
- Open your child theme’s functions.php file using a code editor. For more details about the functions.php file, refer to this blog.
- Paste the Factors AI code snippet (copied from the previous step) at the end of the file.
| <script>window.faitracker=window.faitracker||function(){this.q=[];var t=new CustomEvent("FAITRACKER_QUEUED_EVENT");return this.init=function(t,e,a){this.TOKEN=t,this.INIT_PARAMS=e,this.INIT_CALLBACK=a,window.dispatchEvent(new CustomEvent("FAITRACKER_INIT_EVENT"))},this.call=function(){var e={k:"",a:[]};if(arguments&&arguments.length>=1){for(var a=1;a<arguments.length;a++)e.a.push(arguments[a]);e.k=arguments[0]}this.q.push(e),window.dispatchEvent(t)},this.message=function(){window.addEventListener("message",function(t){"faitracker"===t.data.origin&&this.call("message",t.data.type,t.data.message)})},this.message(),this.init("SAMPLE_UNIQUE_ID",{host:"https://api.factors.ai"}),this}(),function(){var t=document.createElement("script");t.type="text/javascript",t.src="https://app.factors.ai/assets/factors.js",t.async=!0,(d=document.getElementsByTagName("script")[0]).parentNode.insertBefore(t,d)}();</script> |
Code snippet: Sample Factors AI code added through functions.php file
- Note unique SDK ID is replaced with SAMPLE_UNIQUE_ID.
- Save the changes and refresh your webpage.
Option 3) Installing Factors AI With Google Tag Manager
Integrating Factors AI with your website via Google Tag Manager (GTM) is an efficient method that requires minimal coding. Follow these steps to set up the integration:
- Access your GTM account associated with your website.
- In the GTM dashboard, go to the Tags section.
- Click on New Tag to create a new tag.
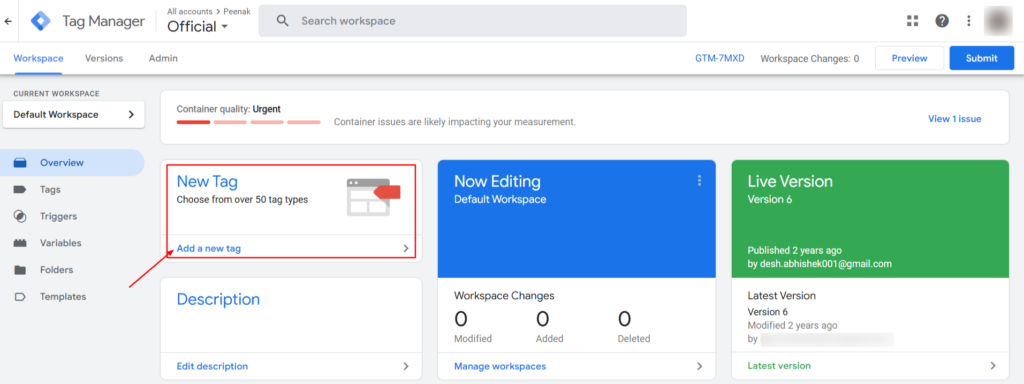
Screenshot 15: Access your GTM
- Name the tag (e.g., "Factors AI").
- Click on Tag Configuration and choose Custom HTML as the tag type.
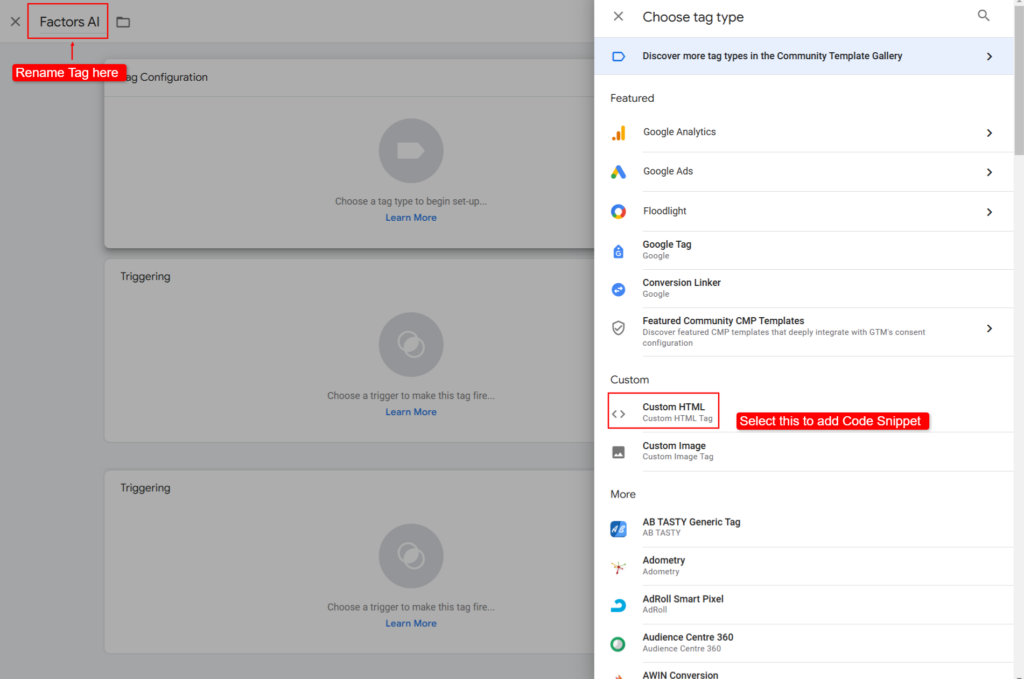
Screenshot 16: Name the New Tag and Select Custom HTML
- Paste the Factors AI SDK code snippet into the HTML field.
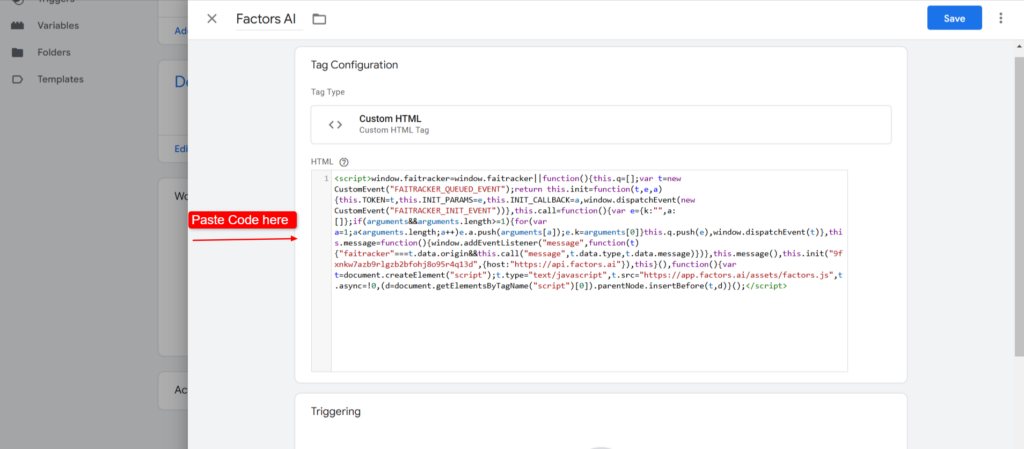
Screenshot 17: Paste Factors AI SDK Code Snippet
- Click on Triggering and select All Pages to ensure the SDK loads on every page of your website.
Screenshot 18: Choose Trigger
- Click Save to store the new tag configuration.
- In the GTM workspace, click Submit and then Publish.
Screenshot 19: Click on Submit
Screenshot 20: Click on Publish
Follow the same steps for verification as described in Method 1.
Post Installation Step: Activate Deanonymisation
Visitors coming to your website are usually anonymous—you don’t know which company or account they belong to. Deanonymization helps identify some of these visitors by linking them to known company data.
This step allows you to control how many accounts Factors AI should try to identify, which impacts your monthly quota.
Now, you have two options:
- Identify All Accounts: Factors AI will identify all website visitors, providing maximum company data but potentially consuming your monthly quota quickly. This is best suited for businesses needing complete visitor insights.
- Set Custom Rules: Choose specific conditions to identify only relevant visitors based on pages or locations, helping you conserve your monthly quota.
Screenshot 21: Select preference for Deanonymisation
If you select Set Custom Rules, you’ll get two more options:
- By Page: Identify visitors who visit key pages (e.g., pricing, signup, or contact pages) to focus on high-intent leads.
- By Location: Track visitors from specific countries, ignoring irrelevant regions (e.g., limit to US and UK if your business serves only those markets).
Screenshot 22: Set Custom Rules
Click on Activate and Continue.
Tada! You are almost done!
Screenshot 23: Welcome to Factors
Select what you want to achieve with Factors AI. The options help Factors AI tailor its analytics and insights to match your needs.
Screenshot 24: Choose Options
You’ll have to answer a mandatory question: From where did you learn about Factors AI?
Answer the question and click on Submit to complete the process.
Screenshot 25: Click on Submit after Answering the Question
Your Project is Ready!
Click on Continue to Project.
Screenshot 26: Project is Ready
You are all set up to use Factors AI!
Verifying That Factors AI Is Working on Your Site
Once you’ve installed Factors AI on your WordPress website, you’ll want to confirm that it’s working. Here is a simple way to check:
Check if the Script is Running Correctly
The Factors AI script needs to load properly on your website to start tracking visitors.
- Visit your WordPress site in the search engine.
- Right-click anywhere on the page and select Inspect.
- Go to the “Network” Tab.
- If it’s empty, refresh your page.
- In the search bar (inside the Network tab), type "factors".
- If the script is installed correctly, you’ll see a request loading from Factors AI’s servers.
- Click on it to check the details—if it loads with a status like 200, the script is working.
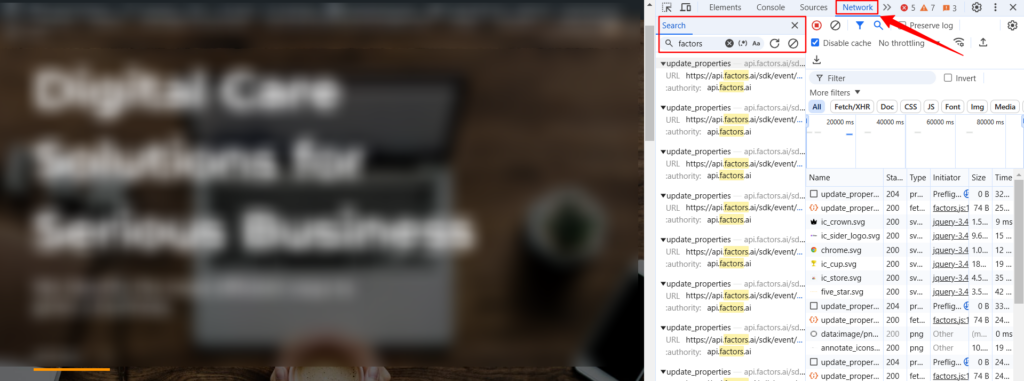
Screenshot 27: Checking if the Script is Running
What if you don’t see the script?
- Make sure you’ve pasted the script in the right place (the header section).
- Clear your website’s cache and refresh the page.
- Try using Incognito Mode to check if caching is the issue.
Conclusion
Congrats! You’ve successfully installed Factors AI on your WordPress site, unlocking powerful insights into visitor behavior.
We hope you have chosen a favorable method of installing Factors AI.
Now it’s time to dive into your dashboard, explore the data, and make smarter marketing decisions.
Tutorials
5 min read
How to Publish Blog Posts from Google Docs to WordPress in One Click
If you’re a blogger, content creator, or part of a marketing team, chances are you’re drafting your posts in Google Docs.
And why wouldn’t you? It’s easy to use, allows for real-time collaboration, and auto-saves everything—no more “I lost my work” horror stories.
What if you could, with a click of a button, have your fully formatted Google Doc instantly appear in WordPress, complete with images, links, and proper headings?
That’s exactly what one-click import solutions like Wordable help. They take the tedious work out of publishing so you can focus on what matters—creating great content.
In this guide, we’ll walk you through how to seamlessly import Google Docs into WordPress with just one click, saving you time, frustration, and energy. Let’s dive in!
Using Wordable to Import Blog Posts from Google Docs to WordPress in One Click
Step 1: Installation and Activation
Install the Wordable plugin on your site or create an account here.
To install the plugin on your WordPress, go to:
WordPress Dashboard > Plugins > Add New Plugin > Wordable
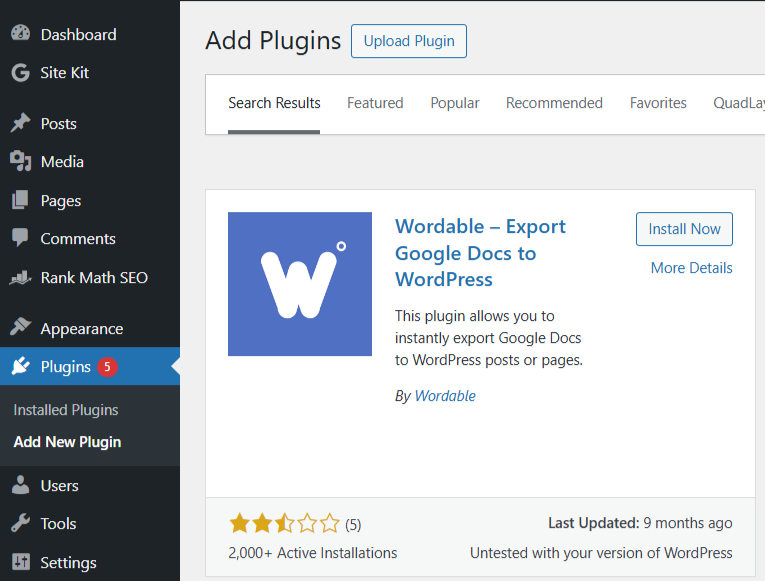
Screenshot 1: Add Wordable Plugin on Your Dashboard
You can also visit the official site of Wordable and sign up.
Screenshot 2: Wordable Plugin Official Site
Step 2: Connect Your Account
Connect your Google Drive account.
Screenshot 3: Connect Google Drive
You'll be prompted to choose the Google account that you want to use.
Screenshot 4: Choose Google Account
Check the box according to your requirement.
Screenshot 5: Wordable Asks for Permissions
Step 3: Import File
You will then be prompted to import your file from Google Drive.
Screenshot 6: Use the Google Picker
Select the file you want to import.
Screenshot 7: Select the file to Import
Step 4: Export File
Your selected documents will be added to the export queue. Select the document you want to export. Then, click on Export.
Screenshot 8: Click on Export
You can also view and change the document settings, such as Post Title, Post Slug, and Meta Description. Click on Done to save the changes.
Screenshot 9: Document Details
Step 5: Export Settings
Click on Export Options to proceed further.
Screenshot 10: Export Settings
The details of these settings are provided below:
General Settings
This section contains various cleanup and formatting options that help optimize content before exporting.
Screenshot 11: General Settings
Basic Cleanup
- Keep Custom Styles (Beta) – This option retains any custom styles applied in Google Docs when exporting to WordPress. Since it is in beta, it may not work perfectly.
- Remove ID Attributes – If enabled, this removes ID attributes from HTML elements, which can help clean up unnecessary code.
- Always Remove First H1 – This ensures that the first <h1> heading in the document is removed. Many WordPress themes automatically generate an <h1> from the post title, so having another <h1> in the content could negatively affect SEO.
Table of Contents
- If enabled, this feature automatically generates a Table of Contents (ToC) based on the headings within the document. This is useful for improving readability and navigation.
Update Previous Exports
- If checked, Wordable will update an already exported document instead of creating a new one. This is helpful when making revisions to previously published content.
Add Wordable Branding
- Style – If this option is enabled, a "Powered by Wordable" branding will be added to the post.
- The branding style is customizable with a white background or a transparent background.
SEO Attributes
This section ensures the exported content is optimized for search engines.
- Meta Title: This allows the user to set a custom meta title for the post, which is crucial for SEO.
- Meta Description: This lets the user add a meta description, which influences how the page appears in search engine results.
Wordable integrates with the Yoast SEO plugin and automatically sets these attributes using _yoast_wpseo_metadesc post meta. If another SEO plugin is used, Wordable can still apply custom meta titles and descriptions, you just have to put a request for that.
Links
This section provides link management options to improve SEO and user experience.

Screenshot 12: Links Settings
- Apply 'nofollow' Attribute to All Links: If enabled, all links in the post will have the rel="nofollow" attribute, preventing search engines from passing link authority.
- Open Links in New Tab: Forces all links in the post to open in a new browser tab.
- Replace Embeddabble Links (Beta): This option (currently in beta) replaces embeddable content (like YouTube or Twitter links) with their embedded version instead of just a plain URL.
WordPress Options
This section allows customization of how the document will be published on WordPress.
Screenshot 13: WordPress Settings
- Publish As: Users can choose whether to export the document as a post, page, or other post type.
- Publish Status: Options include Save as Draft, Publish Immediately, or Schedule for Later.
- Categories: The user can assign one or more WordPress categories to the post.
- Post Type: Defines whether the content should be treated as a blog post, page, or another custom post type.
- Editor: Users can select between the Classic and Block (Gutenberg) editor in WordPress.
- Double Check Uploaded Images: If enabled, this verifies that all images are properly uploaded and formatted before publishing.
Image Settings
This section controls how images in the document are handled when exported.
Screenshot 14: Image Settings
- Compress Images: Reduces image file sizes to improve page loading speed.
- Set Image Attributes: Allows setting a default image alignment (e.g., Center, Left, or Right) for all images in the post.
- Use Featured Image: This determines whether an image from the document will be set as the featured image in WordPress.
- Default to the First Image: If enabled, the first image in the document is automatically set as the featured image.
- Remove Featured Image from Document: This removes the first image from the body of the post if it has been set as the featured image.
Step 6: Complete Export Process
Click on Export Now to continue.
You can save the above settings for future use, or you can check the settings every time.
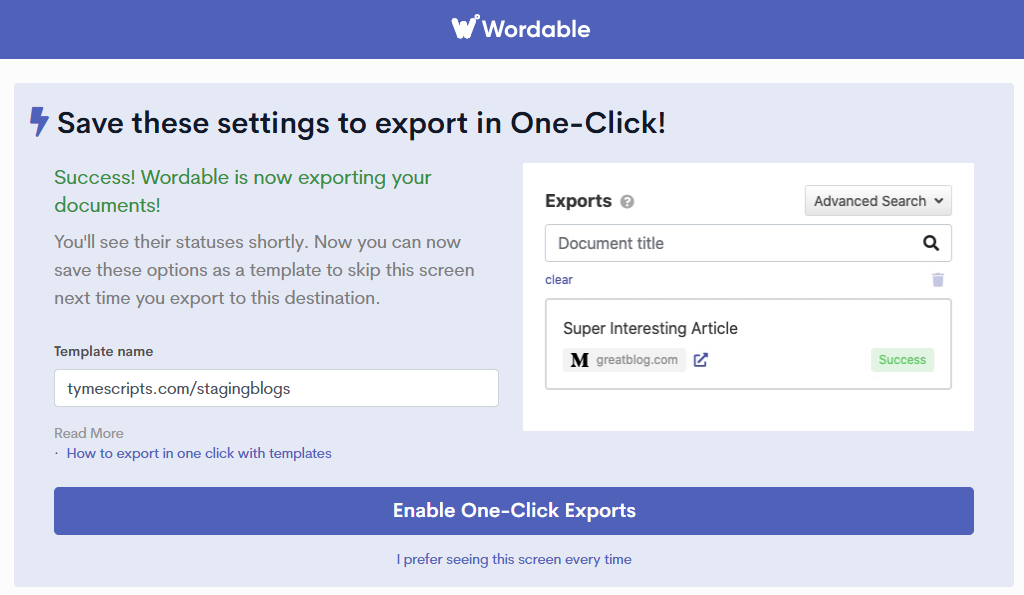
Screenshot 15: Save Settings
You’ll be redirected to the Wordable dashboard, where you can see your exported documents.
Step 7: Final Step to Export
Click on the icon as shown in the image to open your post in WordPress.
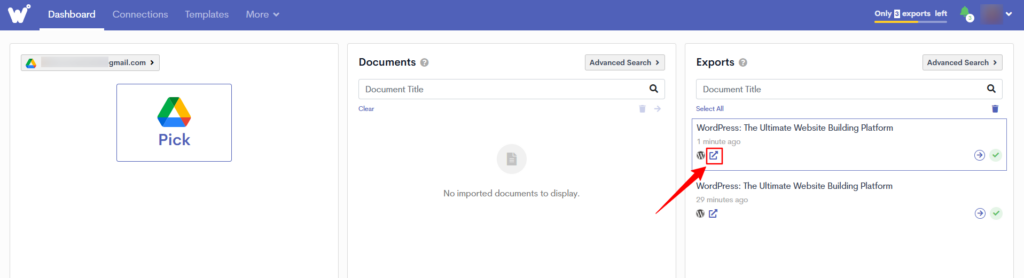
Screenshot 16: Click to Edit Post
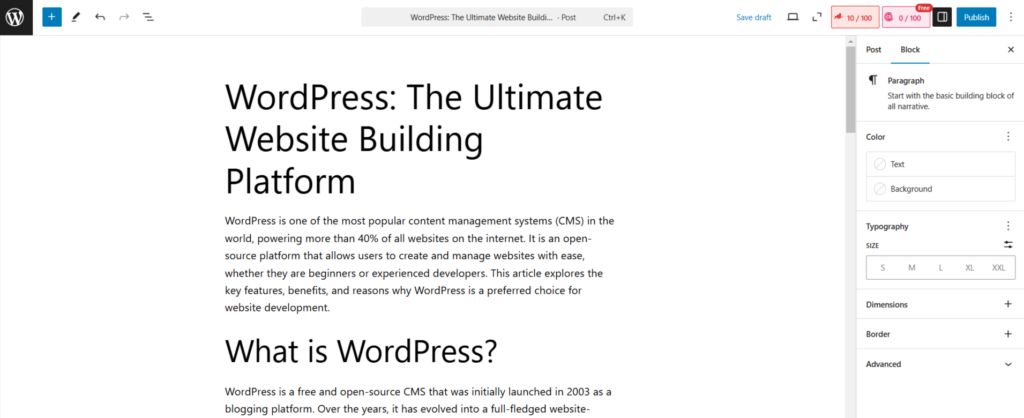
Screenshot 17: Edit Post in WordPress
Voila! You just imported your Google Doc in WordPress in literally one click!
Before hitting Publish, take a few minutes for a final review—formatting, images, links, and SEO details can sometimes go off-track. A quick check ensures your post looks polished, professional, and ready to go live!
Conclusion
Transferring blog posts from Google Docs to WordPress shouldn’t be a hassle. However, with tools like Wordable, you can keep formatting intact, upload images automatically, and save your valuable time. Focus on writing great content—let the one-click import tool Wordable handle the rest!