

Insights, ideas and inspiration. A go to wisdom hub right here.
Featured Posts
Tutorials
7 Min Read

Latest Posts
Tutorials
13 min read
How to Set Up Matomo in WordPress for Complete Website Tracking (Part 1)
Introduction
Matomo for WordPress is an official plugin that brings Matomo’s open-source, privacy-focused web analytics directly to your site. It allows you to collect and view visitor data under your control (hosted on your server or Matomo Cloud), ensuring you maintain ownership of analytics data, manage retention and privacy settings, and avoid sending raw user data to third-party platforms.Key Features Of Matomo Plugin
- Data ownership & hosting options: Host analytics on your WordPress site, on a separate self-hosted Matomo server, or use Matomo Cloud so you control the data.
- Integrated dashboard & WP admin widgets: view core reports and KPIs inside your WordPress admin without switching tools.
- Real-time visitor tracking: See live visits, active pages, referrers, and locations as they happen.
- Pageviews, events & custom dimensions: Track pageviews, clicks, downloads, and custom events, and add custom dimensions for richer segmentation.
- Goals & conversion tracking: define goals (form submit, URL, events) and measure conversion rates and funnels.
- E-commerce tracking tracks product views, cart actions, transactions, revenue, and product-level metrics.
- Funnels & A/B testing: build conversion funnels and run experiments to optimize user journeys.
- Heatmaps & session recordings: visualize where users click/scroll and replay sessions to spot UX issues (optional modules).
- Form analytics: analyze form interactions, drop-offs, and field-level friction.
- Privacy & compliance controls: IP anonymization, cookie controls, tracking opt-out, and settings to help meet GDPR/CCPA requirements.
- Consent manager and cookie handling ability to respect consent banners and conditionally enable tracking based on user consent.
- APIs, developer hooks & plugin integrations: REST APIs, WP filters/actions, and integrations so themes/plugins can send custom data or extend Matomo.
- Multi-site & user permissions support for multisite setups and role-based access to analytics data.
- Reporting & export: scheduled reports, CSV/PDF exports, and custom report creation.
- Performance/configuration options to disable cookies, reduce data retention, and tune which modules run to limit server load.
- How to install the Matomo Plugin in WordPress
- A step-by-step guide to installing, activating, and configuring Matomo correctly.
- Get Started
- Initial setup, first-time configuration, and important settings every site should enable.
- Update your privacy page.
- Why your Privacy Policy must be updated, and how Matomo helps you stay compliant.
- Enable tracking
- How to activate visitor tracking, verify that Matomo is recording data, and avoid common setup mistakes.
- Summary Reporting
- A top-level view of your key metrics and website performance.
- Visitors Reports
- Overview
- Visits Over Time
- Visits Overview
- Understand total visits, engagement metrics, patterns, and behaviour trends.
- Visits Log
- See detailed session-level visitor data.
- Real-time Tracking
- Real-time dashboard
- Locations
- Where your visitors come from and which regions drive the most engagement.
- Devices
- Breakdown of devices, screen sizes, and user technology.
- Software
- See which browsers, operating systems, and technologies your audience uses.
- Times
- Insights into peak activity hours and user behaviour throughout the day.
- User IDs
- Track logged-in users (optional) for deeper analytics and behavioural insights.
How to install the Matomo Plugin in WordPress
Go to the WordPress Dashboard of your website.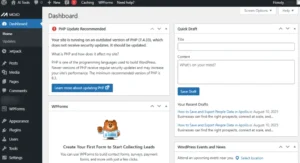
Screenshot 1: Dashboard of WordPress
From the left-hand navigation menu, go to the Plugin menu and click on it.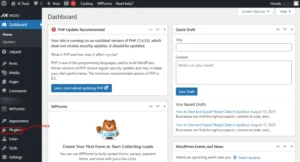
Screenshot 2: Plug-in Menu
You will see a Plugins Dashboard. Click on Add plugin.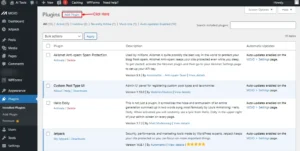
Screenshot 3: Add a Plugin
Search for the Matomo plugin in the Add Plugin screen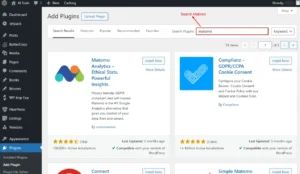
Screenshot 4: Search for Matomo Plugin
Click on Install Now in the Matomo Plugin.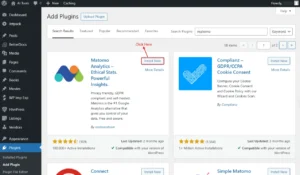
Screenshot 5: Install Now Plugin
Click on the Activate Button.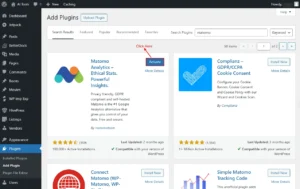
Screenshot 6: Activate Matomo plugin
After installing the Matomo Plugin, you will see the menu of Matomo Analytics menu in the left-hand navigation.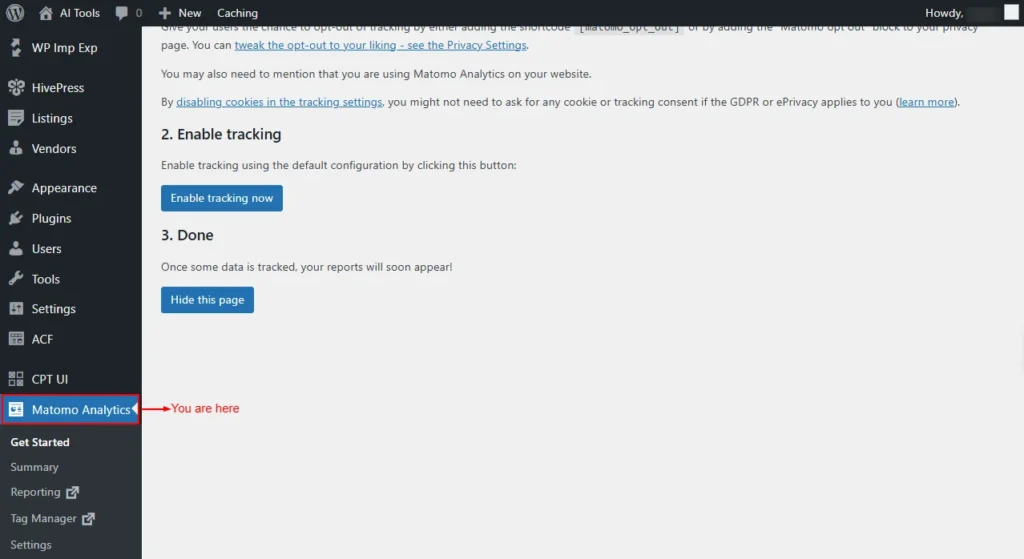
Screenshot 7: Matomo Analytics
Navigate to the Matomo plugin's dashboard.1. Get Started
This menu lists all the steps required for getting started using the Matomo plugin.Update your privacy page
Before you begin tracking, you have to update your privacy page with information about how you will respect user privacy to comply with laws like the GDPR or ePrivacy. You may also need to mention that you are using Matomo Analytics by having an Analytics section on your privacy page. Next, provide your visitors with an easy opt-out option by adding the [matomo_opt_out] shortcode to your privacy page or using the Matomo opt-out Gutenberg block.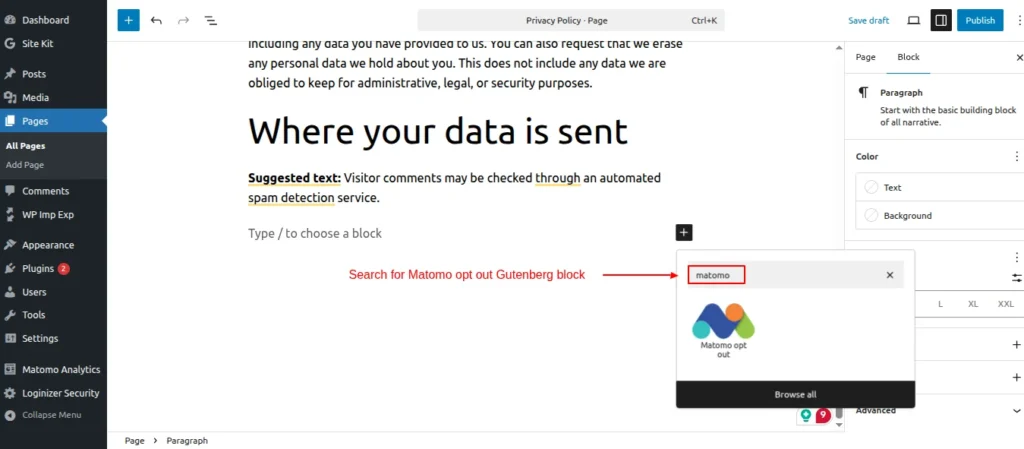
Screenshot 8: Matomo opt-out Gutenberg block
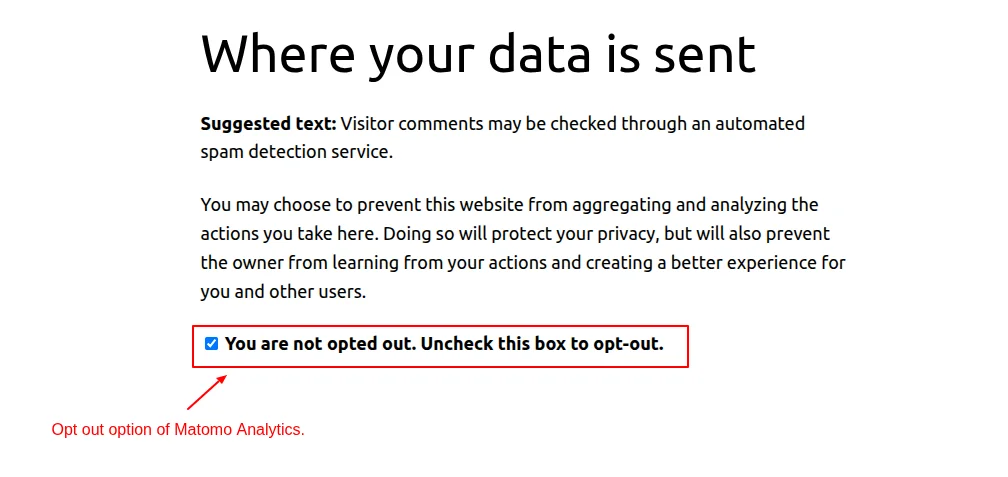
Screenshot 9: Matomo opt-out option added to privacy page
Note: If you disable cookies in the tracking settings (it will be discussed later), you may not need to request cookie consent under GDPR/ePrivacyEnable tracking
Turn on tracking using the default configuration by clicking the Enable tracking button.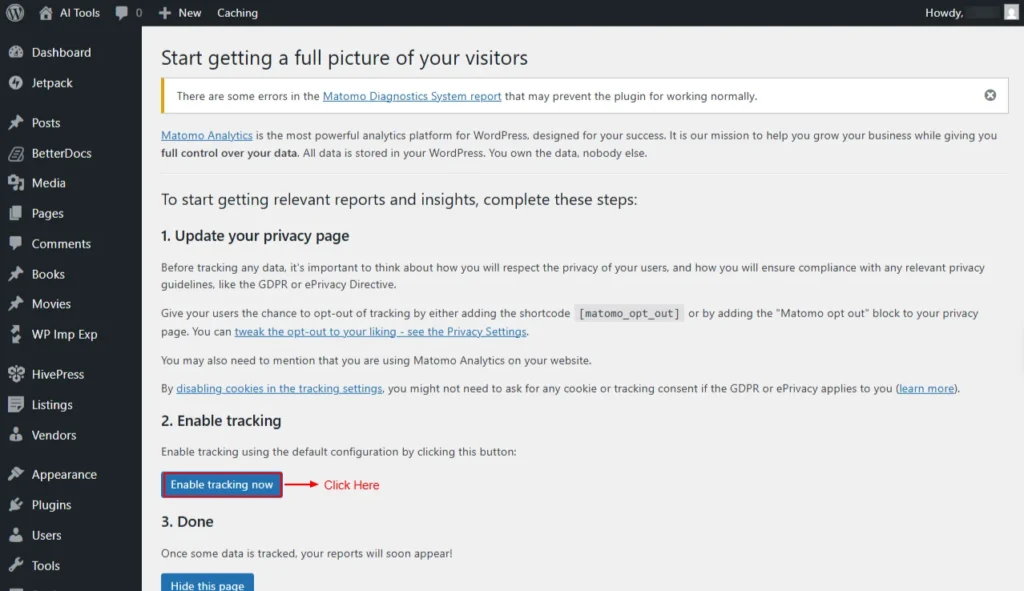
Screenshot 10: Enable Tracking Now
Once the button is clicked, you will see a message: Tracking is enabled.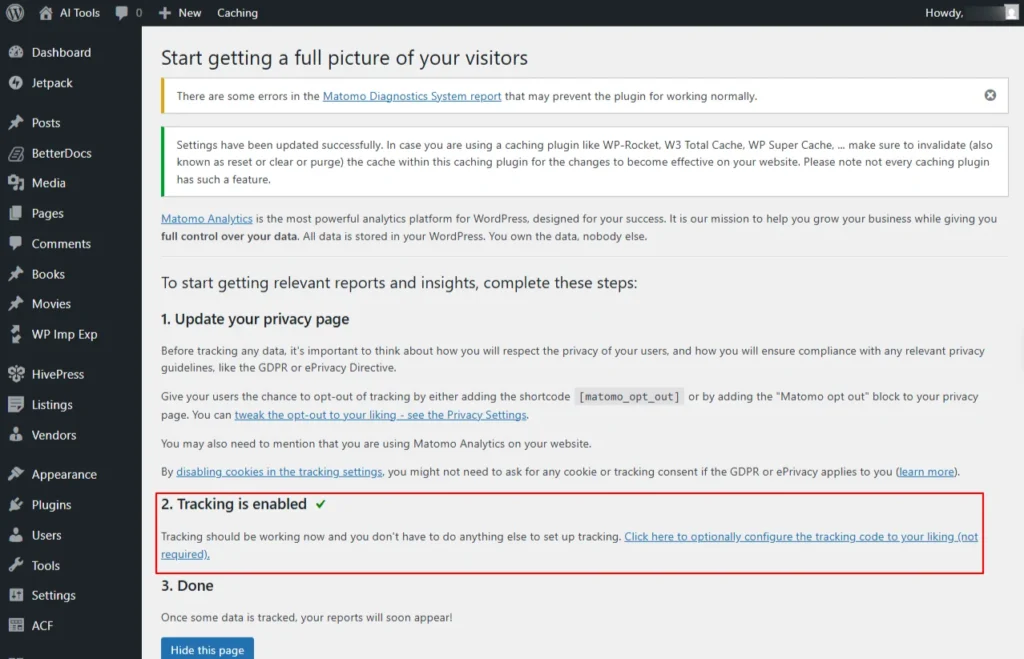
Screenshot 11: Tracking Is Enabled
This means your tracking is up and running: no further setup is needed. If you’d like, you can click here to customize the tracking code, though it’s completely optional. After some visits are recorded, your reports will appear in the dashboard. At this step. We will be discussing this in depth in the upcoming section.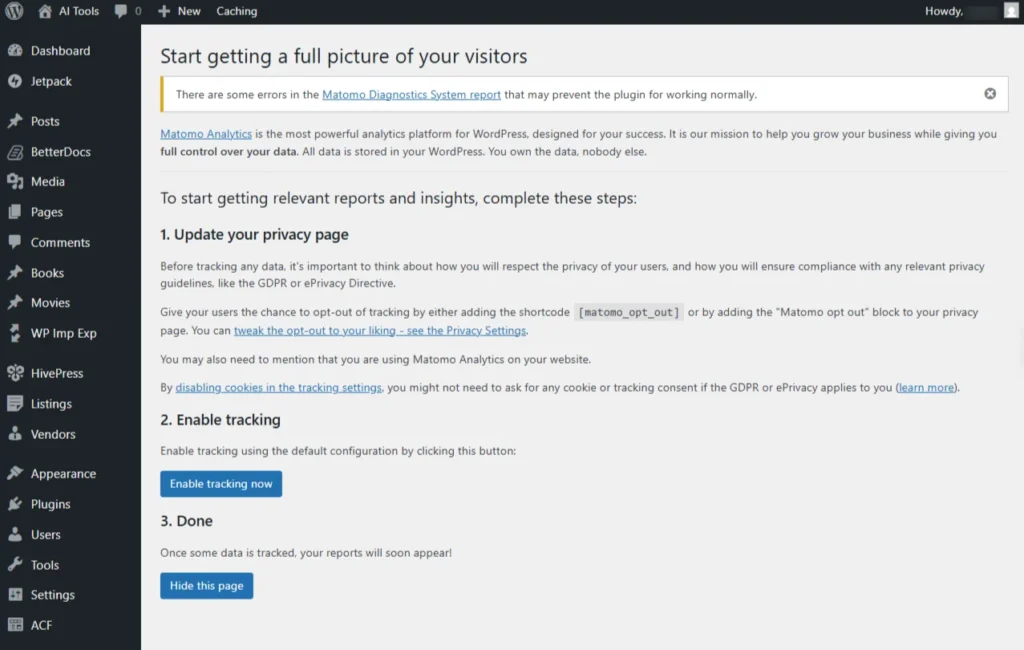
Screenshot 12: Dashboard Of Matomo Plugin
You can hide this page (Getting Started menu) once all the Getting Started steps are completed.2. Summary
This menu gives a bird's-eye view of all the metrics that are tracked by Matomo Analytics.- Country: Shows where your visitors are located geographically.
- Device type: Identifies whether users visit from desktop, mobile, or tablet devices
- Screen Resolution: Displays the screen sizes and resolutions your visitors use.
- Browsers: Lists the web browsers your audience uses to access your site.
- Page titles: Report analytics based on individual page titles viewed by users.
- Exit page titles: Shows the pages where visitors most often leave your site.
- Outlinks: Tracks clicks on links that lead users to external websites.
- Social Networks: Displays traffic and engagement coming from social media platforms.
- E-commerce Orders: Tracks online sales, transactions, and order details.
- Visits Summary: Provides an overview of total visits, unique users, and key metrics.
- Actions-main Metrics: Measures user actions such as pageviews, clicks, and events.
- Goals: Tracks how often visitors complete defined objectives like signups or purchases.
- Operating System Families: Identifies the operating systems visitors use (e.g., Windows, iOS, Android).
- Visits per hour in the site’s timezone: Displays visit trends across different hours of the day.
- Entry page titles: Shows which pages visitors first land on when entering your site.
- Downloads: Tracks files or documents downloaded from your website.
- All Channels: Summarizes traffic sources such as direct, search, social, and referrals.
- Campaigns: Measures visits and conversions generated by marketing campaigns.
- Product Name: Displays performance data for each product in your e-commerce tracking.
- Yesterday
- Today
- This week
- Last week
- This month
- Last month
- This year
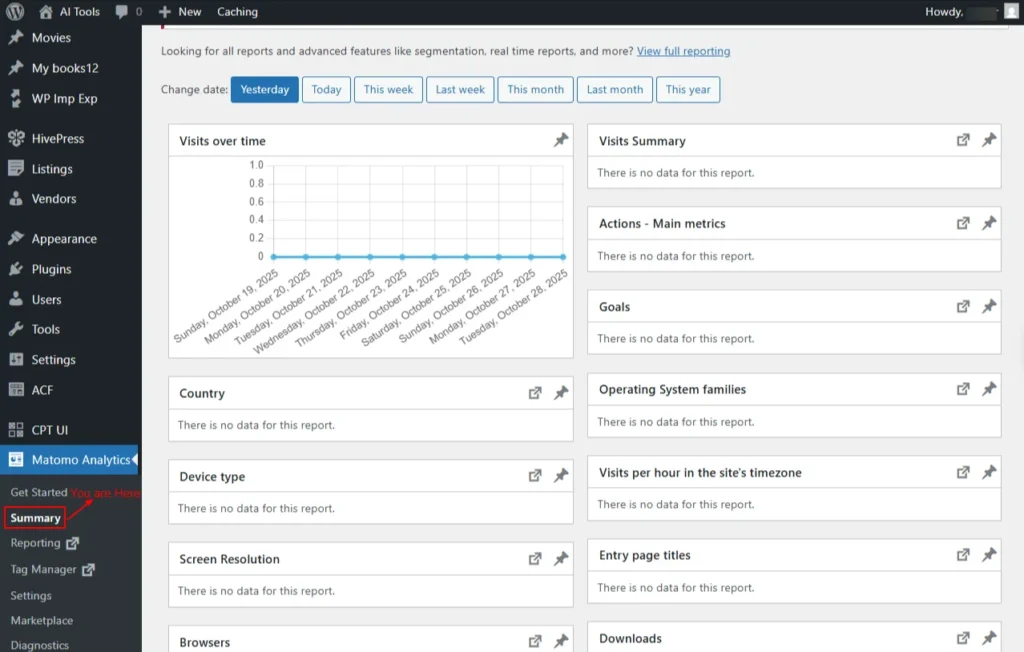
Screenshot 13: Matomo Analytics Summary
3. Reporting
The Reporting section provides detailed insights into your website’s traffic, visitor behavior, and performance metrics, helping you analyze and understand your site’s analytics in one place. This menu will open the Matomo plugin's dashboard in a new tab. It will show the following cards.- Visits in real time: Displays live visitor activity on your website in real time.Click on View detailed visit log.
- Welcome card: You can view all Matomo video tutorials. You can close this widget anytime by clicking the ‘X’ icon at the top.
- Visits Over Time: Shows the number of visits to your website over a selected period of time.
- The following are the Metrics available to plot
- Visits
- Unique visitors
- Users
- Avg. Visit Duration (in seconds)
- Bounce Rate
- Actions per Visit
- Maximum actions in one visit
- Visits with Conversions
- Pageviews
- Unique views
- Downloads
- Unique Downloads
- Outlinks
- Unique Outlinks
- Avg. generation time
- Searches
- Unique keywords
- Also, you can view data by day, week, month, and year.
- The following are the Metrics available to plot
- Movers and Shakers: Shows which pages, campaigns, or keywords have experienced the biggest changes in traffic or performance compared to a previous period.
- Visits Overview: The Visits Overview card provides a quick snapshot of your key visitor metrics for whatever date range you’ve selected. Instead of diving into full reports, you get the essentials right at a glance.
- Each metric is paired with a mini trend line that shows how that metric has behaved over time.
- The blue dot marks the peak, the day or moment traffic was strongest.
- The orange dot shows the low point, where activity dipped.
- These tiny visual cues make it easier to understand performance patterns instantly, without needing to interpret a large chart.
- The following data is available:
- Unique visitors
- Visit duration
- Visits have bounced (left the website after one page)
- Actions (page, views, downloads, outlinks, and internal site searches)
- Max actions in one visit
- Pageviews
- Unique pageviews
- Unique keywords
- Downloads
- Unique downloads
- Outlinks
- Unique outlinks
- Each metric is paired with a mini trend line that shows how that metric has behaved over time.
- Become a Matomo expert: This card guides you on your journey to becoming a Matomo expert.
- Visitor Map: Displays the geographic locations of your website visitors, showing where your traffic comes from around the world.
- Channel Types: Shows how visitors reach your website by categorizing traffic sources such as direct visits, search engines, social networks, and campaigns.
- Matomo.org Blog: Provides the latest news, updates, and tips from the official Matomo team to help you make the most of your analytics.
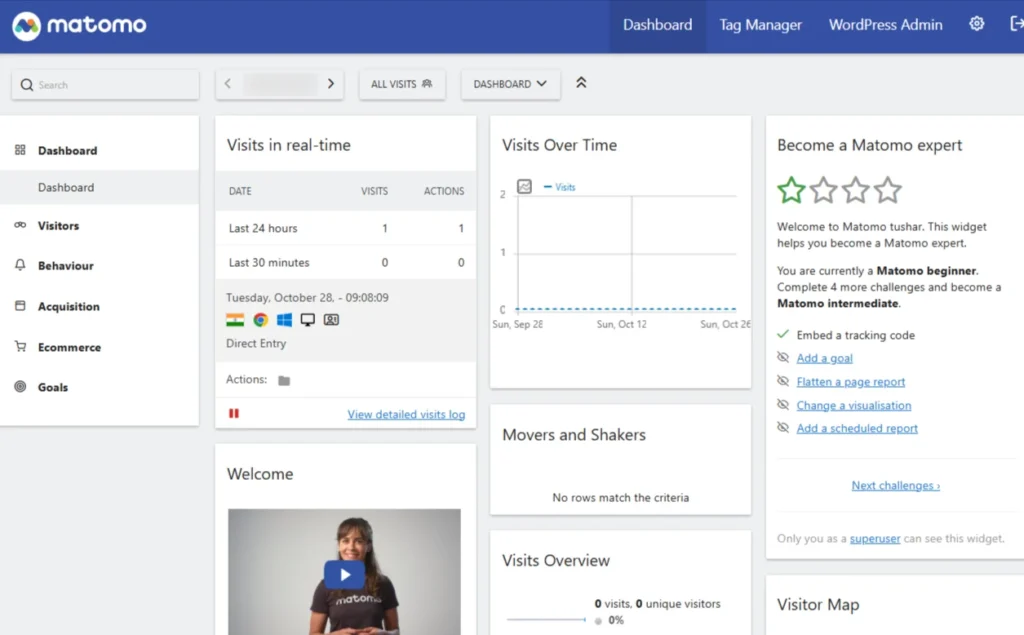
Screenshot 14: Reporting → Dashboard
Visitors
Shows who is visiting your site, their location, device, and behaviour, and how they interact during their visits.Overview
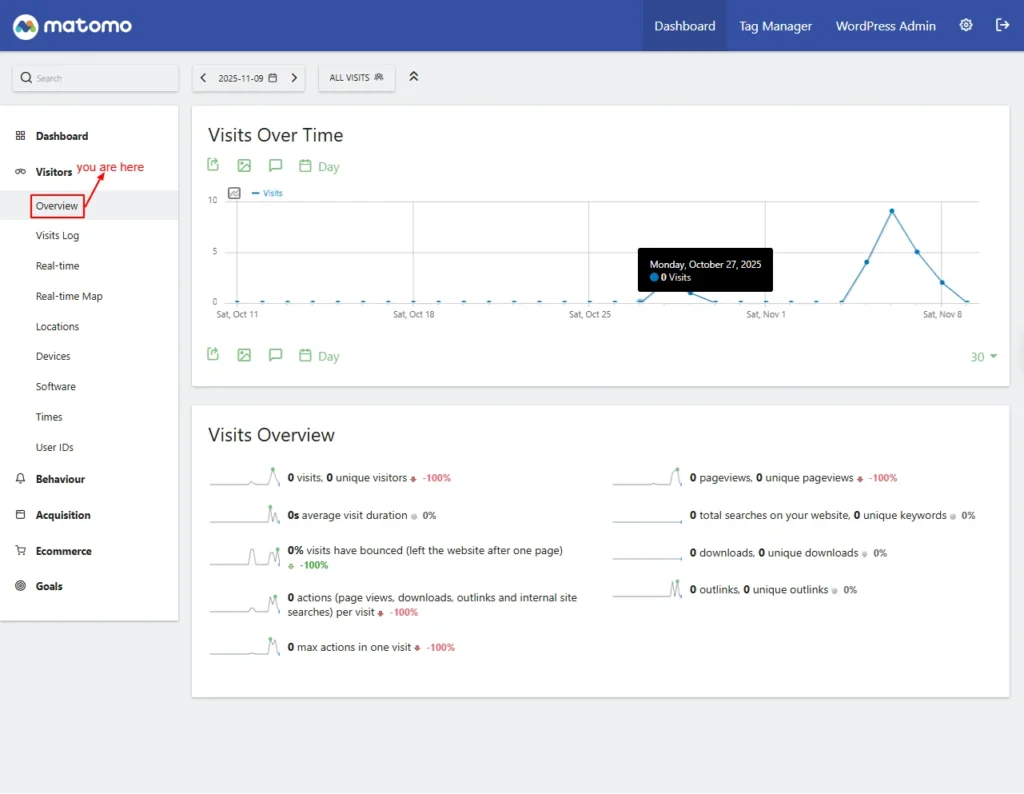
Screenshot 15: Visitors → Overview
Visits Over Time
This graph shows how many people visited your site within a selected date range.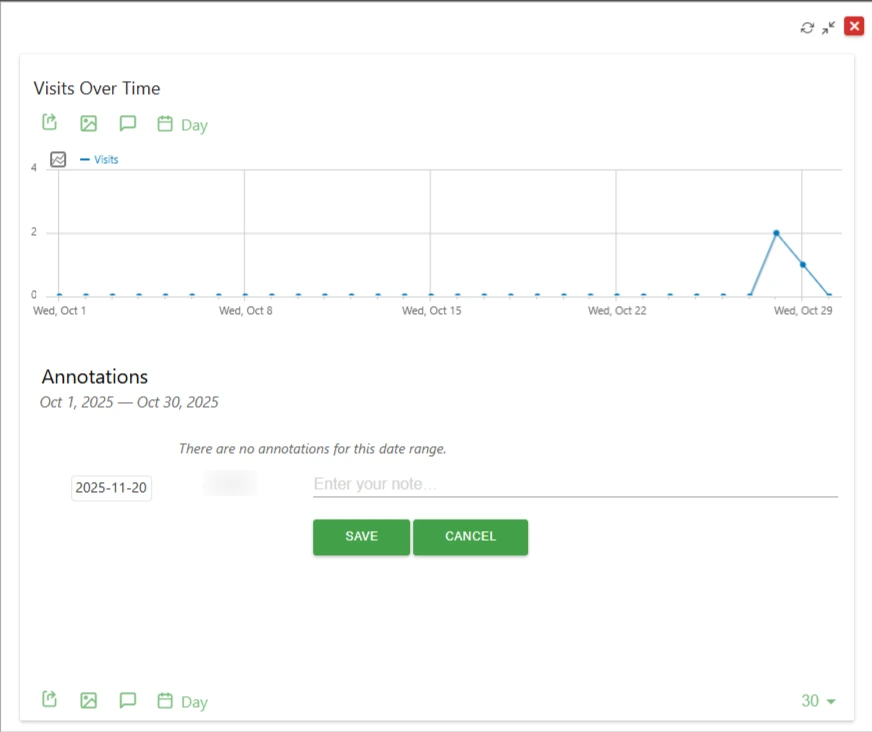
Screenshot 16: Annotations for date range
Visits Overview
This card gives a summary of key visitor statistics.- Unique visitors, Number of total visits
- Average visit duration: Average time users stayed on your site.
- Bounce rate: Percentage of users who left after viewing only one page.
- Actions per visit: Average actions (pageviews, downloads, searches) per visit.
- Max actions in one visit: The highest number of actions taken by a single visitor.
- Pageviews, unique pageviews: Number of pages viewed and unique pages viewed.
- Total searches, unique keywords: Count of internal searches and distinct keywords used.
- Downloads, unique downloads: Number of file downloads and unique files downloaded.
- Outlinks, unique outlinks: Number of outbound link clicks and unique link destinations.
Visits Log
This screen shows a detailed list of each visitor’s activity.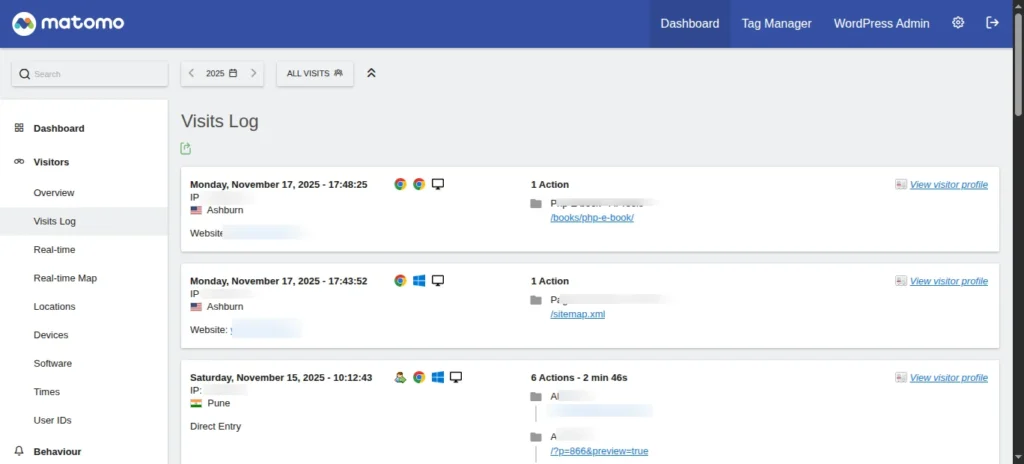
Screenshot 17: Visitors → Visit Logs
In the single row, it shows.- Visit Time: Timestamp of when the visit occurred.
- IP: IP Address
- Location: Visitor’s country, region, or city.
- Referrer: Shows how the visitor arrived (search, social, direct, or link).
- Browser/OS/Device: Shows the browser and operating system used and device (desktop, tablet, mobile).
- Visitor Type (New/Returning): Indicates whether the visitor is first-time or returning.
- Actions Taken: Action with duration. Below is a list of all pages the visitor opened during the session.
- View Visitor Profile: This opens a new pop-up panel where the full activity history of a specific visitor is displayed.
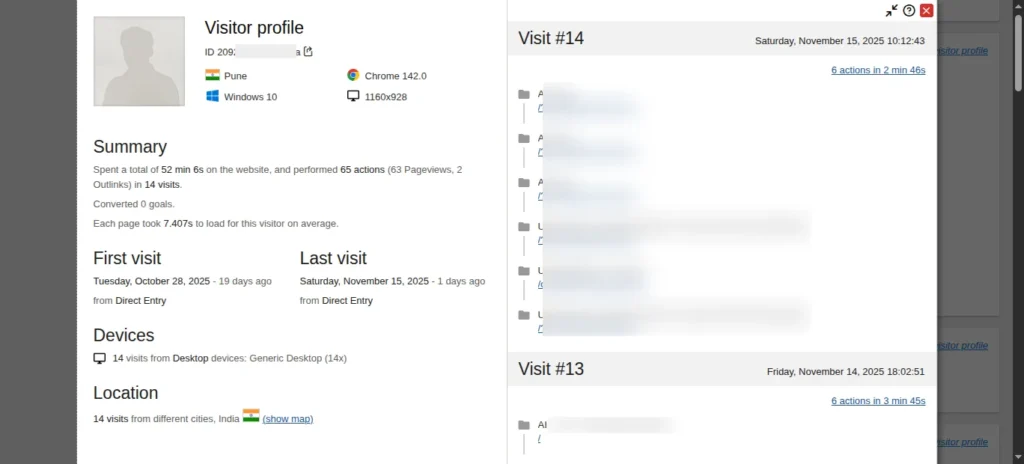
Screenshot 18: View Visitor profile
- Conversion Details: Displays goals or e-commerce conversions triggered.
- Custom Variables/Dimensions: Any additional custom data attached to the visit.
- Reload/Refresh: Updates the latest visits in real time.
- Segment/Filter: Allows filtering by visitor attributes or behaviour.
- Export/Download: Download raw visit data in different formats.
Real-time
This screen shows live visitor activity as it happens.
Screenshots 19: Visits in real time
The first two rows are- Date
- Last 24 Hours: Live stats from the past 24 hours.
- Last 30 Minutes: Live stats from the past 30 minutes.
- Visits: Number of visitors within the selected time range.
- Actions: Total interactions (pageviews, clicks, downloads) in that period.
- The next row shows all the visits in real time.
- There is a button to start or pause visits in real time.
Real-time map
This screen shows live visitors on an interactive world map.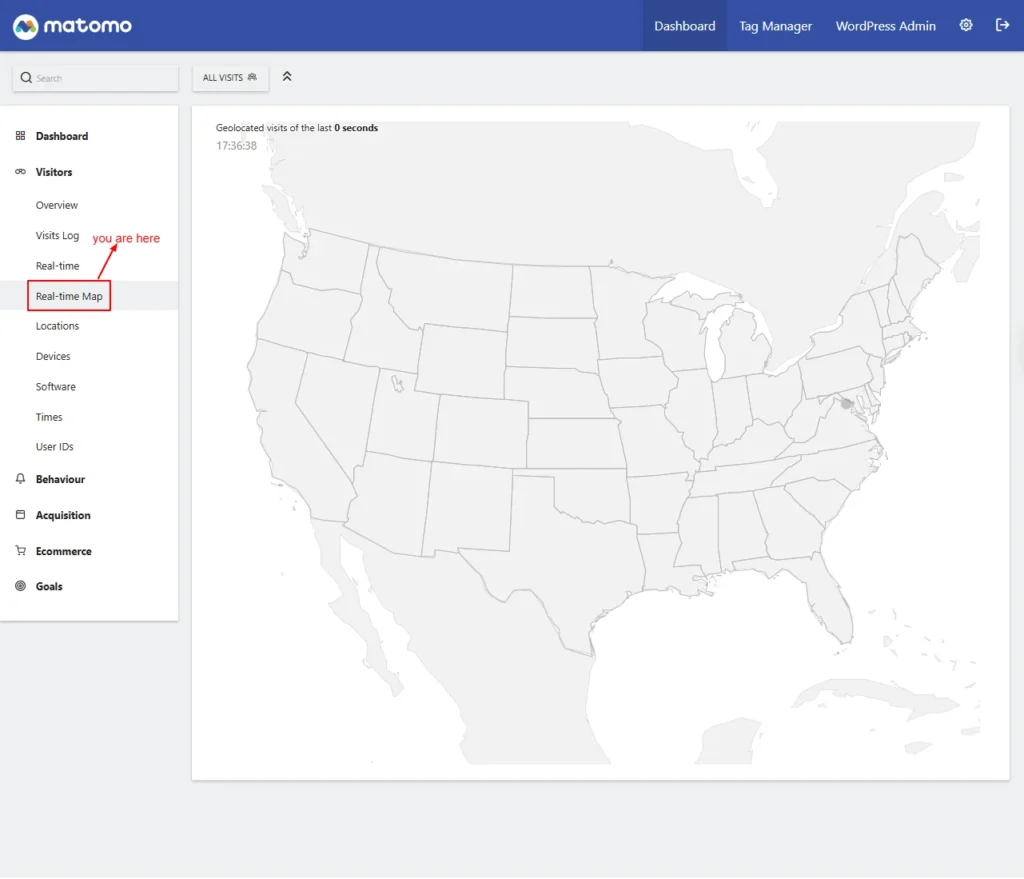
Screenshot 20: Visitors → Real Time Map
Locations
The Locations report shows where your visitors come from, displaying countries, regions, and cities to help you understand your audience’s geographic distribution.- Visitor Map: This is the first card shown. It shows where visitors are located on a world map.
- Country: Lists visits by country.
- Continent: Group visits by continent.
- Region: Shows visits sorted by region/state.
- Distinct Countries: Number of unique countries visitors came from
- City: Shows visits grouped by city.
- Web-browser Language: Displays the language set in visitors’ browsers.
- Language Code (Related Report): Shows language codes used by visitors.
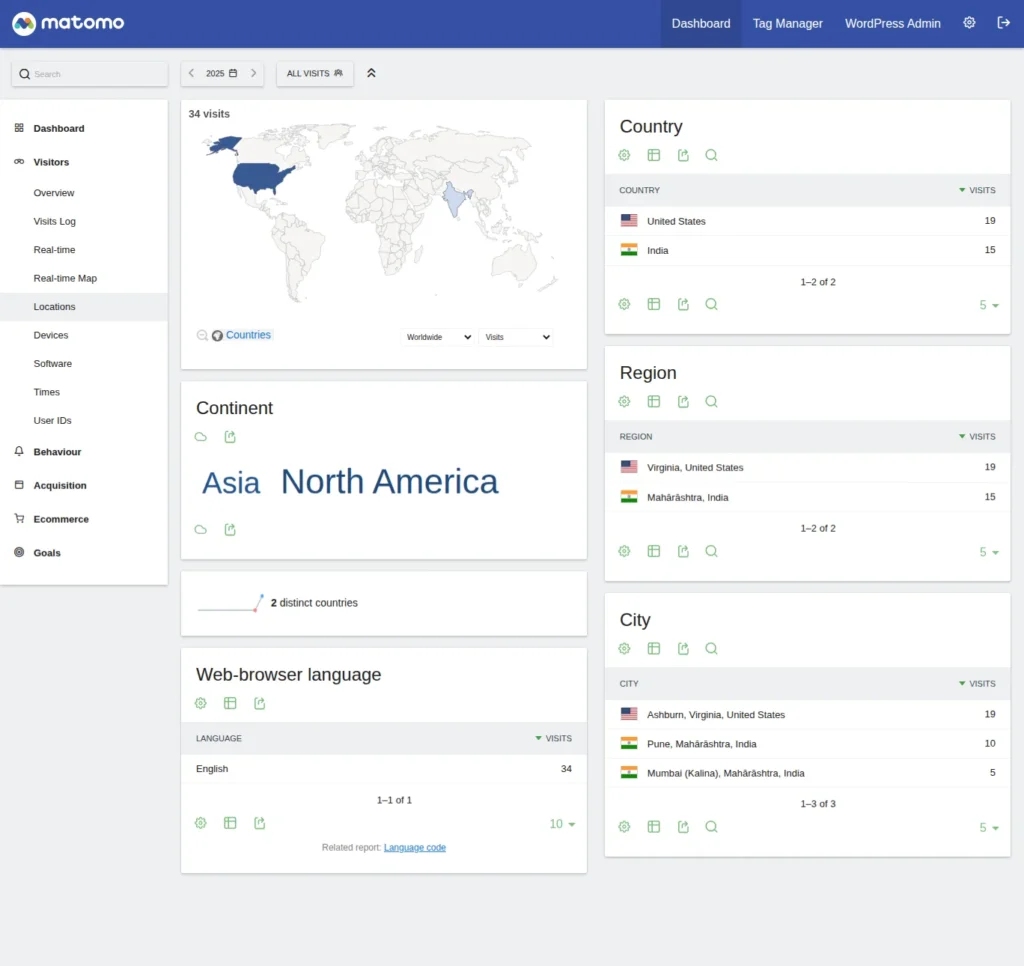
Screenshot 21: Visitors → Location
For all the cards, data can be displayed in the following formats:- Displays a simple table
- Display a table with Visitor engagement metrics
- Display a table with Goals metrics
- Insights
- Vertical bar graph
- Pie chart
- Tag cloud
Devices
The Devices report shows the types of devices, operating systems, and screen resolutions your visitors use, helping you optimize your site for different user experiences.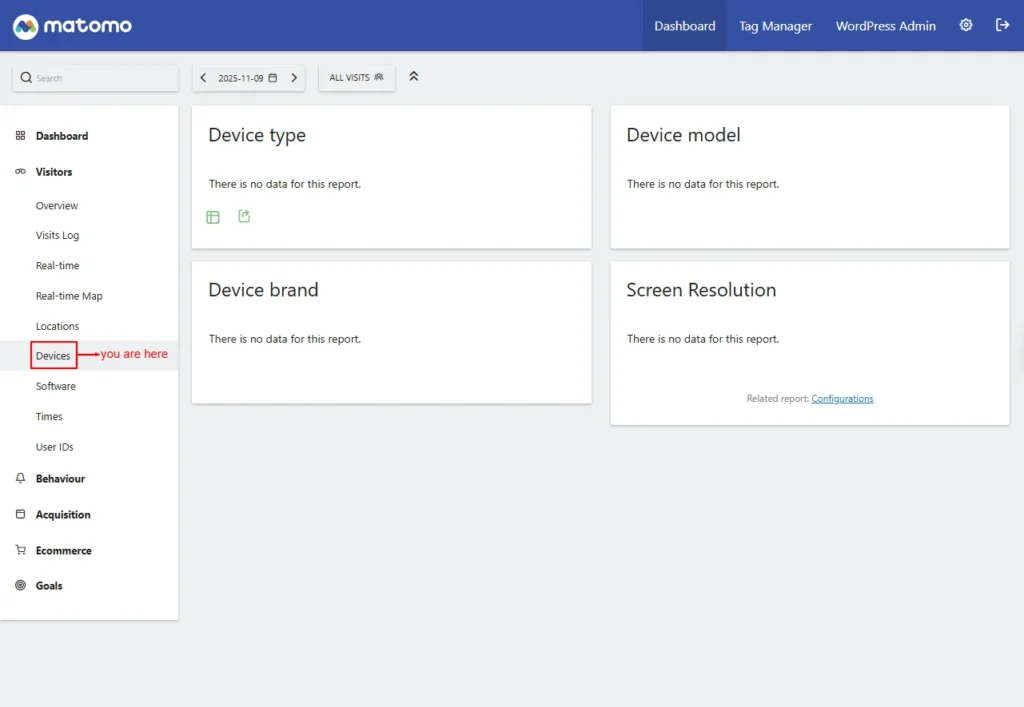
Screenshot 22: Visitor → Devices
Device Type: This shows the category of devices used- Desktop
- Camera
- Car browser
- Console
- Feature phone
- Peripheral
- Phablet
- Portable media player
- Smart display
- Smartphone
- Smart speaker
- Tablet
- Tv
- Wearable
- Device Model: Shows the exact model of the visitor’s device.
- Device Brand: Displays the manufacturer of visitor devices.
- Screen Resolution: Lists screen sizes used by visitors.
Software
The Software report displays the browsers, browser versions, and operating systems your visitors use, helping you understand their technical environment.- Operating System Versions: Shows the specific OS versions used by visitors.
- Operating System Families (Related report): Groups visitors by OS family (Windows, macOS, Linux, etc.).
- Browsers: Shows which web browsers visitors used.
- Browser Version (Related Report): Lists versions of each browser.
- Configurations: Lists detailed browser + OS + device combinations.
- Screen Resolution (Related Report): Shows visitors’ screen sizes.
- Browser Plugins: Displays browser plugins detected for visitors. (Note: Not tracked for IE < 11; only for modern browsers.
- Browser Engines: Shows which rendering engines (e.g., Blink, WebKit, Gecko) were used.
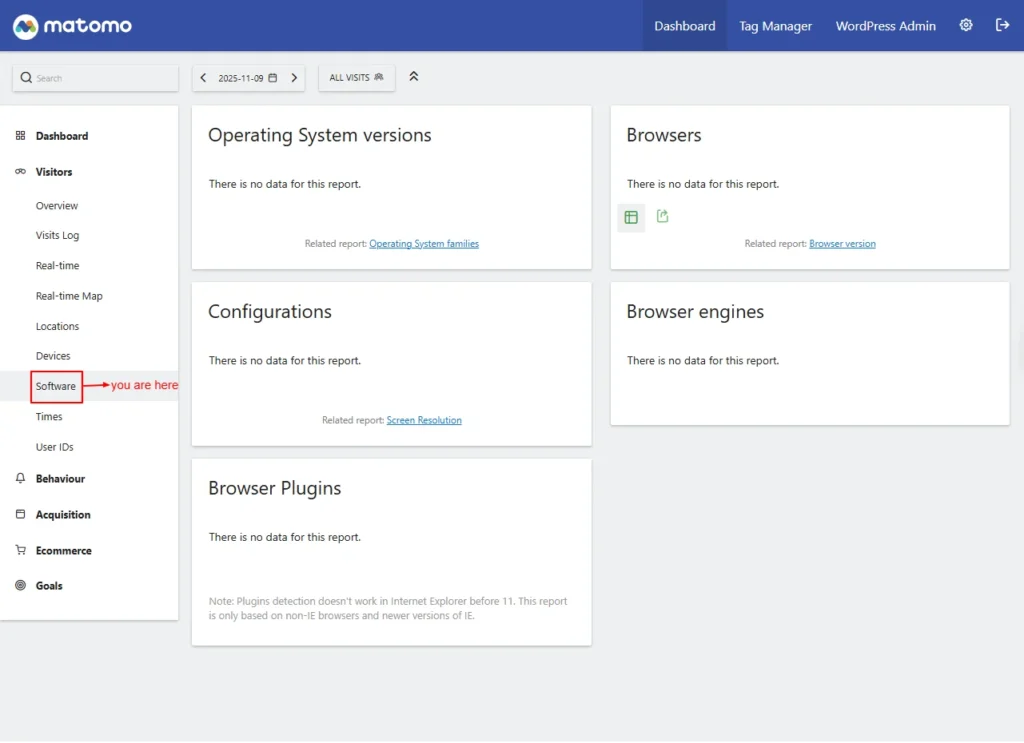
Screenshot 23: Visitors → Software
Times
The Times report shows when visitors access your site, highlighting peak hours and daily activity patterns to help you understand user behaviour over time. The first graph shows the local time in each visitor’s own time zone when they accessed your site. The second graph shows the corresponding times based on your site’s time zone.- Visits per Local Time: Shows visits based on each visitor’s local time.
- Visits by Day of the Week (Related Report): Displays how traffic varies across weekdays.
- Visits per Hour in the Site’s Timezone: Shows visit distribution by hour using your site’s timezone.
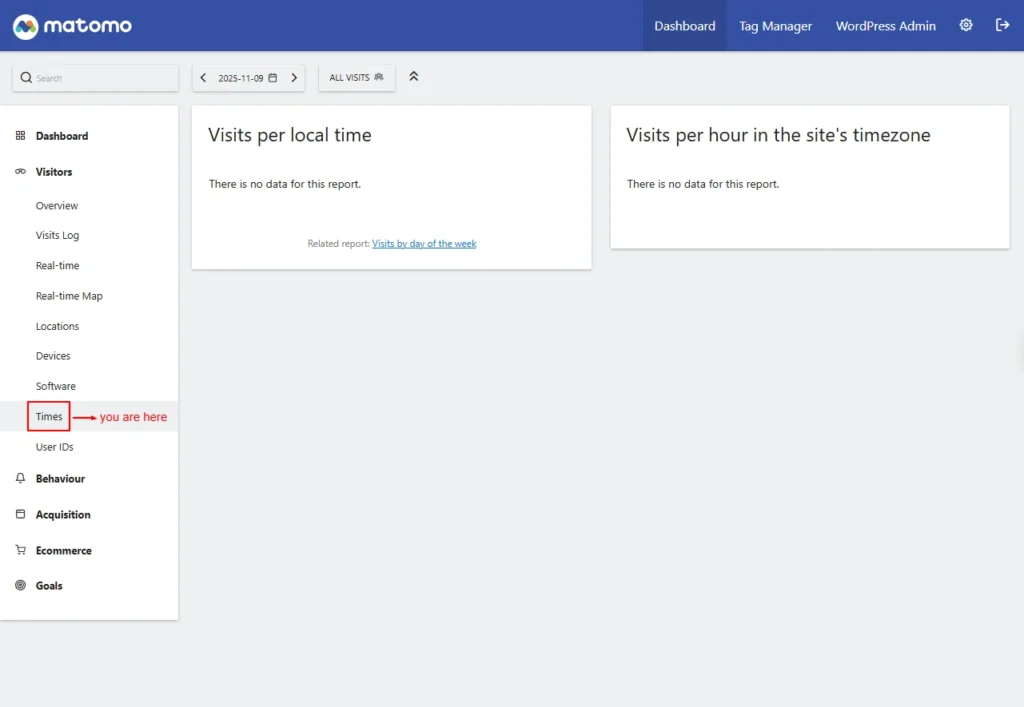
Screenshot 24: Visitors → Times
User IDs
The User IDs report tracks activity from logged-in or identified users, allowing you to view individual user journeys and behavior across your site. This screen lists visits grouped by assigned user identifiers (such as a username or email). Note: If no data is displayed, a User Guide Link is shown, which provides instructions for enabling and generating User ID data. This is discussed in the next section of the Settings menu.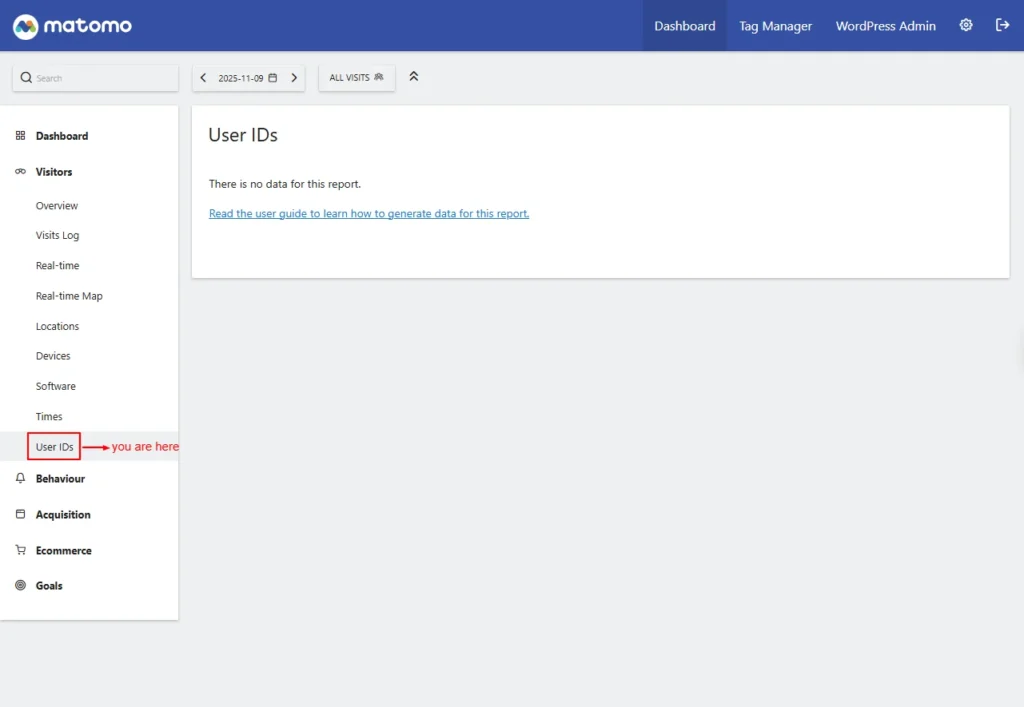
Screenshot 25: Visitors → User IDs
Conclusion
Setting up your WordPress site with Matomo isn’t just about installing another analytics plugin; it’s about building a strong, privacy-friendly, fully owned data foundation. In this first part, we covered how to install the Matomo plugin, update your privacy page, enable tracking, and understand the core reporting areas that will guide your decision-making. With your analytics framework in place, you now have the clarity, accuracy, and control needed to understand how users interact with your website. This foundation ensures your tracking is compliant, your insights are reliable, and your decisions are based on real behavior, not guesswork. Next up in Part 2, we’ll dive deeper into Matomo’s advanced reporting features. You’ll learn how to interpret user behavior, track performance across channels, measure conversions, and unlock powerful insights across:- Behaviour Reports
- Acquisition Reports
- E-commerce Reports (if enabled)
- Goals
- Tag Manager
- Settings
Tutorials
16 min read
How to Migrate Webflow to WordPress in 2026
Introduction
If you’ve started to feel like Webflow is holding your website back & want more flexibility to grow, customize, and take full control of it, migrating to WordPress is a smart move. The process might seem complicated at first, but with the proper planning, it becomes much easier.
Whether you’re a marketer or a business owner, this guide will help you move everything over smoothly. We’ll walk you through every stage, from preparing and exporting your content to rebuilding your design and launching your new WordPress site with confidence.
Why Consider Migrating from Webflow to WordPress in 2026?
Webflow makes it easy to create visually stunning websites with simple design tools right from the start. But as your business grows, you might find its features, integrations, & pricing too limiting.
On the other hand, WordPress gives you full control & flexibility. It scales effortlessly with your growth and opens the door to thousands of plugins and themes, making it a perfect fit whether you’re running a blog, an online store, or a large enterprise website.
Flexibility and Customization Options
WordPress’s open-source setup gives you complete freedom to shape your website however you want. You can create custom content types, add advanced features, and tweak the code to fit your needs without restrictions.
Plugin Ecosystem and Integrations
Webflow offers limited integrations, but WordPress supports almost any tool you can think of. From WooCommerce for eCommerce to Yoast SEO, marketing automation & CRM platforms that help your site grow.
Cost Efficiency and Long-Term Value
From a total cost of ownership perspective, WordPress offers significantly better long-term value. Your initial investment covers hosting, setup, and essential tools, but ongoing costs remain stable even as your website scales. Unlike Webflow’s usage-based pricing, where expenses rise with additional pages, traffic, CMS Collections, or users.
SEO Capabilities and Site Ownership
WordPress offers advanced SEO plugins (Yoast, Rank Math) to automate technical SEO sitemaps, schema, and redirects far beyond Webflow’s basics. Since it’s self-hosted, you fully own your data, code, and SEO with no vendor lock-in.
Preparing for Your Migration: What You Need Before You Start
Before moving from Webflow to WordPress, take time to organize and back up your existing site. This preparation ensures nothing gets lost during migration & helps you rebuild your site in WordPress with accuracy & efficiency.
Assessing Your Current Webflow Site Structure
- Check the Sitemap: - Export your Webflow sitemap with a crawler (e.g., Screaming Frog) or online tools and document every URL, hierarchy, and internal link.
- Forms and Interactive Elements: - List all forms & animations, & you’ll need to rebuild in WordPress.
- Custom Code & Integrations: Document all custom HTML/CSS/JS, analytics configurations, and API integrations implemented on your Webflow site.
- Check Images and Media Assets: - Create a full list of all images, videos, and documents with file names and alt text so you can verify them in WordPress, preventing missing visuals, broken URLs, and SEO loss during migration.
Choosing Reliable WordPress Hosting
- Choose a managed WordPress host (like Awesome Ops, WP Engine, Kinsta, or Cloudways) for better performance and security.
- Ensure compatibility with PHP 8+ and MySQL 8+.
- Set up WordPress on a staging site, create secure admin credentials, and enable HTTPS and automatic updates.
Exporting Content and Media from Webflow
You can export that data (like blog posts, case studies, or a team directory) as a CSV file. Open the CMS Collections section in Webflow, select the collection you want, & click Export. This CSV file will be your key to importing everything into WordPress.
Map the Content Structure
Before importing, decide how your Webflow content will live inside WordPress:
- Blog posts → Posts
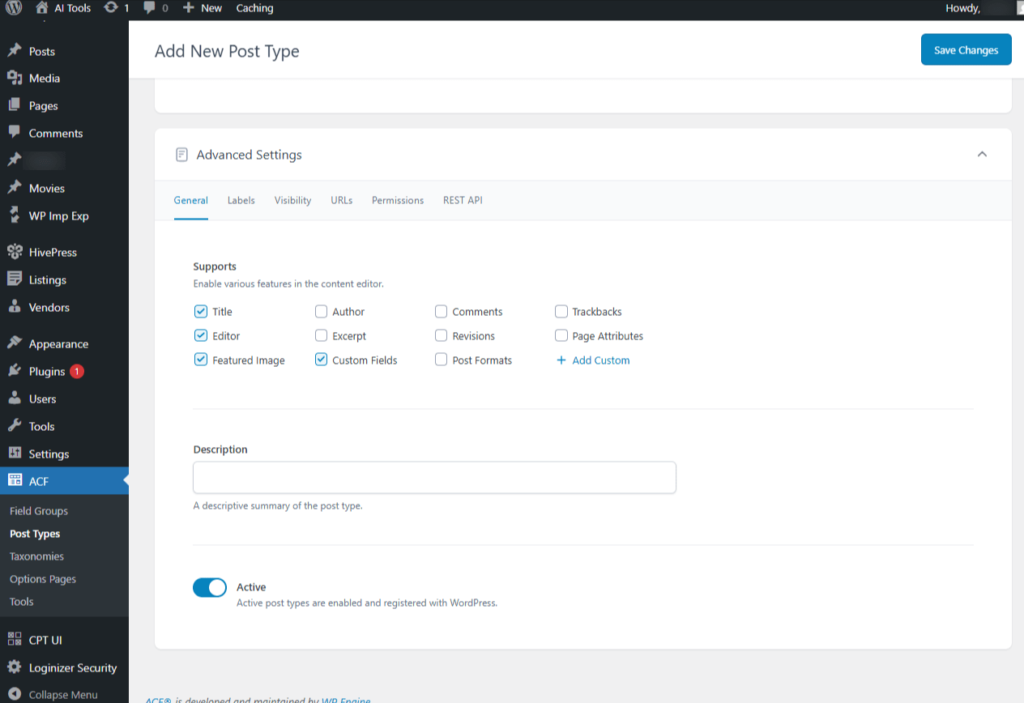
- Case studies or portfolio items → Custom Post Type (CPT)
Document which Webflow fields should map to which WordPress fields. Here’s a simple example you can follow:
| Webflow Field | WordPress Field | Notes |
| name | Post Title | Main title of the post/page |
| slug | Post Slug | URL slug for the post |
| postcontent | Post Content | Main body content |
| postsummary | Post Excerpt | Short description/summary |
| image | Images → Image filenames | Will import to Media Library |
| published on | Post Date | Controls the “Published On” date |
| author | Post Author | Must match an existing WordPress username |
| maintag[1], tag2[1], tag3[1] | Taxonomies → Tags | Add tags if needed |
| poststatus | Post Status | Normally set manually to “Published.” |
| ctabuttontext, ctadescription featured |
Custom Fields | Adds a custom field value |
Table 1: Sample Content Mapping from Webflow to WordPress
Export each Webflow CMS Collection as its own CSV file. If the CSV includes images, WP Import Export Lite can download and attach them to the WordPress Media Library.
Save Static Pages & Custom Elements
Static pages (like Home, About, and Services) are included in Webflow’s Code Export as static HTML, CSS, JS, and assets. This option is only available on paid Webflow plans. Since WordPress can’t directly import these exported files, the practical approach is to manually move over the text content and re-upload your images during the migration.
Custom layouts, forms, and animations are included in the exported code, but they aren’t directly usable in WordPress and typically need to be rebuilt or reconfigured. These elements can be recreated in WordPress using page builders like Gutenberg or Elementor.
Step-by-Step Process to Migrate from Webflow to WordPress
Installing and Setting Up WordPress
Start by installing WordPress on your hosting account. Most hosts offer a one-click installer. Create an admin account with a strong password and a valid email address.
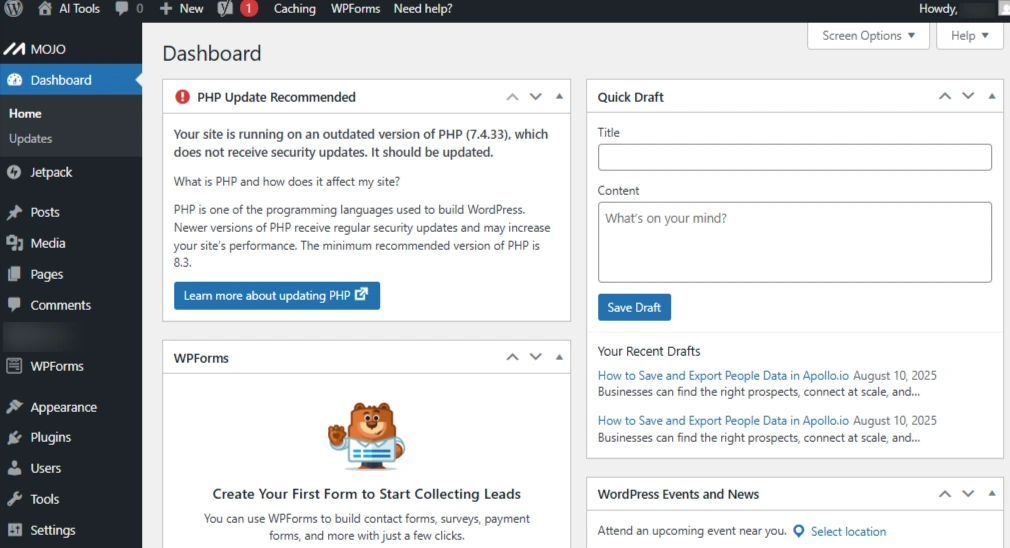
Once installed, log in to your WordPress dashboard, your new control center for managing pages, posts, media, and plugins.
Before importing your content, adjust a few key settings:
- Timezone and Date/Time Format: Go to Dashboard → Settings → General and match your local time.
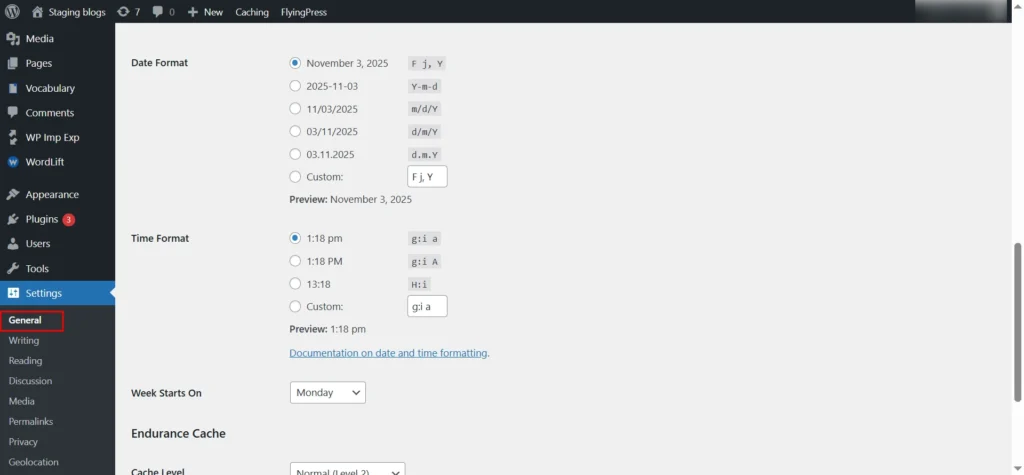
Screenshot 1: Date/Time Setting
- Permalinks: Under Settings → Permalinks, choose a clean structure like Post name. Match your Webflow URLs to preserve SEO value.
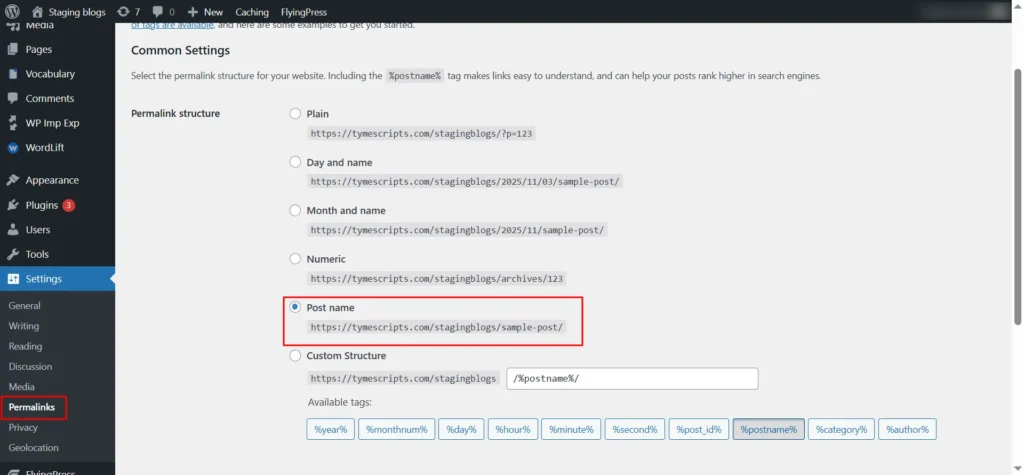
Screenshot 2: Permalinks
- Media Settings: Adjust upload file size limits and image sizes if needed.
- SSL: Enable HTTPS using your host’s SSL and a plugin like Really Simple SSL.
- Turn on automatic updates: Turn on automatic updates (Dashboard → Updates ) for WordPress core, plugins, and themes.
Once WordPress is installed, add a few essential plugins to get ready for migration:
- Migration: Use something like WP All Import Export (premium or the new name)to import your CSV exports.
- SEO plugin: Tools like Yoast SEO, Rank Math, or AIOSEO help maintain your search visibility.
- Security plugins: Wordfence or Sucuri helps in keeping your site secure.
- ACF (Advanced Custom Fields): Lets you create custom fields to match your Webflow content structure, best for migrating extra data like images, repeaters, text fields, and more.
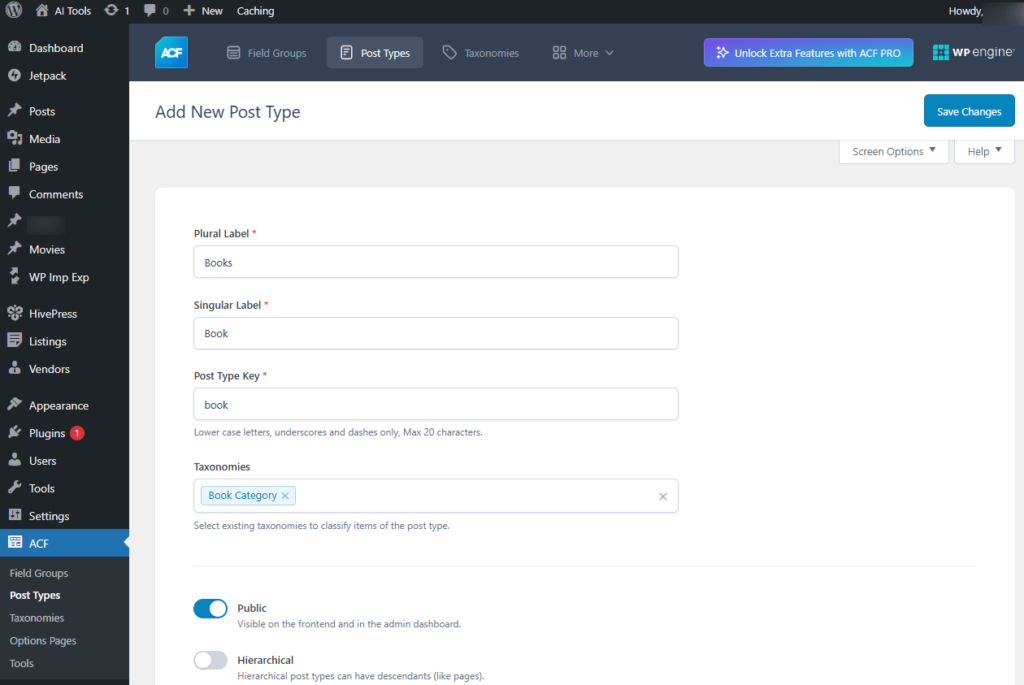
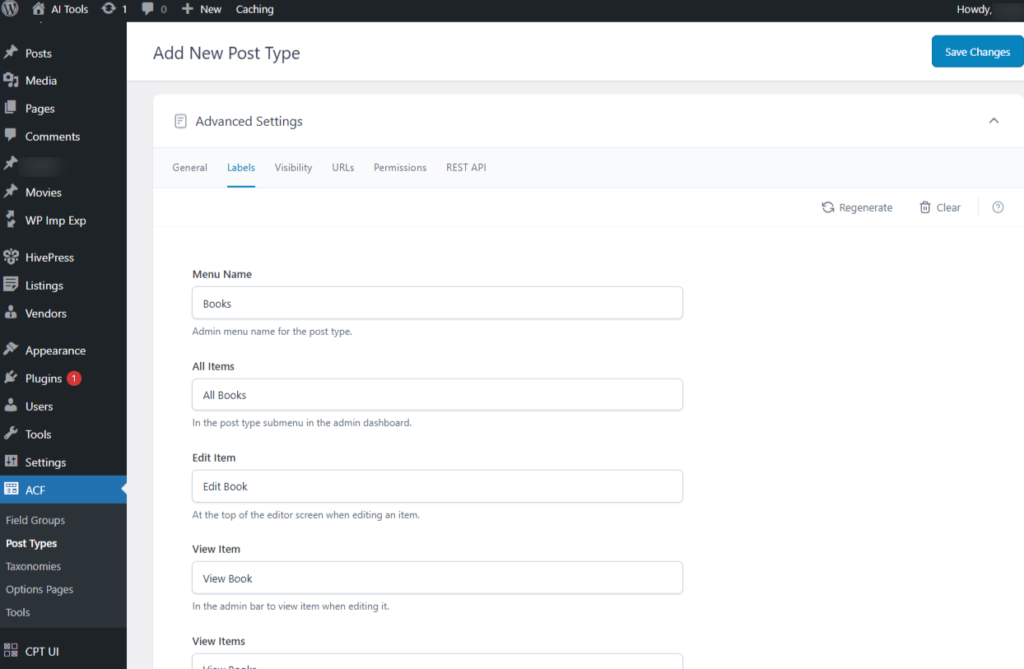
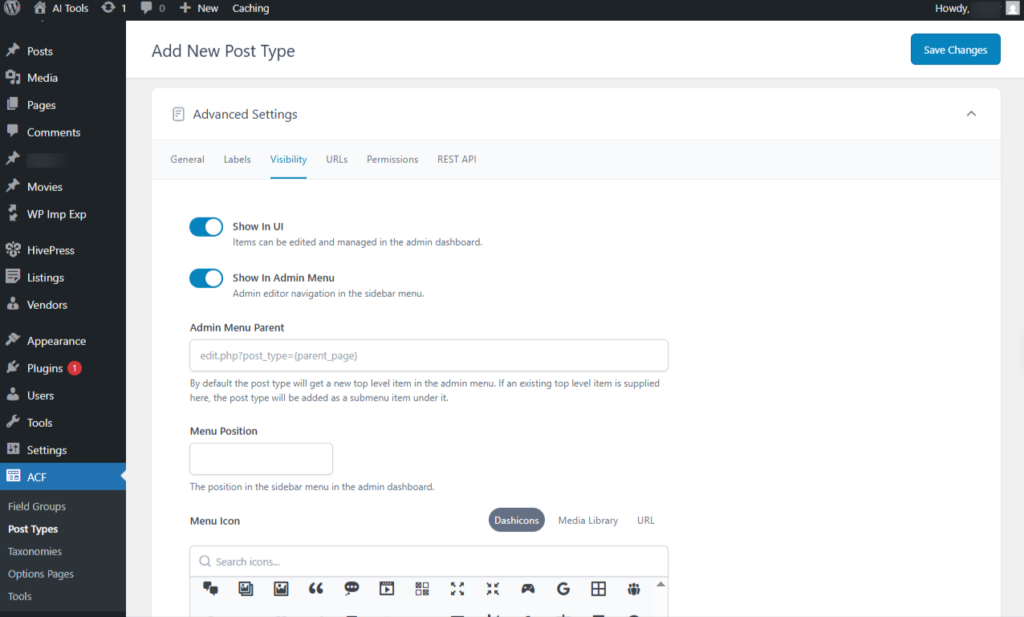
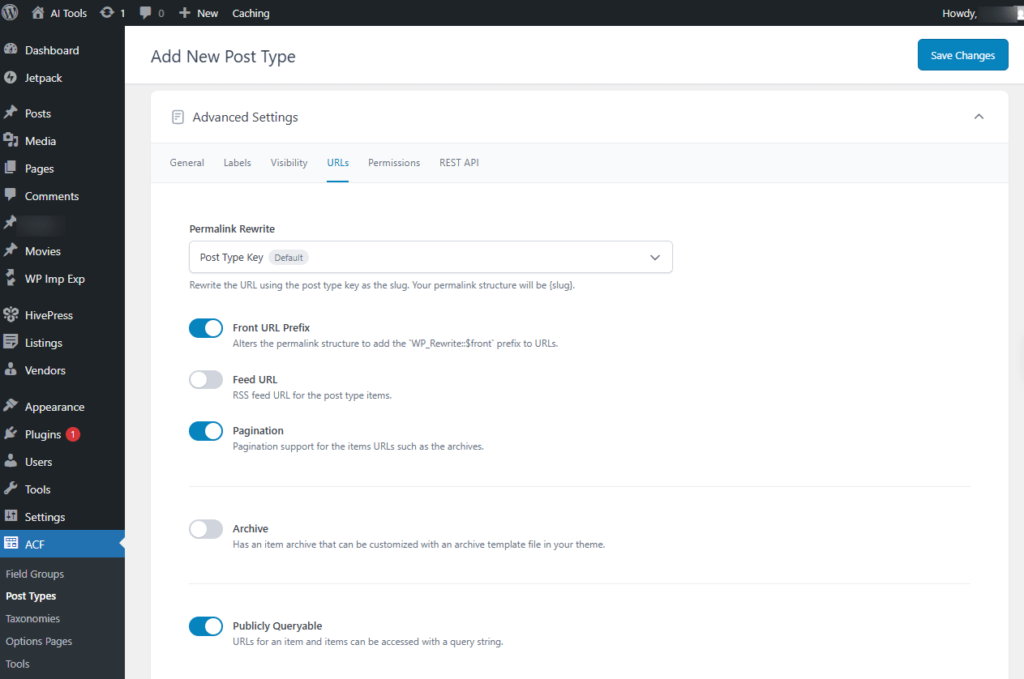
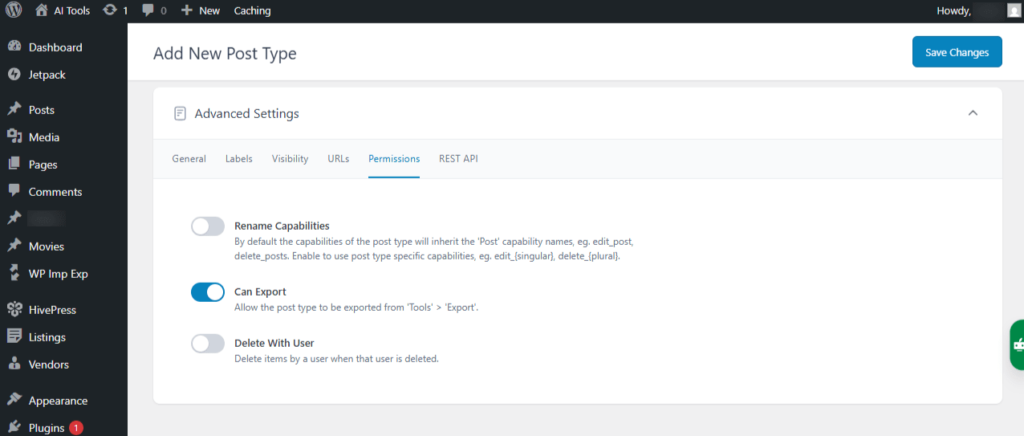
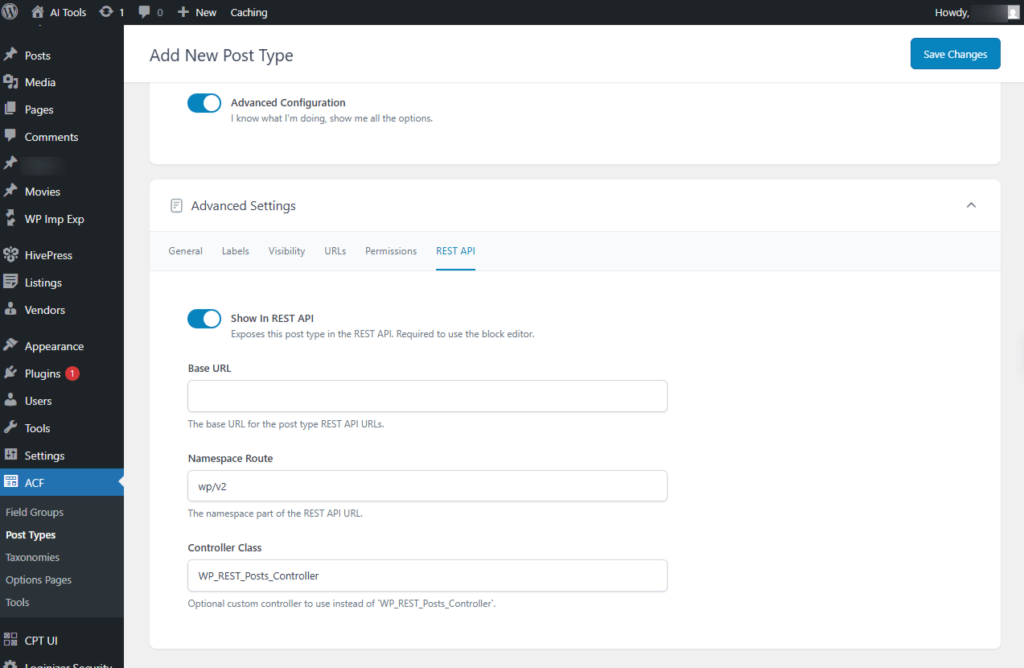
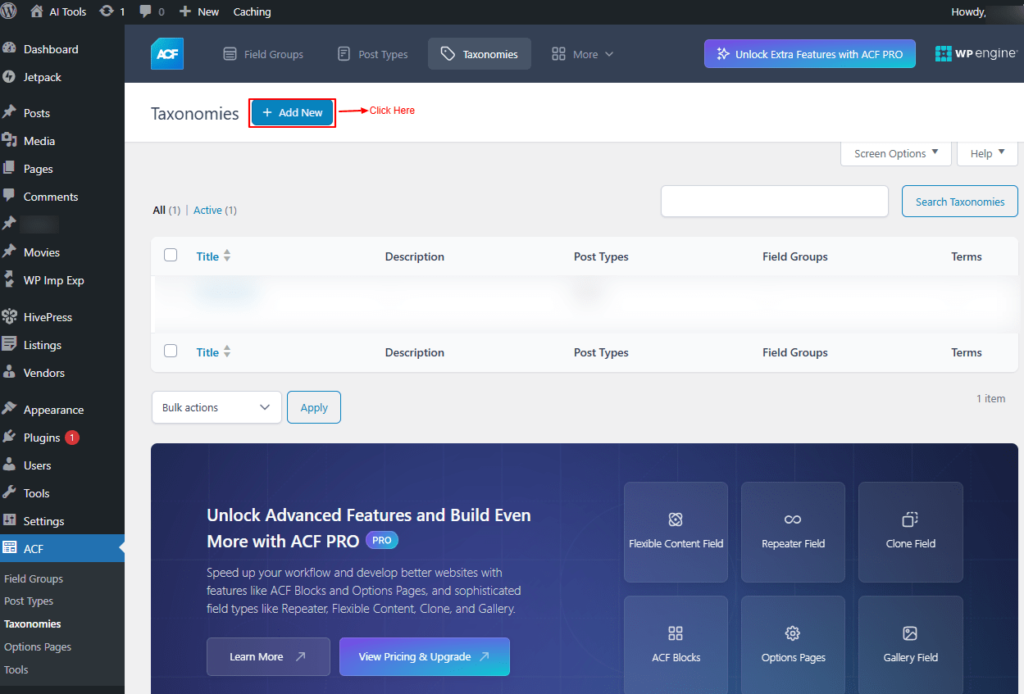
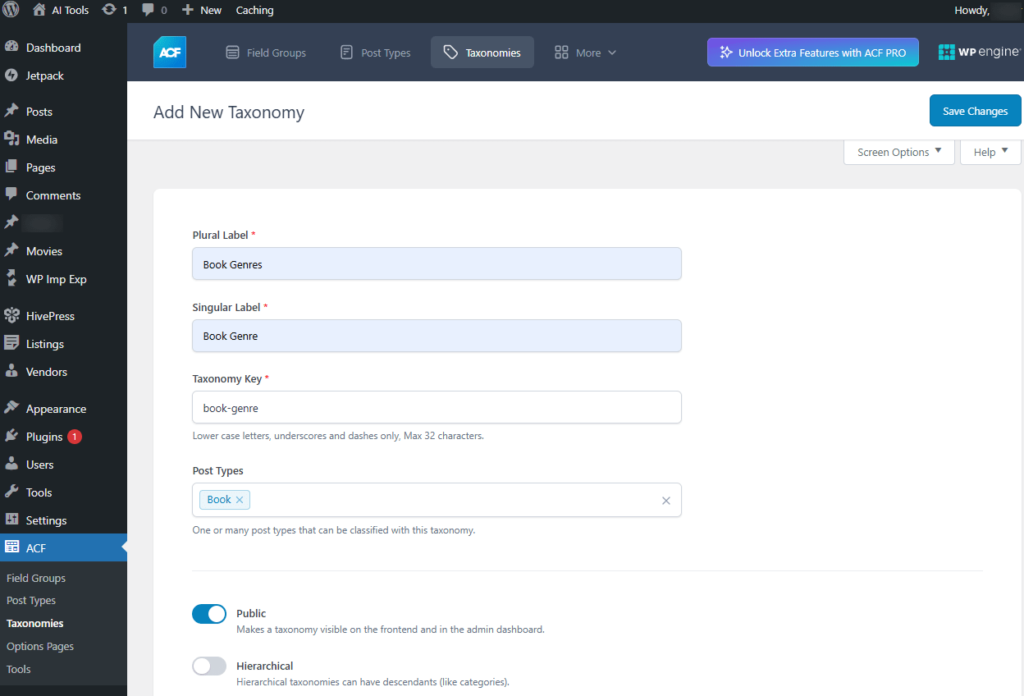
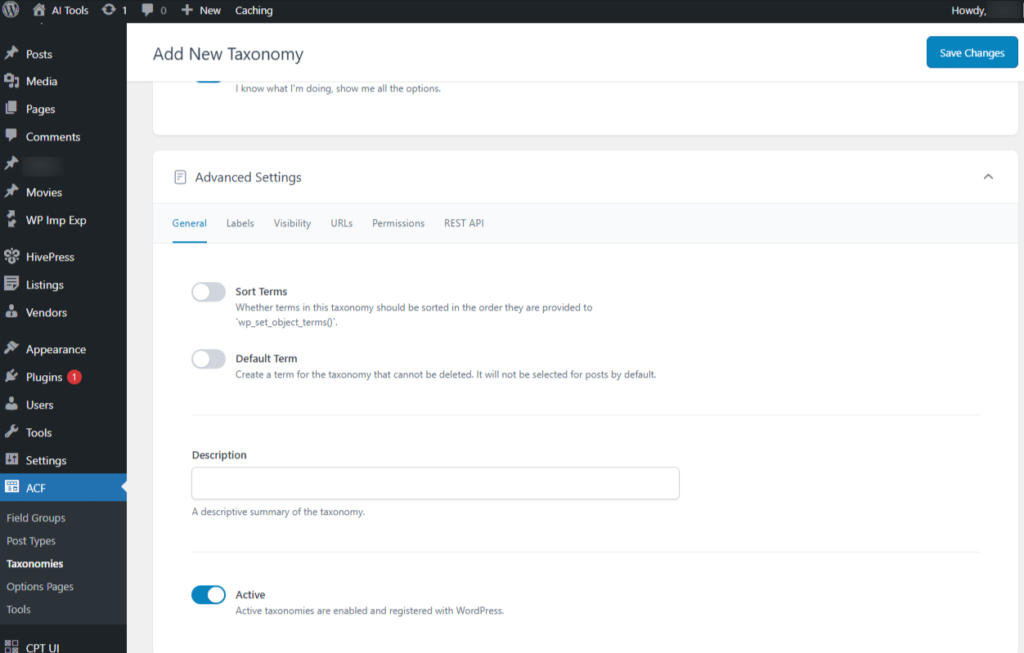
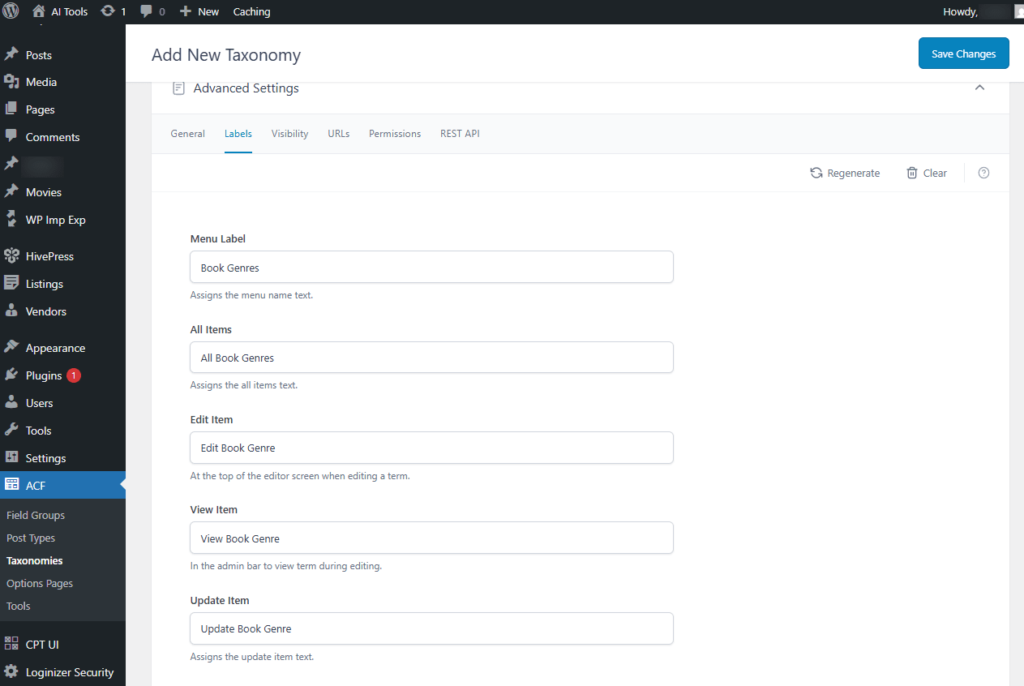
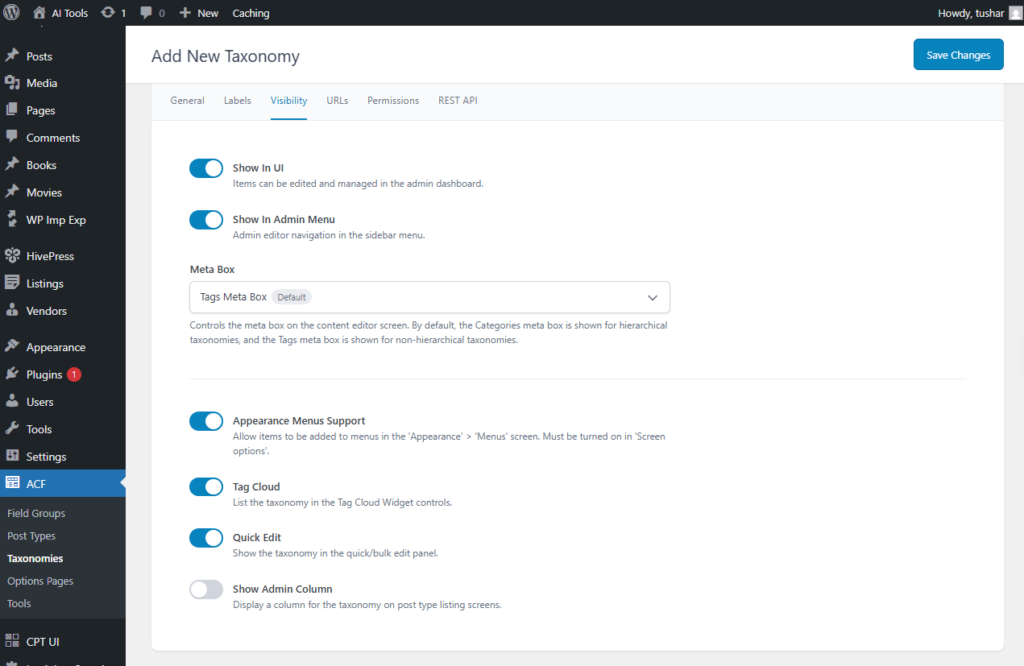
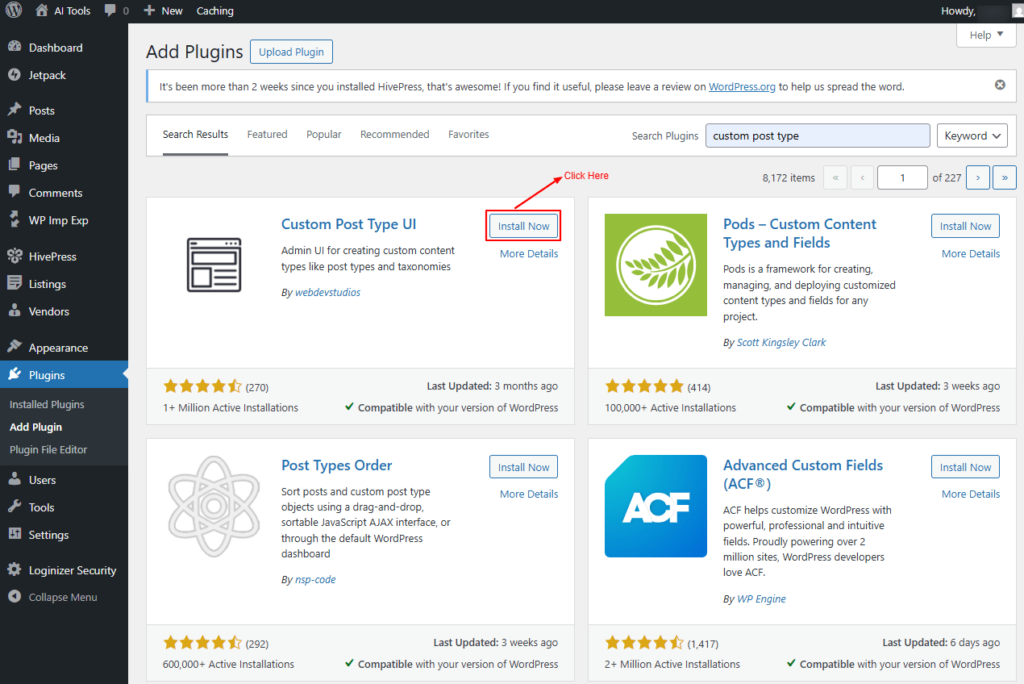
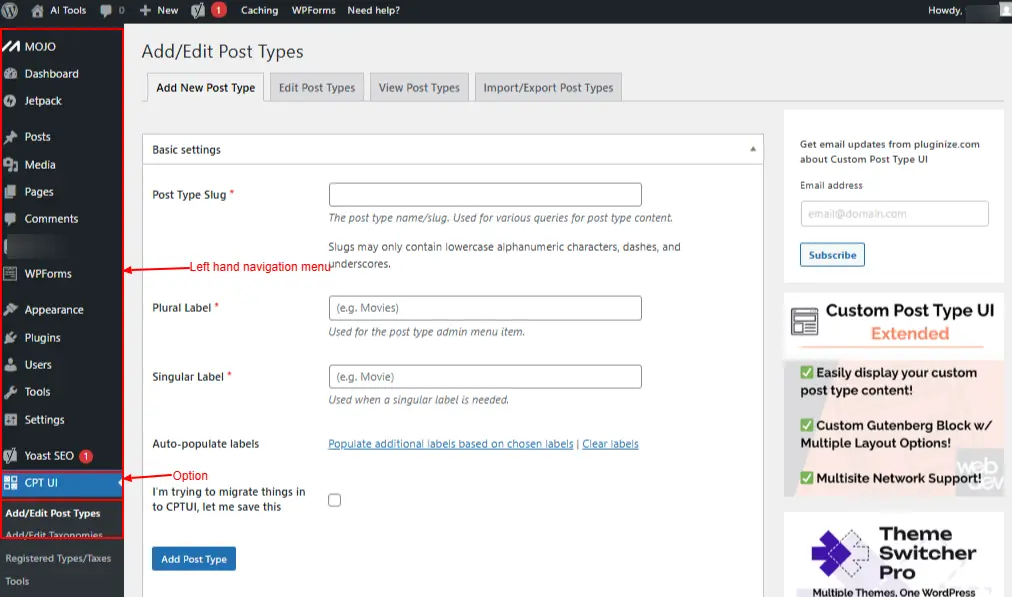
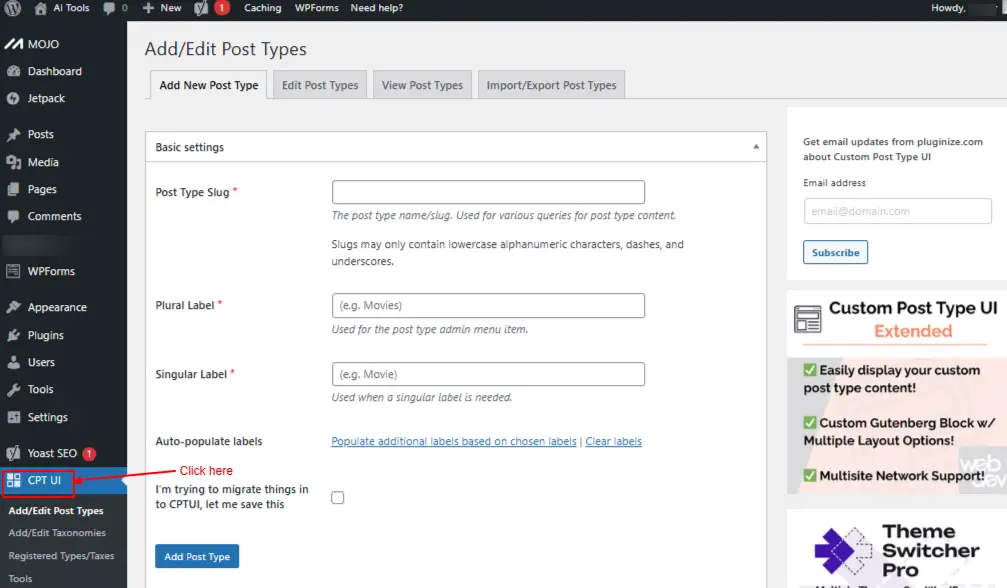
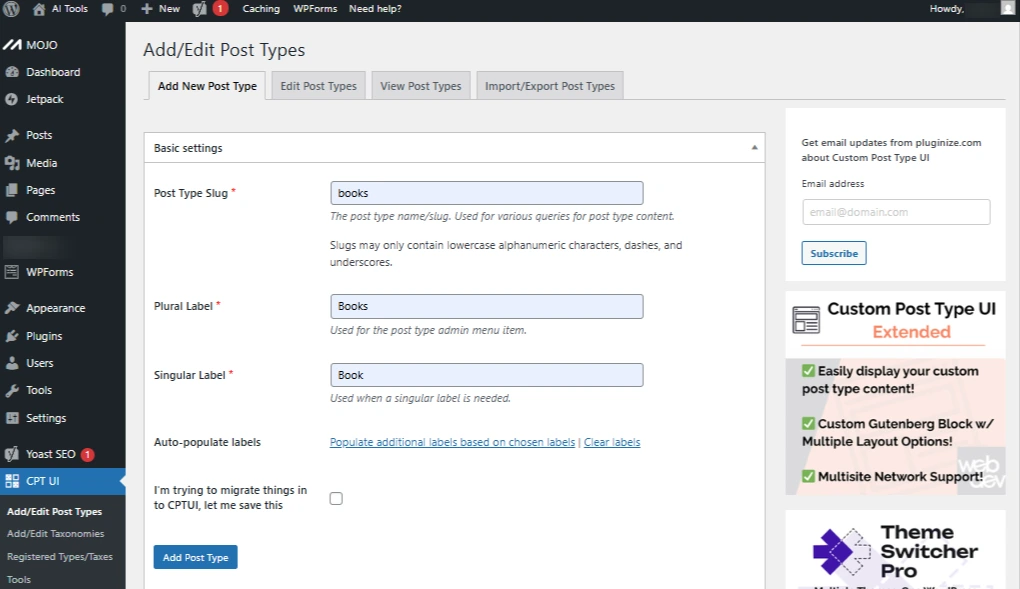
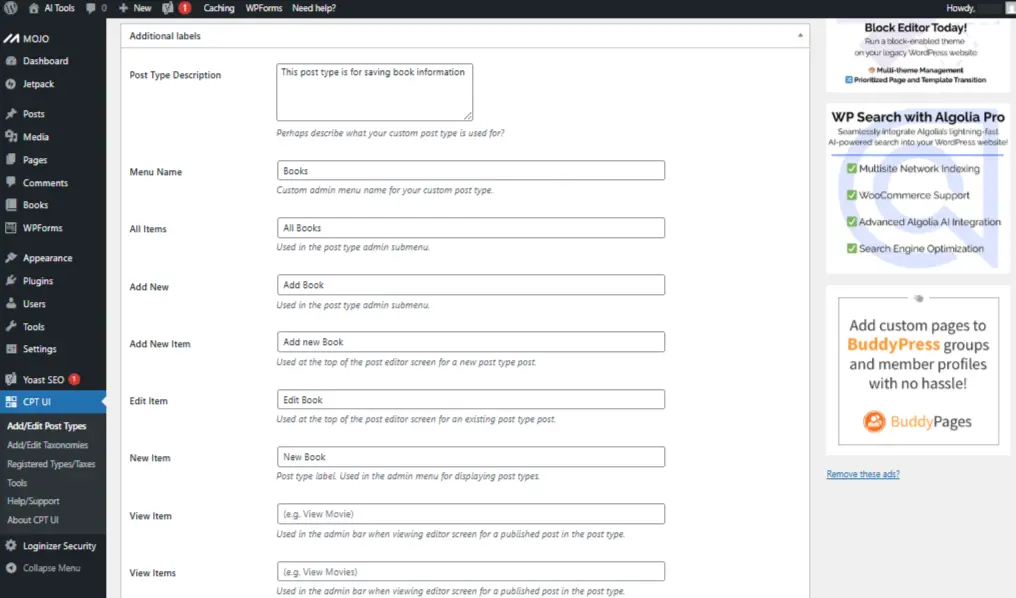
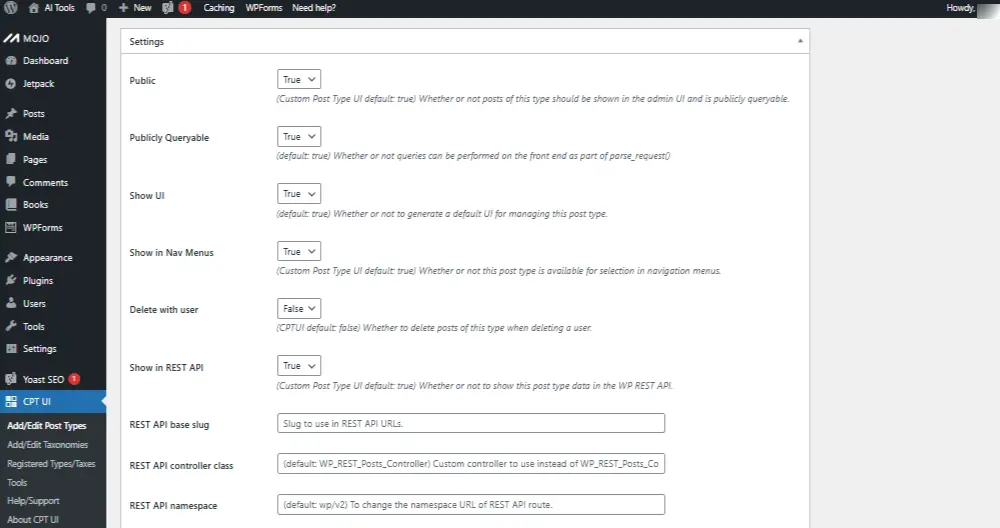
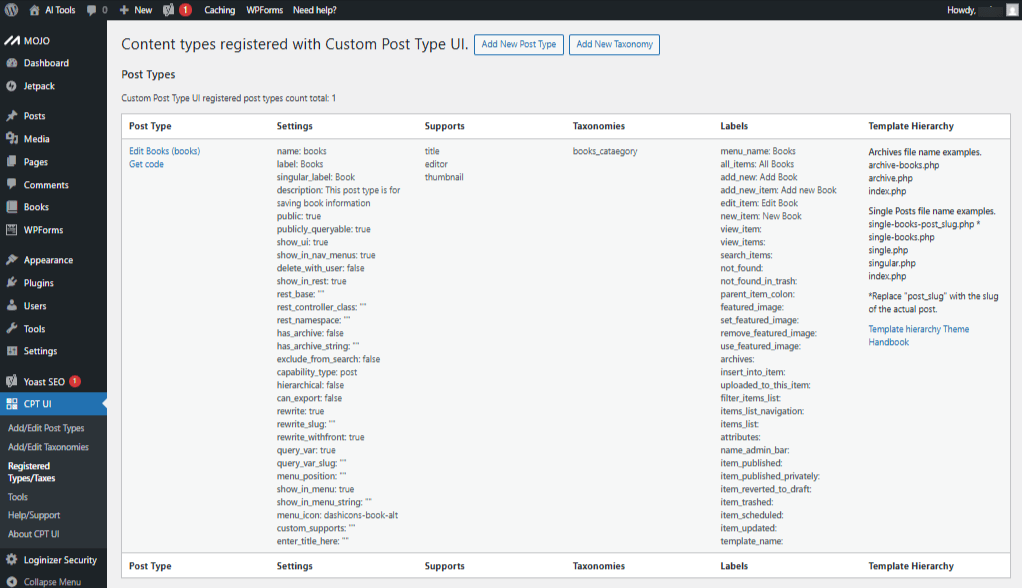
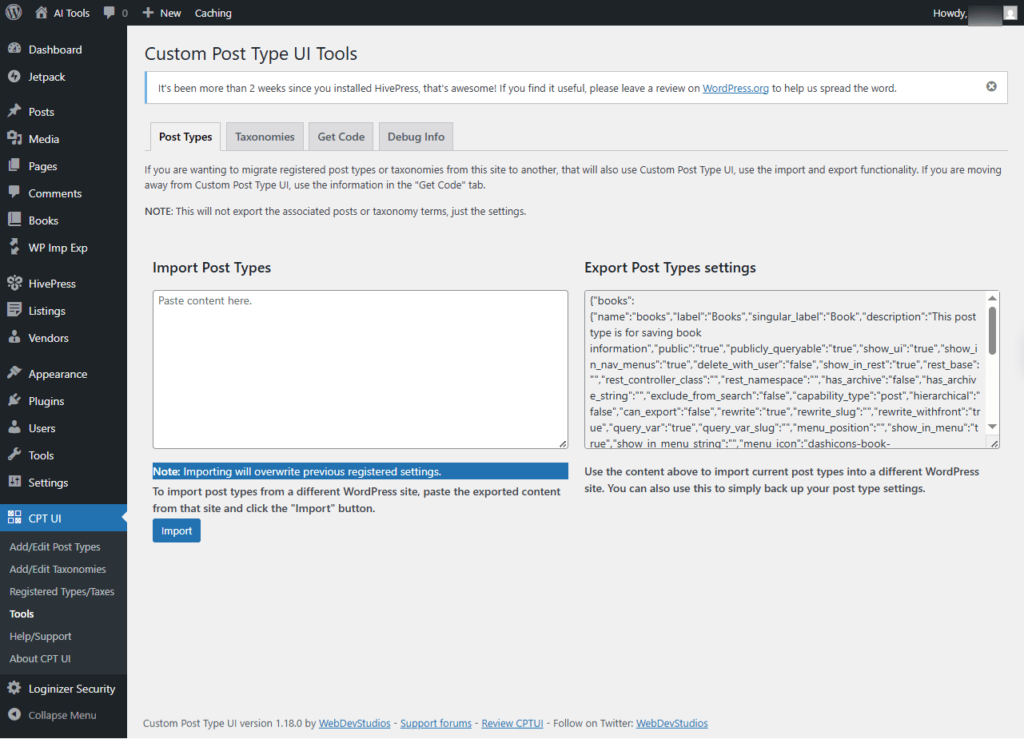
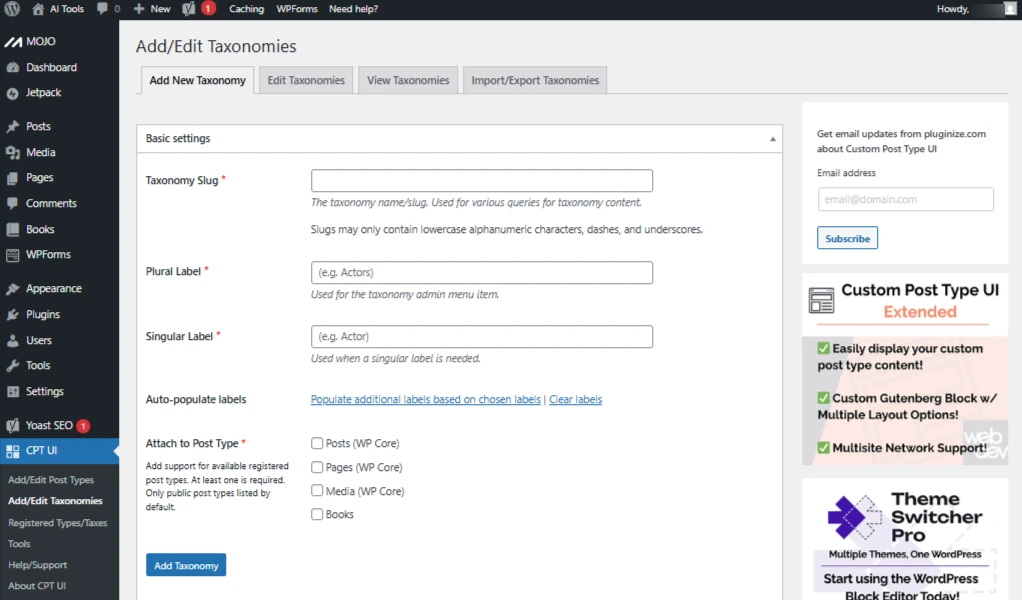
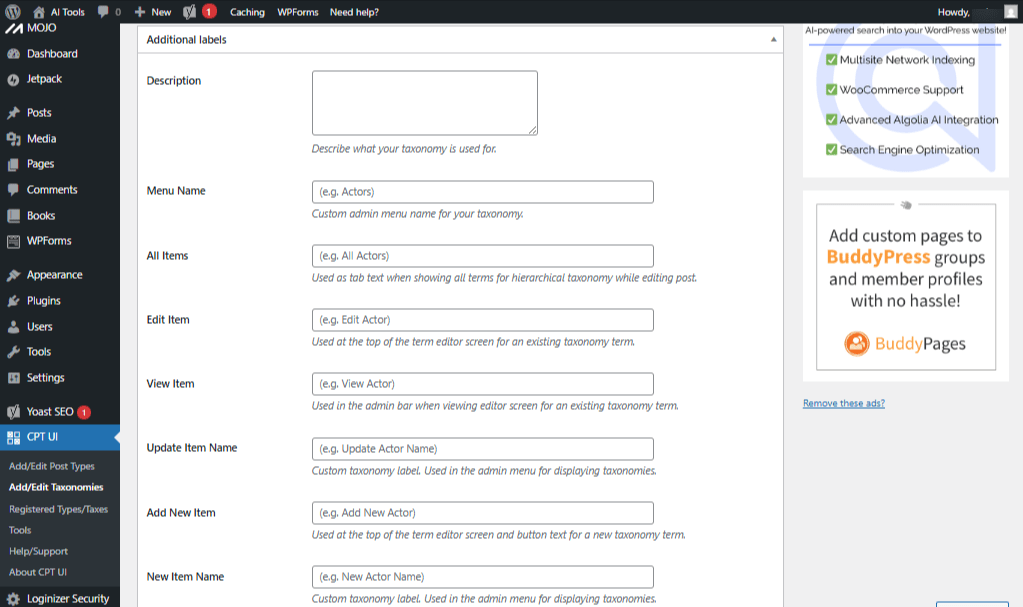
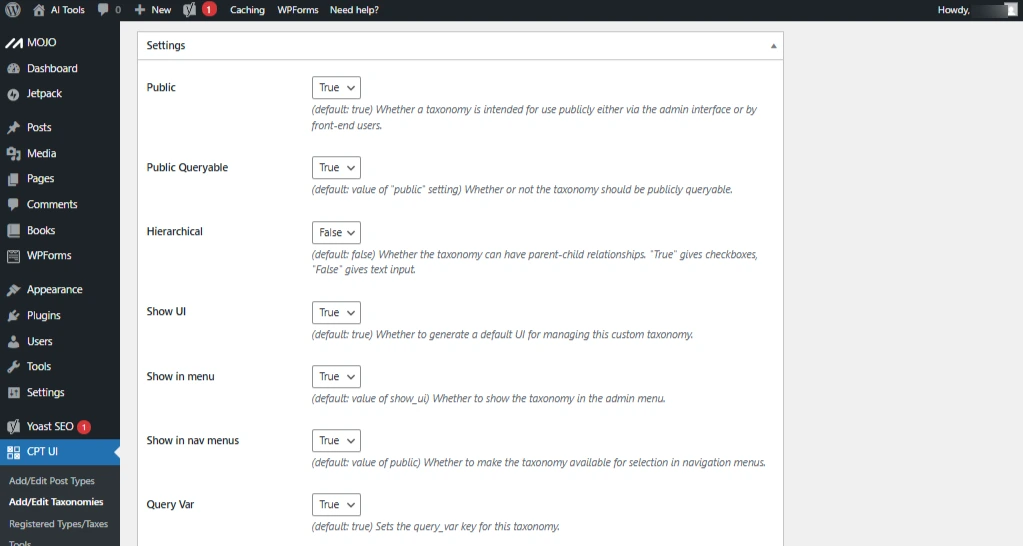
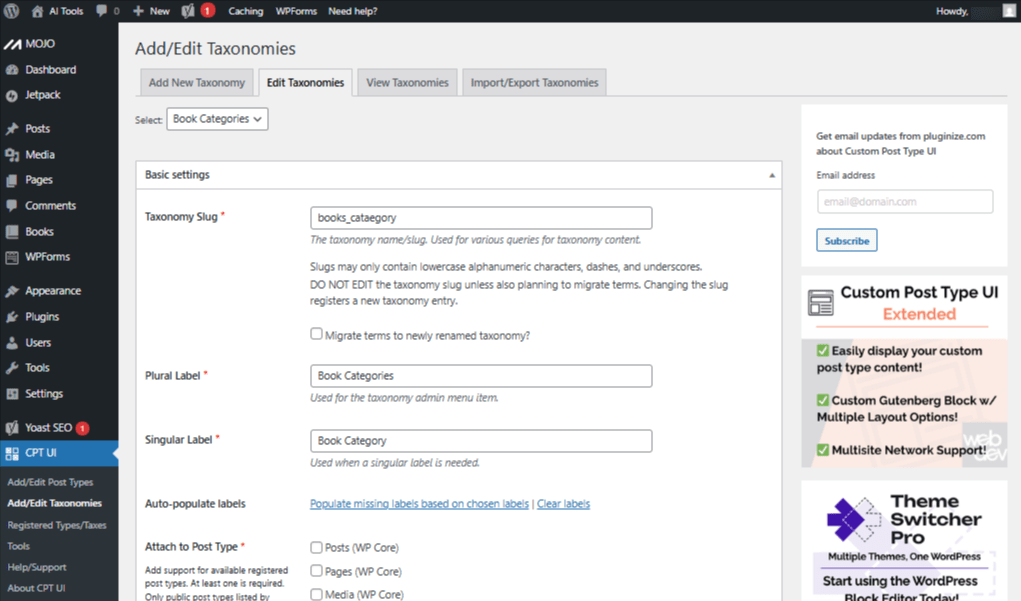
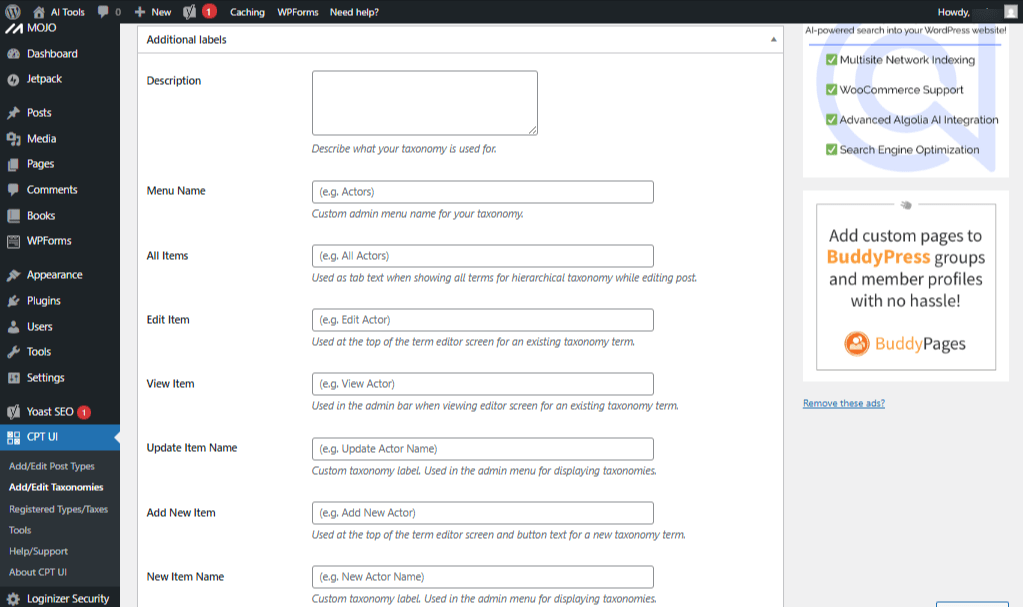
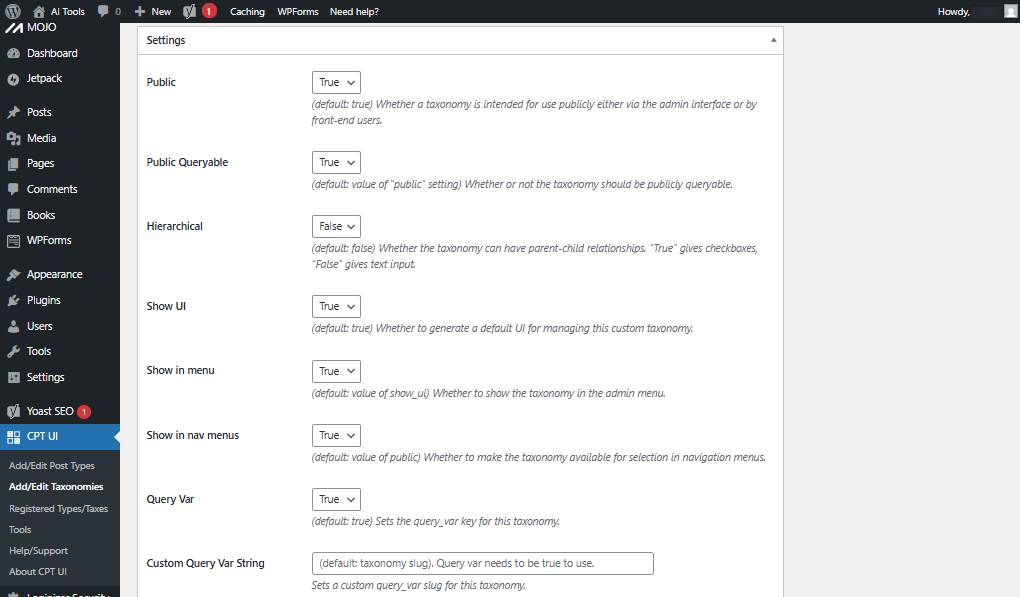
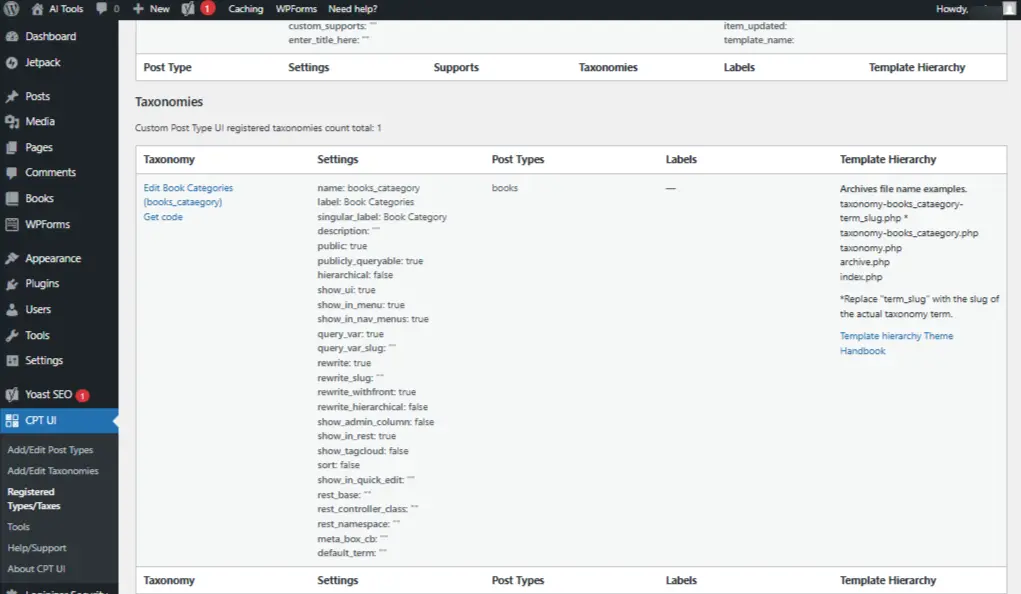
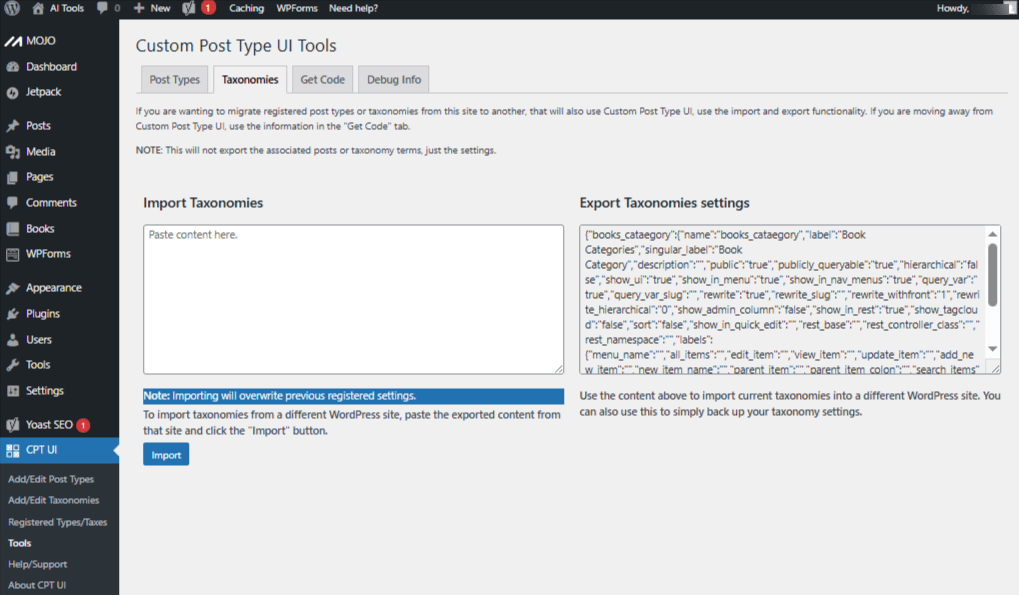
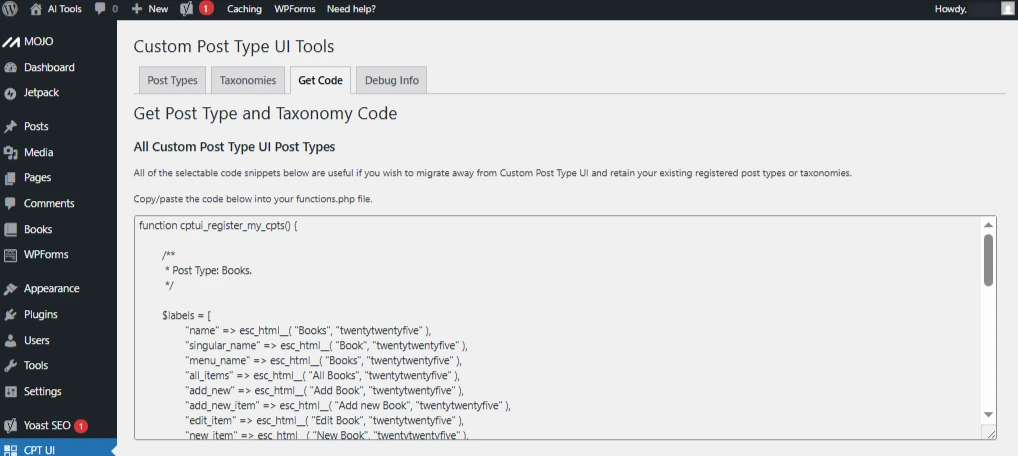
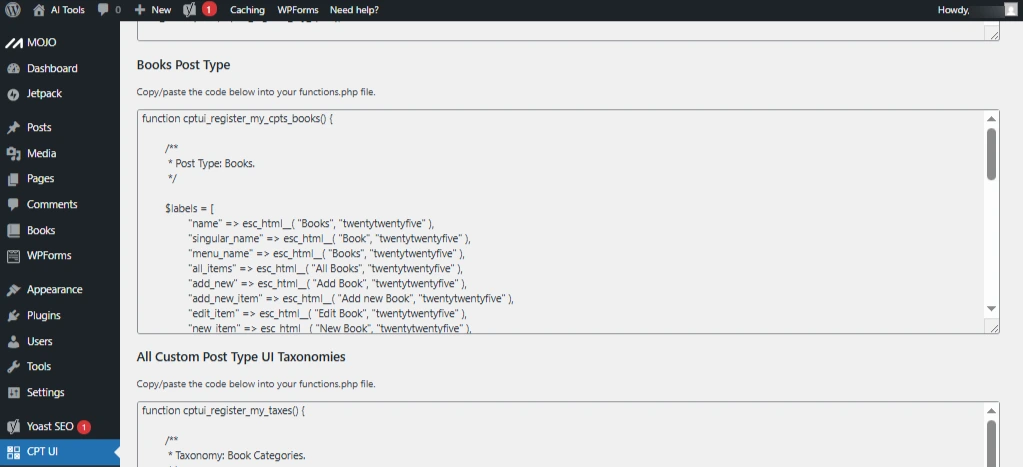
- Custom Post Type UI (CPT UI): Helps you create custom post types & taxonomies by replicating Webflow CMS Collections like Blogs, Case Studies, Services, or Team Members.
Your WordPress setup is now ready for migration.
Importing Webflow Content to WordPress
Step 1: Install the WP Import Export Lite Plugin
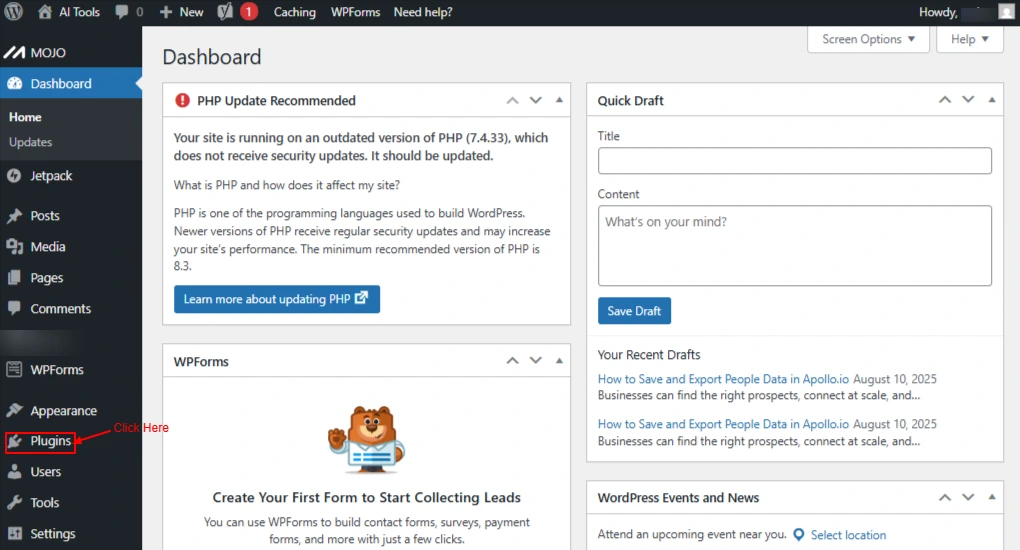
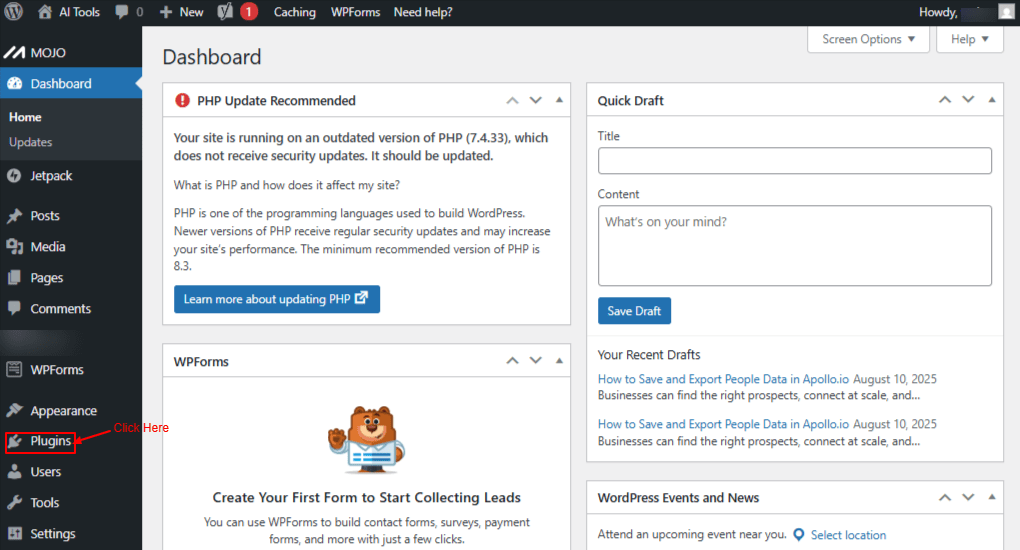
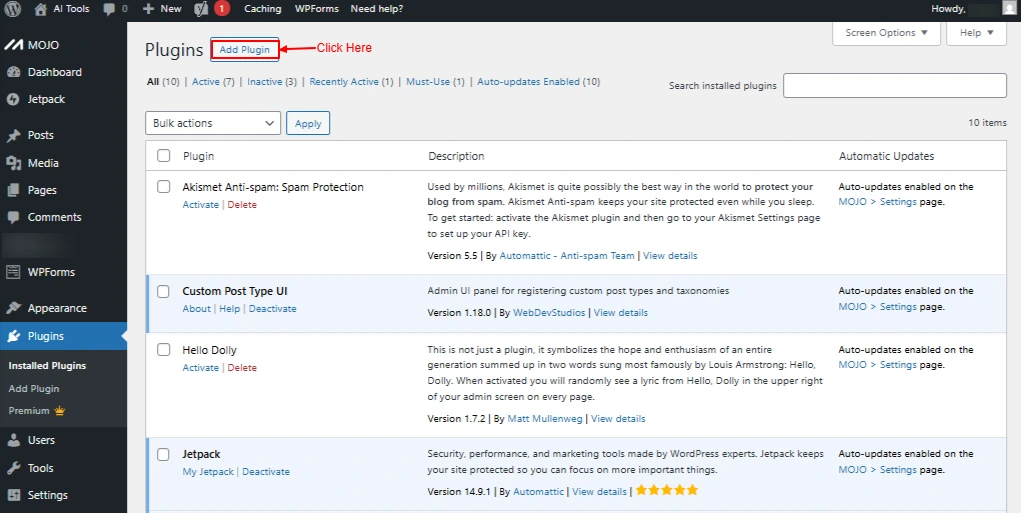
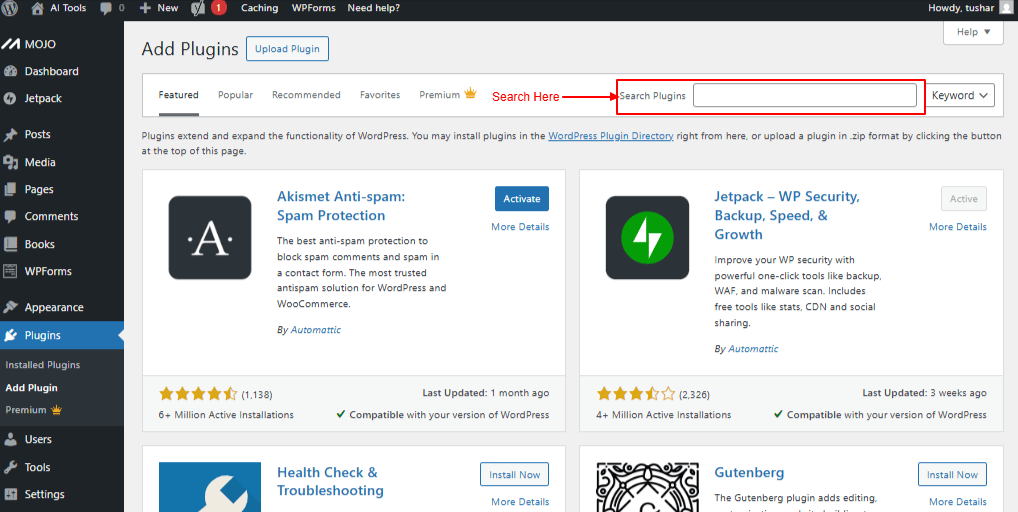
- Go to your WordPress Dashboard → Plugins → Add New.
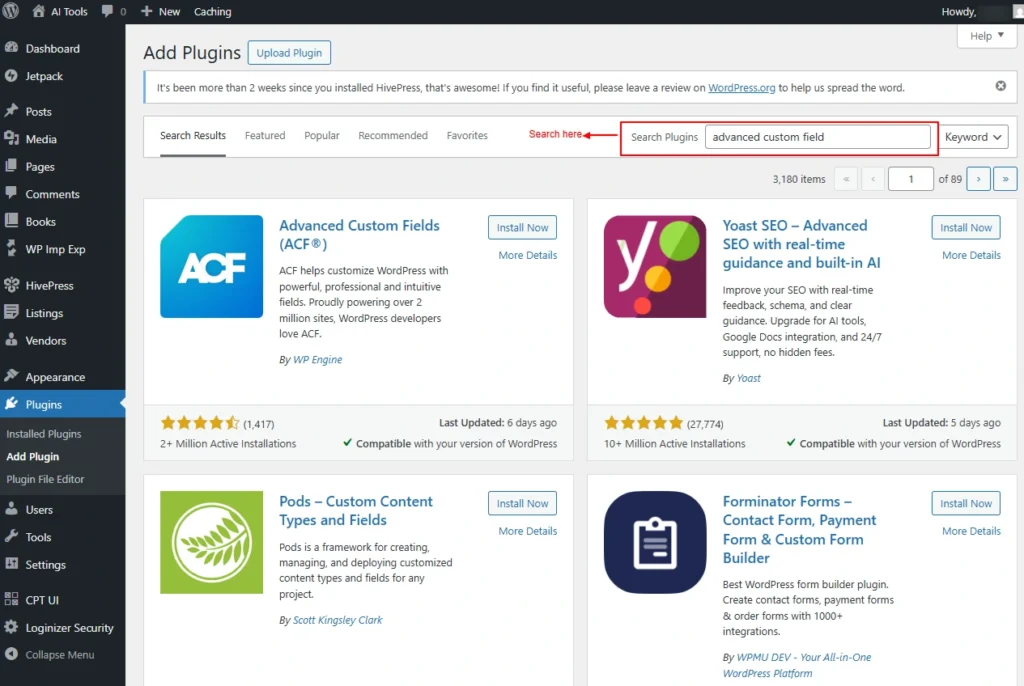
- Search for “WP Import Export Lite.”
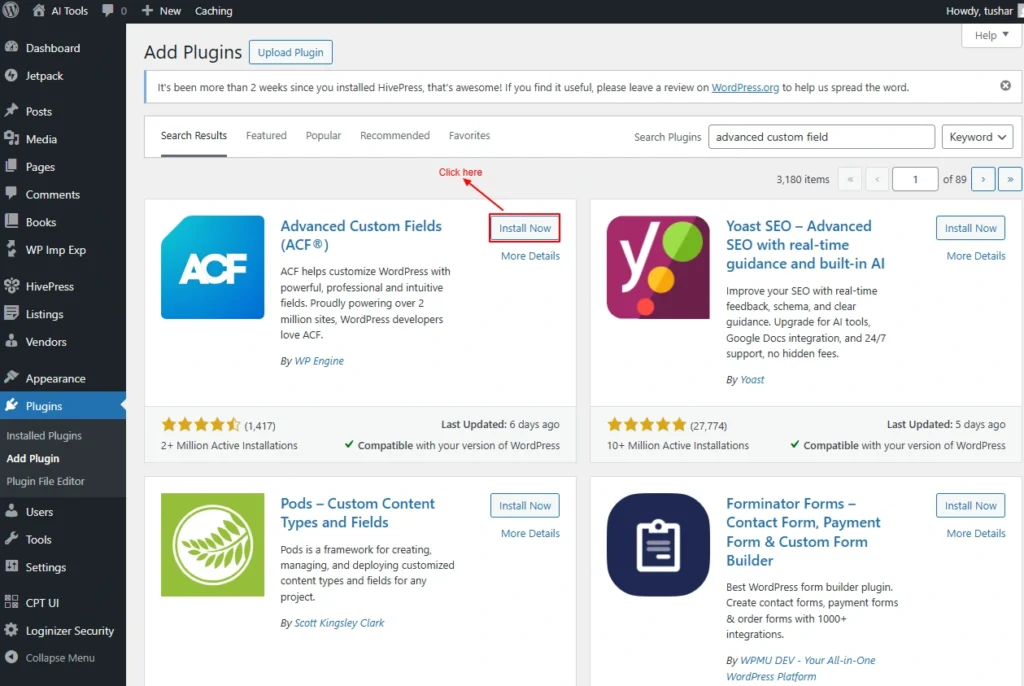
- Click Install Now and then Activate the plugin.
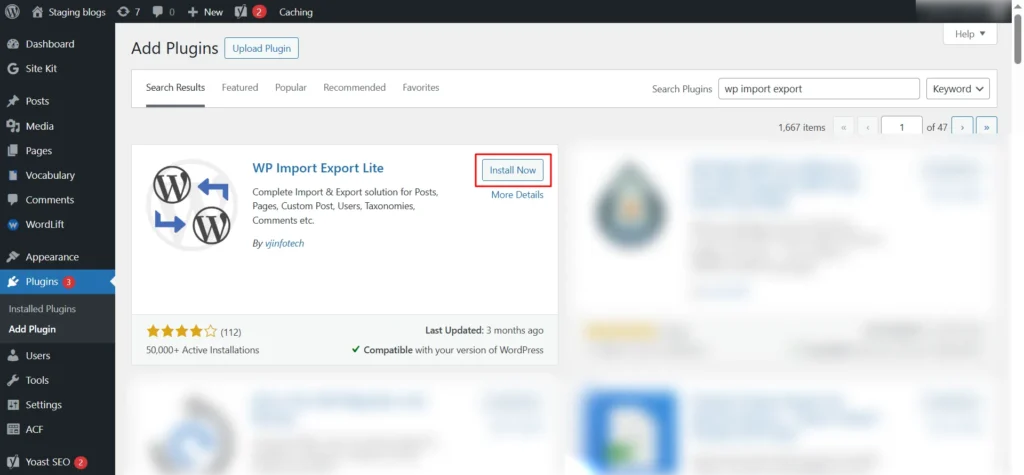
Screenshot 3: WP Import Export Lite
Step 2: Create a New Import
- Navigate to WP Imp Exp → New Import in your WordPress admin panel.
- Choose Upload from Desktop, then click Select Files to upload your CSV file.
- After the file uploads successfully, click Continue to Step 2.
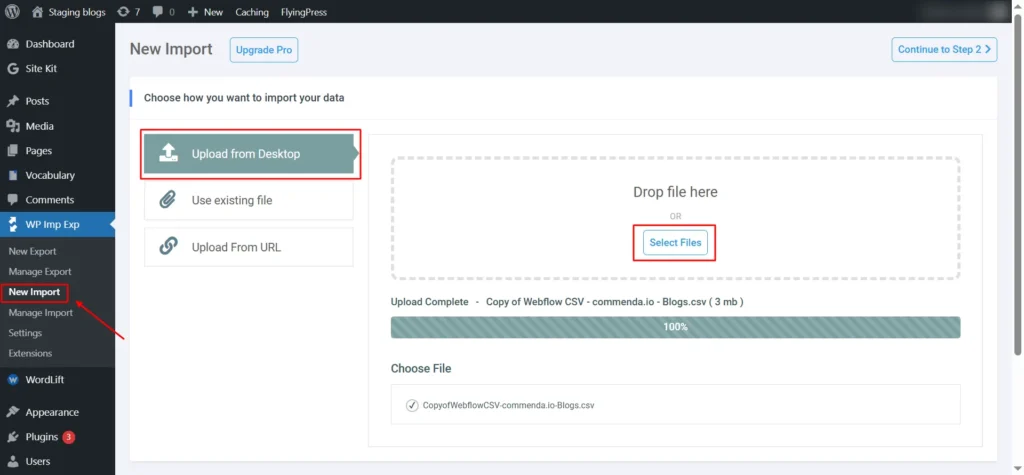
Screenshot 4: New Import
Step 3: Select Post Type
- Under Import each record as, choose Post, Page, or any custom post type depending on your data.
- In Handle New and Existing Items, select:
- Import new items only & skip existing items (recommended for first-time import).
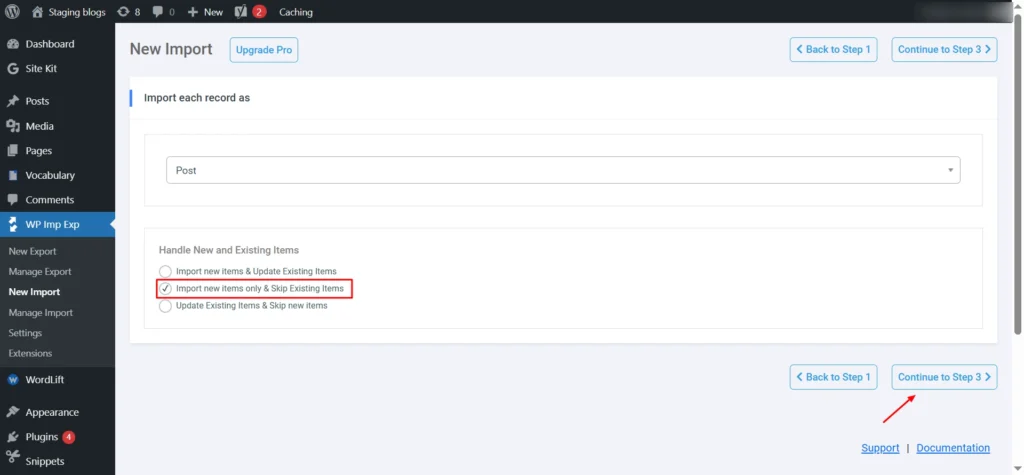
Screenshot 5: Select Post Type
Then click Continue to Step 3.
Step 4: Map Title and Content Fields
In the Title & Content section, map your CSV fields:
- In the Title & Content section, map your CSV fields:
- Post Title → {name[1]}
- Post Content → {postcontent[1]}
- Enable “Search image through content and import images wrapped in <img> tags” if your posts contain inline images.
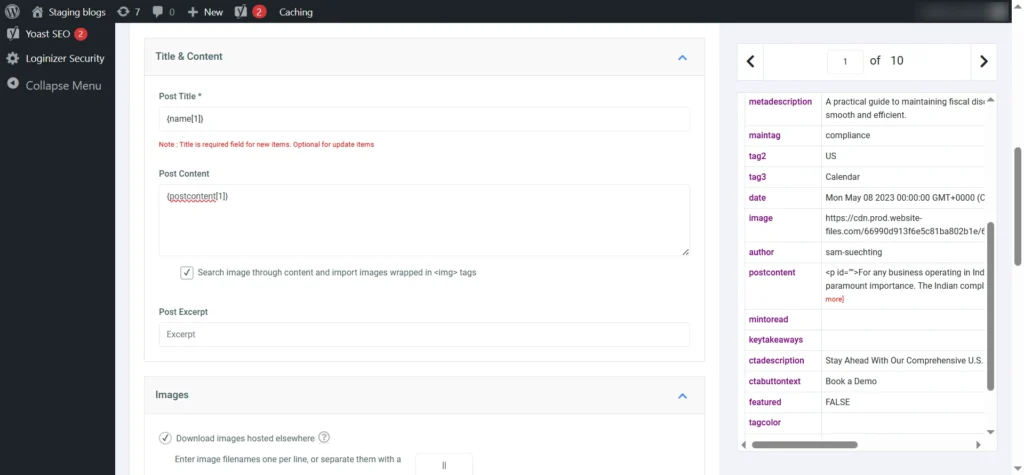
Screenshot 6: Map Title and Content Fields
Step 5: Configure Image Settings
- Scroll to the Images section.
- Enable Download images hosted elsewhere and add your image field (e.g., {image[1]}).
- Check Set the first image to the Featured Image (_thumbnail_id) to automatically assign featured images.
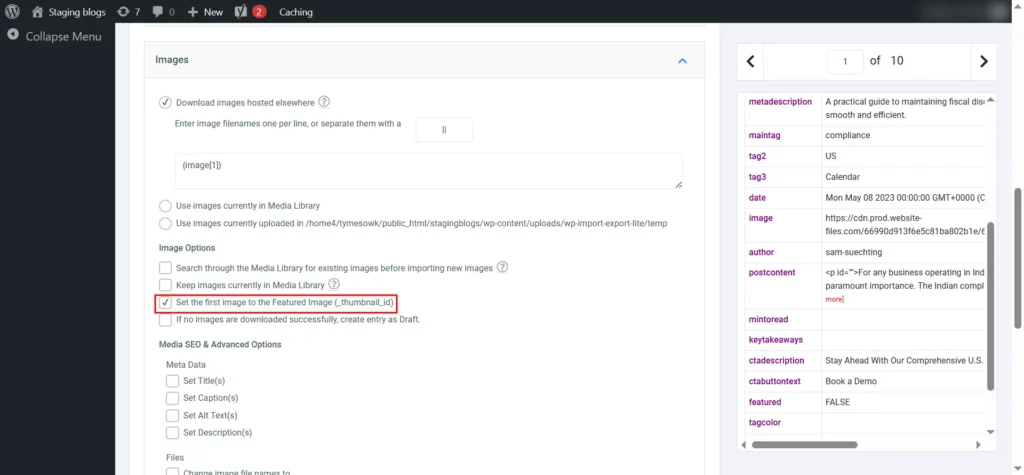
Screenshot 7: Image Settings
Handling AVIF Image Formats During Migration
Webflow often exports images in .avif format, which is good for keeping your visuals sharp and your site fast, but WordPress doesn’t fully support AVIF yet, so those images might not upload during migration.
You can easily enable AVIF support with a quick code snippet added through the Code Snippets plugin.
| // Allow AVIF in media uploads function allow_avif_uploads($mime_types) { $mime_types['avif'] = 'image/avif'; return $mime_types; } add_filter('upload_mimes', 'allow_avif_uploads'); // Fix file type detection for AVIF function fix_avif_filetype_check($data, $file, $filename, $mimes) { $ext = pathinfo($filename, PATHINFO_EXTENSION); if (strtolower($ext) === 'avif') { $data['ext'] = 'avif'; $data['type'] = 'image/avif'; } return $data; } add_filter('wp_check_filetype_and_ext', 'fix_avif_filetype_check', 10, 4); |
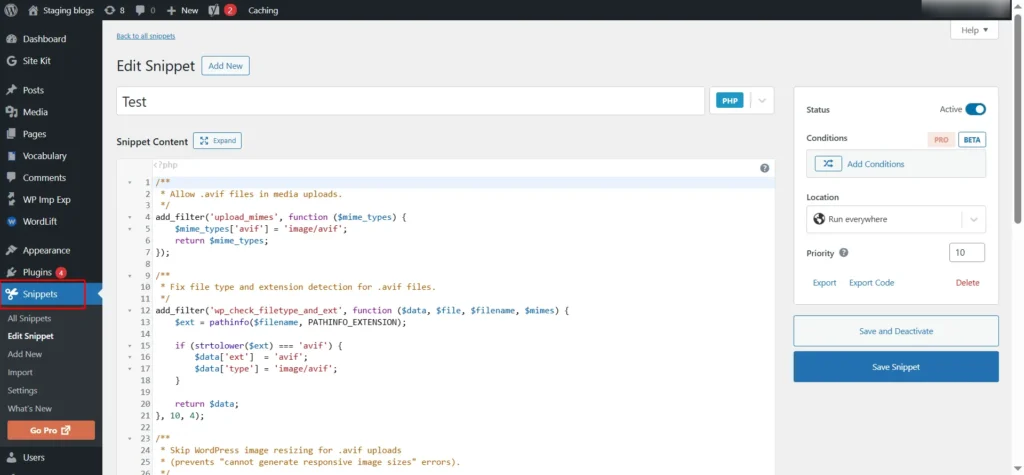
Screenshot 8: Handling AVIF Image
This code helps WordPress recognize .avif images properly. It not only allows you to upload AVIF files but also prevents those “file type not allowed” errors.
Once added, you can safely re-import or manually upload your .avif images through the media library without issues.
Step 6: Title & Meta Description
Scroll to the Yoast SEO section and map:

Screenshot 9: Title & Meta Description
Step 7: Custom Fields (If Applicable)
- Scroll to the "Custom Fields" section.
- Click Add New and create a mapping for each field.
- Enter the custom field name or WordPress ACF field name (e.g., cta_description, cta_button_text, featured) (from the Table 1 Fields that were mapped)
- In Value, insert the matching source placeholder
(e.g., {ctadescription[1]}, {ctabuttontext[1]}). - Set Options as Normal Data.
- Repeat for every field that you want to be imported.
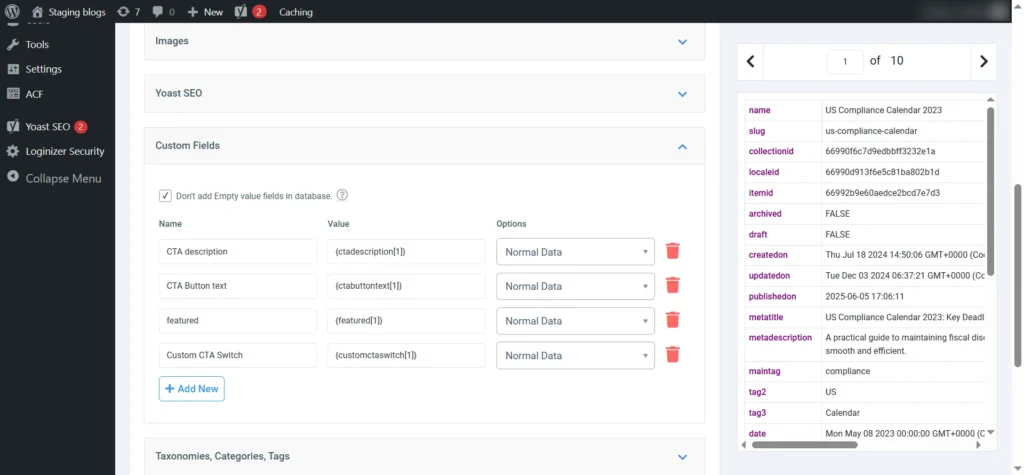
Screenshot 10: Map Custom Fields
Step 8: (Optional) Set Up Missing ACF Fields
Perform this step only if the ACF fields you need are not created in WordPress:
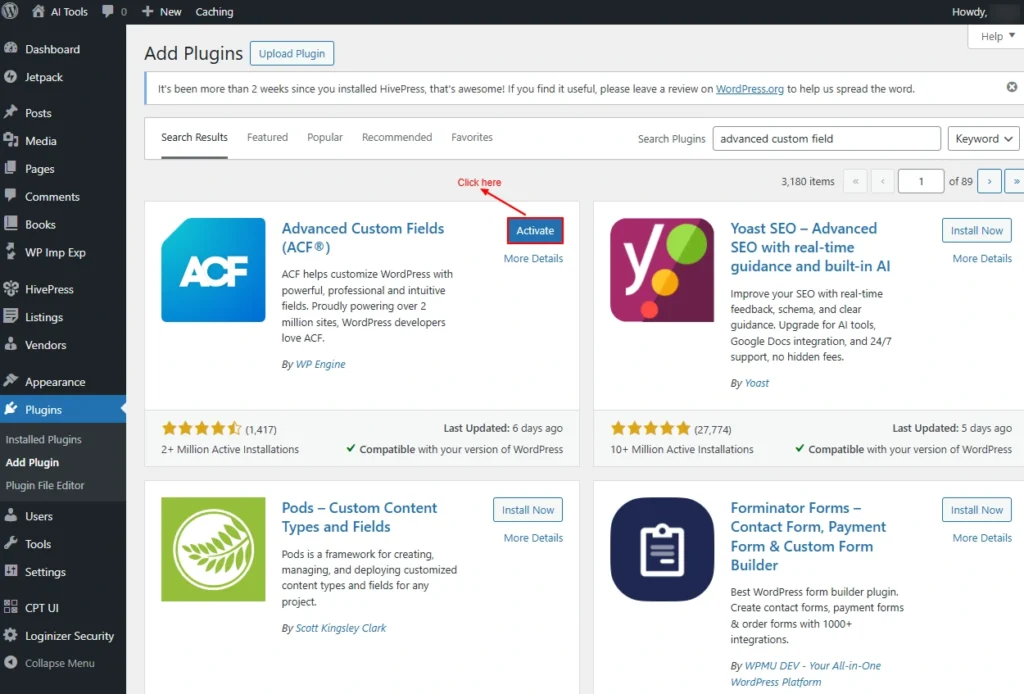
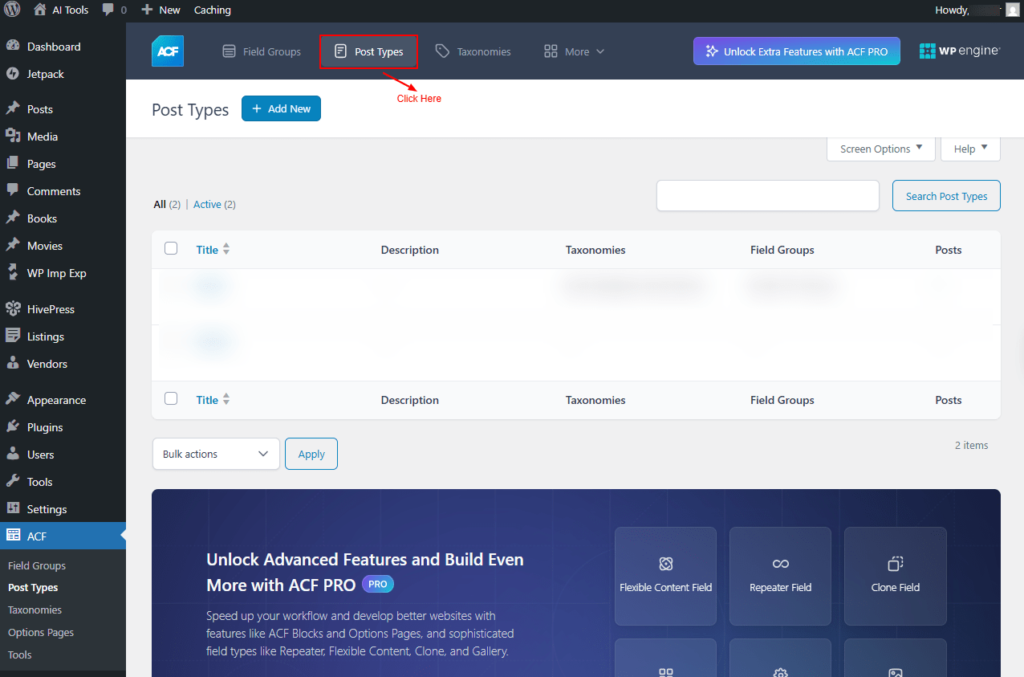
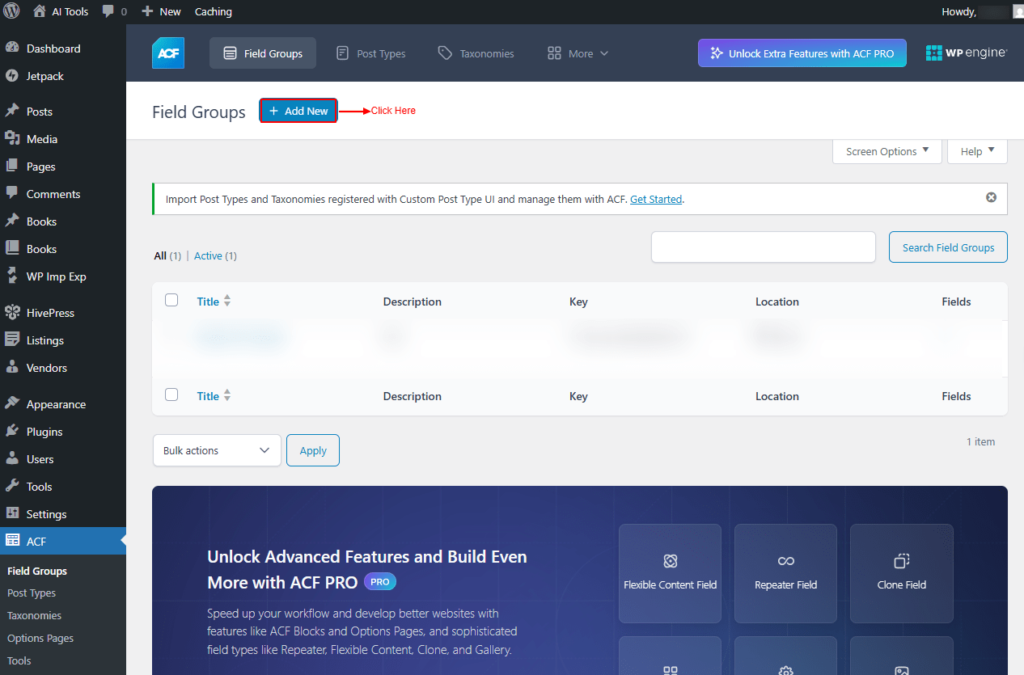
- Go to Plugins → Add New
- Install and activate Advanced Custom Fields
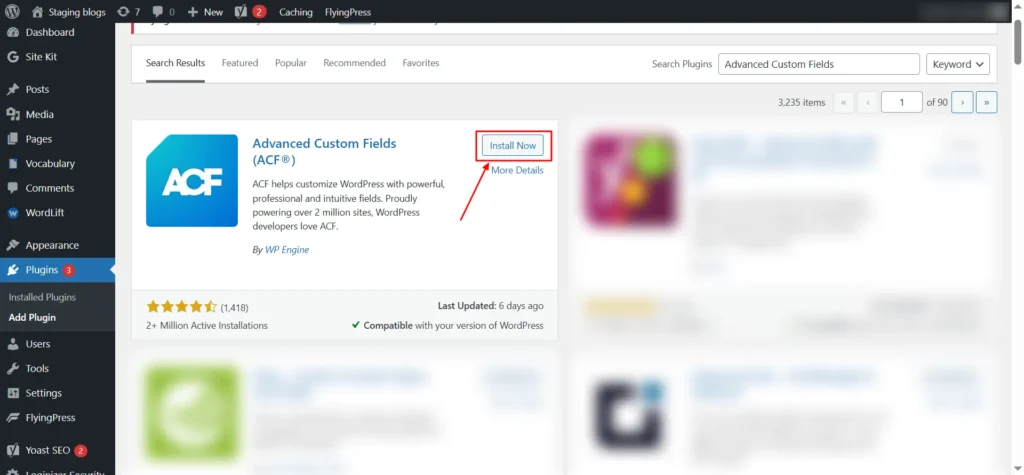
Screenshot 11: Install ACF
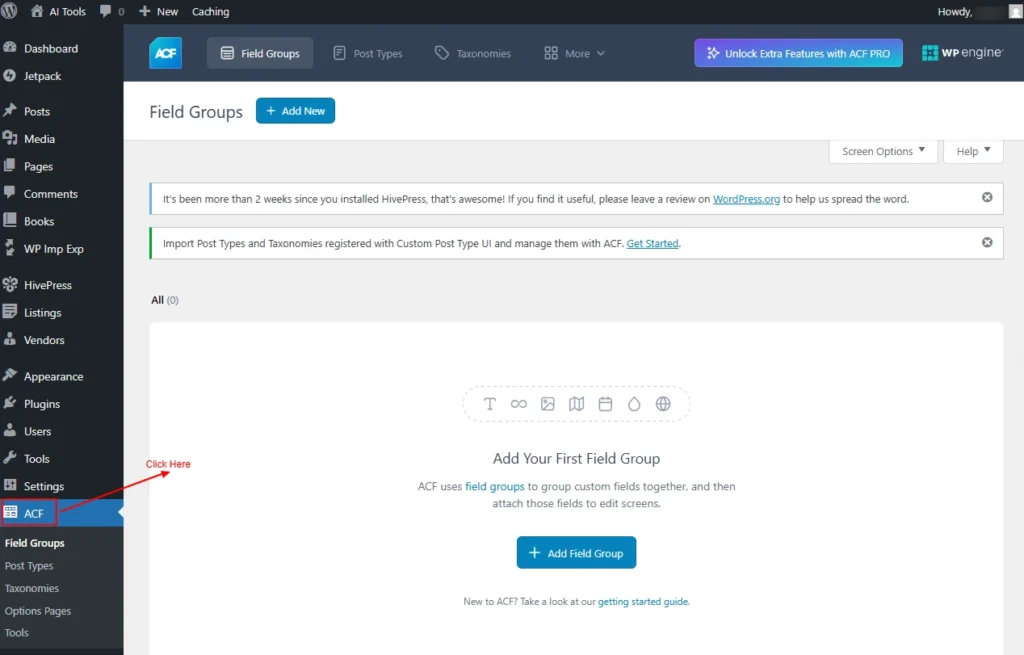
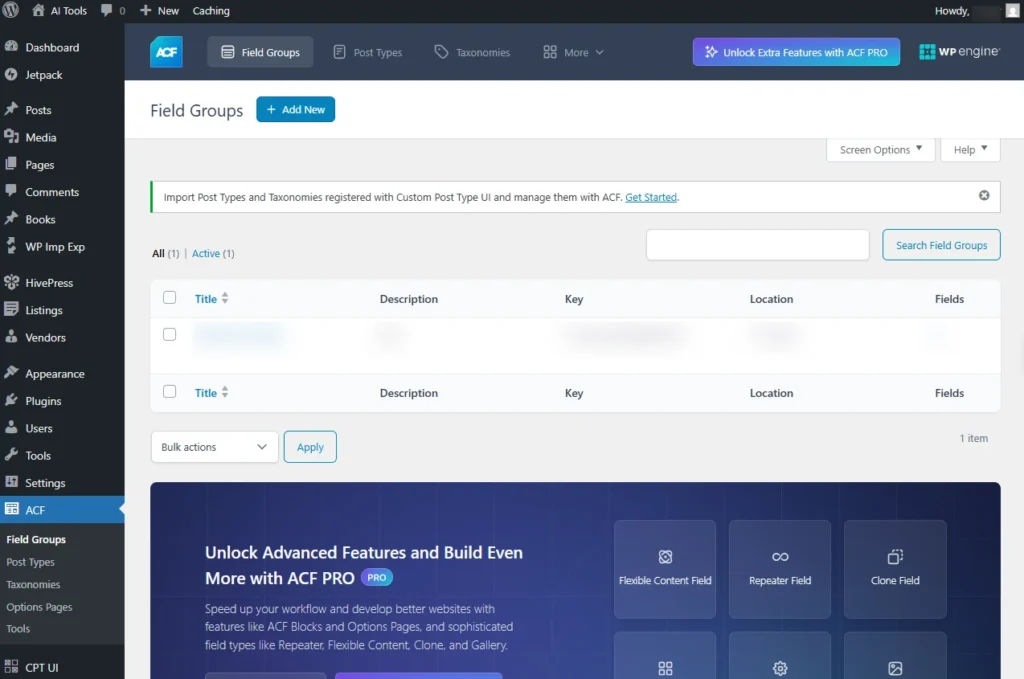
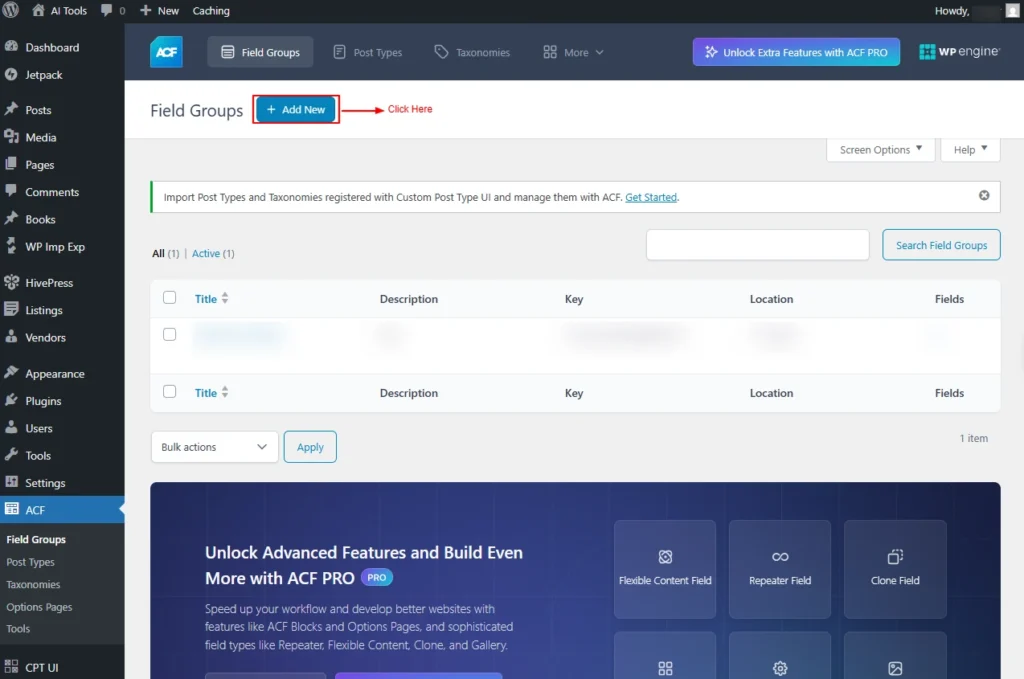
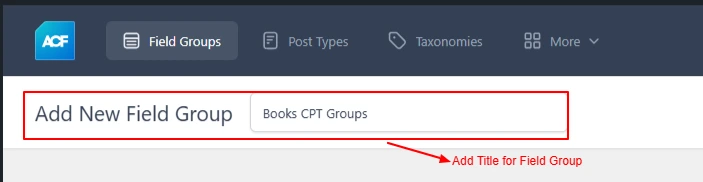
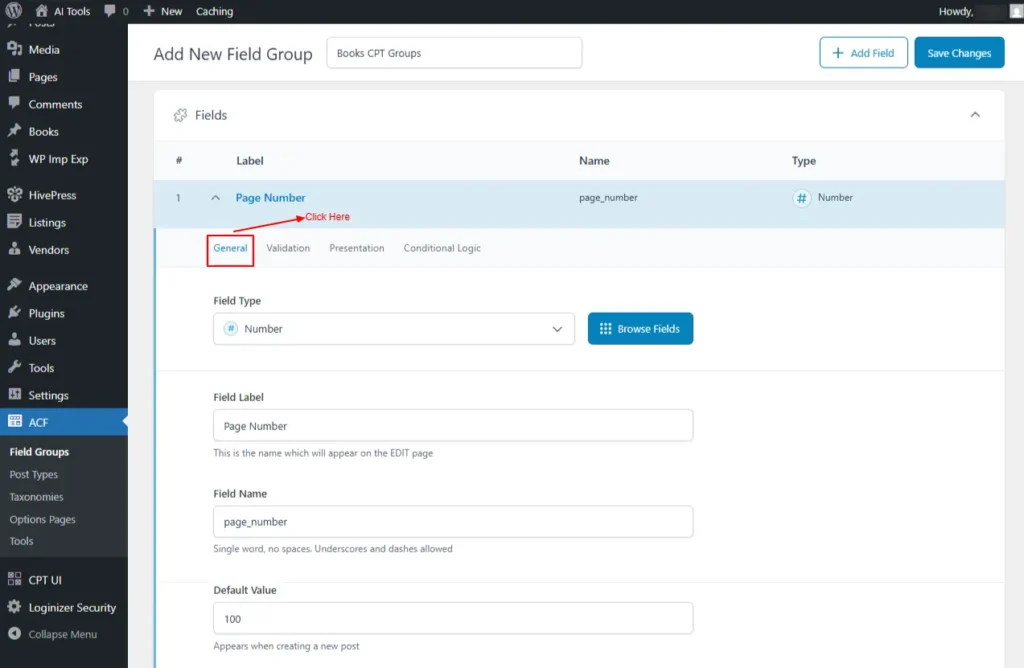
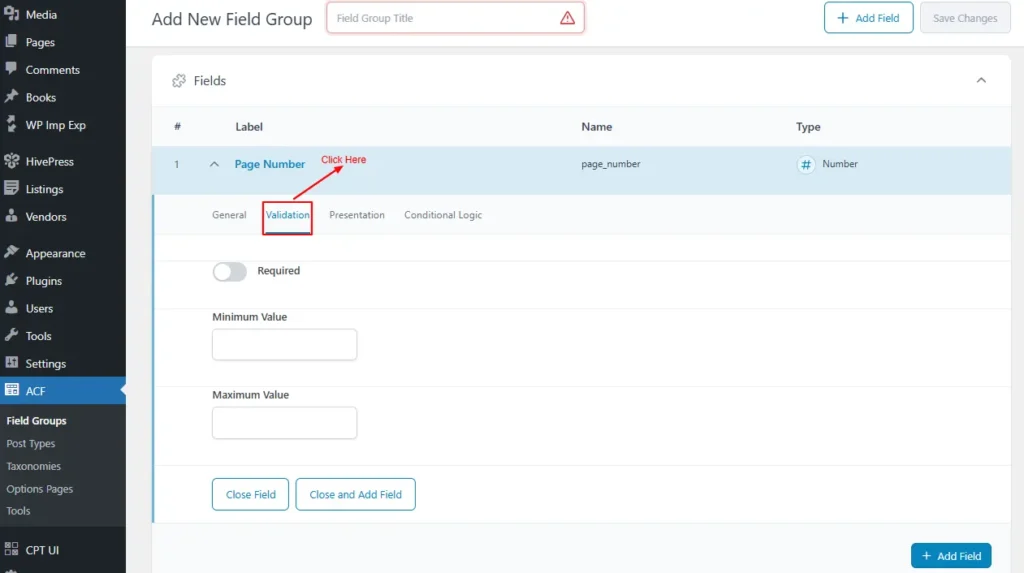
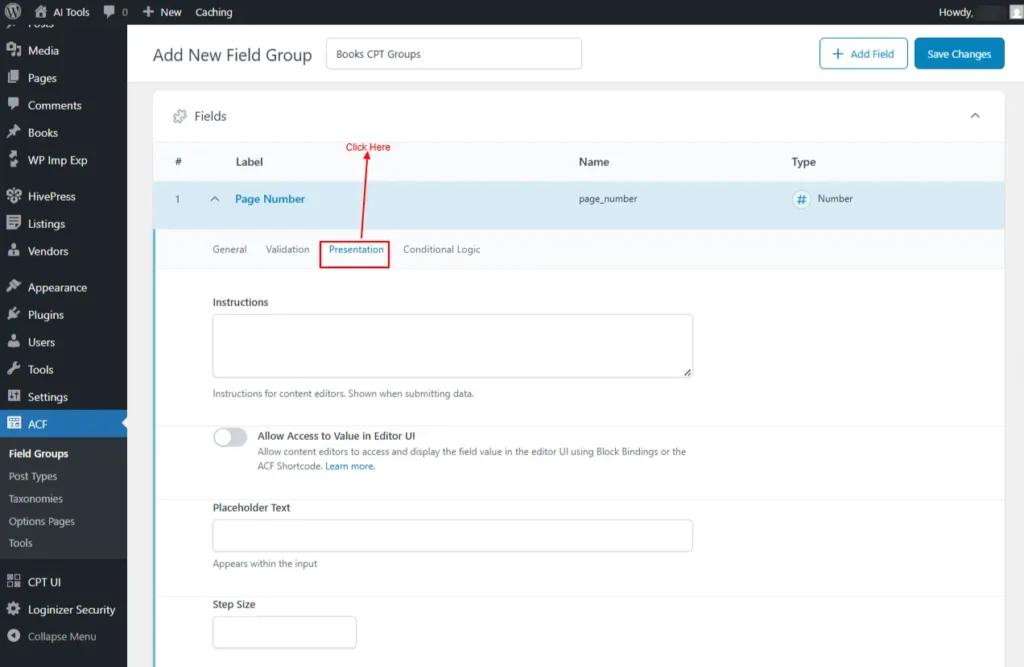
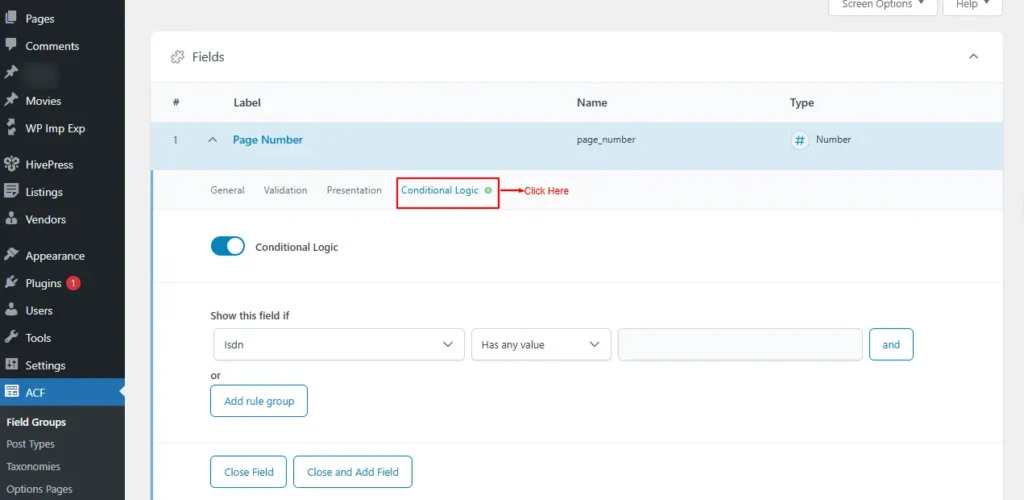
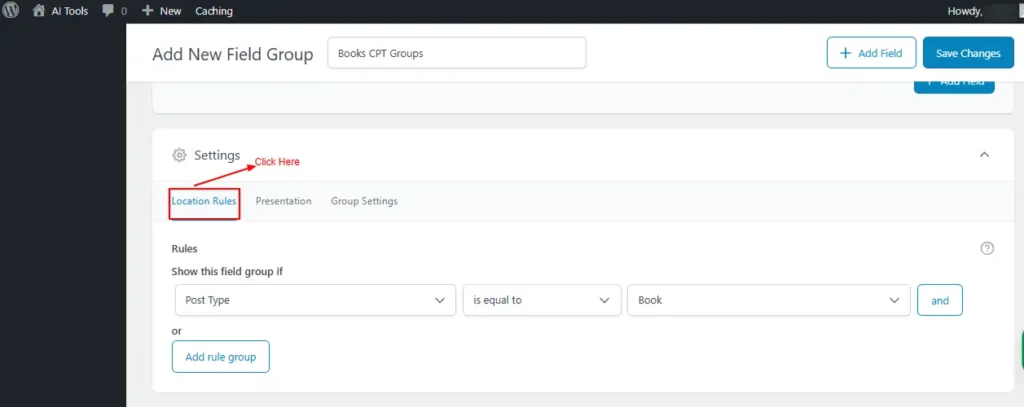
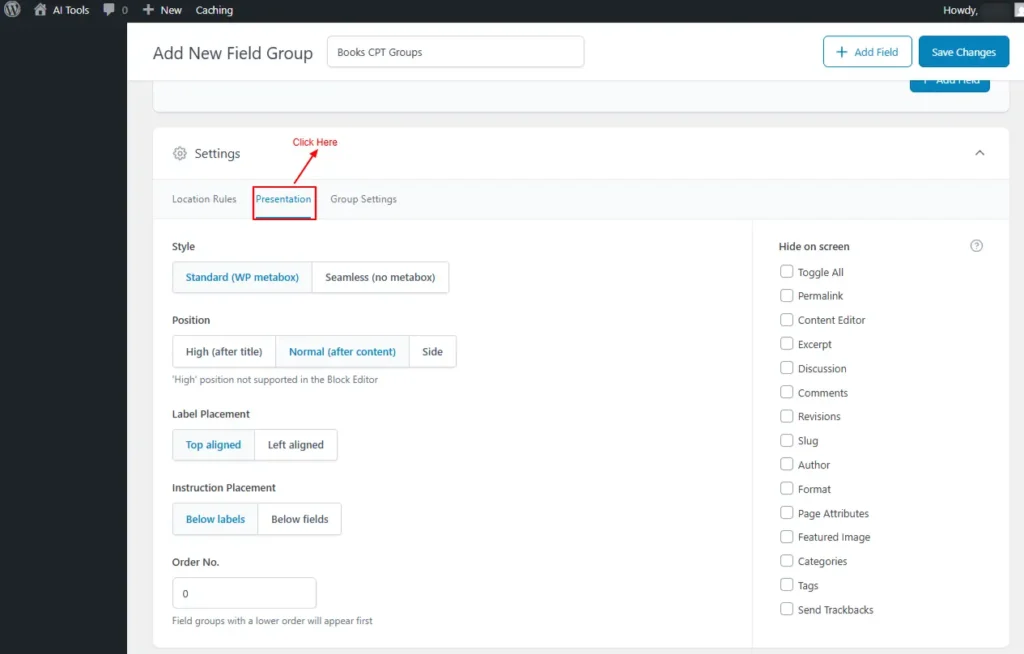
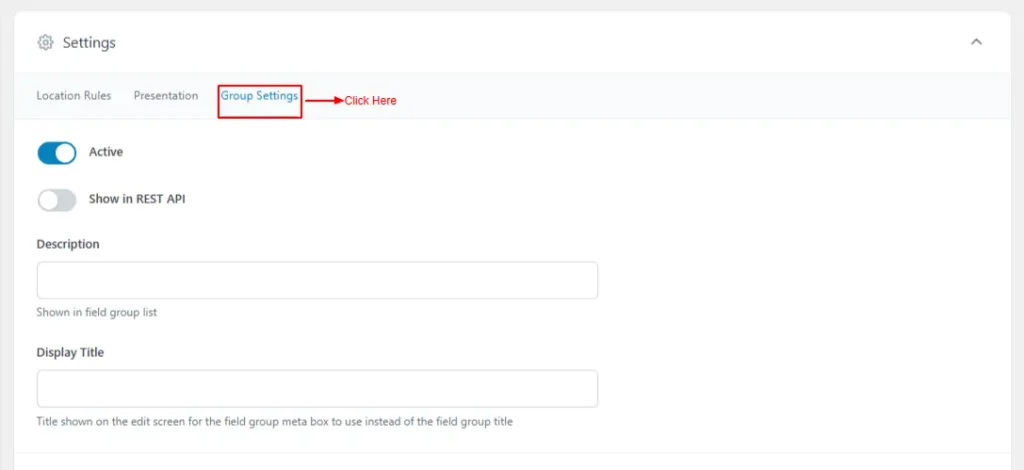
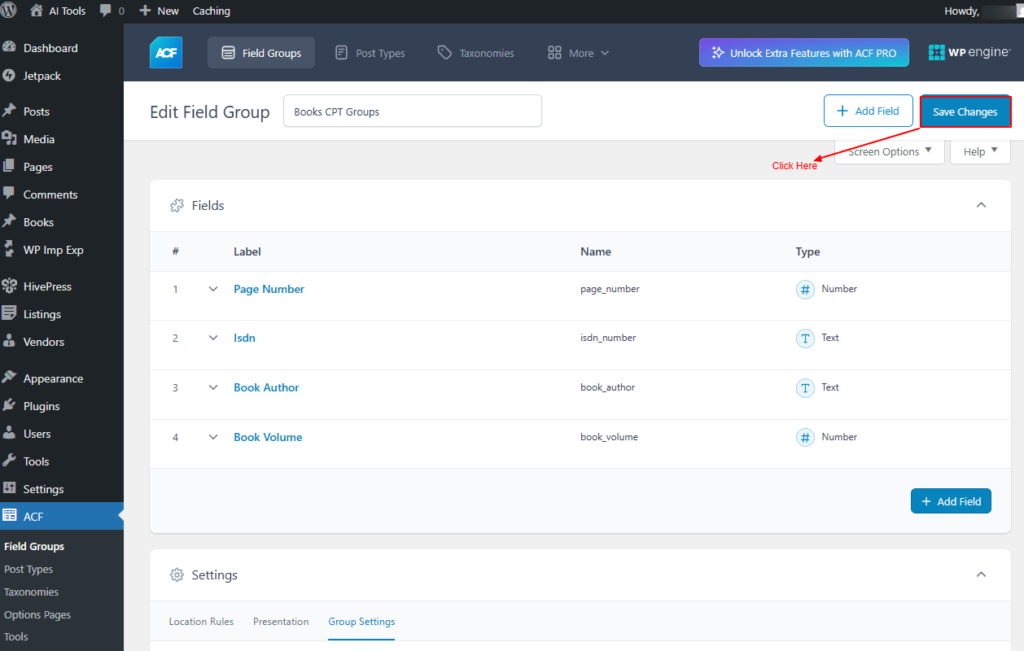
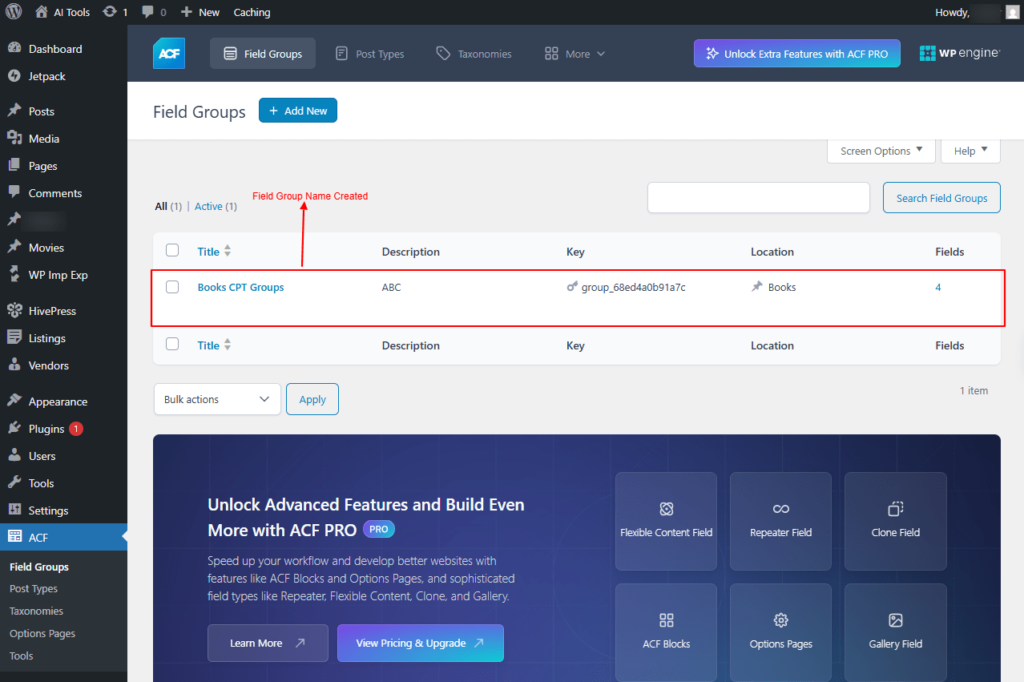
- Create a Field Group for your imported fields.
- Assign the Field Group to the correct Post Type.
- Save the field group.
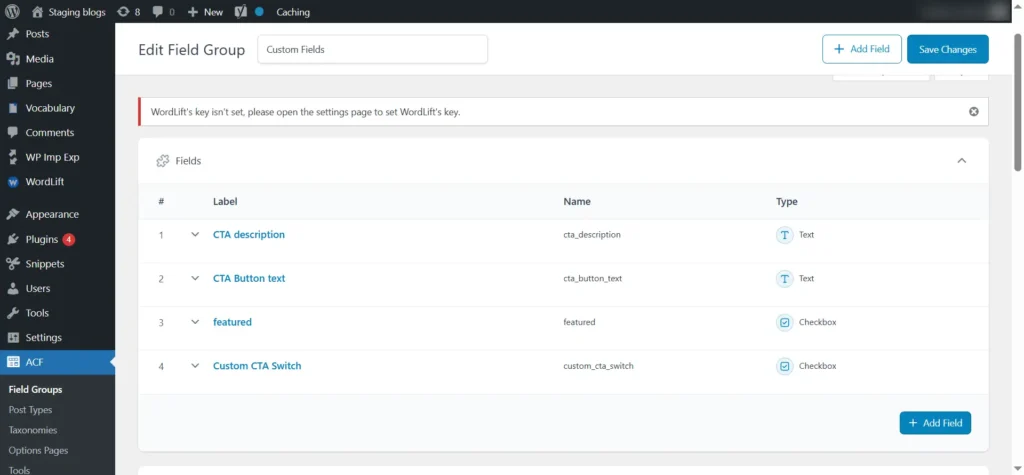
Screenshot 12: Field Groups
Step 9: Configure Taxonomies
Taxonomies organize your imported content in WordPress by grouping posts in categories, tags, or any custom taxonomies your theme or plugins use.
- Scroll down to the Taxonomies section.
- You’ll see options such as:
- Categories
- Tags
- Any custom taxonomy (e.g., “Topic,” “Industry,” “Location,” etc.) registered on your site.
- Enable the taxonomy you want to import (for example, Tags or Categories).
- In the mapping field, insert the corresponding columns from your CSV file. For example: {maintag[1]}, {tag2[1]}, {tag3[1]}
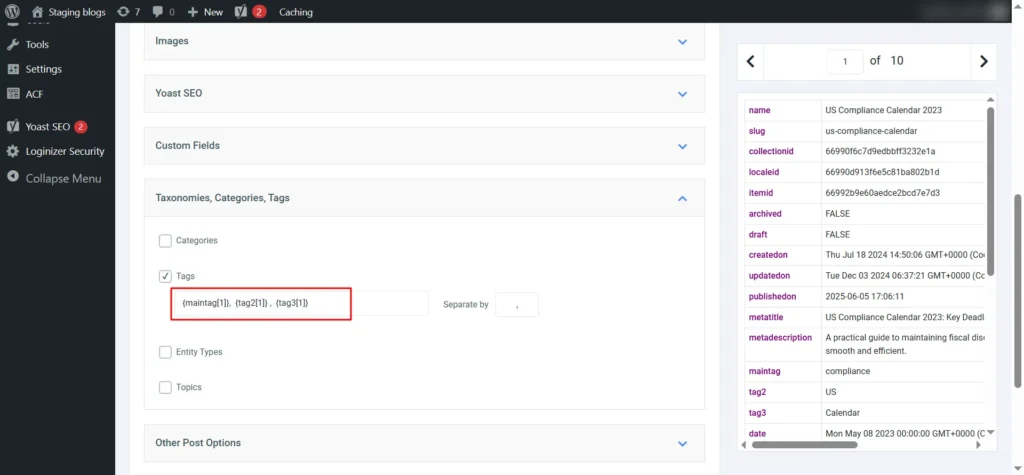
Screenshot 13: Taxonomies, Categories, Tags
Step 10: Configure Post Status, Date & Discussion Options
Under Other Post Options, set the following:
- Post Status -> Published
- Post Dates -> {publishedon[1]}
The date field must use a format supported by WordPress. Example: 2024-11-10 13:00:00
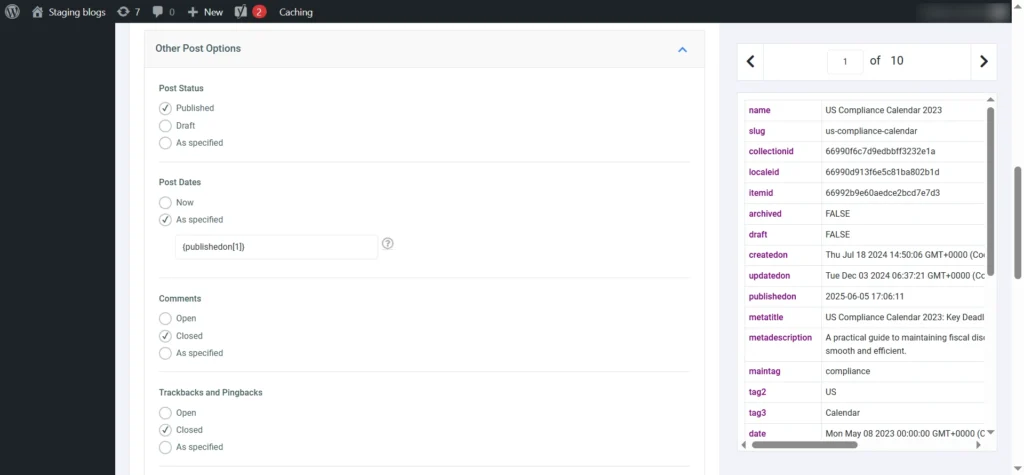
Screenshot 14: Post Status, Date & Discussion
Next, map Slug and Post Author.
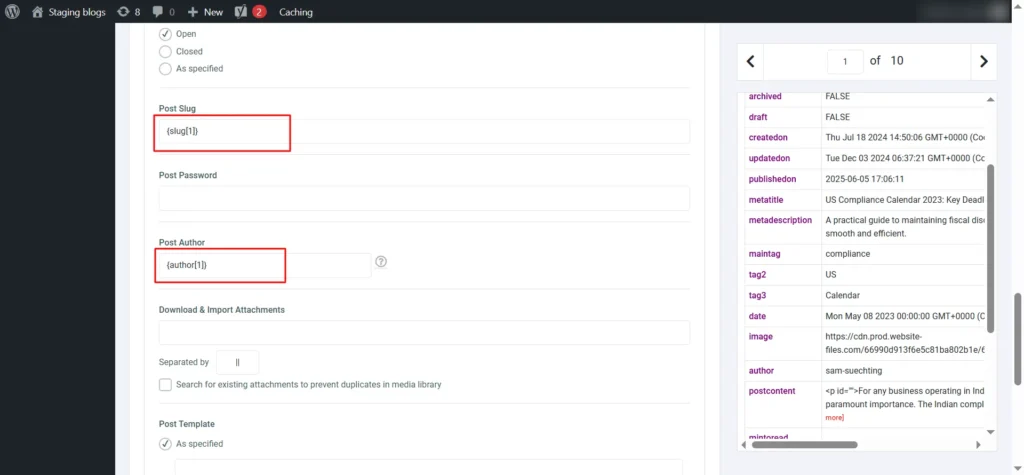
Screenshot 15: Slug & Author
- Match the author column from your CSV to the WordPress Author field. Eg: {author[1]}
- Before importing, make sure all the authors in your CSV are already users in WordPress.
- If an author doesn’t exist, create their user profile first.
- This way, every post you import will automatically show the right author.
Step 11: Handle Existing Items & Update Options
- In step 11, scroll to Search Existing Items.
- Choose how to detect duplicates on your site using one or more fields, for example, by slug, title, Post meta, or Post ID.
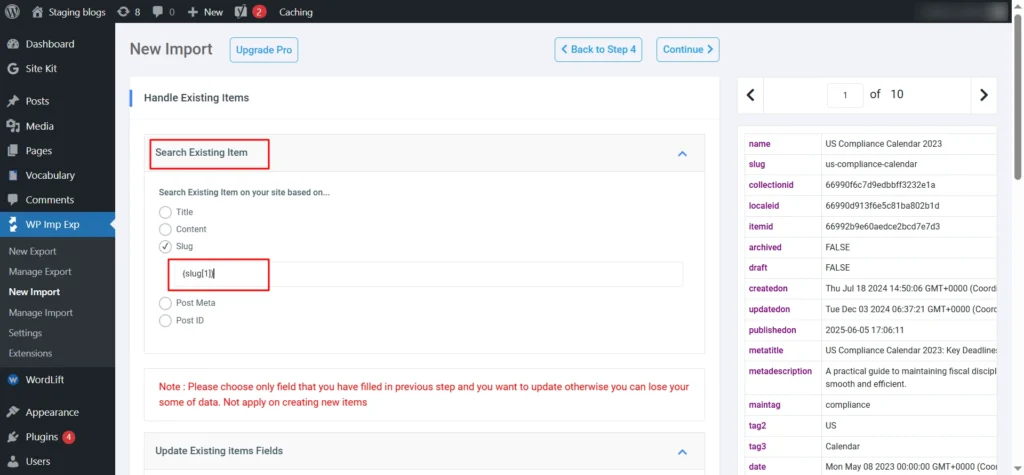
Screenshot 16: Search Existing Items
Update Existing Item Fields
- Choose which parts of your content to update, or choose 'update all' if you want.
- Post status
- Title
- Author
- Slug
- Content / Description
- Excerpt / Short Description
- Dates
- Menu order
- Parent post
- Post type
- Comment status
- Ping Status
- Post Password
- Attachments
- Images
- Custom Fields
- Taxonomies (incl. Categories and Tags)
- For your first import, you’ll need to select at least one field, as the plugin requires it.
- Check Title, Content, & Images as these are essential fields & safe to include.
- Leave other options like Dates, Slug, Custom Fields, or Taxonomies unchecked unless you need to update them.
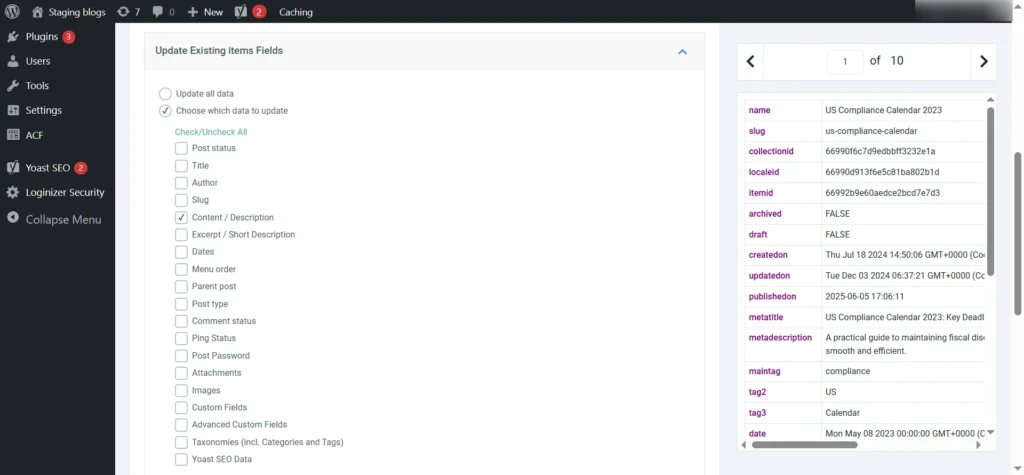
Screenshot 17: Update Existing Item Fields
Speed Optimization
Enable iterative processing and processing around 20 records per batch (adjust as per server capacity).
Set a friendly name for the migration process, such as Webflow to WordPress migration {datetime}
You will be shown the Import Summary with all the settings that were set in the previous steps. To complete the import, you once in the import in background or run it as it is.
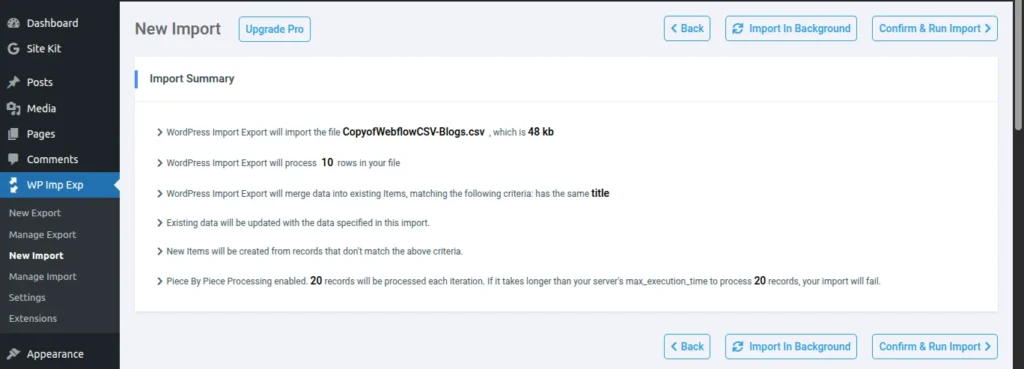
Screenshot 18: Import Summary
Click Continue to start the import.
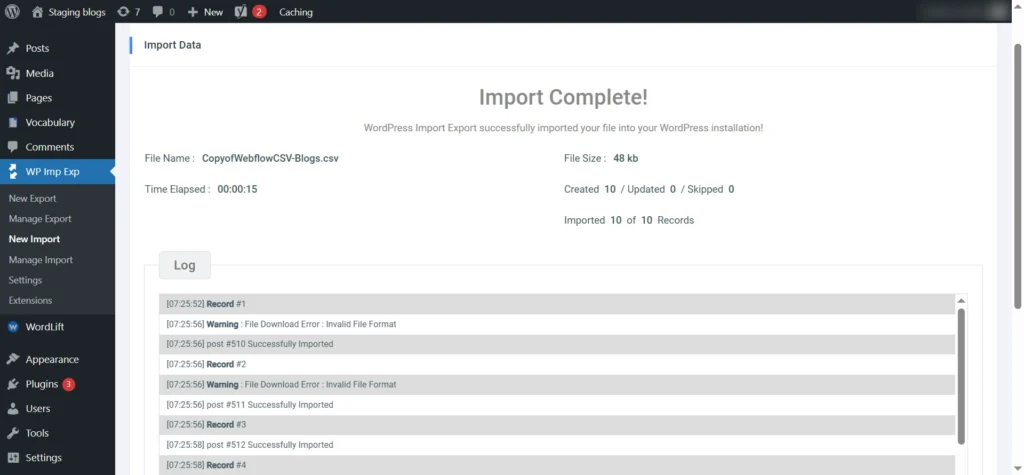
Screenshot 19: Import Complete for a Particular Collection
| Note: Repeat these steps (till Step 11) for all the CMS collections. Blogs in Webflow will be migrated to posts in WordPress. All other CMS collections should be migrated to custom post types. |
Rebuild Your Webflow Design in WordPress in Parallel
While your content migration is in progress, also start rebuilding your Webflow designs in WordPress. Doing both in parallel helps you save time, maintain design consistency, and ensure the new site is ready for launch as soon as your data migration is complete.
Decide how you want to build the site, like a custom theme, or customize a pre-built theme with a page builder like Elementor.
Choose a Theme
Pick a lightweight, flexible, mobile-friendly theme compatible with your plugins or builder. Avoid bloated themes.
Use the WordPress Customizer to:
- Upload your logo and brand assets
- Adjust colors, fonts, and layouts
- Configure headers, footers, and responsive settings
Replicating CMS Collections and Static Pages
First, note how many unique design pages there are. Then develop single and archive templates for all of them.
For blogs, use WordPress Posts, and for CMS collections, use Custom Post Types. Replicate them exactly as the original design.
Use Gutenberg or a page builder such as Elementor to replicate each webpage visually.
Similarly, for static pages, replicate them as WordPress pages.
When rebuilding your Webflow site in WordPress, the goal is to replicate every element visually, structurally, and functionally to achieve a seamless transition.
Here are a few things to consider
- Recreate the headers, footers, and navigation menus according to the Webflow layout.
- Recreate layout grids and sections to mirror Webflow’s structure.
- Match font families, font weights, and line heights
- Replicate color palettes and gradients for consistency across pages and components.
- Recreate spacing and alignment, and maintain the same padding, margins, and hierarchy used in Webflow.
- Rebuild animations and transitions using CSS, GSAP, or your WordPress page builder’s animation options.
- For category filters or sorting options, you can write custom WordPress queries or use plugins like FacetWP, SearchWP, or Relevanssi WordPress plugins.
- Recreate the forms using the Gravity Forms or Formidable Forms WordPress plugins.
Post-Migration Checklist: Ensuring a Smooth Transition
You're almost at the finish line! With your content migrated and your design in place, the last step is to test everything & make sure it runs perfectly.
Testing Site Functionality and Performance
Check every page & feature to make sure they’re working properly:
- Navigation & Links: Check all internal and external links to ensure nothing is broken.
- Forms: Submit every contact or lead form to confirm it is working.
- Interactive Elements: Test sliders, buttons, pop-ups, & other dynamic features.
- User Accounts: Verify login, registration, & profile functionality if applicable.
View your website on different browsers & devices to ensure responsiveness.
A fast website improves both UX and SEO:
- Test page load times (GTMetrix, PageSpeed Insights)
- Check layouts on mobile and tablet
- Confirm cross-browser compatibility (Chrome, Safari, Firefox, Edge)
- Review Core Web Vitals: LCP, FID, CLS
Make sure your content is transferred correctly:
- Review each page & post to fix any formatting issues
- Check that all images, videos, and downloadable files appear and function properly
- Test internal & external links to ensure nothing is broken
Point your Webflow domain to WordPress
The final step is to connect your domain to your WordPress site. This just means updating your DNS settings so visitors & search engines are directed to your new WordPress hosting instead of Webflow. Follow these steps:
- Get DNS Records from Your WordPress Host: Log into your hosting account & locate the required DNS settings, usually nameservers (e.g., ns1.yourhost.com, ns2.yourhost.com), A record (server IP), or a CNAME for the www version.
- Access Your Domain Registrar: Sign in to the platform where your domain is registered (e.g., GoDaddy, Namecheap, Google Domains, Cloudflare). This is where you manage DNS & domain settings.
- Remove Webflow DNS Records: Delete any DNS records or nameservers that are still pointing to Webflow. Then, add the new nameservers, or update the A record/CNAME—provided by your WordPress host to make sure your domain connects to the correct server.
- Save & Allow DNS Propagation: Save your updated DNS settings, then allow DNS propagation. DNS propagation may take anywhere from a few minutes to 24–48 hours, during which your site may temporarily show the old version.
- Test Your Domain & Site: Once DNS propagation is complete, open your domain in a browser & make sure your WordPress site loads properly. Check a few pages, links, forms, and media to confirm everything is working as it should.
Conclusion
Migrating from Webflow to WordPress opens the door to more growth, freedom, and endless customization. With the right tools and proper planning, you can smoothly migrate your content, continue your unique design, and expand your site with ease.
Ready to make the move? Start your migration today and see just how far WordPress can take your website.
Want us to handle your Webflow-to-WordPress migration? Schedule a free consultation with our migration experts.
Frequently Asked Questions
Can I transfer my Webflow template design to WordPress without losing quality?
No, you cannot directly transfer your Webflow design. The migration process requires you to recreate the design using a WordPress theme/template, a page builder, & custom HTML, JS, and CSS. This allows you to either replicate your old look or create a new one while ensuring high quality & responsiveness on your new platform.
How long does the Webflow to WordPress migration take?
The time it takes to migrate from Webflow to WordPress really depends on your site’s size, the amount of content, design complexity, & any custom features you want to include.
For a small to medium Webflow site with standard pages & blog posts, the migration usually takes around 5-6 weeks.
For bigger, more complex sites with custom layouts, e-commerce, or advanced features, the migration can take 10–12 weeks, including testing and SEO checks to ensure a smooth transition without any data loss.
What are the advantages of switching my website from Webflow to WordPress?
Switching your website from Webflow to WordPress comes with several key advantages:
1. WordPress lets you customize your site freely with an extensive range of themes, plugins, and integrations.
2. As your website grows, WordPress scales effortlessly to handle increased traffic.
3. WordPress can be more cost-effective, too, avoiding the rising, tiered fees that Webflow charges as your site expands.
4. It gives you advanced SEO plugins like Yoast or Rank Math, helping your site perform better in search engines.
5. Most importantly, with WordPress, you fully own your website and all its data, with no platform restrictions
Tutorials
9 min read
How to Set Up Custom Events Tracking in Google Analytics 4 in WordPress (without Google Tag Manager)
Introduction
Google Analytics 4 (GA4) gives marketers and developers the flexibility to go beyond standard tracking by creating custom events tailored to business goals.
In GA4, everything is an event, but there are four distinct types of events.
Automatically Collected Events
Automatically collected events are the interactions GA4 tracks right out of the box. The moment you set up GA4 on your site or app, it begins recording these events without any additional work from your side.
Here are some examples of automatically collected events:
- first_visit: when a user visits your site or app for the first time
- session_start: when a new session begins
- user_engagement: when users focus on your site or app for a measurable time
These built-in events help you understand basic user activity without adding code.
Enhanced Measurement Events
Enhanced measurement events are also collected automatically, but only if the enhanced measurement feature is enabled in your GA4 property settings.
With enhanced measurement turned on, GA4 can track additional interactions like
- Scroll tracking
- Outbound link clicks
- Video engagement (play, pause, progress)
- File downloads
- Site searches
These events provide deeper insights without needing custom implementation.
Recommended Events
Recommended events are actions that you manually implement on your website or app. Google provides predefined names and parameters for these events, which align with common needs such as:
- For All Businesses - login, sign_up, search, share, etc
- For Online Sales - add_to_cart, begin_checkout, add_payment_info, purchase, etc
- For Lead Generation - generate_lead, qualify_lead, working_lead, etc
- For Games - level_start, level_end, level_up, earn_virtual_currency, etc
Custom Events
Custom events are entirely defined by you. These are useful when the automatically collected, enhanced measurement, or recommended events do not fit your specific use case.
Since custom events are not part of GA4’s standard reports, you will need to create custom reports or use the Explorations feature to analyze them. It’s best to use custom events only when no other option meets your tracking requirements.
This blog discusses the process for setting up custom event tracking in Google Analytics 4 without Google Tag Manager (GTM)
Step-by-Step Guide to Configuring Custom Events in GA4
Configuring events in GA4 is easier than it seems. Below, we’ve outlined clear steps to help you set up, edit, and manage events, allowing you to track the interactions that matter most.
Method 1: Create Custom Events Without Code (using the GA4 interface only)
Best For:
- Page-based tracking scenarios where events are triggered by URL changes or existing GA4 events
- Quick setup requirements with minimal technical resources
- Small teams or organizations with limited development capacity
- Simple conversion tracking, like thank you page visits or specific URL patterns
- Marketing teams that need independence from development cycles
What You Can Track Without Code
Page-Based Events:
- Thank you for page visits
- Specific URL patterns (pricing pages, product pages)
- Form completion confirmation pages
- Download completion pages
Modifying Existing Events:
- Adding parameters to automatically collected events
- Creating variations of enhanced measurement events
- Combining multiple existing events into new custom events
What cannot be tracked:
- Custom user interactions like specific button clicks, hover events, or form field interactions
- Dynamic content interactions, such as AJAX form submissions or single-page application events
- Complex conditional logic where events should fire based on multiple criteria
- Real-time user behavior, like scroll depth percentage, time spent on specific sections
- Cross-domain tracking with custom parameters
- Events that occur before page load or during page transitions
Steps for custom events tracking without code
- Click the Admin gear icon in the bottom left.
- Under the Data column (or Data Display), choose Events.
- Click Create Event (top right)
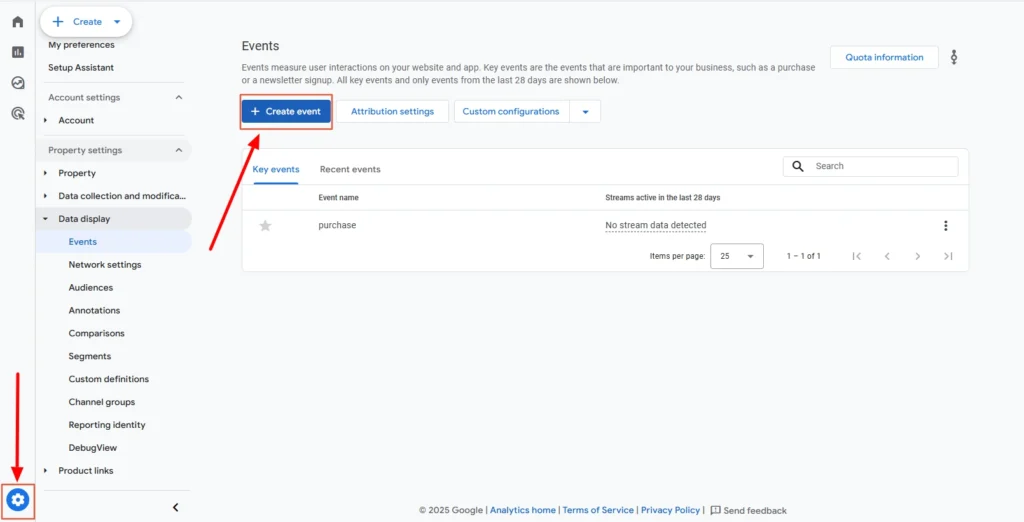
Screenshot 1: GA4 Events Create
- The Create an Event pop-up will appear. Click on the View More Options button under the Create without Code Section, as shown in the screenshot below.
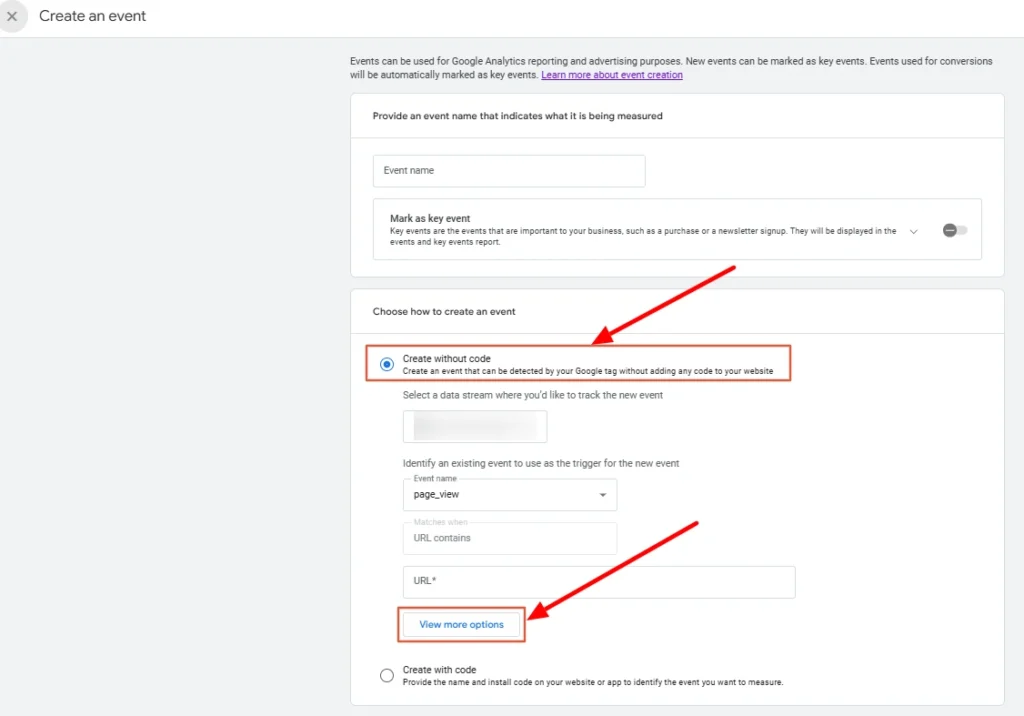
Screenshot 2: Create without Code Section
- Another Create Events panel will appear.
- Name your custom event by using lowercase letters, with underscores to separate words, for example, 'contact_us_button_click'.
- Note: We will debug this custom event later using debug tools
- GA4 limits names to 40 characters; avoid spaces or uppercase letters.
- Then, we need to move on to the Matching Conditions section, which specifies when the event should fire using conditions based on an existing event and its parameters. Typical setup includes:
- event_name equals page_view
- link_text equals Contact Us
- The following parameters are available for creating custom events :
| event_name | affiliation |
| content_id | content_type |
| coupon | creative_slot |
| currency | discount |
| group_id | index |
| item_brand | item_category |
| item_id | item_list_id |
| item_list_name | item_name |
| item_variant | items |
| language | location_id |
| method | page_location |
| page_referrer | page_title |
| payment_type | price |
| promotion_id | promotion_name |
| score | search_term |
| shipping | shipping_tier |
| success | tax |
| transaction_id | value |
| virtual_currency_name |
- When creating or editing an event in GA4, tick the checkbox of Copy parameters from the source event to pull in all details like URL, button text, and page info from the original event. This ensures your custom event is complete for reporting purposes.
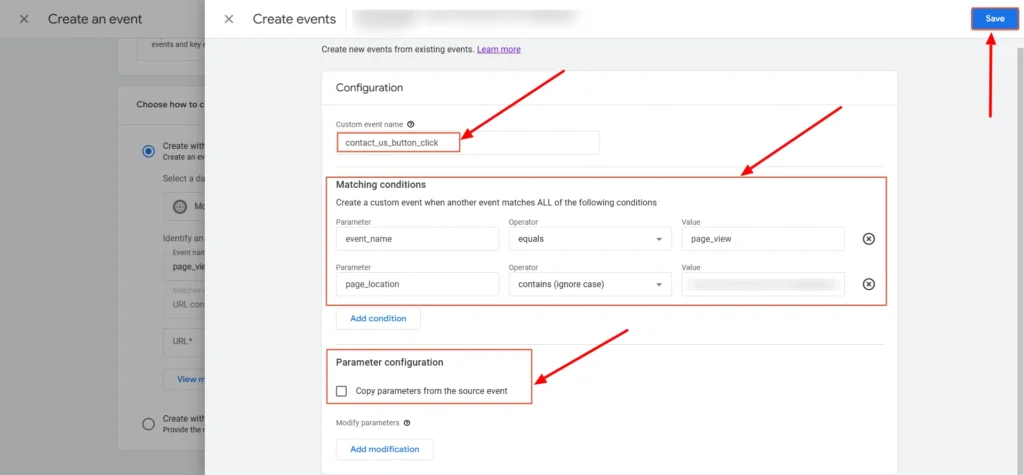
Screenshot 3: Custom Event Config
- Once you hit Save>Create, GA4 starts tracking the custom event in the background.
- Your event will now start triggering when the matching conditions are met (no code needed).
- It may take a few hours for the data to appear in reports and up to 24–48 hours to show in standard reporting.
Method 2: Create Custom Events With Code (Manual Implementation)
Creating custom events with code is most suitable for the following situations:
- Complex user interaction tracking requiring precise control over when events fire
- E-commerce implementations with detailed product tracking and custom parameters
- Single-page applications or dynamic websites where standard page view tracking isn't sufficient
- Advanced debugging requirements where you need detailed control over event timing and parameters
- High-accuracy tracking scenarios where you cannot afford to miss events
Steps for custom events tracking using code
Let’s track a button click (such as a "Contact Us" submit button) in GA4 using a custom event.
Create the Event in the GA4 Interface
- Click the Admin gear icon in the bottom left.
- Under the Data column (or Data Display), choose Events.
- Click Create Event (top right)
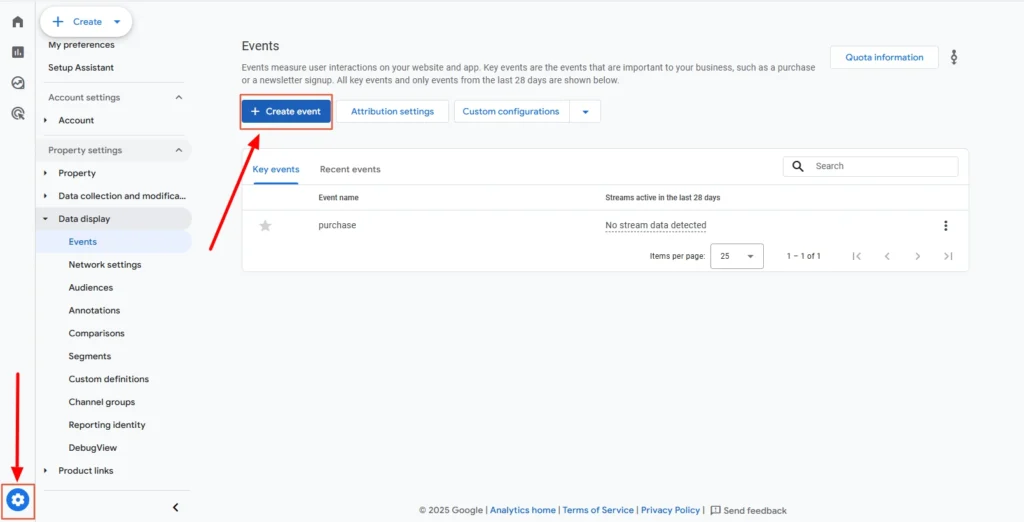
Screenshot 4: Create Event
- The Create an Event panel will appear.
- In the Event name field, enter the name, e.g., contact_us_form_submit_using_code.
- Note: According to the official documentation, marking an event as a key event is optional when creating custom events. However, when creating an event using the code, some reason “Create event” button click is not working unless the “Mark as key event” toggle is turned on. This appears to be a bug at the time of writing this blog.
- In contrast, when creating a custom event without code, you can create the event even when the “Mark as key event” toggle is off.
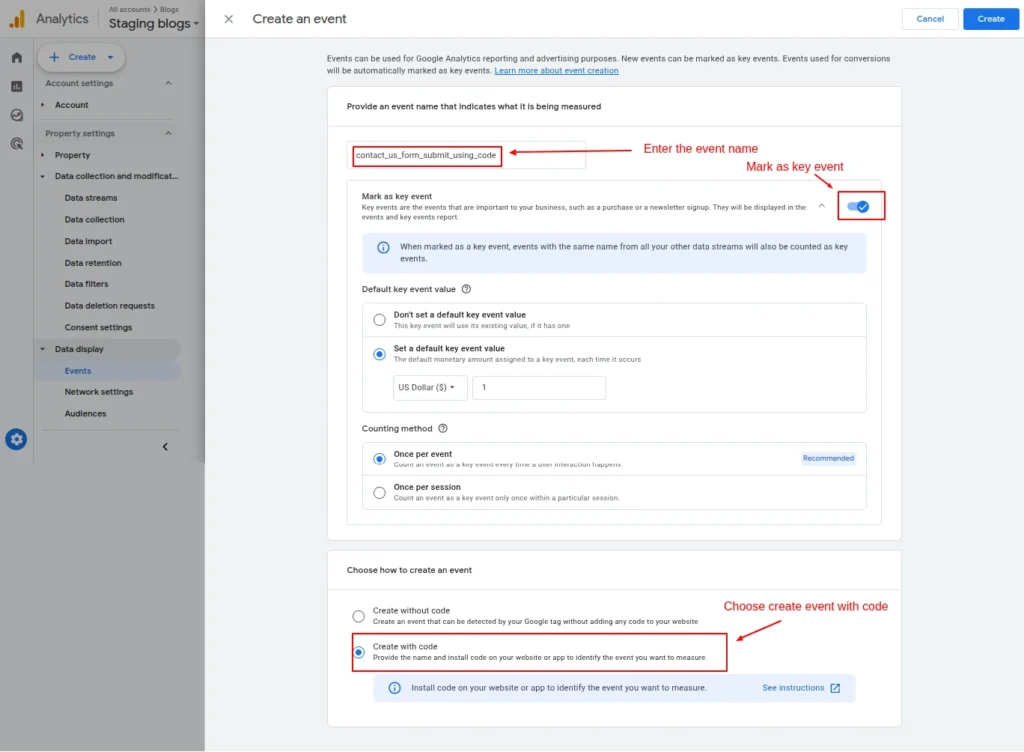
Screenshot 5: Create an event with custom code
- Then, select Create with code. This means the event would be fired from your website and doesn’t need extra conditions here.
- Finally, click on Create.
Add the Code to Your Website
- You’ll be adding the custom events code to the functions.php file of your WordPress child theme. Using a child theme is recommended so your changes aren't lost when updating the parent theme.
- Paste the following code into the functions.php file of your active child theme:
| <?php function my_custom_ga4_contactus_submit_event_script() { ?> <script> document.addEventListener('DOMContentLoaded', function() { var form = document.querySelector('#contact-us form'); // Adjust selector to your form container if (form) { form.addEventListener('submit', function(event) { if (typeof gtag === 'function') { gtag('event', 'contact_us_form_submit_using_code', { event_category: 'form', event_label: 'Contact Us Form', value: 1 }); } }); } }); </script> <?php } add_action('wp_footer', 'my_custom_ga4_contactus_submit_event_script'); |
- The above code adds custom JavaScript to your WordPress child theme that listens for a form submission event and then fires a GA4 custom event (e.g., contact_us_form_submit_using_code). This approach ensures the event is recorded only after the form is successfully submitted.
- Note: The code provided is a sample and may need adjustments to match your specific form’s HTML structure or WordPress form implementation.
That’s it; your new custom event is now ready to be tracked. Now, let’s see methods to debug custom events.
Testing and Debugging Custom Events
The first step is to enable debug_mode so that events appear in GA4’s DebugView for testing.
To do that, there are two options
- Google Analytics Debugger (Chrome Extension)
- Manually setting debug_mode to true in the code
Google Analytics Debugger (Chrome Extension)
- Go to the Google Analytics Debugger extension page on the Chrome Web Store.
- Click "Add to Chrome."
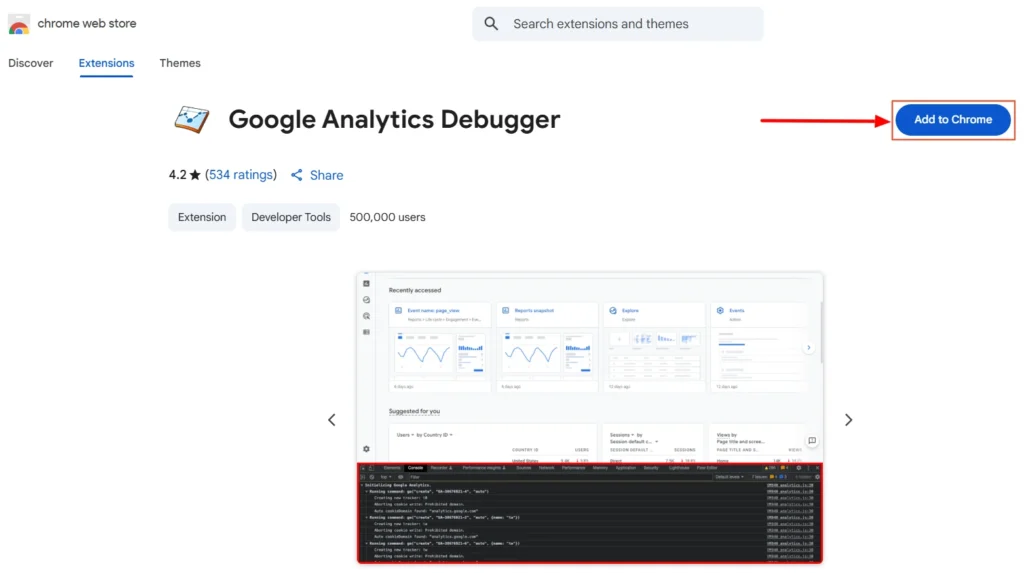
Screenshot 6: GA Debugger Extension
- Click "Add Extension" in the pop-up to confirm.
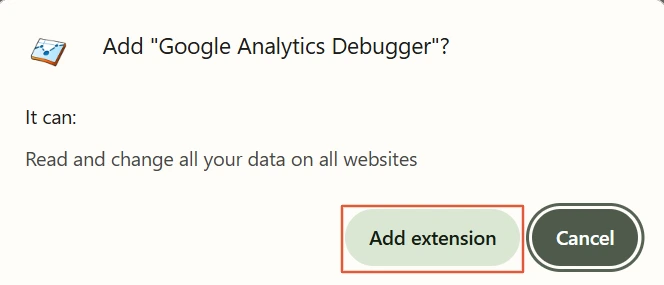
Screenshot 7: Add Extension
- After installing, click the extension icon (puzzle piece) in the Chrome toolbar.
- Find “Google Analytics Debugger” and click the pin icon to keep it visible.
- Click the extension to enable it; you should see an “ON” icon when the extension is on.

- Now refresh your website page where the event code is triggered (e.g., where your contact_us_button_click_code runs) and click.
- Right-click anywhere on the webpage and select Inspect, or press Ctrl + Shift + I (Windows) or Cmd + Option + I (Mac).
- Go to the Console tab.
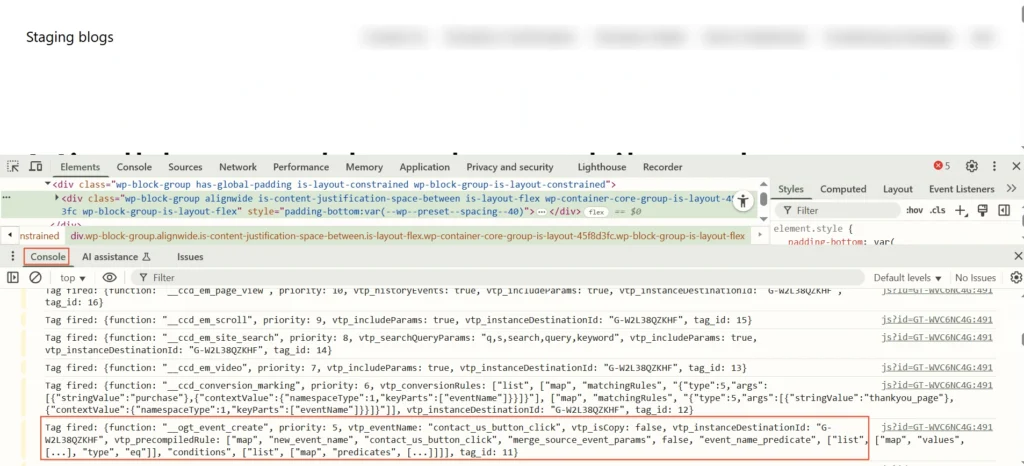
Screenshot 8: GTM Tag Fired Console
- You’ll now see detailed logs from GA4, including:
- Page view events
- Custom events like contact_us_button_click_wc
- Configuration info
- Any event parameters being passed
Manually setting debug_mode to true
The following code will make the custom events appear in DebugView immediately, allowing you to test and verify your tracking in real time.
| <script> gtag('event', 'contact_us_form_submit_using_code', { // Add other parameters that need to be passed debug_mode: true // activate the debug mode }); </script> |
DebugView in GA4
- Once the debug mode is enabled using the Chrome extension or the manual code, go to Google Analytics GA4 > Admin > DebugView (under the Property column).
- Act on your site (e.g., click the Contact Us button).
- In DebugView, you should see the custom events appear on the timeline.
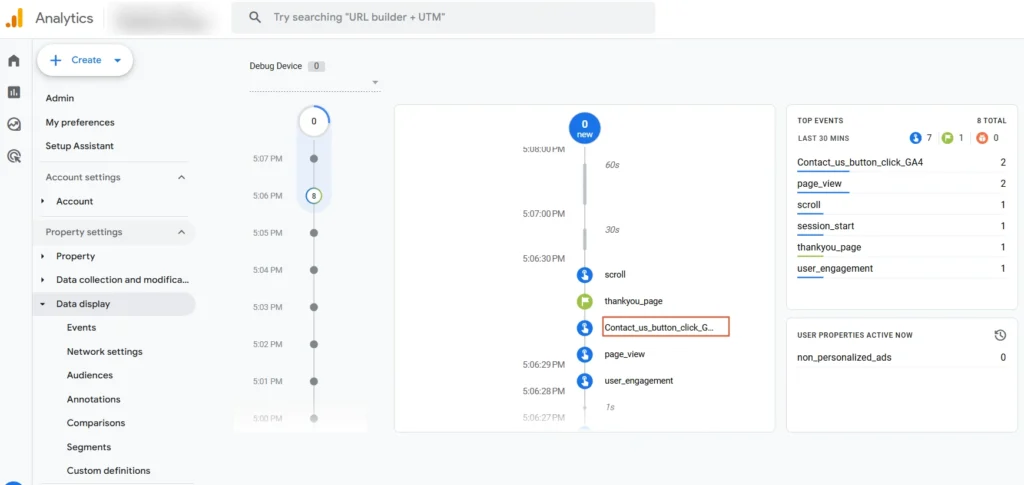
Screenshot 9: GA4 DebugView Event
Conclusion
With GA4's custom events, you can keep track of the interactions that are most important to your business, whether it’s lead form submissions, key button clicks, or advanced e-commerce actions.
The option to create custom events in GA4 without using code is quick and easy to use for simple needs. But for dynamic websites, single-page applications, or scenarios where accuracy is critical, implementing custom events via code gives you the precision and control you need.
That’s it for this blog; now you know how to create custom events in GA4, when to use the without code option, and when to rely on code for more accurate tracking.

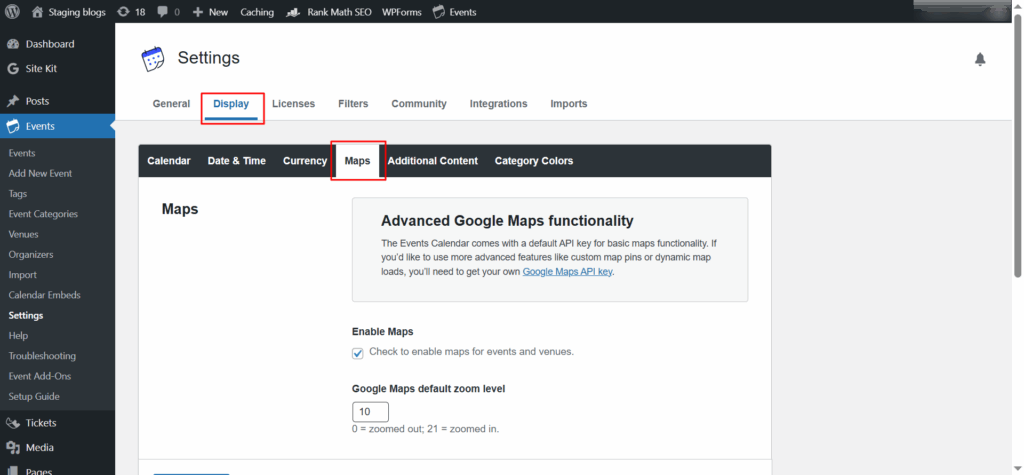
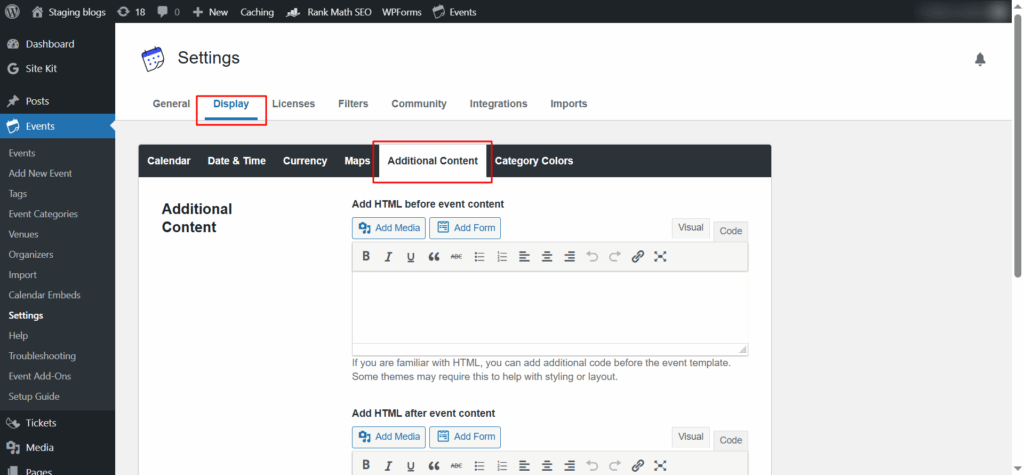
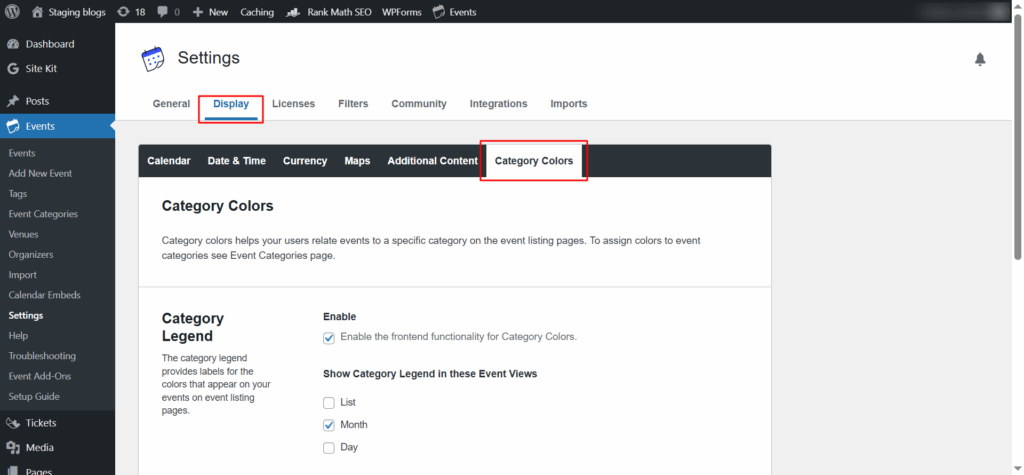
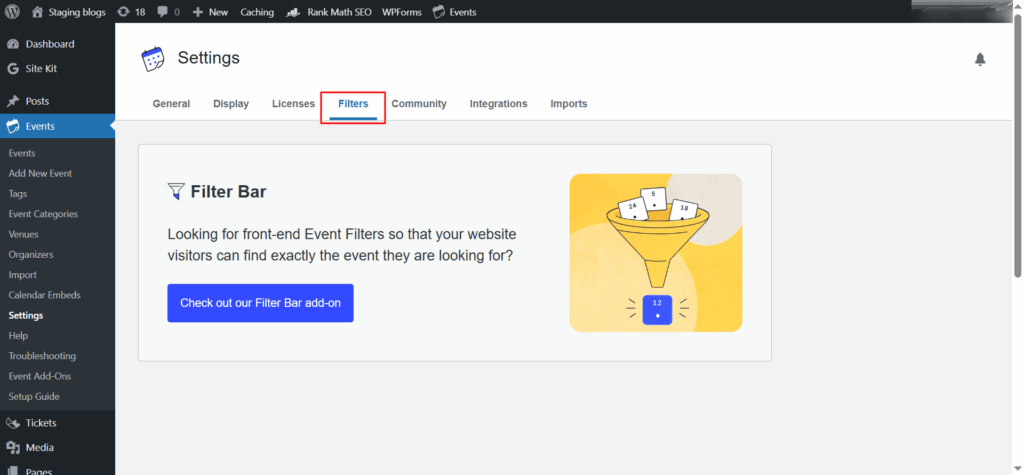
General
13 min read
The Ultimate Enterprise WordPress SEO Checklist 2026 (Part 3)
Introduction
In the Part 1 and Part 2 of this series, we laid a solid SEO foundation and implemented advanced on-site strategies to make your enterprise WordPress site more visible, engaging, and technically sound.
Now it’s time to take your SEO efforts beyond your website. In this final part, we’ll cover the
- Adding structured data (schema markup) to enhance search visibility and click-through rates
- Continuously optimizing performance to keep your site fast and secure
- Building authority with a sustainable off-page SEO strategy and high-quality backlinks
- Implementing international and multilingual SEO to reach a global audience
1. Add Structured Data (Schema Markup)
Structured data (also known as schema markup) helps search engines like Google understand what your page is really about. It enhances listings with rich snippets like FAQs, reviews, and product prices and often improves click-through rates by 20–30%.
Types of Structured Data to Use
- Article: Use for blogs or news. Shows the author and publication date.
- Product: Ideal for eCommerce—adds price, stock, and rating.
- FAQ: For pages with question-answer formats.
- Breadcrumb: Helps show site hierarchy in search.
- Review: Adds customer ratings or testimonials.
- Schema.org offers many more types of structured data suited to different content types. You can explore the full list here: https://schema.org.
Tools for Implementation & Testing
Schema Markup Validator
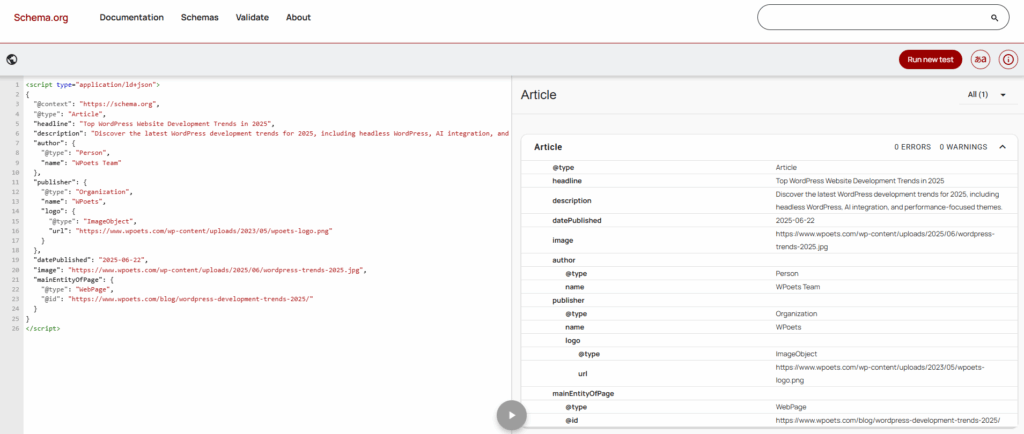
Screenshot: Schema Markup Validator
This tool helps you validate your structured data to ensure it’s formatted correctly in JSON-LD or Microdata formats. It detects missing or wrongly applied properties.
Rich Results Test
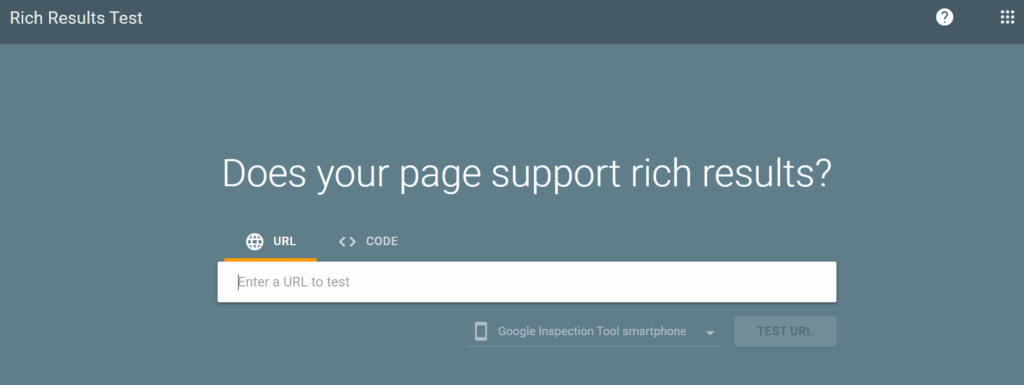
Screenshot: Rich Results Test
This is Google’s official tool that checks if your structured data can generate rich snippets in search results.
2. Continuous Performance Optimization & Maintenance
A fast and well-maintained WordPress site keeps visitors engaged and helps your content get discovered more easily. Let’s look at some key points that we need to keep in mind to keep your site running at its best.
Host Website on a High-Speed, Scalable Server
Choose a hosting provider known for speed and reliability. These services automatically scale your resources during traffic surges, which means your site remains fast even during high-demand periods like major campaigns or product launches.
Use a CDN to Deliver Assets Worldwide
A Content Delivery Network (CDN) stores copies of your site’s files across global servers. When a visitor loads your page, they receive content from the server closest to them.
Ongoing Speed Optimizations to pass core web vitals
- Optimize Site Load Time: To keep your website fast and user-friendly, regularly monitor Core Web Vitals—Google’s key performance metrics:
- LCP (Largest Contentful Paint): Measures how fast the main content loads.
- CLS (Cumulative Layout Shift): Tracks layout stability while loading.
- INP (Interaction to Next Paint): Replaces FID in 2024 to measure how quickly your site responds to clicks or taps.
- Improving these helps with both SEO and user experience. Common fixes include compressing images, reducing unused code, and limiting third-party scripts.
- Use WordPress caching plugins: Caching plugins like FlyingPress, W3 Total Cache, or WP Rocket help by storing a static version of webpages. Because the server doesn’t generate the page afresh on every visit, load times can be dramatically reduced, sometimes by more than 50%.
- Minimize CSS and JS: Reducing the size of your CSS and JavaScript files helps your website load faster and perform better. This is done by removing unnecessary characters like spaces, comments, and formatting without changing how the code works.
- Key benefits of minifying include
- Speeds up page load time
- Improves Core Web Vitals scores
- Lowers data usage for users
- Boosts user experience and engagement
- Key benefits of minifying include
- Optimize Images (use WebP, compress with TinyPNG): Switching to formats like WebP or AVIF can reduce image files by around 25–40 percent. Tools such as TinyPNG can further compress images without noticeable quality loss. Properly sized images are critical for fast, responsive pages.
- Enable Gzip and HTTP/2 for Faster Transfers: Gzip compression reduces the size of text-based files, while HTTP/2 enables servers to deliver multiple files simultaneously. Together, these technologies speed up file delivery and improve overall performance.
- Lazy Load All Non-Essential Elements: Lazy loading defers the loading of images, videos, and iframes until they become necessary, speeding up initial page rendering. Modern browsers support loading="lazy" natively. This approach significantly improves perceived performance without compromising experience.
- Keep All Plugins, Themes & WordPress Core Up-to-Date: Outdated or unsupported software can slow your site and increase vulnerability to hacking. Regular updates ensure smooth performance, stronger security, and compatibility with optimization tools and technologies.
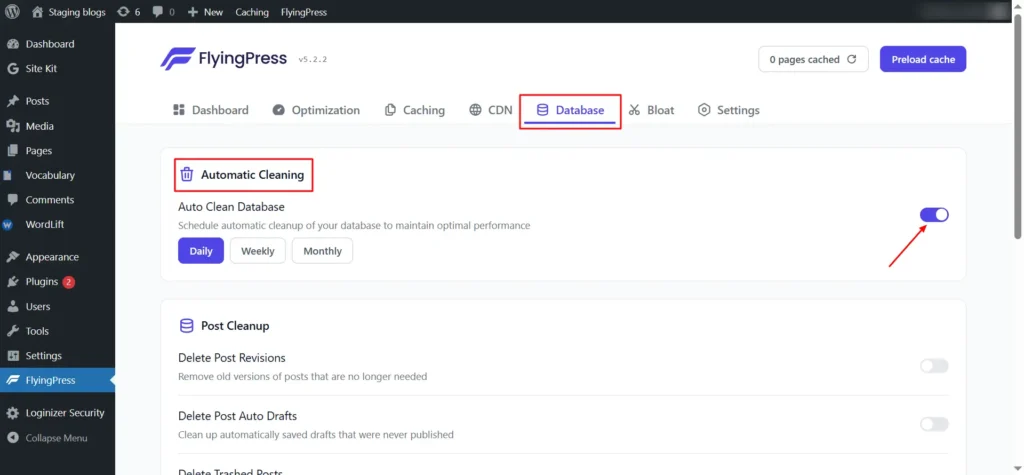
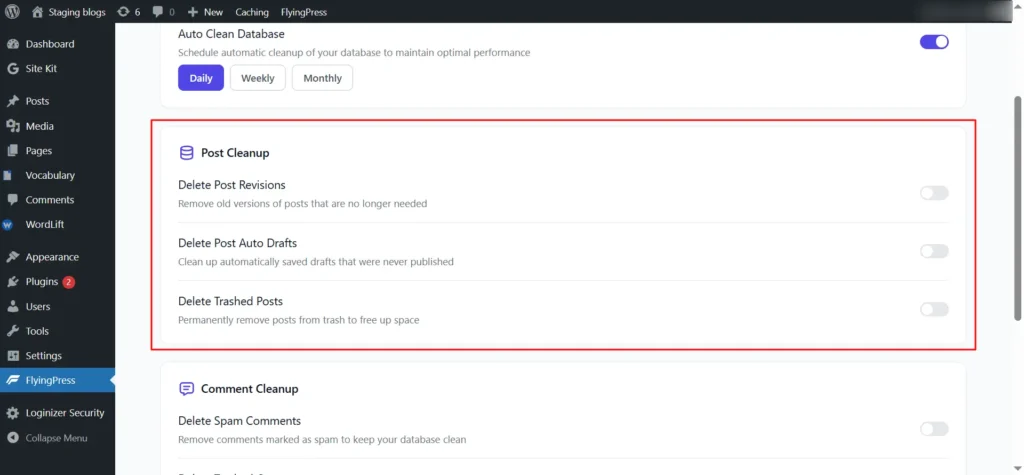
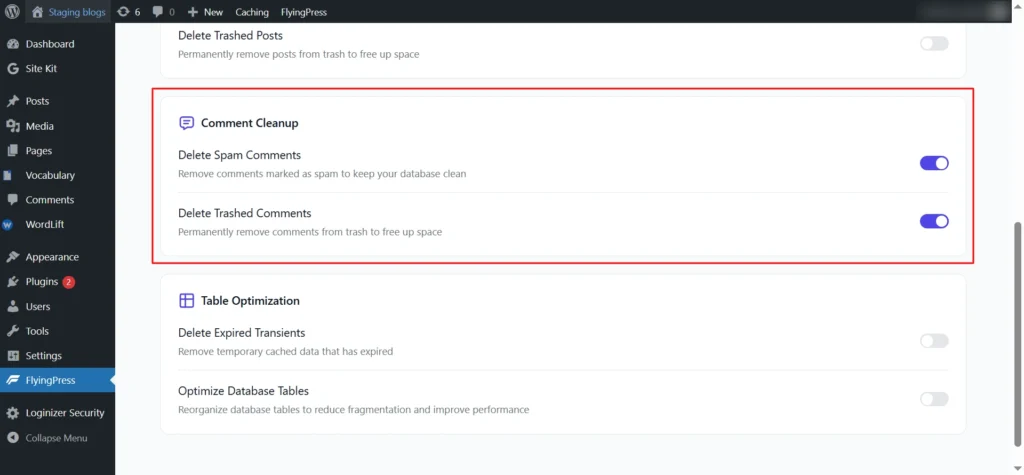
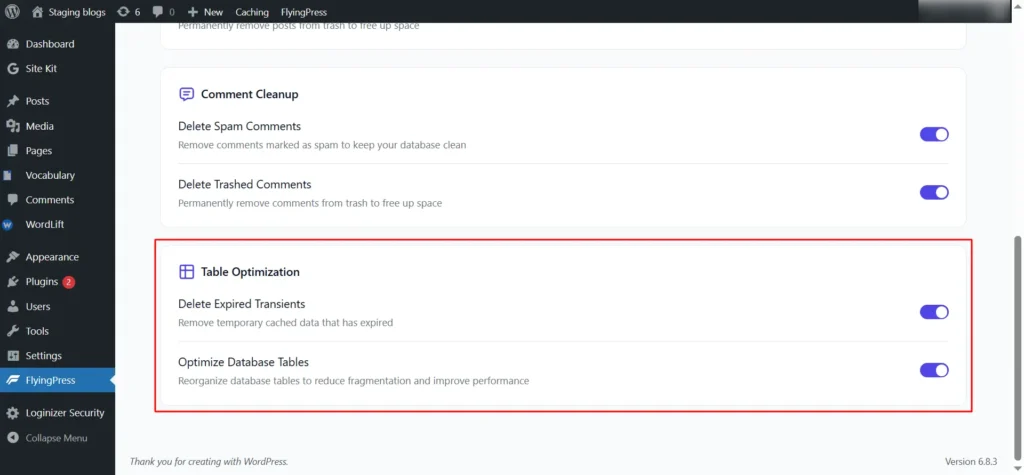
- Optimize WordPress Database Regularly: Over time, databases accumulate clutter, like post revisions, spam comments, and transients. Plugins like WP-Optimize clean out this digital debris, improving database speed and overall site performance.
Tools to Monitor and Improve Page Speed & Core Web Vitals
- PageSpeed Insights: Real-user performance data
- Google Search Console: Tracks site-wide Core Web Vitals
- Chrome Lighthouse & Web Vitals Extension: Built directly into the Chrome browser and can be accessed through DevTools (the Inspect panel). Which evaluates performance accessibility, SEO, etc.
- GTmetrix: Speed and visual performance audits
3. Building Authority Beyond Your Website
Off-page SEO focuses on building your site’s reputation and authority beyond its content, primarily through backlinks.
Strategic off-page SEO is essential for standing out in search and earning trust from both users and search engines.
Performing Competitive Analysis to Spot Link Opportunities
Before you build links, you need to know where to get them. This starts with analyzing your competitors' backlink profiles to spot opportunities you might be missing.
Use tools like
- Ahrefs
- SEMrush
- Ubersuggest
These tools allow you to
- Discover niche-specific websites that link to your competitors (ideal for guest posting or partnerships)
- Uncover broken backlinks for which you can offer better content to replace those dead links.
- Learn what content formats (e.g., blogs, infographics, guides) earn the most links in your industry.
Develop a Link Strategy That Matches Your Goals
Not all links serve the same purpose. Whether you want to boost product visibility, improve domain authority, or increase overall rankings, your link-building strategy should align with specific business objectives.
Ask yourself:
- Do I want to rank a particular page?
- Am I trying to build authority in a niche?
- Is my goal to improve referral traffic or brand awareness?
Choose your approach wisely.
Build Foundational Backlinks (Directories, Citations)
Before chasing high-authority publications, lock down the basic opportunities. Foundational backlinks are the “low-hanging fruit” that establish credibility.
These help Google confirm your business is legitimate and connected to a real location or niche.
Try getting a backlink from
- Business Directories: Register your site on reputable business directories such as:
- Google Business Profile
- Yelp
- Clutch
- Crunchbase
These platforms help verify your business identity, increase online visibility, and even generate customer leads.
- Local Citations
If your business serves specific cities or regions, submit your details to local business citation sites and chamber of commerce directories. Consistent name, address, and phone number (NAP) across listings helps improve local SEO. Examples: - Industry-Specific Listings
Choose directories relevant to your niche:- For design or marketing agencies: DesignRush
- For medical professionals: Healthgrades or Practo
These listings not only give you valuable backlinks but also help potential customers find you in targeted searches.
Launch Guest Blogging Campaigns on Niche Sites
Guest blogging remains one of the safest and most sustainable link-building methods in 2025, when done right. These:
- Target relevant niche blogs with engaged audiences
- Personalize your pitch, showing familiarity with their tone and past content
- Link back naturally to useful content on your site (not just your homepage)
Create linkable assets that naturally attract links
You can’t earn good links without creating great content. Linkable assets are content pieces designed to attract natural backlinks due to their quality, originality, or usefulness.
Examples include:
- Data-driven industry reports
- Ultimate guides
- Infographics or interactive visuals
- Templates, checklists, and calculators
According to Backlinko's 2024 Content Study, long-form, data-backed content gets 77.2% more links on average.
Build Campaigns Around Existing High-Value Content
Instead of starting from scratch, focus on content that's already performing well. These pages have proven value, so giving them an extra push with backlinks can lead to even better rankings and traffic.
Use tools like Google Search Console or GA4 to:
- Identify high-performing pages; look for those with strong traffic or impressions.
- Check their keyword rankings. Understand which terms they’re showing up for in search results.
- Spot link gaps; prioritize pages that rank well but have few backlinks. These are often easier to boost with strategic outreach.
Example: If a blog post on your site ranks on page 2 for a valuable keyword, building a few strong backlinks to it might push it to page 1.
Create Infographics to earn backlinks.
Infographics are still an underrated way to build backlinks, especially when paired with manual outreach.
How to run a campaign:
- Design a stunning, data-rich infographic
- Reach out to relevant blogs in your niche.
- Offer to write a short post to go with the infographic on their site.
- Get a backlink in return.
Tools like Canva can help you create professional visuals in minutes.
Turn Brand Mentions into Backlinks
Sometimes, websites mention your brand but don’t link back. Reclaim these mentions with a friendly outreach email.
Use tools like:
Politely ask for a backlink where your brand name is mentioned. Most site owners are happy to oblige if your brand is already included.
Leverage Digital PR to Earn High-Quality Backlinks and Brand Mentions
Digital PR blends traditional media outreach with SEO strategy. Instead of just asking for links, you're offering valuable insights, research, or stories that journalists genuinely want to feature.
By contributing expert commentary or unique data, you can earn links from major publications like Forbes, TechCrunch, or Business Insider—all of which carry high authority in Google’s eyes.
Useful platforms to connect with journalists:
- HARO (Help a Reporter Out) – Respond to real journalist queries.
- Quoted – Share expert quotes with reporters on deadline.
- Terkel – Contribute answers that get featured in articles.
Develop a Free Tool to Attract Natural Backlinks
One of the most effective ways to earn backlinks passively is by offering a free, helpful tool that others in your industry want to share. Tools that simplify tasks, solve a common problem, or help users get quick results are highly linkable.
People naturally link to resources that save time or add value, especially when they’re easy to use and reliable.
Examples of Free Tools That Earn Backlinks:
- Mortgage calculator – Popular on finance and real estate blogs.
- ROI calculator – Ideal for SaaS and marketing websites.
- Keyword clustering tool – Valuable for SEO professionals and digital marketers.
To make the most of your tool:
- Keep it user-friendly and mobile-friendly.
- Add a lead capture form or email opt-in to grow your mailing list while offering value.
- Promote it through blog posts, guest posts, and social media for initial visibility.
Tracking and Managing Backlinks to Protect Your Site
Getting backlinks is important, but keeping your backlink profile clean is just as crucial. Over time, websites naturally collect links from all kinds of sources, and not all of them are good for your site.
Some may even hurt your SEO if they come from spammy or untrustworthy domains.
How to Track and Maintain Link Health:
- Monitor Backlink Profile Health Regularly
- Run regular audits using tools like Ahrefs, Ubersuggest, or SEMrush. These show which sites are linking to you and flag suspicious domains.
- Audit Backlinks for Spam or Toxic Domains
- Look out for sudden spikes in backlinks, especially if many come from unrelated or low-quality websites. This could indicate negative SEO or bot spam.
- Google’s Disavow Tool is used to remove harmful links:
- Use Google’s Disavow Tool (with caution) to tell Google to ignore harmful links pointing to your site. This should only be done if you’re sure the links are affecting your rankings and you can’t get them removed manually.
4. Optimize for a Global Reach using International and Multilingual SEO
If you're expanding your website to target users in different countries or languages, it's essential to optimize for international and multilingual SEO.
This helps search engines serve the right version of your content to the right audience and improves visibility across different regions.
Here’s how to approach it step by step:
1. Choose Target Locations Through Data and Research: Before making your website multilingual, use tools like Google Analytics and Google Search Console to find out:
- Which countries drive the most traffic to your site?
- What languages do your visitors speak?
- Which pages are popular in which regions?
This data will help you prioritize the right language and country combinations for targeting.
- Define Target Countries and Languages: After gathering data, decide whether your goal is to reach
- Different countries (e.g., Canada vs. India)
- Different languages (e.g., Spanish in Mexico vs. Spain)
This step helps shape everything from keyword selection to content formatting and URL structures.
- Choose a URL Structure for International Targeting: Your website should differentiate versions for each language or country. Google recommends one of the following structures:
- Country Code Top-Level Domains (ccTLDs): Ideal for strong local targeting, but harder to scale. E.g.: example.fr, example.de
- Subdomains: Useful for separating different language versions, but may require more effort to build SEO equity. E.g: fr.example.com or en.example.com
- Subdirectories: Easy to manage and maintain authority from one domain. E.g: example.com/fr/ or example.com/en-us/
- Localized slugs: Great for creating keyword-rich, location-specific content. E.g: /mejores-hoteles-en-madrid/ or /best-restaurants-in-italy/.
- Conduct Multilingual Keyword Research: Translation is not enough. People in different countries search differently, even for the same topic. Use localized keyword tools like:
- SEMrush’s Keyword Magic Tool
- Ahrefs Keywords Explorer
- Google Keyword Planner (location/language targeting)
Target queries that people use in their language and location.
- Implement Hreflang Tags Correctly: Add hreflang attributes to your pages to tell Google which language and region each version of a page is meant for. This avoids duplicate content issues and ensures the correct version is served to users.
Example: <link rel="alternate" hreflang="fr" href="https://example.com/fr/" />
- Translate Content Properly: There are three key strategies when translating content:
- Translation: Word-for-word conversion (okay for technical content)
- Transliteration: Adjusts how words sound or are written (e.g., names)
- Transcreation: Creative adaptation of content, tone, and context to suit local culture (best for marketing content)
Avoid machine translation without review, as poor-quality translation hurts SEO and user trust.
- Use Canonical Tags to Prevent Duplicate Content: If different language versions of a page are similar, add canonical tags to indicate the primary version. This prevents search engines from indexing multiple versions of nearly identical content.
Example: <link rel="canonical" href="https://example.com/en/product-page" />
- Build Local Backlinks: Backlinks from websites based in your target country strengthen your site’s visibility in that region. Look for:
- Local Directories
- Country-specific forums or media
- Partnerships with local bloggers
Example: If targeting Spain, backlinks from .es domains or Spanish-language news sites boost credibility with Google’s local algorithms.
Conclusion
Enterprise WordPress SEO isn’t a one-time task; it’s an ongoing process. It starts with getting your site technically sound, well-structured, and filled with useful content. But once your site goes live, the real work begins.
You’ll need to regularly optimize pages, build quality backlinks, and focus on giving users the best experience possible. With constant changes in search algorithms and user behavior, staying visible means tracking results, testing new approaches, and adjusting your strategy as needed.
With all three parts of this checklist, you now have a comprehensive roadmap to scale your SEO efforts and keep your enterprise WordPress site ahead of the curve in 2026 and beyond.
General
11 min read
The Ultimate Enterprise WordPress SEO Checklist 2026 (Part 2)
Introduction
In Part 1 of this blog series, we laid the groundwork for enterprise WordPress SEO. We looked at the setup of tracking tools, chose an SEO-friendly theme, planned a keyword strategy, and resolved keyword cannibalization to keep your content focused and effective.
Now it’s time to build on that foundation. In this second part, we’ll dive into:
- On-page SEO techniques to help your content rank higher and connect with your audience
- Internal linking strategies that guide visitors naturally and distribute SEO authority
- User experience improvements to keep people engaged and exploring your site
- Technical SEO fixes to ensure your site is crawlable, secure, and ready for search engines
1. On-Page SEO Best Practices
Applying modern on-page SEO techniques to web pages on your website is crucial to improving your site's visibility, user experience, and overall search performance.
Here's how to approach it:
Optimize Your Content for Both Users and Search Engines
Creating content that serves both people and search engines leads to sustainable SEO growth.
- Write for humans first, and then optimize for SEO: Make sure your content reads naturally, addresses user intent, and includes keywords in a meaningful way rather than forcefully.
- Place keywords strategically: Add your primary keywords thoughtfully in the URL, page title, H1 tag, and within the opening paragraph of your content to maximize relevance and crawlability.
- Use a single, well-defined H1 tag: Each page should have only one H1 tag that clearly describes the main topic, helping both readers and search engines understand the page structure.
- Craft unique meta titles and descriptions: Write clear and descriptive titles and meta descriptions for every page to improve click-through rates from search results.
- Structure content using proper formatting. Use headings (H2 to H6), short paragraphs, lists, and bullet points to make your content scannable and easy to digest.
- Add multimedia to support engagement: Include images, charts, videos, and infographics to help explain complex topics and reduce bounce rates.
- Use semantically related keywords: Incorporate supporting terms (also known as LSI keywords) to provide search engines with more context and relevance.
- Add descriptive alt text to all images: Make images accessible to all users and improve search indexing with meaningful alt descriptions.
- Include FAQ sections where relevant: Answer frequently asked questions at the end of the content to improve user satisfaction and win featured snippets.
- Use schema markup wherever relevant: Mark up content types like articles, FAQs, or how-to pages to enable rich results in search listings.
2. Interlinking Strategy
Google relies on internal links to understand the hierarchy and importance of your site’s pages. By strategically linking to these high-value areas, you improve their visibility in search results and help users discover your most impactful content.
Strong internal linking guides both users and search engines through relevant content, helping increase session duration and improve page rankings. According to SEO experts, a well-executed internal link structure can lead to double-digit improvements in organic traffic and conversions.
Not all pages on your website carry the same weight in SEO. Some are far more critical for driving results, especially when it comes to revenue and conversions. That’s why your internal linking strategy should intentionally support and guide users (and search engines) toward your highest-value pages.
These key pages often include:
- Product or service pages, where your offerings are clearly outlined.
- Pillar content: in-depth, evergreen resources that demonstrate authority on a topic.
- Gated assets, like white papers or webinars, capture leads.
An important point to consider for internal linking
- Ensure Links Are Placed in the Main Content: Placing internal links near the top of a page enhances their impact. Google prioritizes links that appear early in the body because they are often more relevant.
- Use Varied and Descriptive Anchor Text: Anchor text should accurately reflect what the linked page offers. Mixing phrasing avoids repetitive, unnatural-sounding content and helps search engines understand your content's depth and relevance.
- Keep Internal Links Balanced: Too many internal links can clutter your content and hurt readability. Aim for 2–5 links per 1,000 words to keep things clean and useful. Add links only where they genuinely help guide readers to important pages.
- Fix Orphaned Pages: Pages without any internal links, known as orphaned pages, are difficult for search engines and users to find. Each important page must be linked to at least once from another part of your site. Regular site audits will uncover these pages and ensure they are incorporated properly.
- Avoid Over-Optimisation: While internal links benefit SEO, excessive linking or keyword-heavy anchor text can feel manipulative and harm user experience. Guidelines suggest maintaining a balanced, natural linking pattern with both internal and external references to preserve trust and readability.
3. Implement User Experience Best Practices
Exceptional user experience is foundational to both SEO performance and audience satisfaction.
It helps you streamline site navigation, optimize for mobile, and use behavioral insights to improve engagement.
Ensure Mobile Responsiveness Across All Devices
With Google’s mobile-first indexing, the mobile version of your website is now the primary version used for crawling and ranking.
For enterprise WordPress websites, which often include custom post types, complex page builders, multi-level navigation, and large volumes of dynamic content, ensuring full mobile responsiveness is crucial for SEO, UX, and conversions. Don’t assume your content automatically adapts; test and optimize.
Use mega menus for multi-level navigation that collapse elegantly into mobile-friendly dropdowns or hamburger menus, ensuring usability and crawlability without overwhelming the mobile user.
Enterprise users often engage on mobile first (research) and convert on a desktop. Ensure that content, CTAs, and structured data remain visible and functional across all devices to support the full buyer journey.
Add a search feature for easy content discovery.
The website should include a search bar, either global or content-specific (like resources, blogs, or case studies), so users can quickly locate specific information.
Ideally, it should be placed in the header of the website so it's globally available, and content-specific search features should be on their respective pages.
For example, placing a search field labeled “Search resources…” improves navigation on content-heavy sites.
Implement a Mega Menu for Clear Site Structure
For enterprise websites with complex structures, mega menus improve navigation by displaying a full panel of links at a glance.
If your company offers many products or services across multiple industries, along with extensive resources like case studies, white papers, and guides, A
A well-designed mega menu can help users find exactly what they need quickly and intuitively.
Understand User Behavior Using Heatmaps and Session Recording Tools
- Microsoft Clarity: Use Microsoft Clarity’s free session recordings and heatmaps to observe how users interact with your site. Clarity reveals the why behind user behavior.
- Hotjar: Hotjar offers scroll heatmaps, session replays, and on-site surveys that highlight user interaction trends. For instance, a scroll map may show users never reach your call-to-action section, prompting a redesign. Avoid launching changes without user feedback; Hotjar’s surveys reveal why users drop off or hesitate.
4. Technical SEO Optimization
Technical SEO is the foundation of your website’s ability to rank in search engines. In simple terms, it ensures that your website is easy for search engines to access, understand, and trust.
Even the best content won’t perform well if your site has technical issues. This section guides you through each critical area, from crawl settings to security and architecture.
Crawlability & Indexing
Search engines like Google need to "crawl" your site to understand your content. If your pages aren't crawlable or indexed correctly, they won’t appear in search results.
Set Up and Submit Your Sitemap.XML
- Create and submit an XML sitemap to search engines. A sitemap tells Google which pages to crawl. Use plugins like Yoast SEO or Rank Math to automatically generate an XML sitemap and submit it to Google Search Console.
- Ensure the Site is Crawlable and Indexed:
- After that, confirm that Google can access all the pages. Using the GSC Page indexing report, you can identify which URLs are indexed and which are blocked.
- A study revealed that 25% of websites experience crawlability issues due to misconfigured robots.txt or broken internal links.
- You can also check if important pages are being indexed by searching on Google with the command site:yourdomain.com. If your pages don’t show up, Google may be having trouble accessing them.
- Fixing these ensures that search engines can follow and index the right pages.
- Maintain a correct list of sitemap: Your sitemap is like a roadmap for search engines. It tells them which pages on your site are important and should be crawled and indexed.
- To keep it effective, only include pages that offer real value to users, such as:
- Main service or product pages
- Case studies, Events,
- Press Releases, White Papers
- E-books
- Blog posts
- Key landing pages
- Avoid including:
- Placeholder or coming soon pages
- Thin pages with very little useful content
- Pages that are purposely blocked via robots.txt or have a noindex directive.
- URLs that result in 301/302 redirects or 404 errors.
- Pages with query parameters
- Backend URLs
- Pages with empty or no content
- To keep it effective, only include pages that offer real value to users, such as:
Identify & Fix Crawl Errors in Search Console:
- Use Google Search Console (GSC) to monitor crawl issues like 404 errors or server errors.
- Go to the "Pages" report in GSC and fix any listed errors to improve your site’s visibility. Resolve these quickly after identifying them.
- Here are a few reasons why pages aren’t indexed
- Page with redirect
- Not found (404)
- Alternate page with proper canonical tag
- Excluded by ‘no index’ tag
- Duplicate without user-selected canonical
- Crawled - currently not indexed
- Discovered - currently not indexed
- Duplicate, Google chose a different canonical than the user
Avoid Duplicate Versions (HTTP vs HTTPS, www vs non-www):
- Your website can be accessed in different ways, like:
- http://yourwebsite.com
- https://yourwebsite.com
- http://www.yourwebsite.com
- https://www.yourwebsite.com
- Search engines treat these as separate versions, which can hurt your SEO by splitting authority and causing duplicate content issues.
- To fix this, choose one preferred version ( HTTPS with or without "www") and set up 301 redirects to point all other versions to it. This ensures:
- Search engines index only one version
- SEO strength is consolidated
- Users always land on the secure, correct version
- Use your server settings or tools like Cloudflare, .htaccess, or WordPress plugins to manage these redirects.
Optimize robots.txt
The robots.txt file gives instructions to search engine bots about which parts of your website they’re allowed to crawl. It helps control visibility without removing pages entirely.
For example, you might want to:
- Allow bots to crawl public pages like blog posts or product listings
- Block access to admin pages, login URLs, or internal tracking scripts
However, this file must be used carefully. Blocking the wrong folder (like your main content directory) could stop Google from indexing important pages.
Make Your Site Secure
Web security isn't just for safety; it directly impacts SEO performance.
- Ensure HTTPS Site-Wide: Google considers HTTPS a ranking signal. Ensure all pages are served securely with an SSL certificate. Chrome now labels non-HTTPS pages as "Not Secure," which can drive visitors away.
- Secure Site with Malware Monitoring Tools: Security issues like malware and spam can cause your site to be removed from search results. Use tools like Sucuri or Wordfence to scan for threats regularly and clean them immediately.
Optimize for Website Architecture
Site architecture is the way your pages and links are structured across your website. A well-organized layout helps users browse smoothly and makes it easier for search engines to crawl and index your content.
- Use Clear URL Structures:
- Keep your URLs short, clean, and descriptive. For example, use /seo-checklist instead of /page?id=1234.
- Readable URLs give users a better idea of what the page is about and help search engines understand the topic quickly.
- Maintain Clean Navigation Hierarchies:
- Group-related content using proper categories and subcategories. Important pages should be accessible within three clicks from the homepage. This helps both users and search engines find key content easily.
- Find and fix Broken Links:
- Broken links can frustrate users and send negative signals to search engines. A website with too many 404 errors can lower user trust.
- Regularly scan your site using tools like Dead Link Checker, Ahrefs, or Ubersuggest to spot and fix 404 errors.
- Check Redirects:
- Whenever you remove a page or change its URL, make sure you set up a redirect to send users and search engines to a similar, updated page.
- This helps visitors avoid broken links and ensures your site doesn’t lose the search value that old pages had.
- Use a 301 redirect to show that the change is permanent and to pass on SEO strength to the new page. Avoid using temporary (302) redirects unless the move is only short-term.
- Use Breadcrumbs for Easier Navigation: Implement breadcrumb trails such as “Home › Blog › SEO › Best Practices” so users can easily understand their location and navigate back. Avoid overly complex breadcrumbs like “Home › 2025 › Blog › SEO › Guides › Checklist,” which can overwhelm and confuse visitors.
Conclusion
By refining on-page SEO, strengthening internal links, enhancing user experience, and addressing technical SEO, your site is now built for both performance and growth.
In Part 3, we’ll focus on off-page SEO and scaling strategies to help you build authority and sustain long-term results.