Looking to accept donations on your WordPress site with ease? Whether you’re a nonprofit, a content creator, or running a fundraiser, the GiveWP plugin makes collecting and managing donations from your website simple.
In this guide, we’ll walk you through how to set up donations using GiveWP, so you can start raising funds in just a few clicks.
Step 1: Install and Activate the GiveWP Plugin
Log in to your WordPress admin dashboard.
Go to Plugins > Add New > GiveWP
Click Install Now, then click Activate.
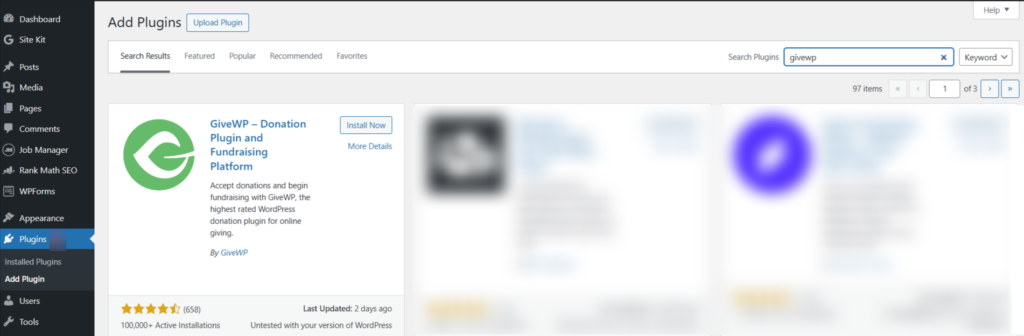
Screenshot 1: Install and Activate the GiveWP Plugin
Step 2: Configure Basic Plugin Settings
After activation, you’ll be redirected to the GiveWP Setup Wizard.
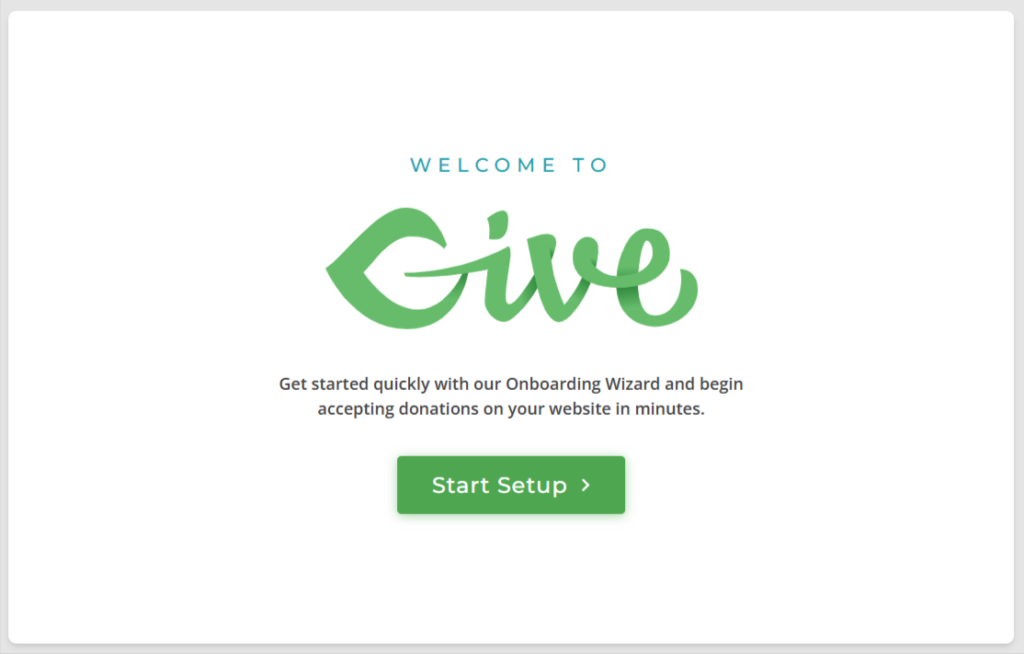
Screenshot 2: GiveWP Setup wizard
Follow the setup steps:
1. Cause: Choose the reason you’d like to support with your fundraising efforts. Also indicate whether you’re participating as an individual, representing an organization, or in another capacity.
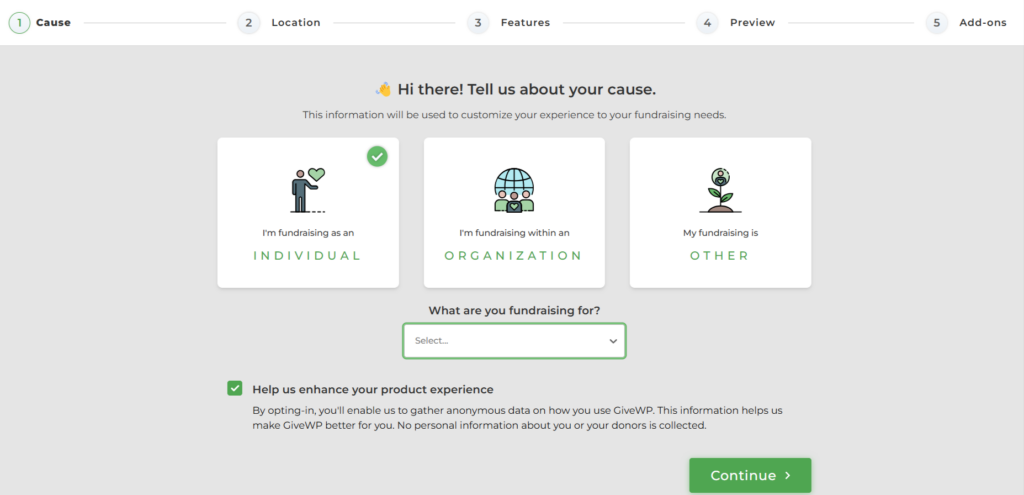
Screenshot 3: Select Your Cause
2. Location: Select your location for tax and payment processing purposes.
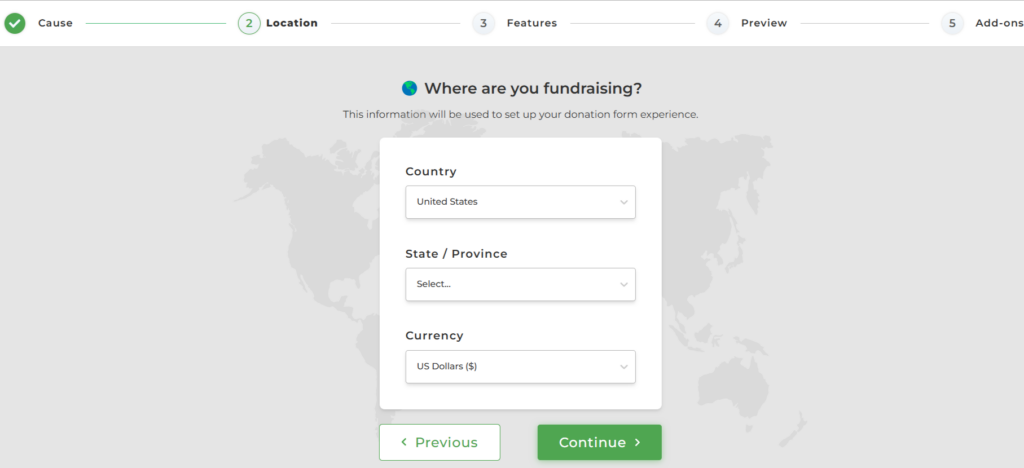
Screenshot 4: Select Location
3. Features: Select what information you want to collect from donors in your donation form.
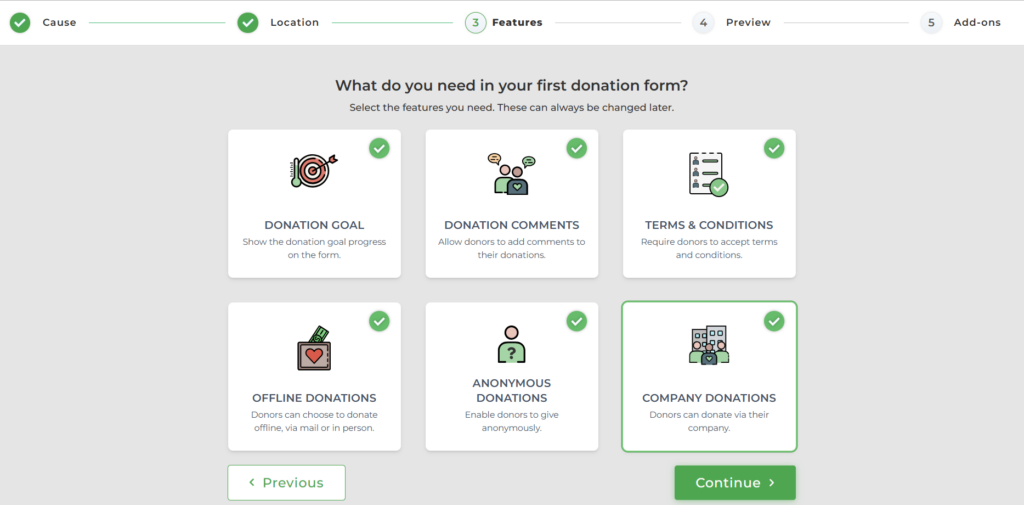
Screenshot 5: Select Features
4. Preview: You have a ready-to-use donation form based on your setup, with preset and custom donation options. You can further customize the design, amounts, and payment methods later. Click “Continue” to proceed.
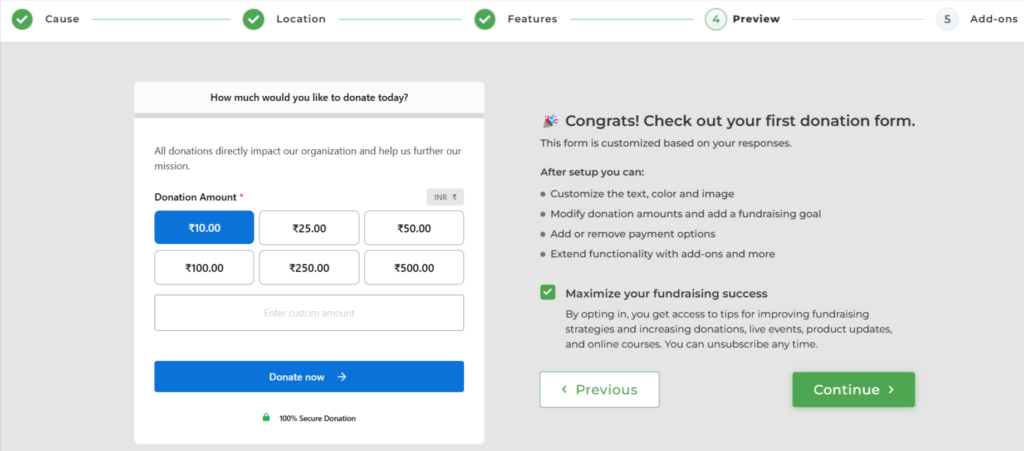
Screenshot 6: Preview
5. Add-Ons: GiveWP introduces optional premium add-ons like Recurring Donations, PDF Receipts, and Currency Switcher to enhance your fundraising capabilities. Select any you’re interested in or click “Continue” to finish the setup.
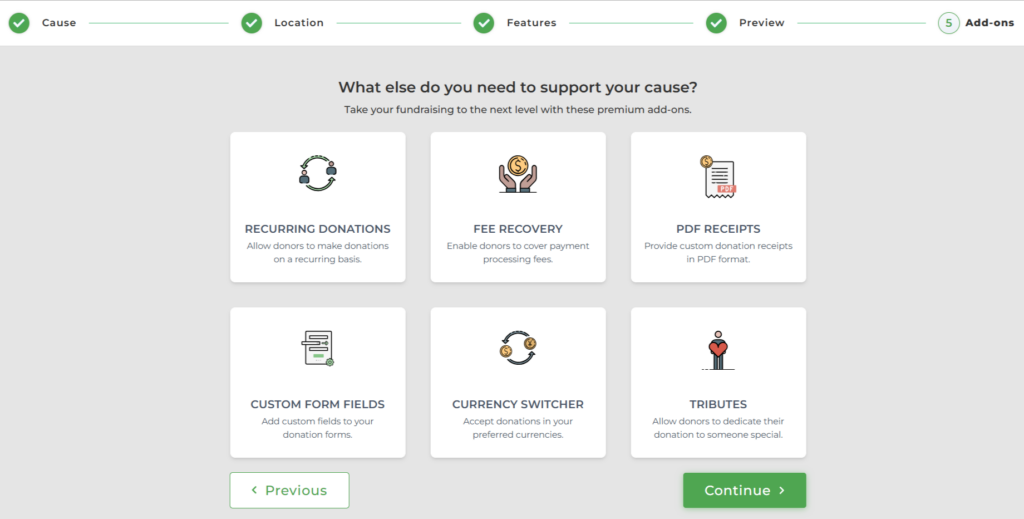
Screenshot 7: Add-ons
After the initial setup is completed, you can now proceed to set up the Payment Gateway to receive donations.
Select any of the payment gateways that are suitable for you and follow the screen instructions.
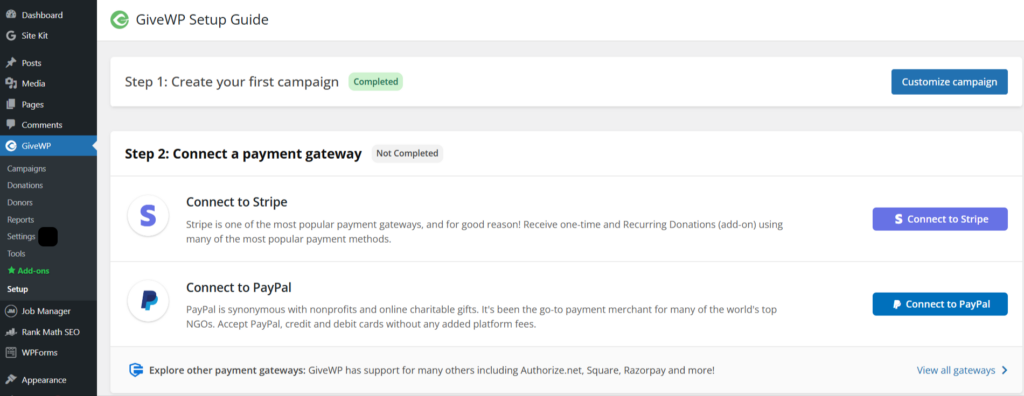
Screenshot 8: Connect a Payment Gateway
Step 3: Campaign
Once your setup is complete, you’ll land on the GiveWP Campaigns dashboard, where all your fundraising campaigns are listed. Here, you can track key metrics like:
- Donation goals (e.g., ₹0 of ₹1,000)
- Number of donations
- Total revenue
- Campaign status (Active/Inactive)
From this dashboard, you can easily create new campaigns, edit existing ones, and monitor the performance of each fundraising effort in real time.
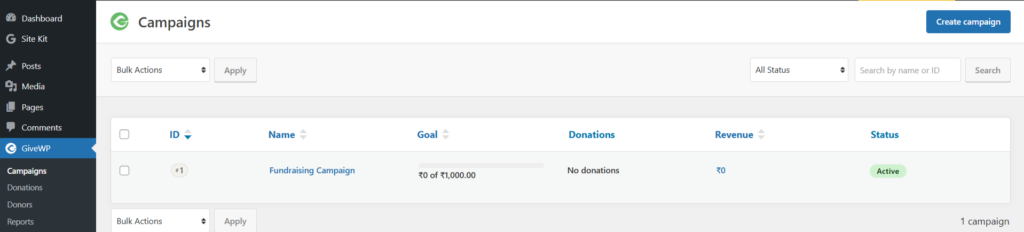
Screenshot 9: Donation Campaigns
Step 4: Keep Track of Your Donations
After launching your campaign, head over to the Donations tab in the GiveWP dashboard. This is where every contribution, whether live or test, is logged and tracked. You can view:
- Donation amount
- Payment method
- Donor details
- Date and time of donation
- Associated donation form
- Status of the donation
As soon as donations start coming in, this page will populate with live data, helping you manage and report on your fundraising progress effortlessly.
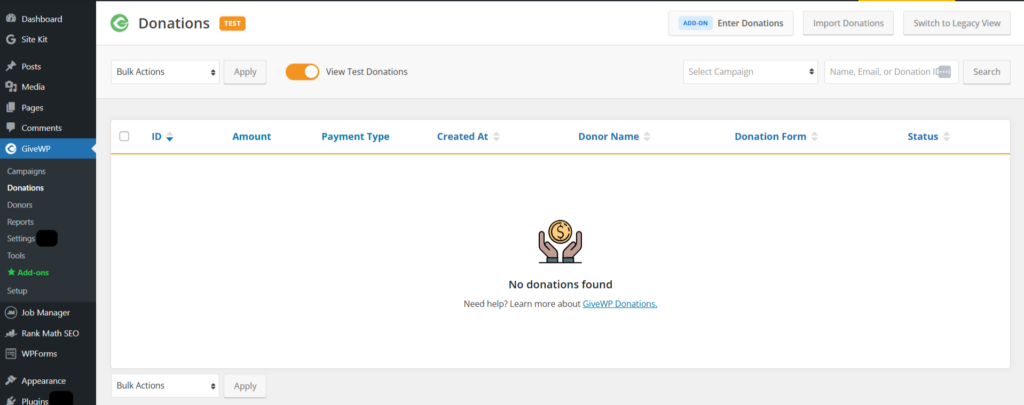
Screenshot 10: Check donations in Real Time
Step 5: Keep Track of Donors
Once your fundraising is live, the Donors tab in GiveWP becomes your central hub for supporter insights. This section offers a clean, organized view of everyone who contributes to your campaigns.
You’ll find details such as:
- Donor contact info
- Total amount given
- Number of donations
- Date of latest contribution
- Donor type (individual, anonymous, etc.)
- Date created
Once donations roll in, this space will automatically populate, turning into a powerful database. You can use it to send thank-yous, segment your supporters, or identify your most generous givers.
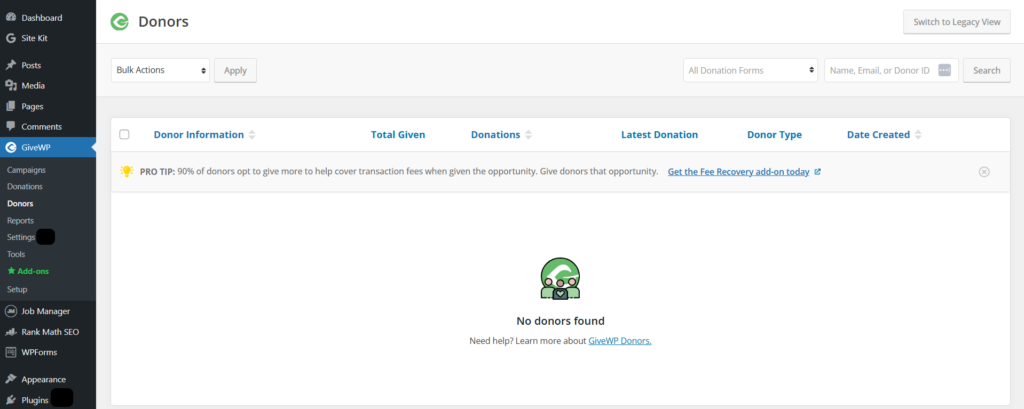
Screenshot 11: Check Donors
Step 6: Check Reports
The GiveWP Reports dashboard gives you a visual summary of your donation activity over time.
Here’s a breakdown of the report:
- Top Stats: Shows total revenue, average donation, total donors, and refunds.
- Graph: Visual trend of daily donations over the selected period.
- Revenue Breakdown: Daily data for donors, donations, refunds, and net revenue.
- Payment Methods: Shows how donors are paying (e.g., credit card, PayPal), helping you understand which methods are preferred.
- Payment Status: Indicates the status of all transactions (e.g., completed, pending, refunded) to ensure successful processing.
- Form Performance: Breaks down revenue by donation form, helping identify which campaigns are most effective.
- Donation Activity: List of recent donations with details.
- Top Donors: Highlights the most generous donors.
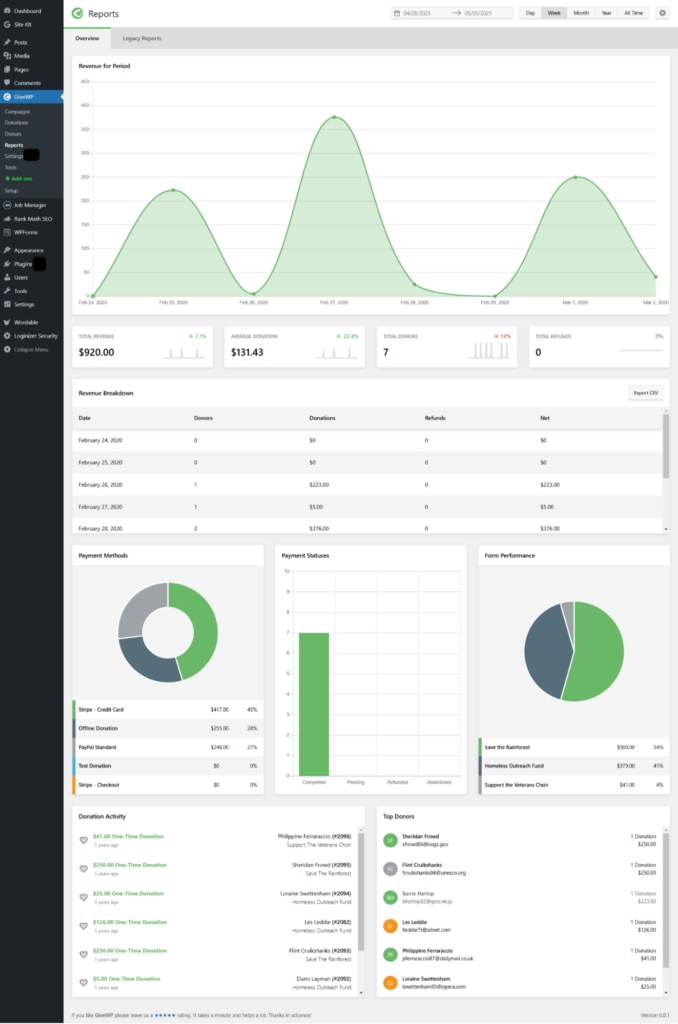
Screenshot 12: Sample Report
Step 7: Settings> General
This is the General setting of GiveWP.
1. Success Page
Purpose: The page donors are redirected to after a successful donation. It usually contains a thank-you message and receipt ([give_receipt] shortcode is placed here).
2. Failed Donation Page
Purpose: The page donors see if their donation fails or is canceled. Helps you provide an explanation or next steps.
3. Donor Dashboard Page
Purpose: A page where donors can view their donation history, edit their profile, and manage recurring donations. Requires the [give_donor_dashboard] shortcode.
4. Base Country
Purpose: Specifies the country your site or organization is operating in. Affects things like currency, tax, and form defaults.
5. Base State/Province
Purpose: Specifies the state or province your site operates from—useful for localization and regional compliance.
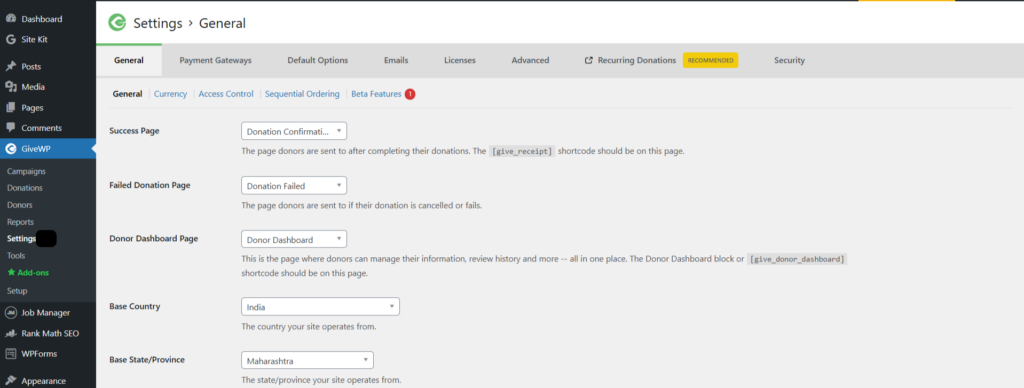
Screenshot 13: General Settings
The other tabs of General settings include:
Currency: Configure your site’s default donation currency and formatting.

Screenshot 14: General Settings> Currency
Access Control: Enable email-based donor login and optionally add reCAPTCHA for security.
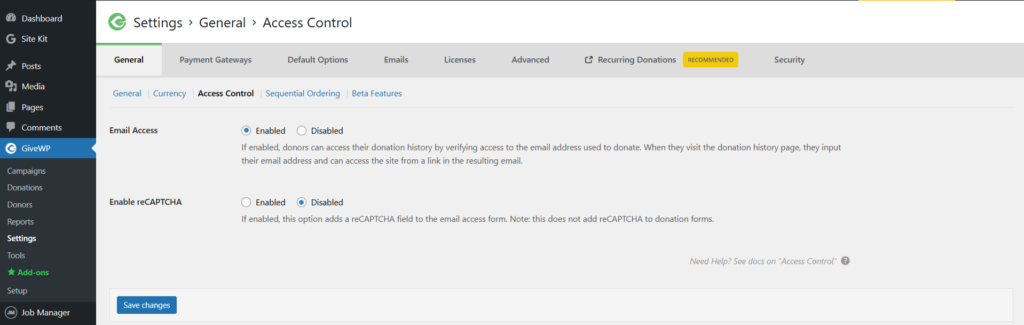
Screenshot 15: General Settings> Access Control
Sequential Ordering: Set custom sequential donation IDs with prefixes, suffixes, and number formatting.
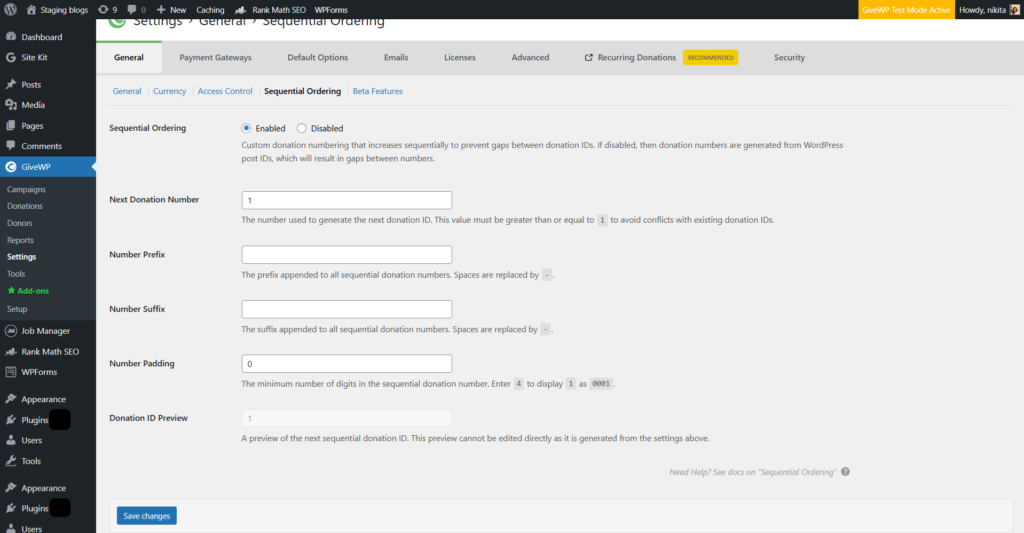
Screenshot 16: General Settings> Sequential Ordering
Beta Features: Allows enabling experimental or upcoming features for testing Event Tickets.
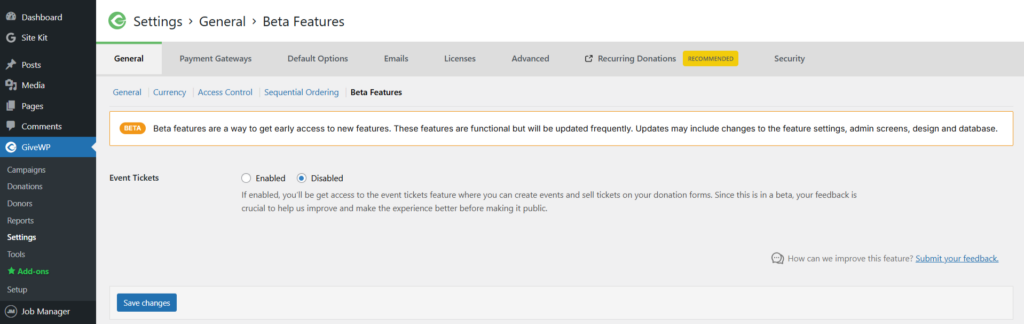
Screenshot 17: General Settings> Beta Testing
Step 8: Settings> Payment Gateways
GiveWP provides a flexible Payment Gateways settings panel where you can choose and configure the payment methods available to your supporters.
- Test Mode: Test Mode lets you simulate donations using sandbox accounts without processing real money. It’s perfect for testing your forms before going live.
- Enabled Gateways: You can enable or disable specific payment gateways, change their labels, and even choose which one is selected by default.
- Label: Customize how each option appears to donors.
- Default: Set which gateway is pre-selected at checkout.
- Enabled: Control whether the gateway is available for use.
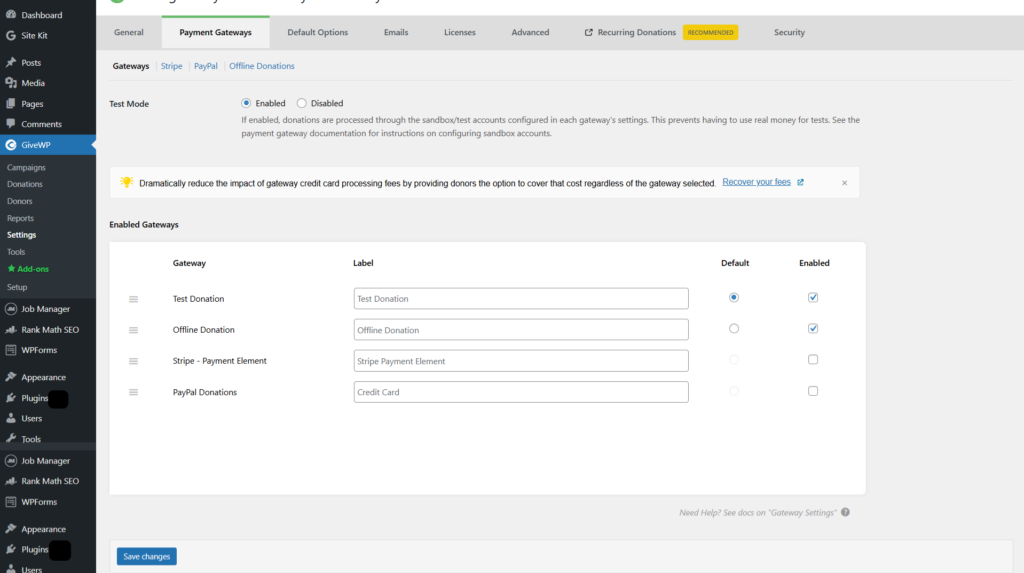
Screenshot 18: Settings> Payment Gateway
You can also customize Stripe and PayPal payment gateways and manage offline donations.
Step 9: Default Options
You can customize the default options.
- Form Fields
- Name Title Prefix: Allows you to add a field for salutations like Mr., Mrs., etc.
- Disabled: Hides the field.
- Required: Makes it mandatory.
- Optional: Let users choose to fill it in or not.
- Title Prefixes: You can add or remove salutation options here.
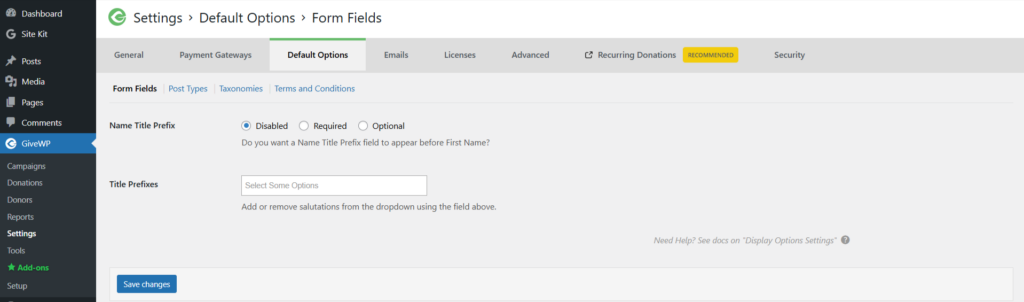
Screenshot 19: Default Options> Form Fields
- Post Types
- Controls how donation forms are displayed on your website.
- Form Single Views: Enables each form to have its page/URL.
- Form Archives: Enables a listing page of all forms.
- Form Excerpts: Allows short descriptions for each form (optional summary).
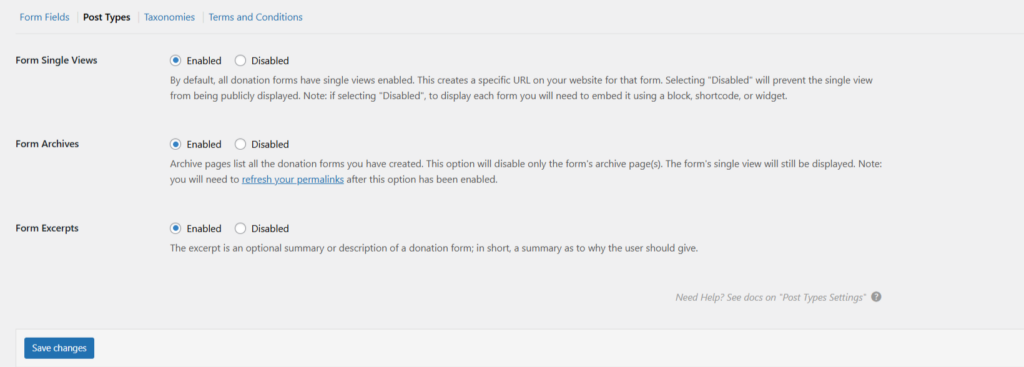
Screenshot 20: Default Options> Post Types
- Taxonomies
- Helps in organizing forms using categories and tags.
- Form Categories: Enable grouping forms into categories.
- Form Tags: Enable to addition of tags for better search and filtering.
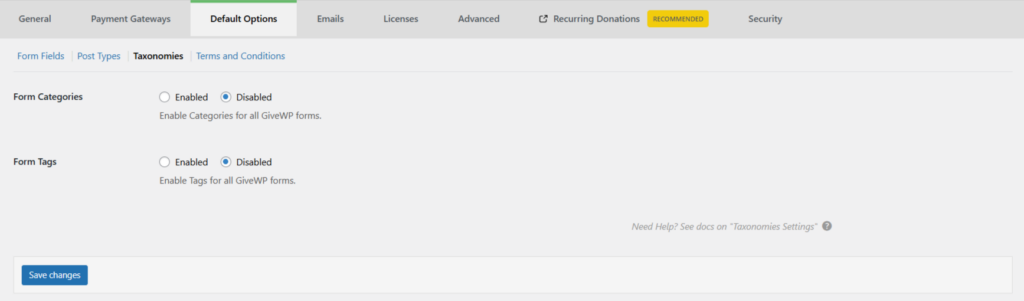
Screenshot 21: Default Options> Taxonomies
Step 10: Settings> Emails
1. Donor Emails
These are email notifications sent to donors:
- Donation Receipt: Sent to donors after a donation is made.
- Donation Processing Receipt: Sent when a donation is being processed.
- Offline Donation Instructions: Instructions for making offline donations.
- User Registration Information: Sent after a donor registers.
- Donation Note: Likely a personalized thank-you note.
- Email access: Possibly related to secure login or access via email.
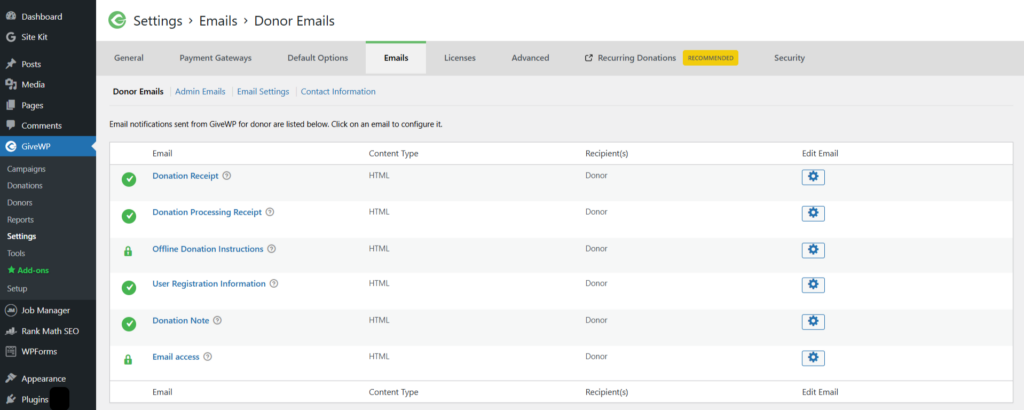
Screenshot 22: Emails> Donor Emails
2. Admin Emails
These are notifications sent to admins:
- New Donation: Notifies admin when a new donation is made.
- New Offline Donation: Admin alert for offline donations.
- New User Registration: Sent to the admin when someone registers as a donor.
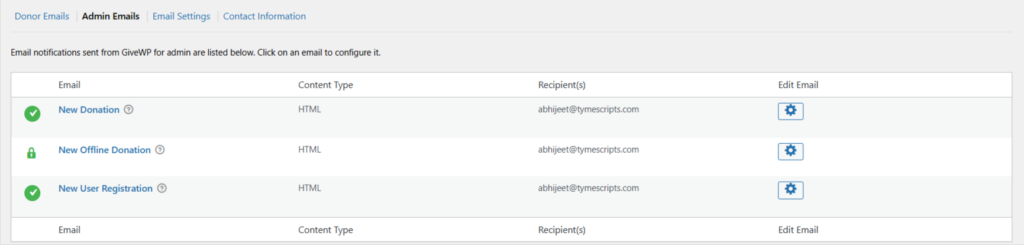
Screenshot 23: Emails Settings> Admin Emails
3. Email Settings
General settings for all GiveWP emails:
- Email Template: Choose the layout/ style of emails (e.g., default template).
- Logo: Optional image shown in emails.
- From Name: Appears in sender name (e.g., “Staging blogs”).
- From Email: The Address used to send emails.
- SendWP: A recommended email delivery service to ensure reliable delivery.
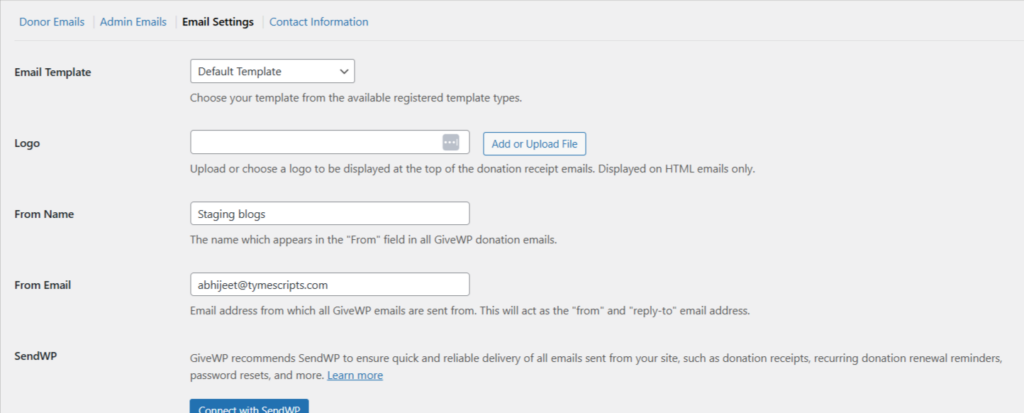
Screenshot 24: Email Settings
4. Contact Information
You can edit your contact information from here.
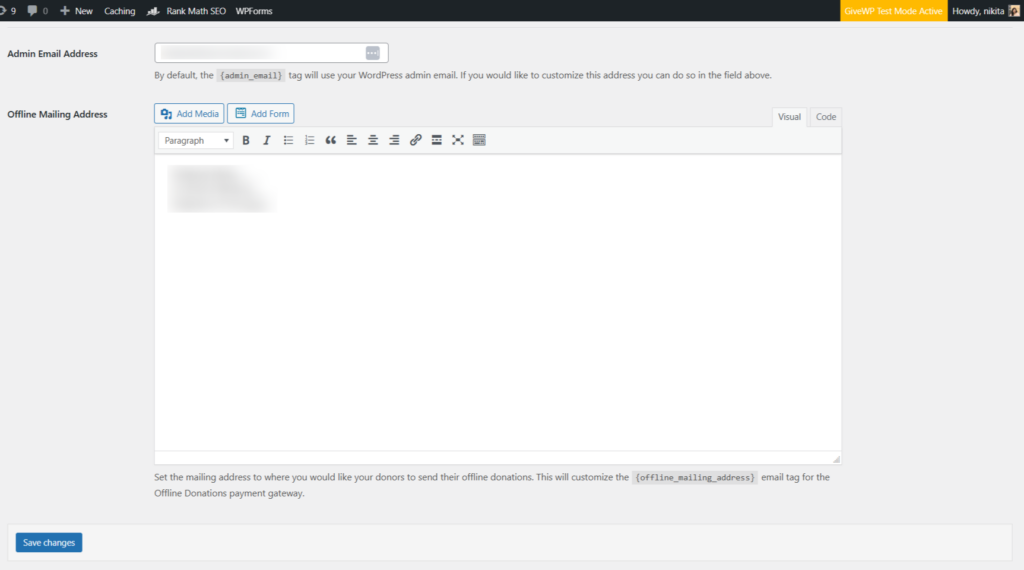
Screenshot 25: Email Settings> Contact Information
Step 11: Settings> Licenses
Enter Your License key here to activate GiveWP add-ons.
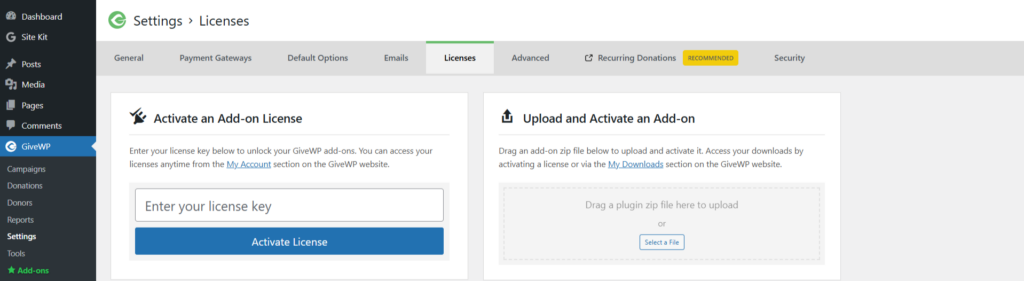
Screenshot 26: Settings> Licenses
Step 12: Settings> Advanced
1. Advanced Options
- Option-Based Form Editor: Enable for the old form editor. Usually keep disabled for the current one disabled.
- Remove Data on Uninstall: Choose “Yes” to delete all GiveWP data when uninstalling, or “No” to keep it.
- Default User Role: Sets the default WordPress role for new donors (e.g., “GiveWP Donor”).
- Setup Page: Enable to see the initial setup wizard; disable after setup.
- Advanced Database Updates: Leave disabled unless support tells you otherwise. It’s for manual database updates.
- Orphaned Donation Forms: Enable to see and manage data from deleted forms in Tools > Data.
- GiveWP Cache: Click “Clear Cache” to refresh GiveWP’s performance-boosting cache.
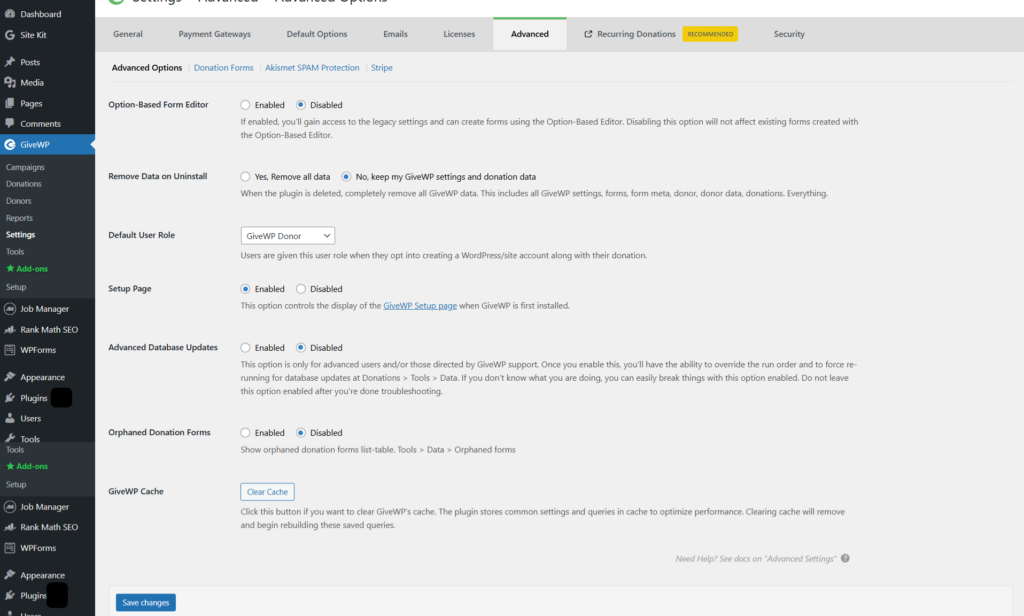
Screenshot 27: Advanced Settings
2. Donation Forms
You can make your custom donation form by writing CSS.
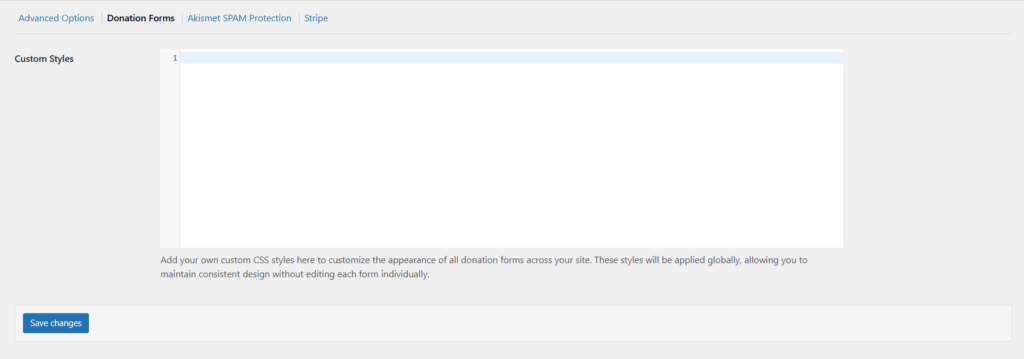
Screenshot 28: Advanced Settings> Donation Forms
3. Akismet Spam Protection
- Akismet SPAM Protection: Enable to automatically filter donation spam using the Akismet plugin (must be installed and configured). Disable to skip this check.
- Whitelist by Email: Add email addresses here to bypass Akismet’s spam filter for specific donors. Useful if legitimate donors are incorrectly flagged.
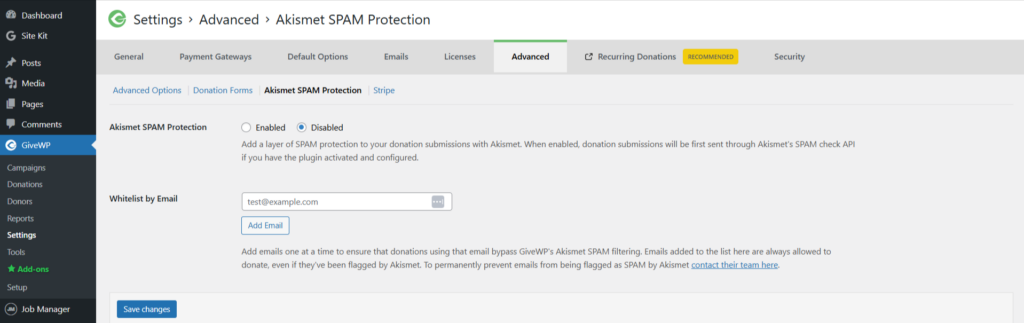
Screenshot 29: Advanced Settings> Akismet Spam Protection
4. Stripe
- Stripe Fonts: Choose between “Google Fonts” or “Custom Fonts” for styling Stripe’s credit card fields.
- Google Fonts URL: If using Google Fonts, paste the URL of your site’s font here to match the payment field fonts.
- Custom Fonts: Select if you’re using non-Google custom fonts on your site (may require extra setup).
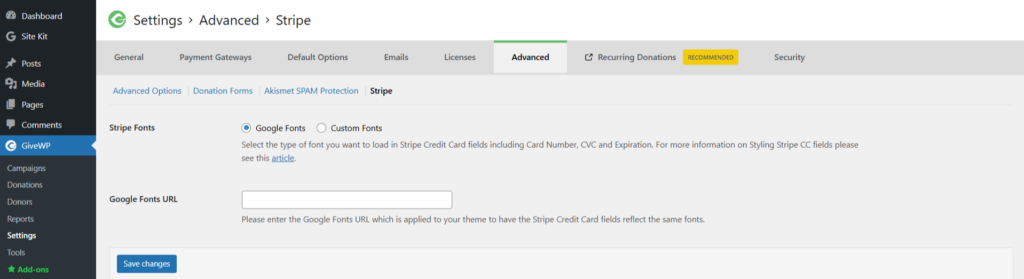
Screenshot 30: Advanced Settings> Stripe
Step 13: Settings> Recurring Donations
Recurring Donations in GiveWP is a premium feature that allows donors to give automatically on a regular schedule, such as monthly or annually, instead of making a one-time donation.
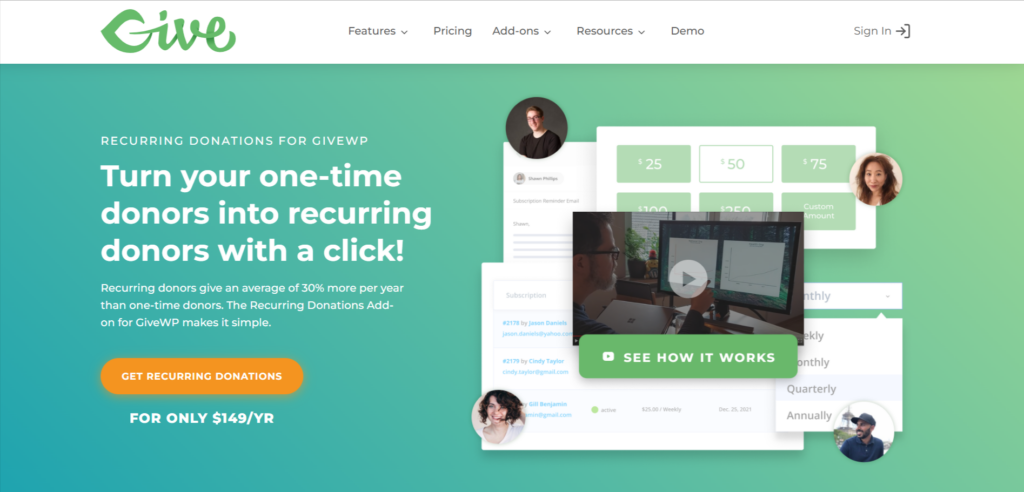
Screenshot 31: Settings> Recurring Donations
Step 14: Settings> Security
Enable Honeypot Field
Turn this “On” to add a hidden spam-catching field to your donation forms. Bots often fill it, while real users don’t. “Off” disables this basic spam protection.
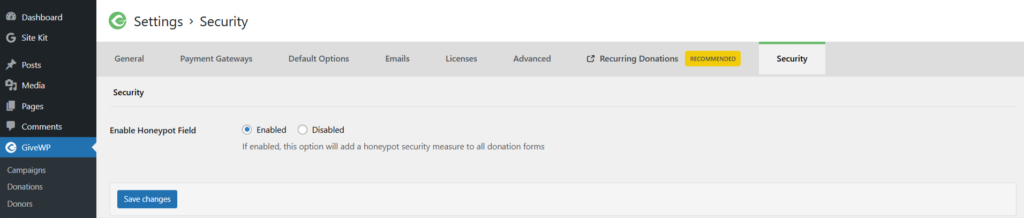
Screenshot 32: Settings> Security
Step 15: Tools
Export
- Export Donation History: Download a CSV of all donations (“Generate CSV”).
- Export PDF of Donations and Revenue: Get a PDF summary for the current year (“Generate PDF”).
- Export Revenue and Donation Stats: Export a CSV of revenue/donations by date range.
- Export Donors: Download a CSV of donor info, filter by date/form, and choose data fields.
- Export GiveWP Settings: Download your GiveWP settings as a JSON file for backup or import (“Export JSON”).
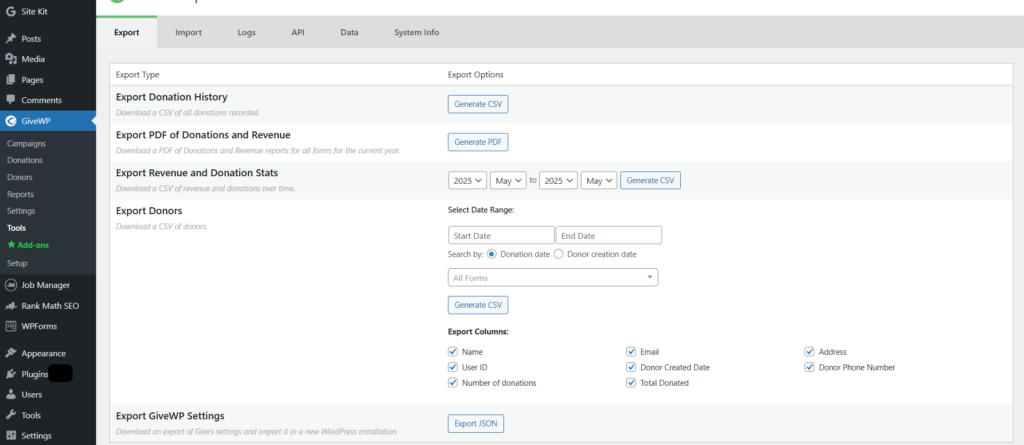
Screenshot 33: Tools> Export
Import:
- Import Donations: Click “Import CSV” to upload and import donation data from a CSV file.
- Import GiveWP Settings: Click “Import JSON” to upload and restore GiveWP settings from a JSON file.
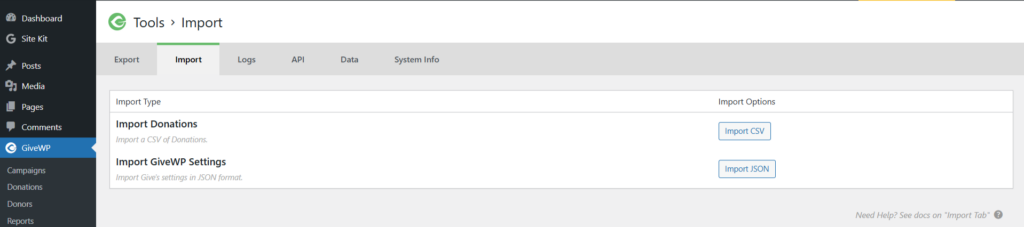
Screenshot 34: Tools> Import
Log:
- Status: The outcome of the event (e.g., successful, failed).
- Category: The area of GiveWP the event pertains to.
- Source: The specific part of GiveWP that triggered the log.
- Date/Time: When the event occurred.
- Description: A brief explanation of what happened.
- Details: Often provides more in-depth information about the event, which can be useful for troubleshooting.

Screenshot 35: Tools> Log
API:
- Select a user: Choose a WordPress user to create API keys for.
- Generate New API Keys: Click to create unique access keys for the selected user.
- API Key Table: Shows the Username, Public Key, Token, and Secret Key for each user with API access.
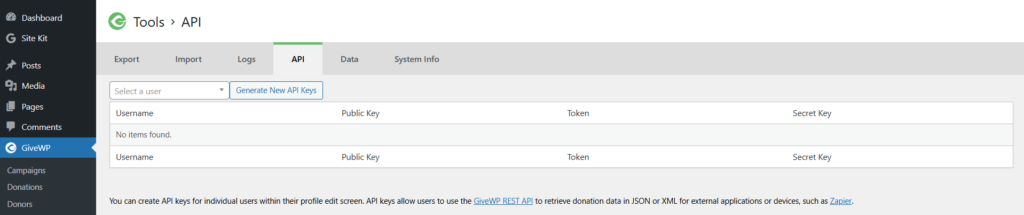
Screenshot 36: Tools> API
Data:
- Status: “Success” means the update worked, “Failed” means there was an issue.
- Migration Title: Describes what database change occurred.
- Last run: When the update was last performed.
- Actions: Might have a “Run Now” button if an update needs to be tried again.
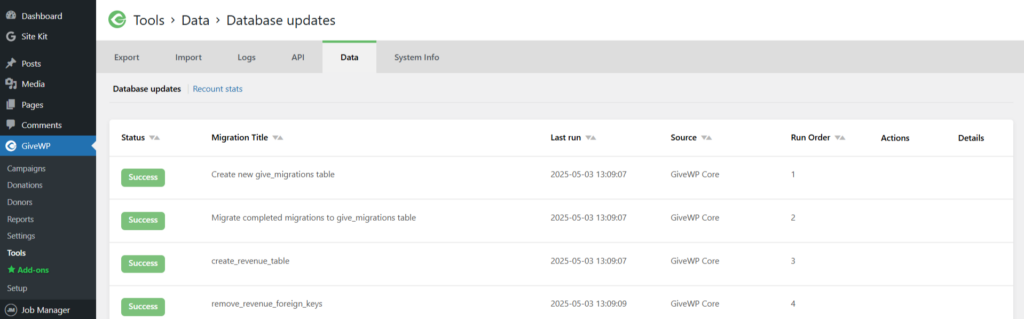
Screenshot 37: Tools> Data
System Info
- Get System Report: Button to generate the information.
- Sections: Includes details on WordPress, GiveWP, server, active plugins, theme, and PHP.
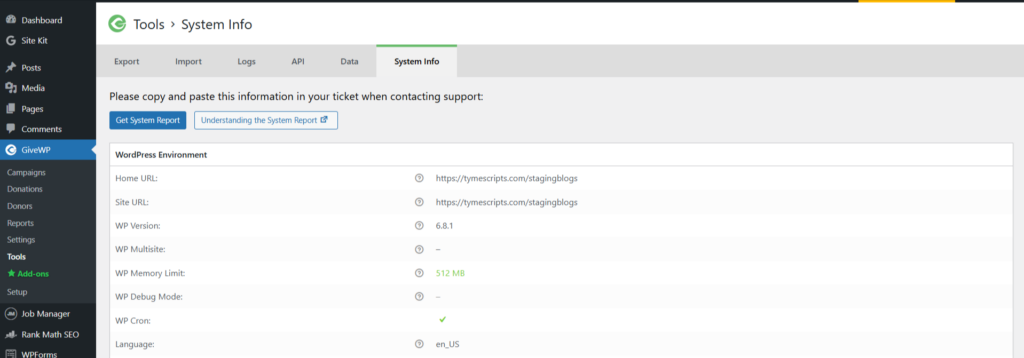
Screenshot 38: Tools> System Info
Conclusion
Setting up donations on your WordPress site doesn’t have to be complicated, especially with the power and flexibility of the GiveWP plugin.
From creating donation forms to customizing emails and tracking contributions, you’re now equipped to launch a seamless giving experience for your supporters.
Published on May 13, 2025 | Updated on Jan 16, 2026
Author

Abhijeet Bendre
Author
|
Reviewer

Savita Soni
Reviewer
|