Introduction
In an era where technology and AI are transforming various fields, it is no surprise that WordPress has adopted this trend. AI plugins and services for WordPress have revolutionized the way website owners and content creators operate. These WordPress tools leverage AI and machine learning to boost productivity, content quality, and user experience.
AI plugins and services for WordPress are made to automate tasks, give data-driven insights, and help with content optimization. Using such AI plugins enables you to work smarter, not harder.
Understanding AI Plugins and Services
Before we begin, let us understand the buzz around AI in WordPress.
WordPress AI plugins and services provide AI-powered features, automate activities, and provide data-driven insights to WordPress websites. These tools boost website performance, content production and management, and user engagement.
WordPress AI plugins and services seamlessly integrate with WordPress websites, usually through the use of APIs (Application Programming Interfaces) or custom plugins.
To use these AI Plugins, just install and activate them. Yes, it’s as easy as installing other plugins!
Why Use AI Plugins on WordPress in 2025?
AI tools help with everyday tasks, enhance your content, and create a smoother, more enjoyable experience for your visitors. Let’s break down how they can practically help your site.
- Enhance the Quality of Your Content: Crafting high-quality content requires time, but AI tools can streamline the process and make it more effective.
- Fix Mistakes Automatically: Plugins like Grammarly help catch typos, grammar issues, and unclear sentences.
- Suggest Better Phrasing: AI can recommend how to improve sentence structure, word choice, and tone.
- Provide Content Ideas: Based on trending topics or keywords, some AI tools suggest what to write about next.
- Save Time on Routine Tasks: Running a website comes with repetitive tasks that eat up your time. AI plugins can help with:
- Generating First Drafts: AI can write basic versions of blog posts, product descriptions, or email replies. You just need to review and refine them.
- Scheduling and Publishing Posts: Some tools allow you to set posts to go live automatically at the best time.
- Finding Relevant Content: AI can search the web and suggest articles, videos, or images to include in your site, saving you hours of manual effort.
- Make Your Website Easier to Find (SEO Help): Getting your content seen on Google or Bing is important, and AI plugins can help with that, too.
- Keyword Suggestions: AI tools help you find the right keywords to target so your content ranks better.
- SEO Recommendations: They suggest ways to improve meta descriptions, headings, and page structure for search engines.
- Content Optimization: You’ll get real-time tips to enhance content readability and keyword use, both of which help with SEO.
- Offer Better User Support, 24/7/: Visitors appreciate fast answers, and AI chatbots make that possible.
- Instant Replies to Common Questions: Chatbots can help users find pages, ask about products, or resolve basic issues—even when you’re offline.
- Improved Navigation and Experience: A well-set-up chatbot can guide visitors through your site, making it easier for them to find what they need.
- Grow with Confidence (Scalability): Whether you’re starting a small blog or growing an online store, AI tools can scale with your needs:
- Handles More Work as You Grow: As traffic increases, AI helps you manage more content, more interactions, and more data without extra workload.
- Flexible for Different Website Sizes: Whether you’re a one-person team or part of a company, AI tools adjust based on how simple or complex your site becomes.
- Cost-Efficient and Budget-Friendly: Hiring writers, editors, developers, and support agents can be expensive. While AI can’t fully replace people, it reduces the need for multiple tools or external help:
- Fewer Tools Needed: Many AI plugins combine multiple features into one solution.
- More Done, Less Spent: With fewer manual tasks to handle, you can focus your time and resources on areas that grow your site faster.
Note: While there are many varied benefits of AI in WordPress, we are focusing only on its benefits for content creation in this blog post.
Must-Try AI Plugins For Content and Image Generation
WP Wand
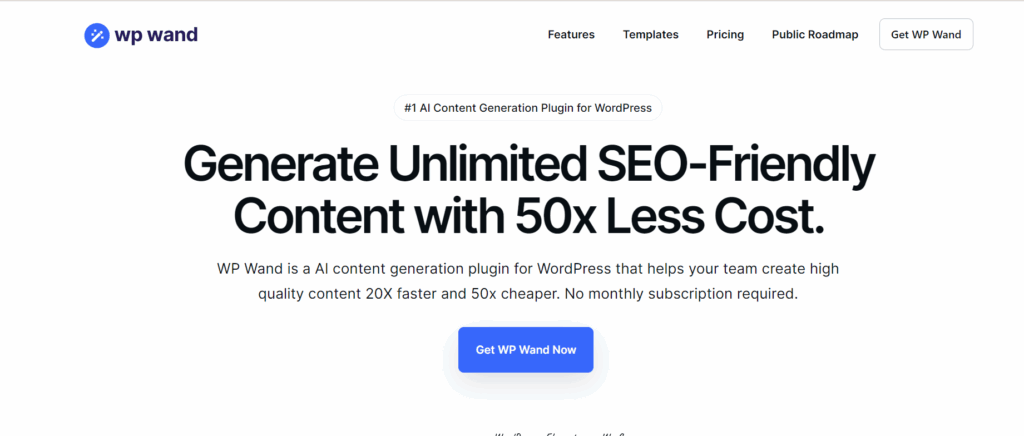
Screenshot 1: WP Wand Website Dashboard
WordPress’s powerful AI content-generating and writing assistant plugin is WP Wand. High-quality, engaging content is easily generated without breaking the bank using complex algorithms and OpenAI’s popular models like ChatGPT, GPT-3.5, GPT-4, DaVinci, and more.
WPWand integrates with Gutenberg Editor, Classic Editor, Elementor Page Builder, and WooCommerce to improve writing. It’s seamless AI writing experience lets you write any content.
Develop a lengthy blog article in under two minutes or produce several posts with our Bulk article Generator.
WP Wand now supports Rank Math and Yoast SEO to boost SEO.
Stop straining to find content ideas, spending hours on research, and gazing at an empty screen. WPWand’s technology is there to handle that. WP Wand can help you write articles, blog posts, marketing copy, social media postings, email content, and product descriptions.
Key Features:
- While you can freely use ChatGPT, it comes with its drawbacks of brief and unedited content. WP Wand overcomes this downside by providing long, useful content and ready-to-use formatting.
- With ChatGPT being integrated with Gutenberg, WP Wand makes writing smarter and faster than ever.
- Image generation is also provided in this plugin.
- Comes with 40+ ready-to-use templates for content creation.
- More than 42 languages are supported.
- Create bulk posts at a time in the pro version.
You can learn about the pricing structure of WP Wand here.
Getting Started With WP Wand
- Enter the OpenAPI key to start using the plugin.
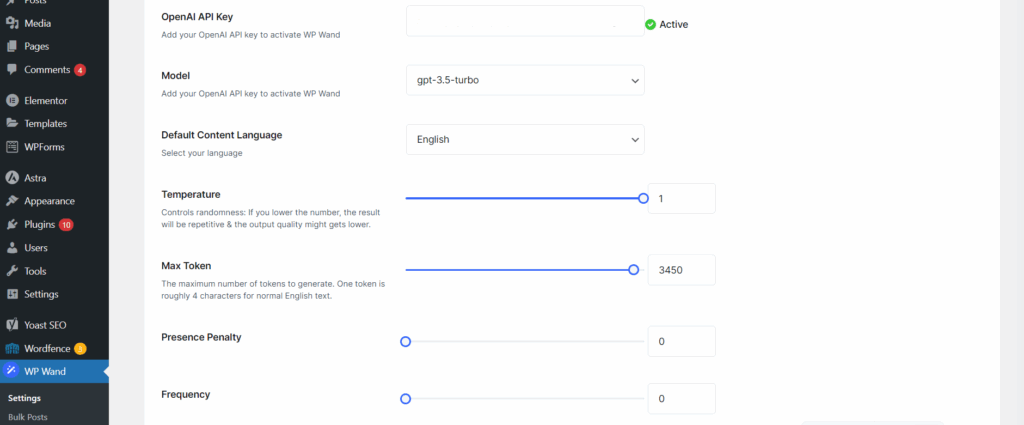
Screenshot 2: Enter the OpenAPI Key
- Once added, WP Wand’s AI features are ready to go, right from your dashboard.
- Once installed, WP Wand blends into your existing editor—whether you’re using Gutenberg, Classic, or Elementor.
- You’ll find the AI Assistant and ready-made templates added right where you work, so you can start generating content without switching between tools or tabs.
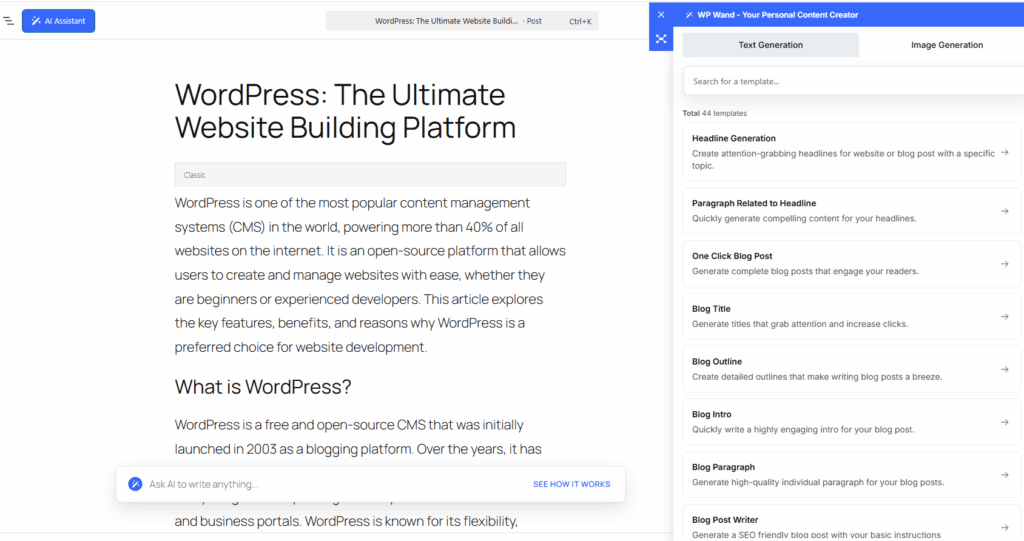
Screenshot 3: WP Wand AI Assistant and Templates Added to Your Integrated
WP AI CoPilot
Screenshot 4: WP AI CoPilot Website Dashboard
WP AI Co-Pilot, the most powerful WordPress AI content writer plugin, will transform your content generation and user engagement. A robust plugin that makes use of GPT-3, OpenAI’s state-of-the-art language model. This WordPress plugin lets you easily write high-quality articles, eliminating human effort and saving time. This plugin works for OpenAI writers and GPT-3 article generators. AI content Writer for WordPress overcomes writer’s block and streamlines article writing.
Key Features:
- The plugin provides personalized prompts according to your needs and interests in your content.
- The plugin is GPT AI-powered.
- Useful for rephrasing content.
- Generate Meta titles, meta descriptions, and SEO-optimized content.
- Useful for generating captions for social media.
- Helpful for drafting an outline for the blog.
To learn about the pricing plan of WP AI Co-Pilot, click here.
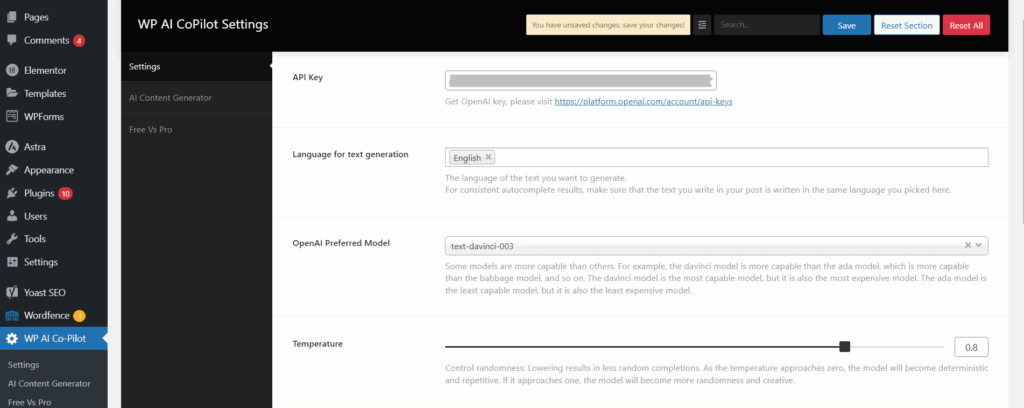
Getting Started With AI CoPilot
- Enter the OpenAPI Key to start using the plugin.
Screenshot 5: Enter the OpenAPI Key
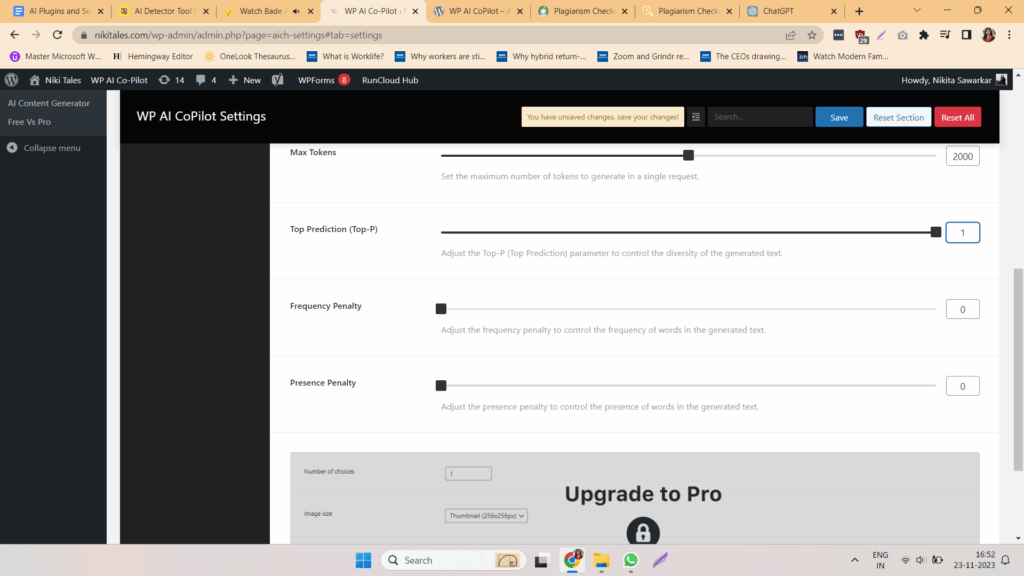
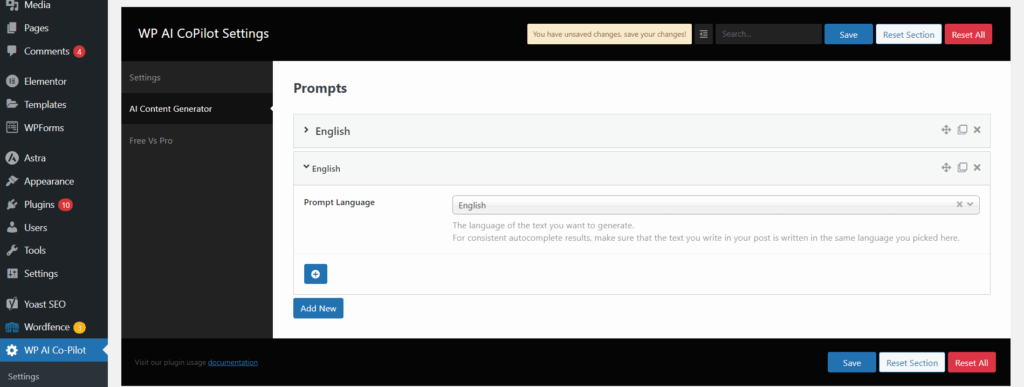
Screenshot 6: WP AI CoPilot Settings
- Next, you can select the prompt language you’d like to work in and perfect if you’re writing for an international audience or managing multilingual content.

Screenshot 7: Content Generation Options
Let’s explore one of the most popular tools, “Write a Paragraph on this”. Simply enter your prompt or title, and CoPilot will generate a meaningful paragraph based on your input.
Screenshot 8: Select Prompt Language
- Once set up, you’ll have access to a wide range of content tools right inside your editor. WP AI CoPilot offers options.

Screenshot 9: Enter prompt title
For advanced features like choosing your tone of voice, defining your audience, adding custom fields, and unlocking more creative control, you can upgrade to the Pro version.
AI Bud WP
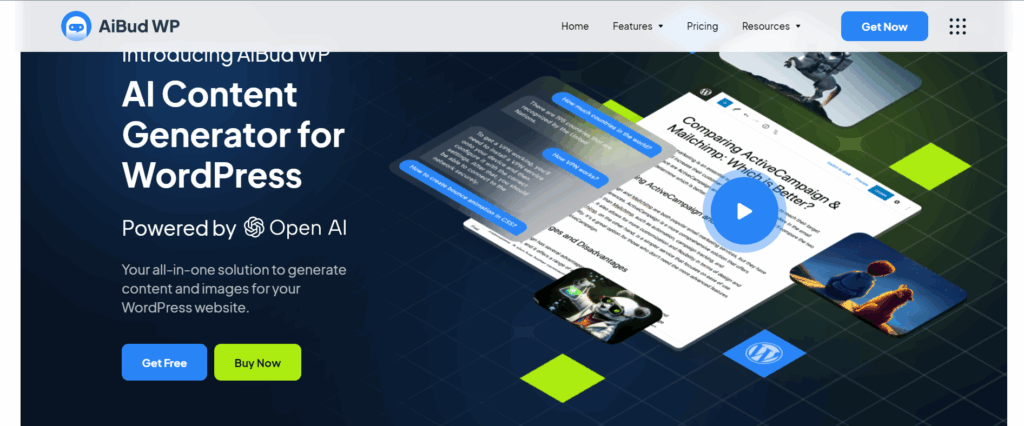
Screenshot 10: AI Bud WP Website Dashboard
AiBud WP WordPress plugin helps you write captivating blog articles with SEO titles and product descriptions, generate AI images, proofread your content, and translate into more than 30 languages. An AI-powered, user-friendly tool simplifies content creation, eliminating the effort involved.
Key Features:
- Quickly generates brief content according to your tone and style.
- You can make a list of topics and then use one click to make multiple posts or pages.
- Virtual Chatbot to help you with everything. To create a customized brand assistant, train your chatbot using datasets and related responses.
- Generate realistic images according to the prompt and type (cartoon, vector, etc)
- The Playground has a prompt section where users can offer AI instructions and learn about its capabilities.
To learn about the pricing plans of AiBud WP, click here.
Getting Started With AI Bud WP:
- Install and Activate the AI Bud WP Plugin.
Screenshot 11: AiBud WP Plugin when Activated
- Go to settings and enter the OpenAPI key to use the plugin.
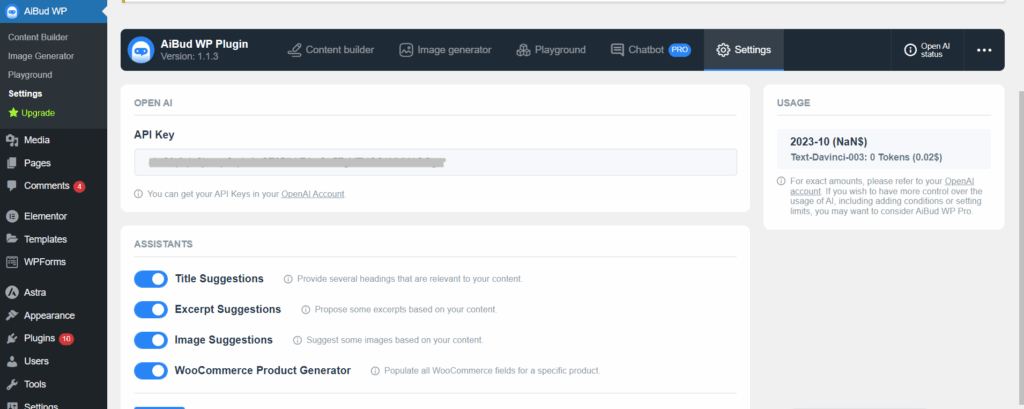
Screenshot 12: Enter API Key
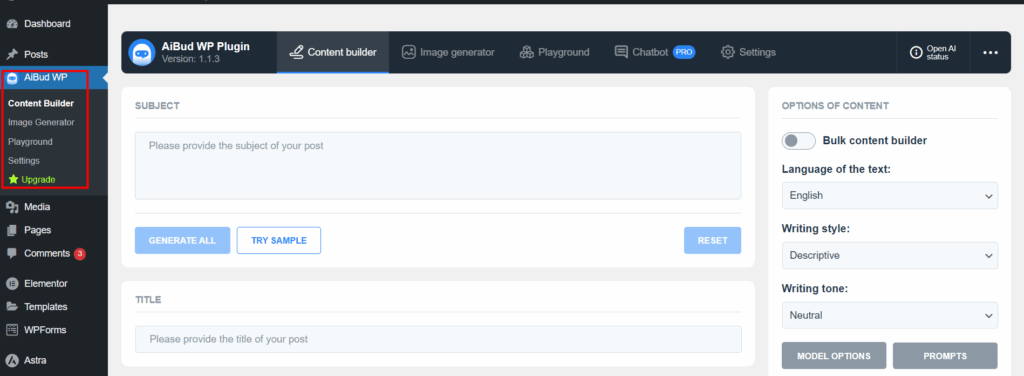
- To generate the content, enter keywords or the subject title of the topic.
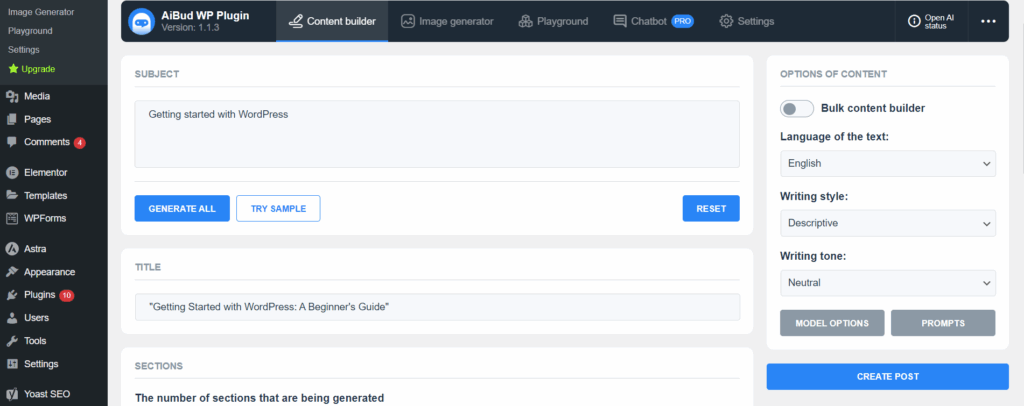
Screenshot 13: Enter Subject Title
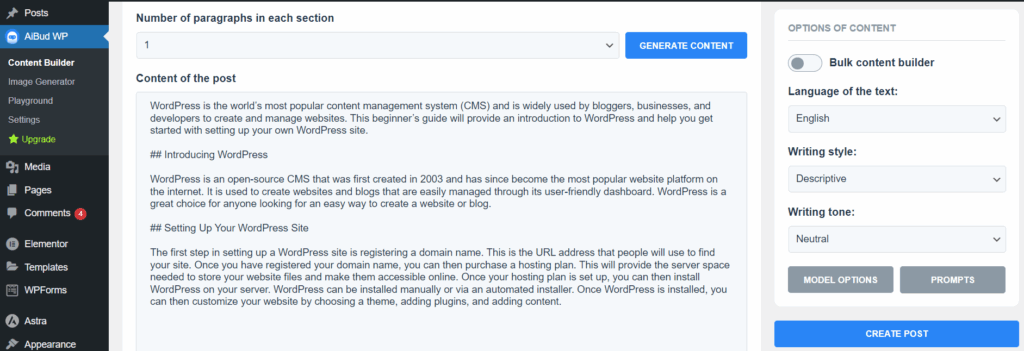
- Before generating content, you can control how detailed it is:
- Choose how many sections you want
- Select the number of paragraphs per section
- Automatically generate an excerpt if needed
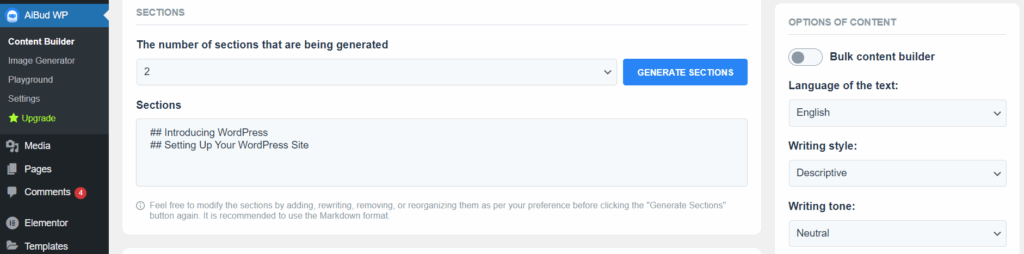
Screenshot 14: Select the number of sections to be generated
Screenshot 15: Select the number of paragraphs to be generated

Screenshot 16: Generate Excerpt
- Before finalizing your post, you can fine-tune the output by selecting:
- Preferred language
- Desired writing style
- Tone of voice (formal, casual, informative, etc.)
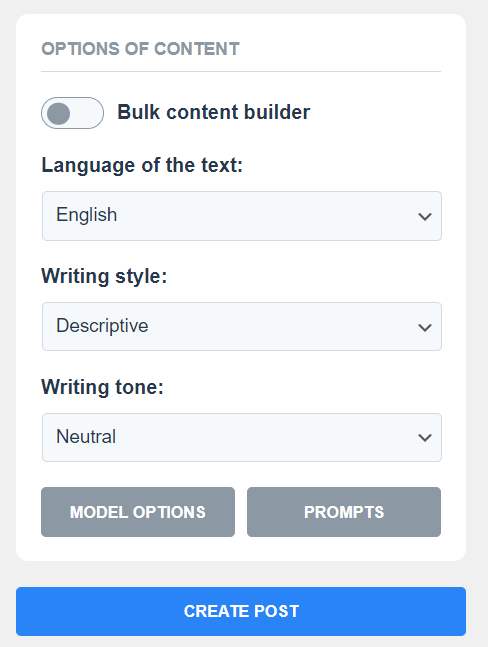
Screenshot 17: Options for Creating a Post
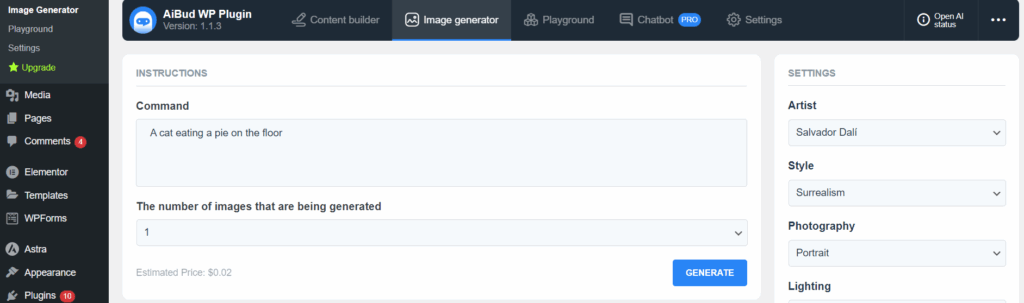
- The plugin also lets you create AI-generated images right from WordPress.
- Head over to the Image Generator tab, and simply describe the kind of image you want to generate. The AI will create visuals based on your prompt.

Screenshot 18: Describe the image to be generated in the Command Section
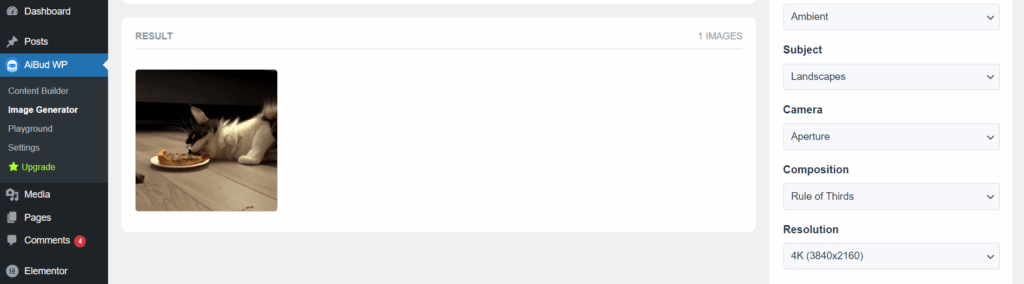
Screenshot 19: Image Generation Result
- You can also customize your images by adjusting options like:
- Camera angle
- Size and aspect ratio
- Lighting
- Resolution
- Composition and more
- With the help of the robust Playground section, you can have live conversations with the AI to learn more about its capabilities.
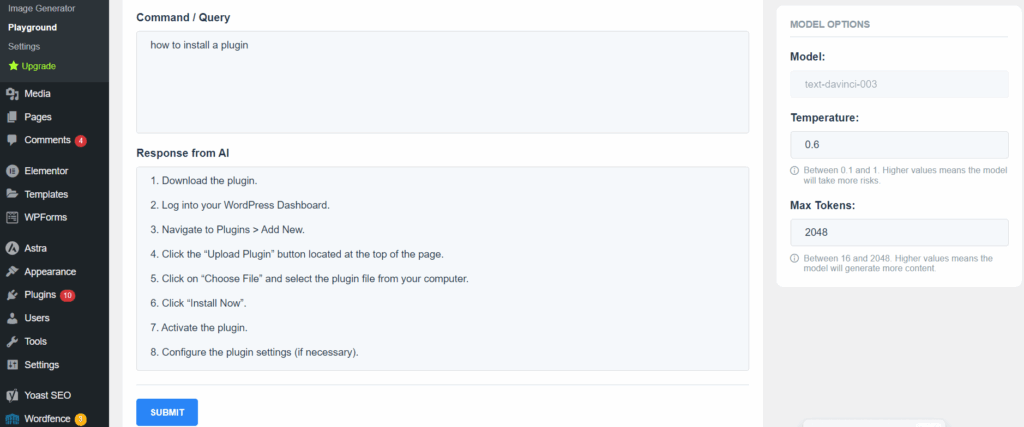
Screenshot 20: Playground Section of the Plugin
- A prompt response will be provided to any inquiry you enter.
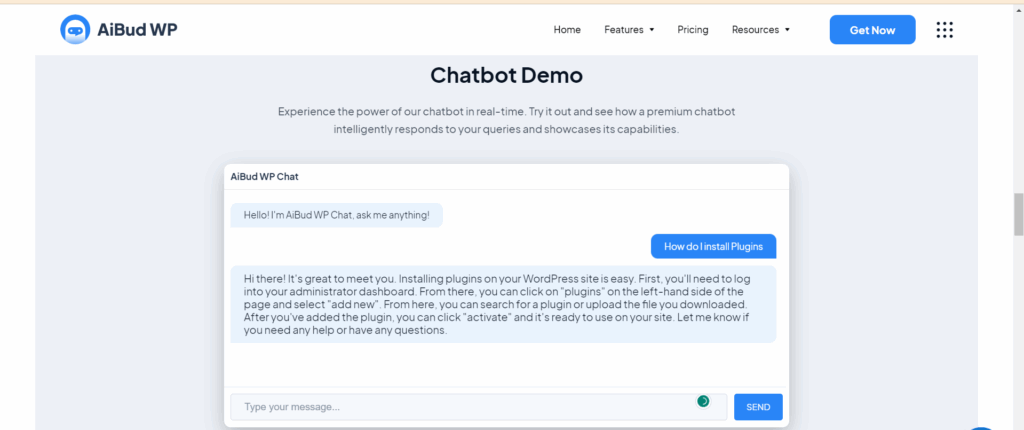
Screenshot 21: ChateBt Demo
Supreme AI
Screenshot 22: Supreme AI Plugin Website
DIVI Supreme AI Writer is a revolutionary plugin that uses AI to transform content creation. It is a plugin developed by Divi Builder. Just a few clicks can produce stunning, engaging content that will leave the readers stunned. All you need to do is provide a brief description or outline of what you want to write about, and the magic begins!
Note: This plugin can only be used if you have Divi Builder.
Key Features:
- More than 20 tones are available to write the content according to the tone you select
- Around 19 styles of writing to choose from
- Provides temperature control settings. It is possible to change the temperature to change how original and novel the result of an AI system is. Lower temperatures produce more predictable outputs, whereas higher temperatures produce more creative and innovative outputs.
- Choose how many words of content you require.
- Integrating with Divi Builder allows you to code through AI.
You can get Supreme AI Writer for $29 per year.
AI Power
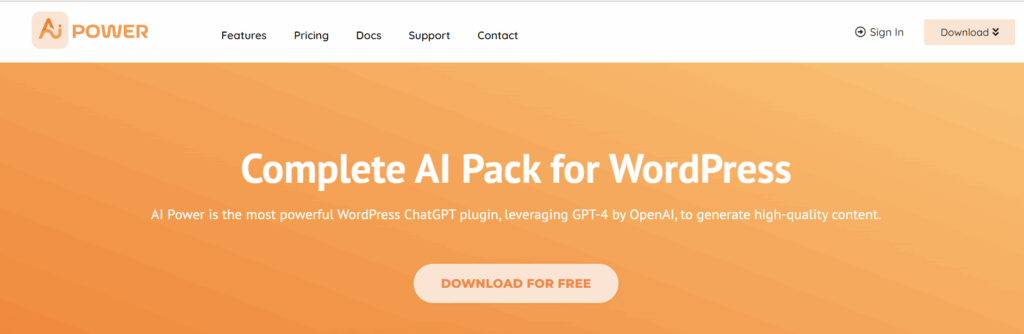
Screenshot 23: AI Power Plugin
AI Power is a powerful WordPress plugin that uses OpenAI’s GPT language model to generate high-quality website content, pictures, and forms. Content Writer, Auto Content Writer, Image Generator (DALL-E and Stable Diffusion), WooCommerce Product Writer, Audio Converter, hundreds of prompts and forms, and AI Training are included in this plugin.
Key Features:
- Along with content and image generation, this plugin generates smart forms using AI for your website.
- An AI-powered chat widget to engage your customers visiting your site.
- AI-powered WooCommerce integration, which helps you write product descriptions and generate recommendations, reviews, and images.
- Using advanced GPT models, this plugin turns spreadsheet data into engaging, well-structured material.
- Convert audio to text using Whisper.
- More than 40 languages are supported.
To learn about the pricing plans of the AI Power plugin, click here.
To read the documentation about AI Power, click here.
Getting Started With AI Power Plugin:
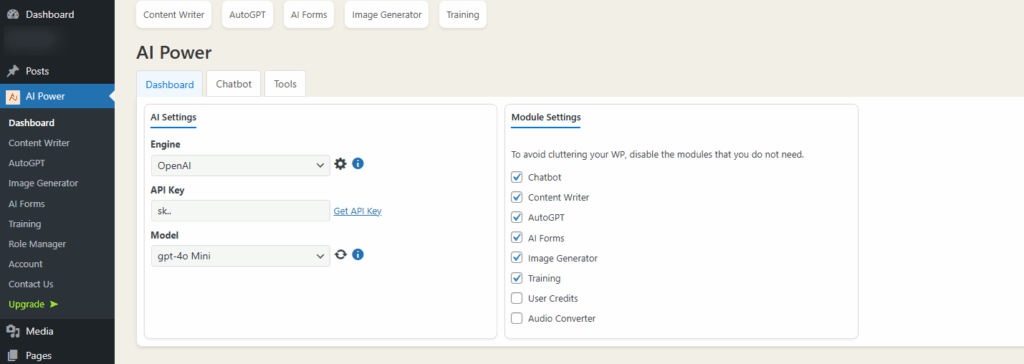
Screenshot 24: AI Power Plugin Dashboard
With this plugin, you can enhance your content writing, image generation, tone and style of writing, and much more!
Once installed and activated, the plugin is integrated into the Post.
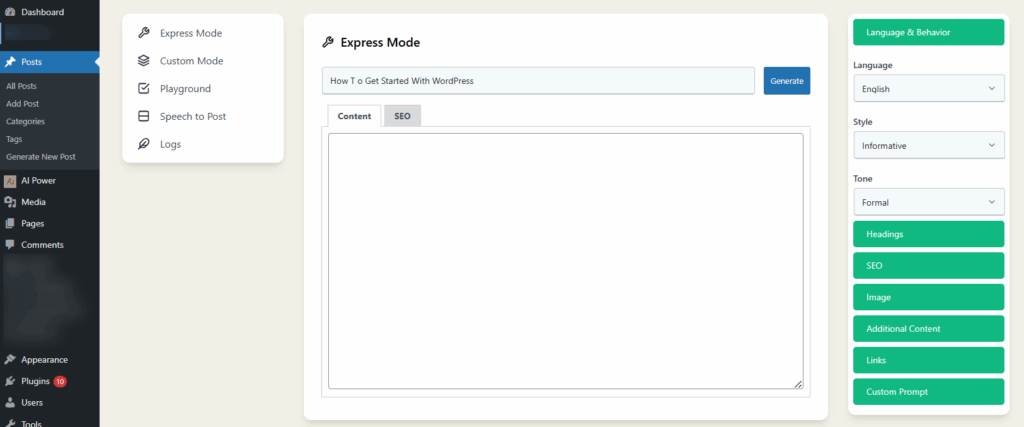
Screenshot 25: AI Power Integrated with the Post to generate automated content by providing keyword/ title
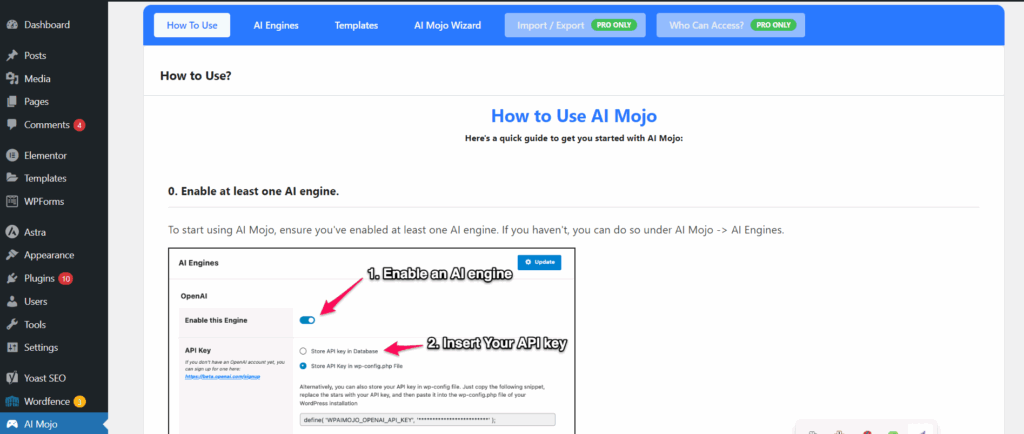
AI Mojo
Screenshot 26: AI Mojo Plugin
AI Mojo recognizes itself as a Bring Your Key (BYOK) plugin, meaning you must possess an Open API key or AI21 key to use this plugin.
Key Features:
- Write introductions, conclusions, and more for your articles.
- Rewrite, shorten, or paraphrase existing content matter.
- Utilize the AI Mojo Wizard to produce an entire article.
Currently, this plugin is completely free.
Getting Started With AI Mojo
- Once installed, just enter your OpenAI key, and you’re all set to use the plugin. Yes, AI Mojo is completely free to use!
- Although AI Mojo doesn’t support image generation, it shines when it comes to writing content. It’s an intuitive wizard that guides you step-by-step through the content creation process.
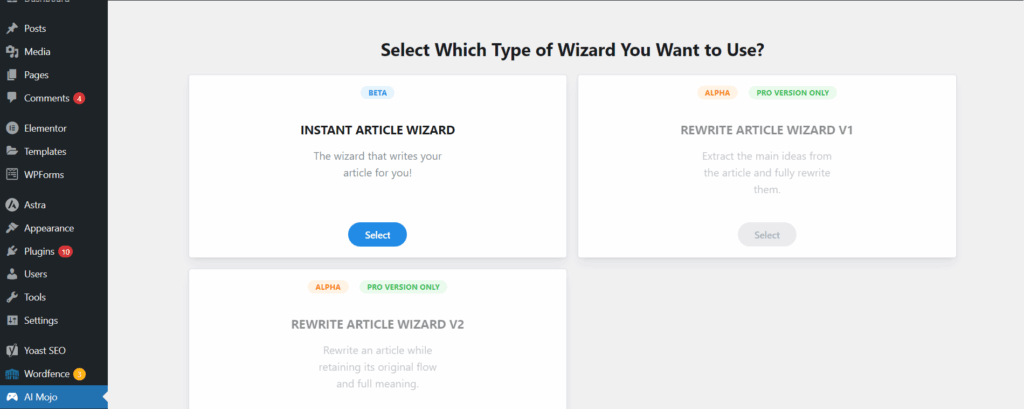
Screenshot 27: AI Mojo Wizard
- Start by entering the topic or subject you want to write about. AI Mojo will take care of the rest.
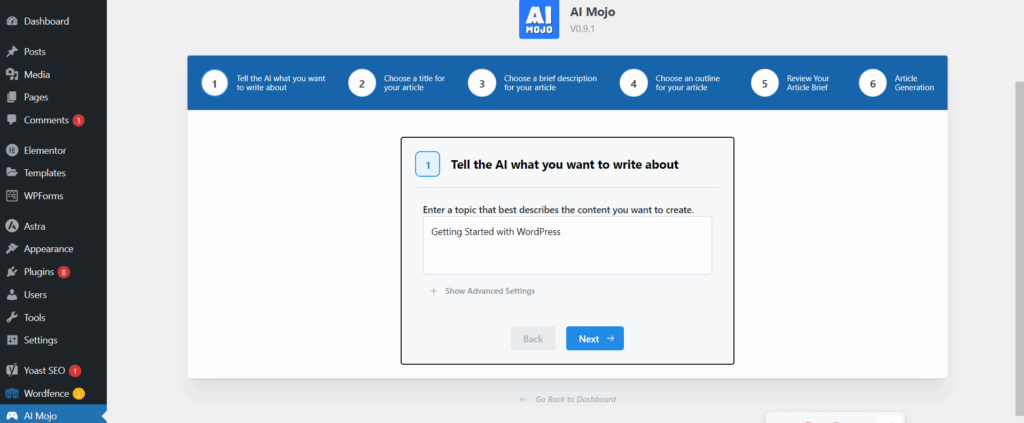
Screenshot 28: Write the topic title you want to write about
- Don’t worry if you are unable to come up with a final title for your blog; AI Mojo can help you with that, too. Just choose which title suits you the best.
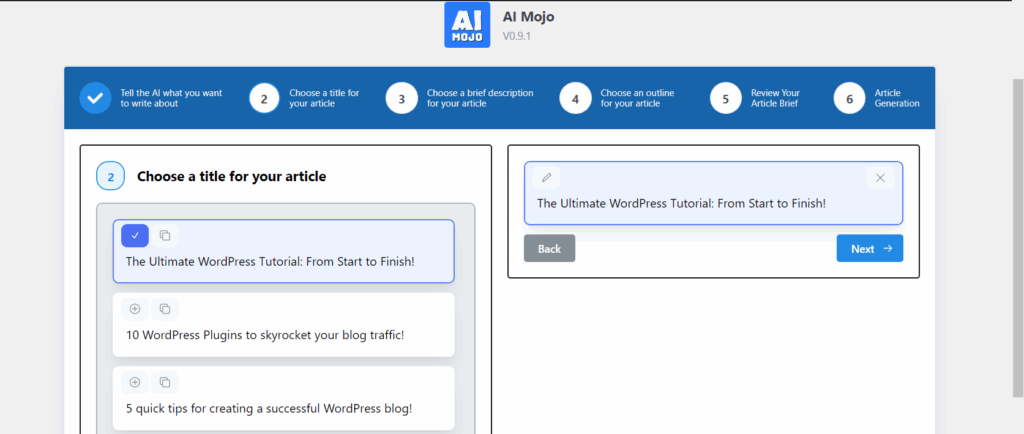
Screenshot 29: Choose a title for your blog
- Next, the plugin will create a few short descriptions for your article. You can select the one that aligns with your content direction.
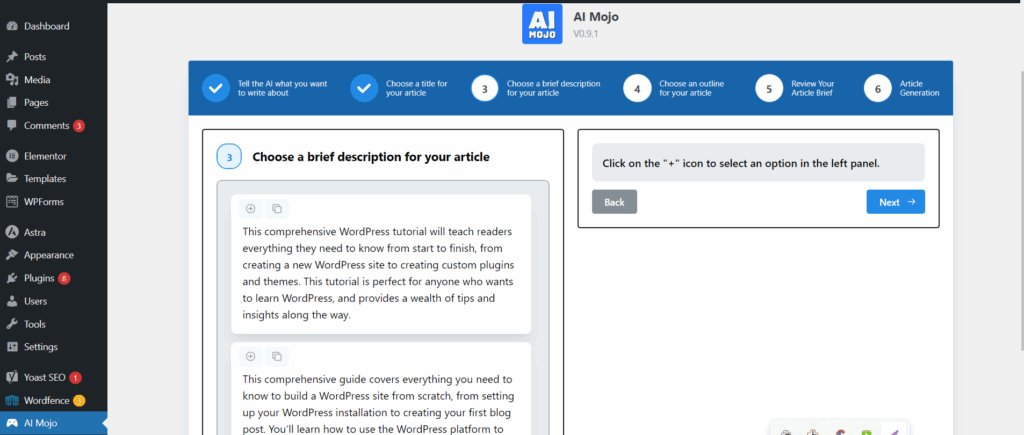
Screenshot 30: Choose Description
- Now, pick an outline that structures your blog post. This helps keep your content organized and easy to read.
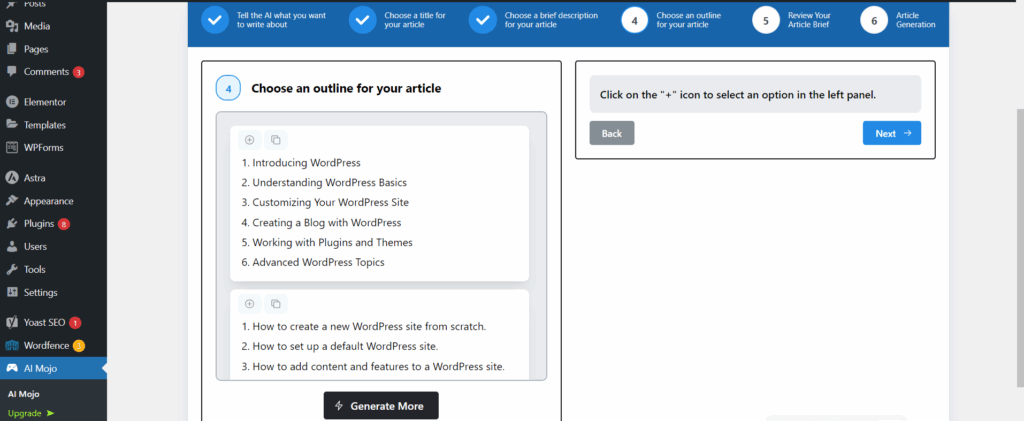
Screenshot 31: Choose Outline
- Before moving forward, you can review the article brief generated so far. It’s a great way to confirm everything is on track.
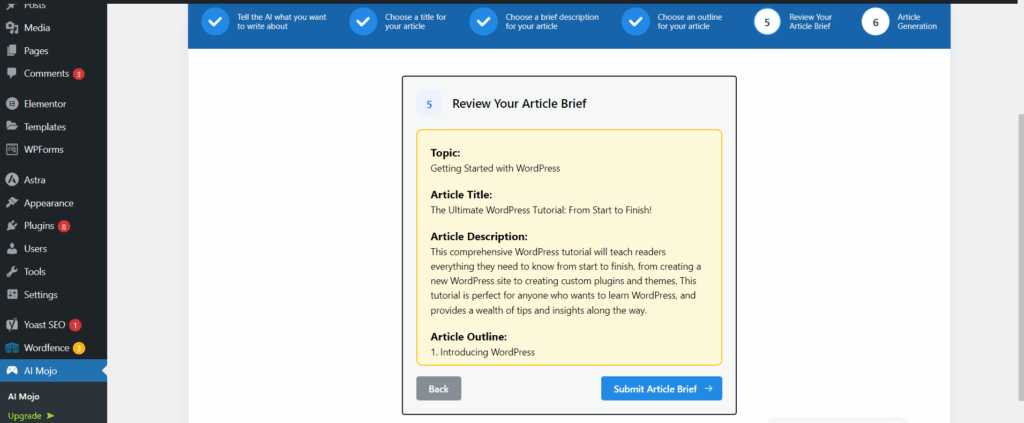
Screenshot 32: Review your article Brief
- AI Mojo will now generate a full draft based on your chosen inputs—ready to edit, polish, and publish!
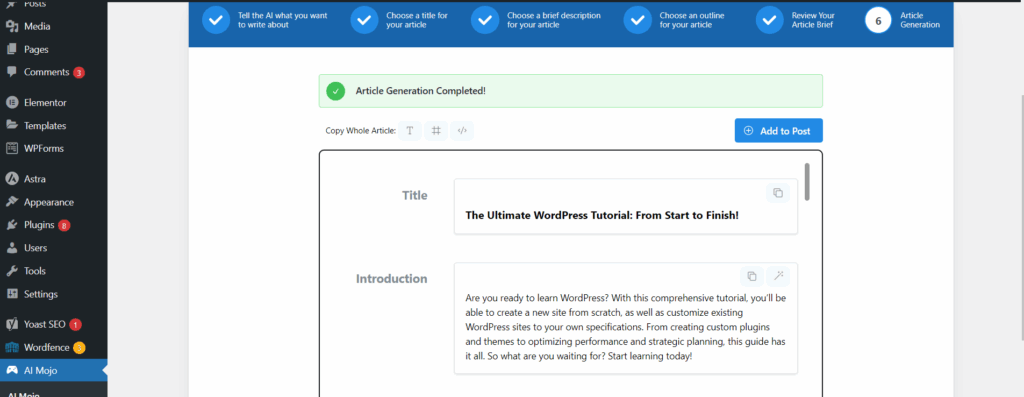
Screenshot 33: Generated Content
- You can also access AI Mojo right inside the WordPress post editor. Just click the AI Mojo icon to launch the writing assistant anytime while creating content.
Screenshot 34: Click on the marked icon to open AI Mojo options
AI Writing Assistant
Screenshot 35: AI Content Writing Assistant Plugin Website
AI Content Writing Assistant is here to save you time and effort while helping you create visually beautiful images and engaging content. Its simple interface lets you generate content on any topic and customize graphics.
Before you begin, you need to enter the OpenAPI key to use this plugin. Additionally, you can save the settings of the plugin for API, content, and general settings, such as assigning user roles.
Key Features:
- Content and Image generation
- Scheduling of your content
- SEO Optimizer
- Comes with 16 Content Structures, 20 writing styles, and 41 writing tones
To learn about the pricing of the AI Writing Assistant, click here.
Getting Started With AI Content Writing Assistant:
- Once the plugin is installed, head over to the settings section. You’ll find different tabs like API Settings, Content Settings, and General Settings. These let you control how your content is created and formatted.
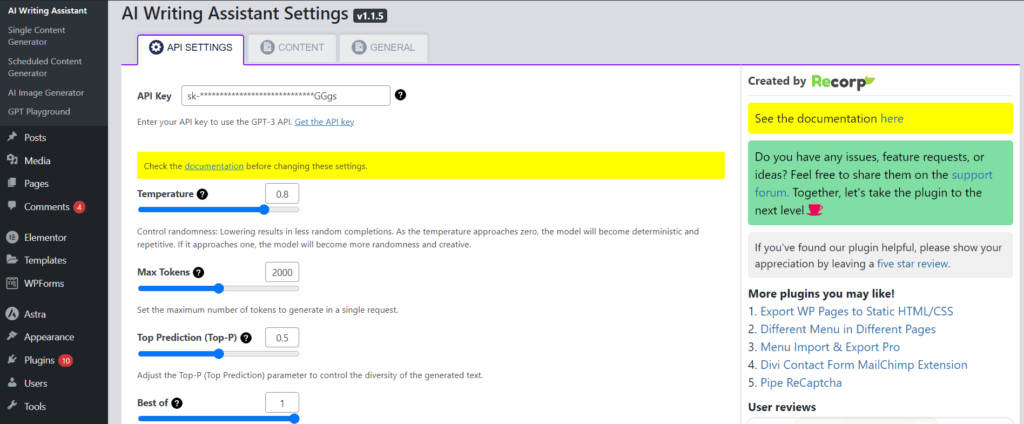
Screenshot 36: API Settings for AI Writing Assistant
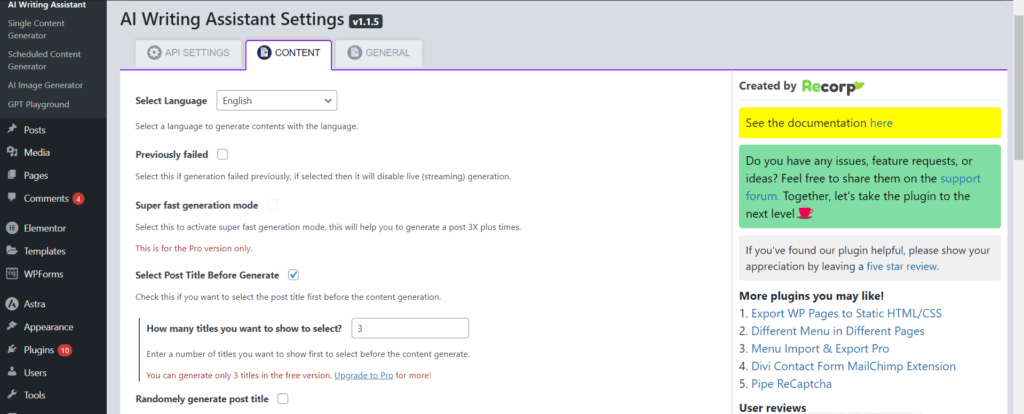
Screenshot 37: Content Settings for AI Writing Assistant
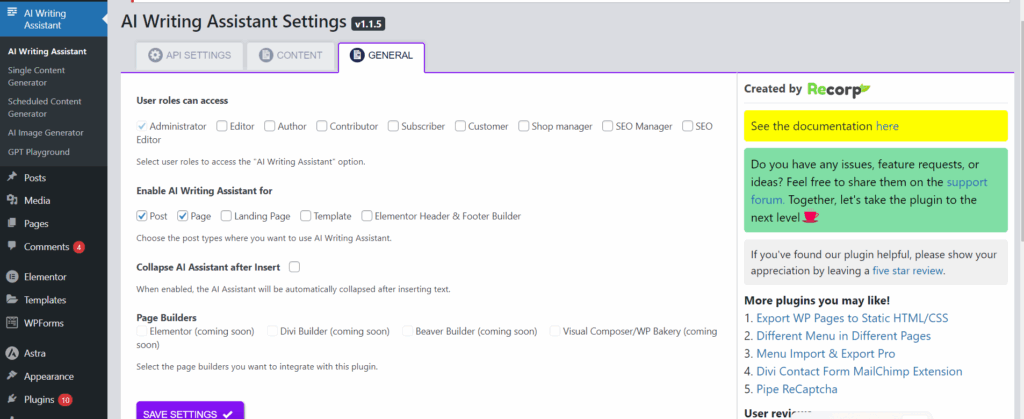
Screenshot 38: General Settings for AI Writing Assistant
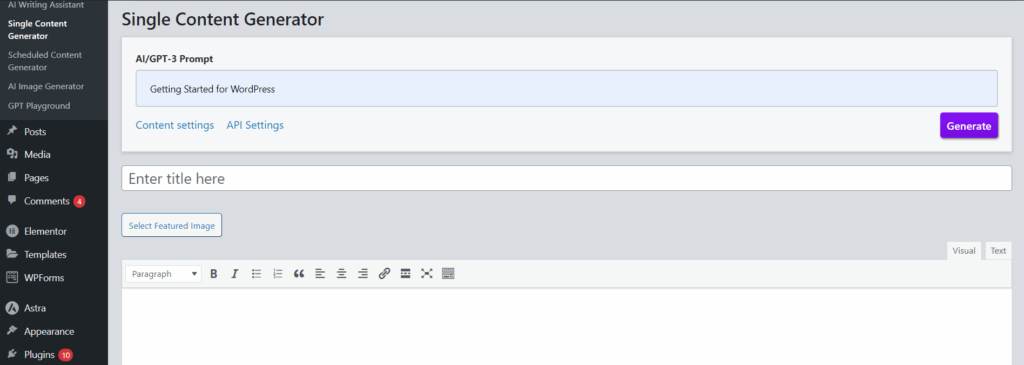
- To get started, enter your topic or prompt in the text box and click on Generate. The assistant will quickly create a complete blog draft for you.
Screenshot 39: Enter the prompt and click on Generate
- You’ll be given a few title suggestions to choose from. Pick the one that best matches your post’s theme.
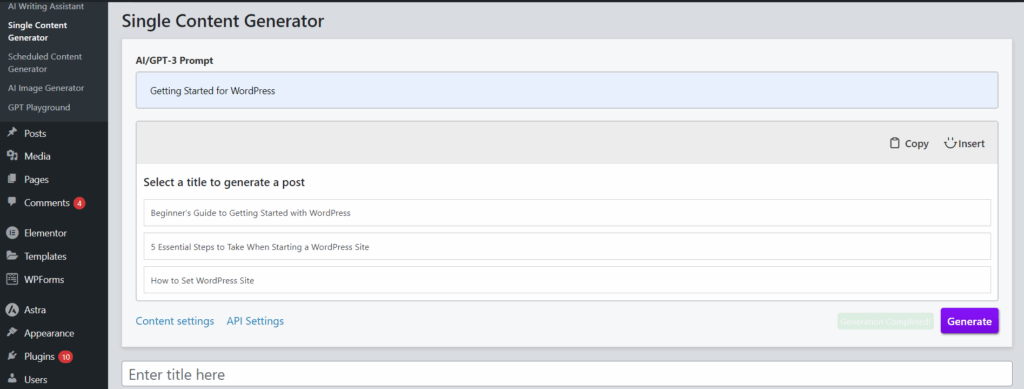
Screenshot 40: Select a Title for Blog Post
- Once the content is ready, you can simply copy and paste the title and body into the post section below, just like creating a regular WordPress post.
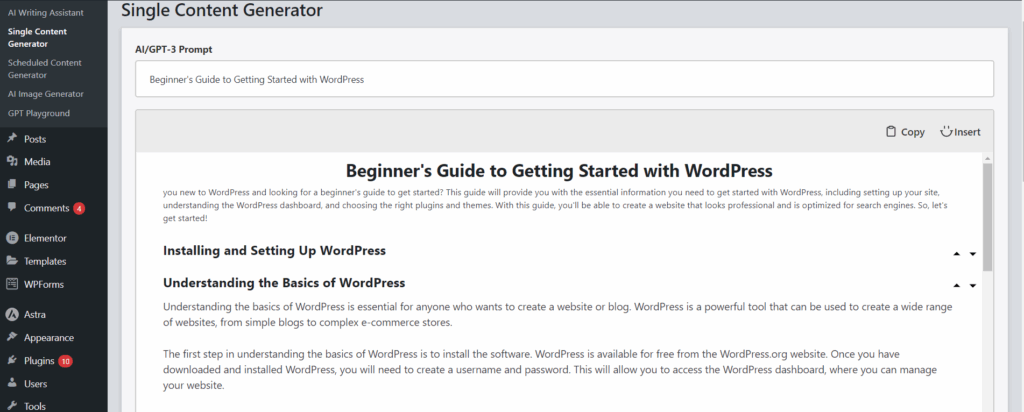
Screenshot 41: Viewing generated content
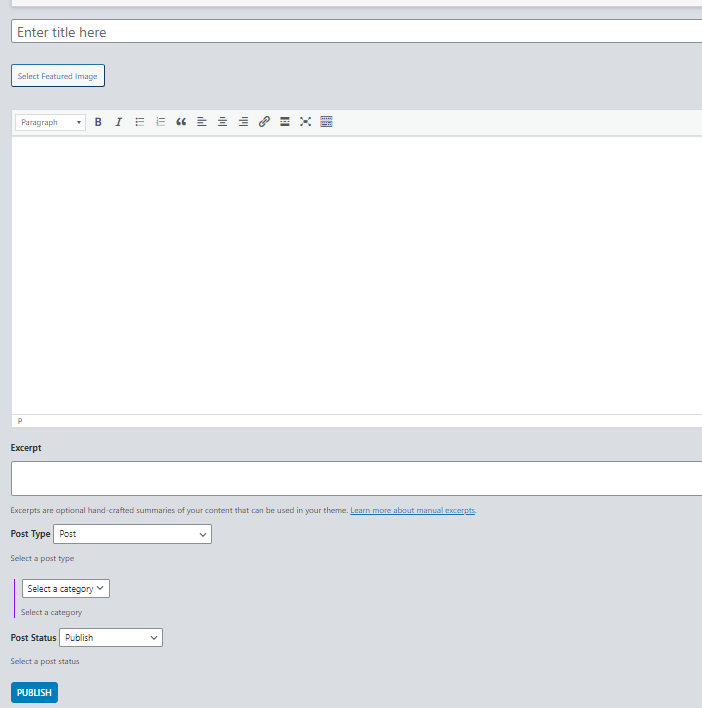
Screenshot 42: Publishing your Post
- Want to publish later? Use the Scheduled Content Generator to set the date and time you want your post to go live.
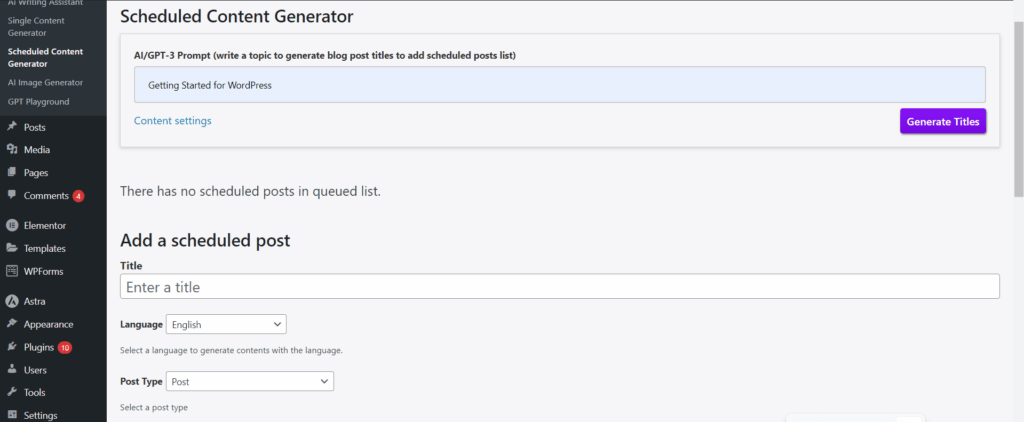
Screenshot 43: Scheduled Content Generator
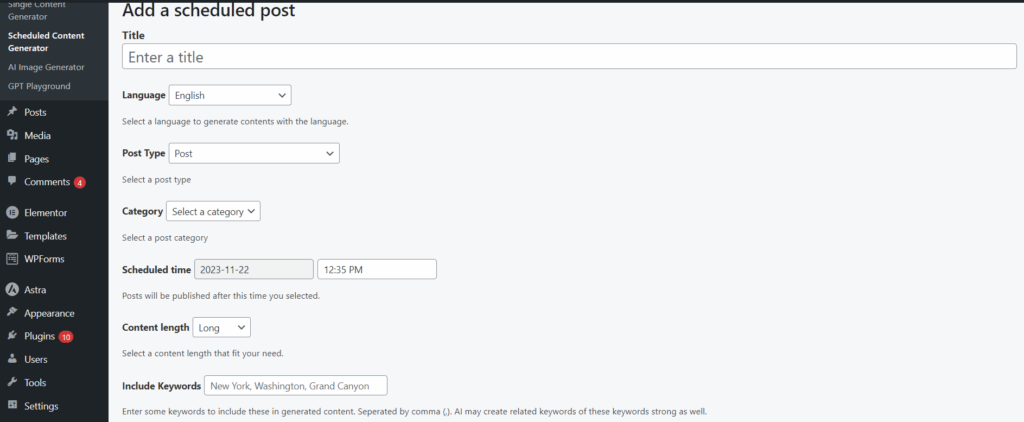
Screenshot 44: Add a Scheduled Post (1)
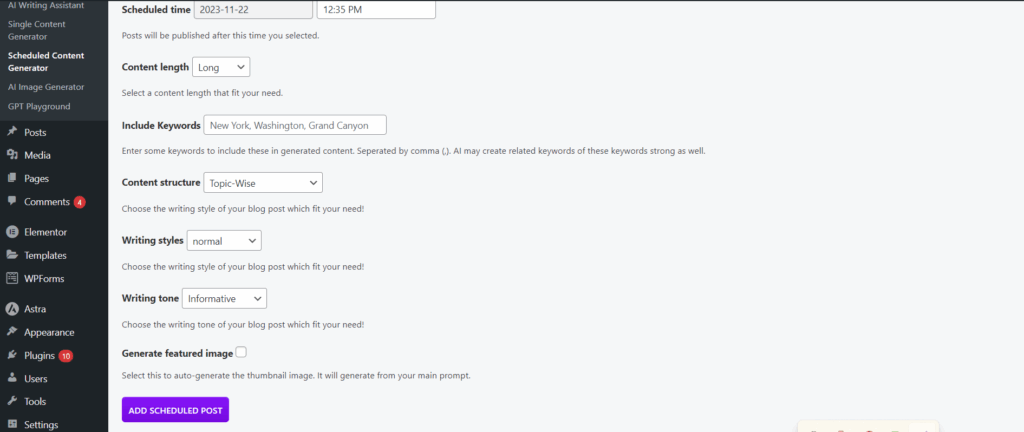
Screenshot 45: Add a Scheduled Post (2)
- The plugin also includes an AI Image Generator. Just enter a short description of the image you want, and the assistant will create it for you.
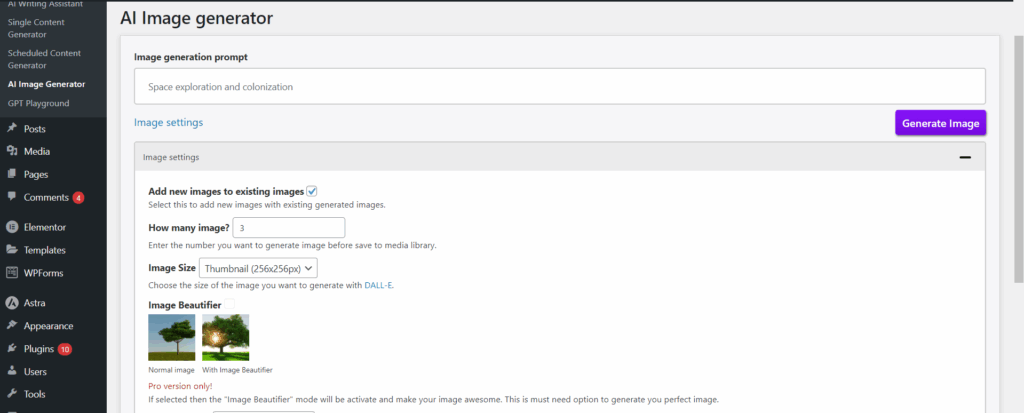
Screenshot 46: AI Image Generator
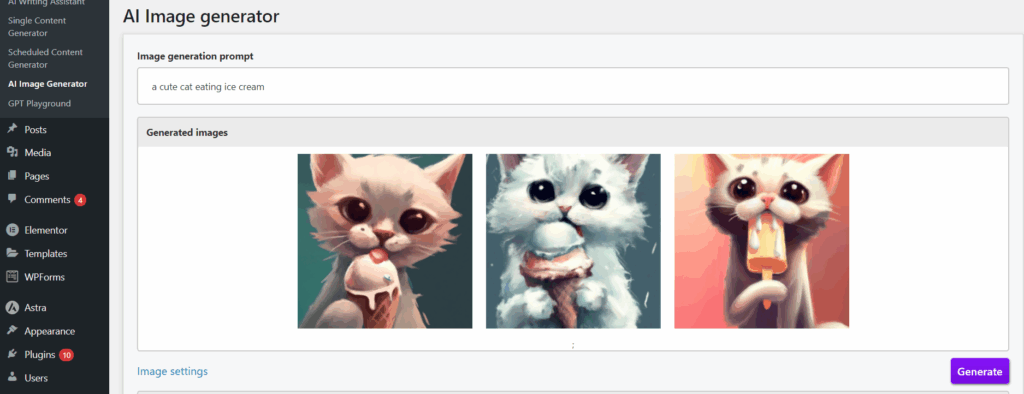
Screenshot 47: Image Generation Result
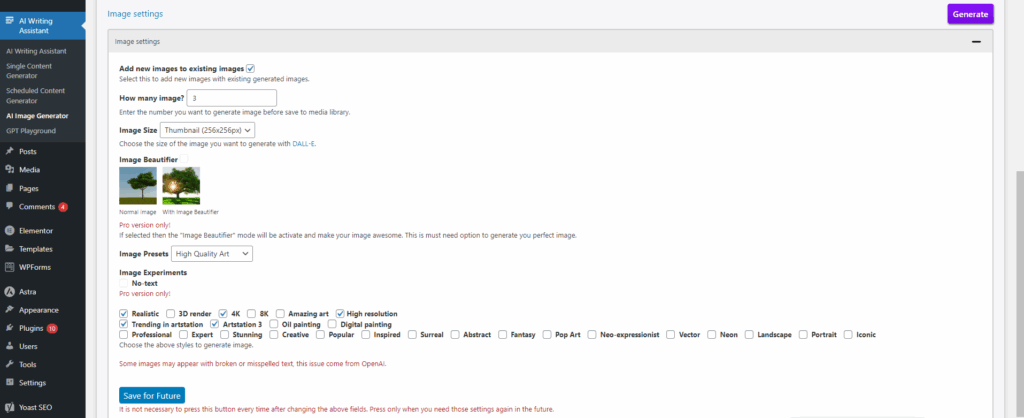
Screenshot 48: Image Generation Settings
Imajinn
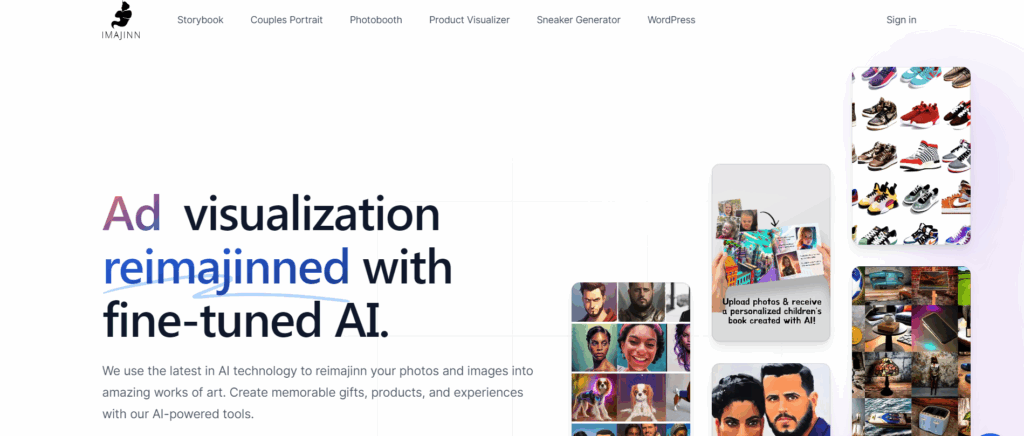
Screenshot 49: Imajinn Plugin Website
The Imajinn plugin is used solely for image creation. Imajinn allows you to create visuals for anything using only your imagination, much like Stable Diffusion, DALL-E 3, and Midjourney. Imajinn is capable of creating a stunning picture for you in a matter of seconds based on the prompt you provide.
Key Features:
- Varied options to create an image, such as selecting image style, artist style, and style modifier.
- AI-based facial restoration to improve hues and restore facial details while maintaining a high degree of authenticity and realism.
- For support with any theme maker, you can make images outside of Gutenberg itself.
- Does not require an API Key.
- Use the image freely, without license fees.
- You don’t have to worry about licencing problems when you use the generated images.
Currently, the plugin is free.
Getting Started With Imajinn:
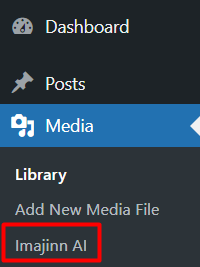
- Once the plugin is installed and activated, you’ll find Imajinn conveniently located under the Media section in your WordPress sidebar.
- To begin using the plugin, you’ll need to log in with your Imajinn account or sign up for a new one if you haven’t already.
Screenshot 50: Imajinn Plugin In WordPress
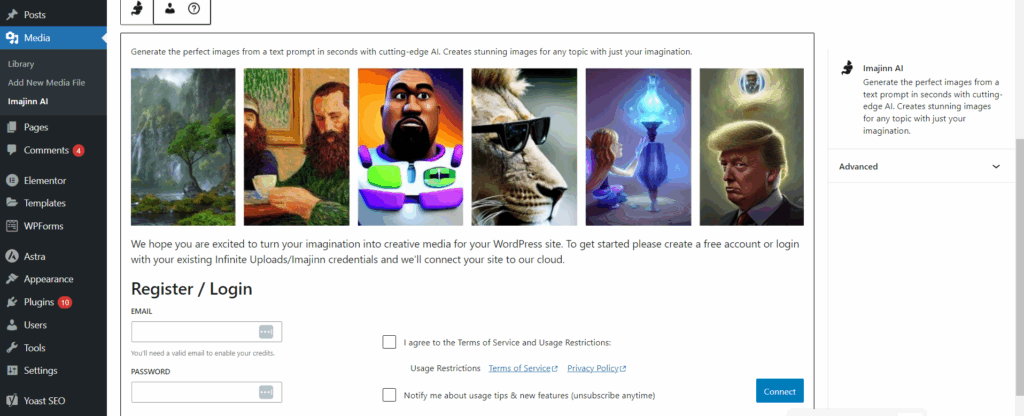
Screenshot 51: Enter the Login details
- You’re all set! In the prompt section, just type a short description of the image you want, like “sunset over mountains with birds flying”, and Imajinn will create it in seconds.
Screenshot 52: Describe the Image
Imajinn is perfect for bloggers, content creators, and marketers who need quick, original visuals without switching between tools. Let the creativity flow, right inside your WordPress dashboard!
Conclusion:
Using AI plugins on WordPress has become one of the easiest ways to work smarter. Whether you’re writing blog posts, managing a website, or creating content for clients, these tools can make your work a lot easier.
Tasks that used to take days now take just a few hours, and the quality often turns out even better. You don’t need to be a tech expert to use them; they’re built to make things simple. Let the AI plugins handle the heavy lifting so you can focus on building content that connects with your audience.