Introduction
In Part 2 of this 3 part Blog series, we covered the following sections of the support candy plugin
- Ticket List
- Agent Ticket List
- Customer Ticket List
- Email notification
Now, in Part 3 which is the final part of this blog, we will explore the settings sections of the SupportCandy plugin.
Settings
Step 1: General settings
- Under this tab, you can configure the general settings.

Screenshot 1: Settings → General Tab
- Ticket Status After Customer Reply: You can define the ticket status that will be set when a customer (the ticket creator) submits a reply. If you don’t want the status to change, select the “Do not change” option.
- Ticket Status After Agent Reply: You can specify the ticket status that will be applied when an agent submits a reply. To keep the status unchanged, select “Do not change.”
- Close Ticket Status: This status is applied when either an agent or a customer closes the ticket.
- Ticket Alice: You can customize the name used for your tickets. For example, you might rename it to “Case,” so tickets will be referred to as “Case #” in individual tickets, email notifications, and other communications.
- Allow Close Ticket: You can determine who has permission to close a ticket. Agents from the selected roles must have the necessary access to enable the “Close” button within an individual ticket.
Page settings Tab
- Here you can set the various pages such as user login and registration screens.
Screenshot 2: Support → Settings → General Settings → Page Settings tab
- Support Page: The support page is where the [supportcandy] shortcode is used on the front end to display the support functionality.
- User Login: This setting determines how users can log in to access the support forum on the front end. You can choose from Default, WP Default, or Custom URL options.
File Attachments
- Go to Support → Settings → General Settings → File Attachments tab
- Here you can set the max file size of the attachment along with its Allowed File Extensions.
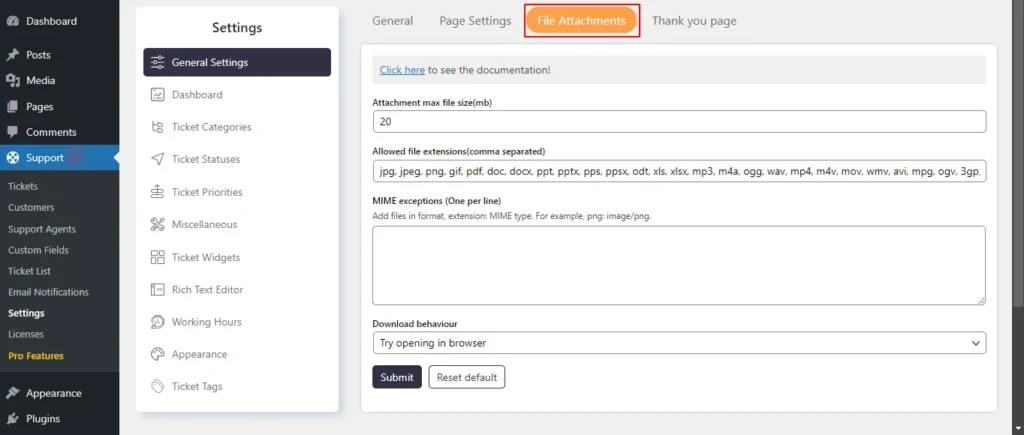
Screenshot 3: File Attachments tab
Thank you page
- Here you can define what action should be taken after the customer or agent submits the ticket.
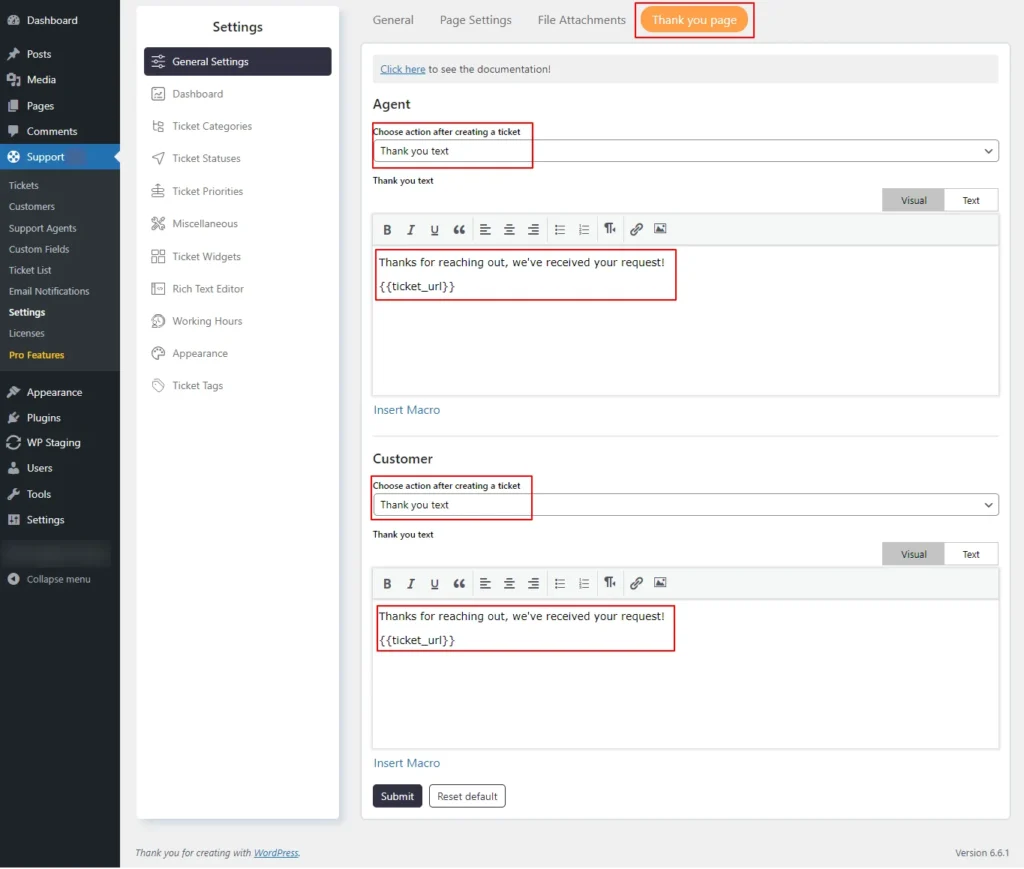
Screenshot 4: Thank You Page
- You can show a thank-you text, redirect to the custom page, or open a ticket page.
Step 2: Dashboard
- Dashboard in SupportCandy lets support agents quickly see important ticket information. This helps them plan their work and choose what to do first.
- You can see how many new tickets, unresolved tickets, unassigned tickets, closed tickets, tickets assigned to the current agent (mine), tickets that are out of SLA, tickets that are due today, and tickets that are due tomorrow.
- If an agent clicks any of these numbers they will be redirected to the respective categories list of tickets with the right filter in place.
General
- Here we define the general settings for the dashboard, such as the default date range and dashboard auto-refresh.
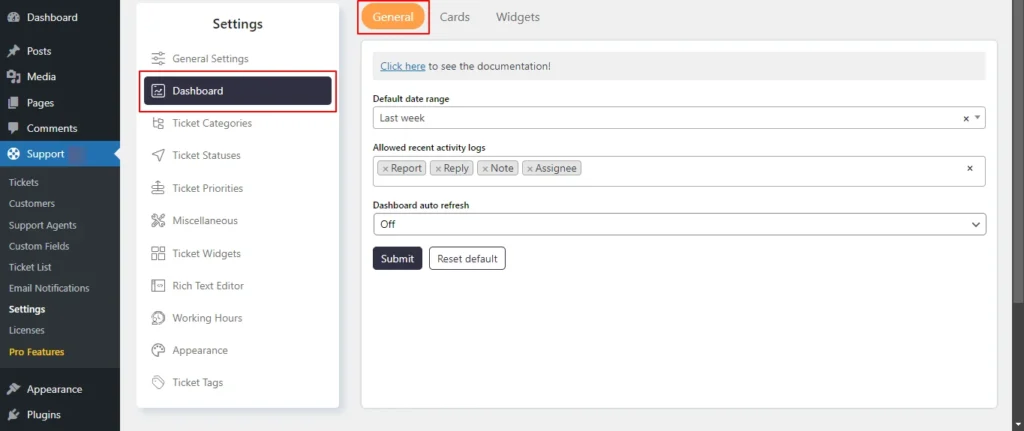
Screenshot 5: Dashboard General Tab
Cards
- Under this tab, set the order of the tickets based on the ticket status.
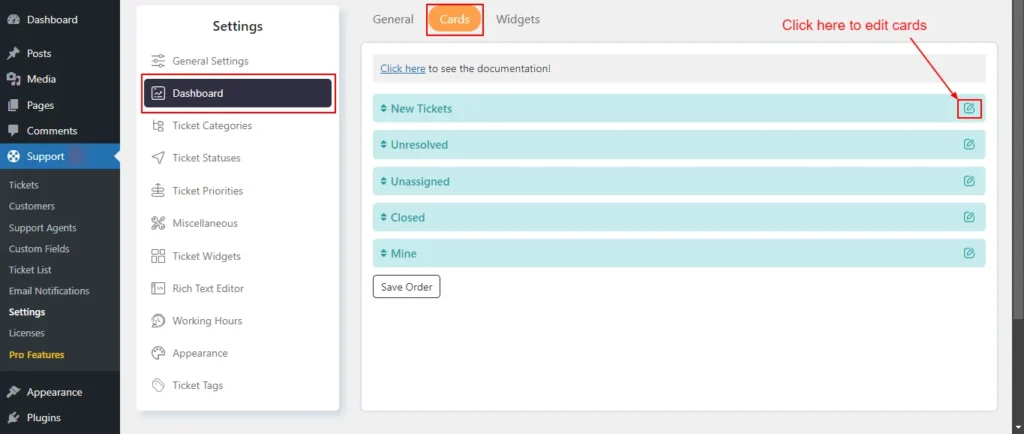
Screenshot 6: Dashboard Cards
- Click the Edit button next to that card, as shown in the screenshot below . You can change the Title, show/hide the card in the dashboard, and allow agent roles who can see the card info in the dashboard.
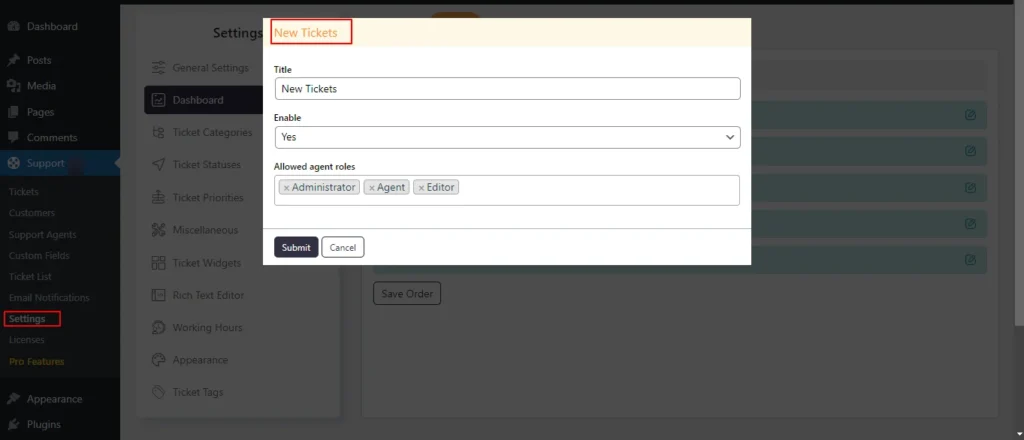
Screenshot 7: Edit the Cards
Widgets
- The dashboard widgets give you a complete view of your support operations, with real-time information on new tickets and closed tickets, as well as full analytics on response times and communication gaps.
- You can customize the dashboard to your needs by rearranging widgets based on priority.
- Also, you can manage visibility for different agent roles by enabling or disabling widgets for specific roles.
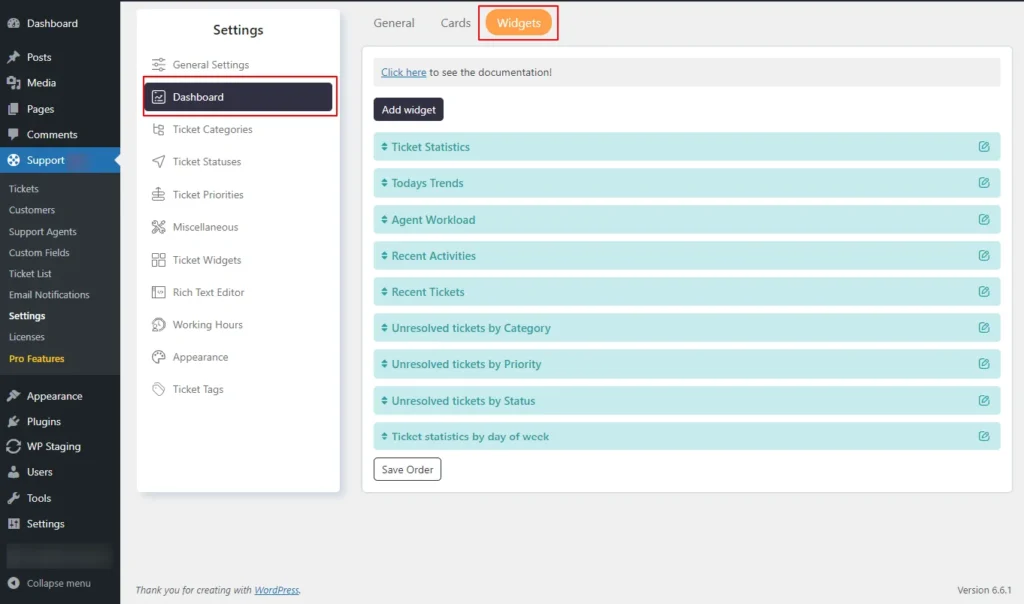
Screenshot 8: Dashboard Widgets
Here is the List of widgets that are available by default
- Ticket Statistics
- Trends of Today
- Agent Workload
- Recent Activity
- Recent Tickets
- Unresolved Tickets by Type
- Unresolved Tickets by Priority
- List of Unresolved Tickets by Status
- Response Delay
- Ticket Closing Delay
- Communication Gap
- Ticket comments
- Agent scores
- Out of SLA Tickets
- Active Timer
- Usergroups
Adding a new widget
- In the Widgets tab, locate the Add New Widget button and click on it.
- Select the Custom field for which you want to add widgets. Click Submit to save changes.
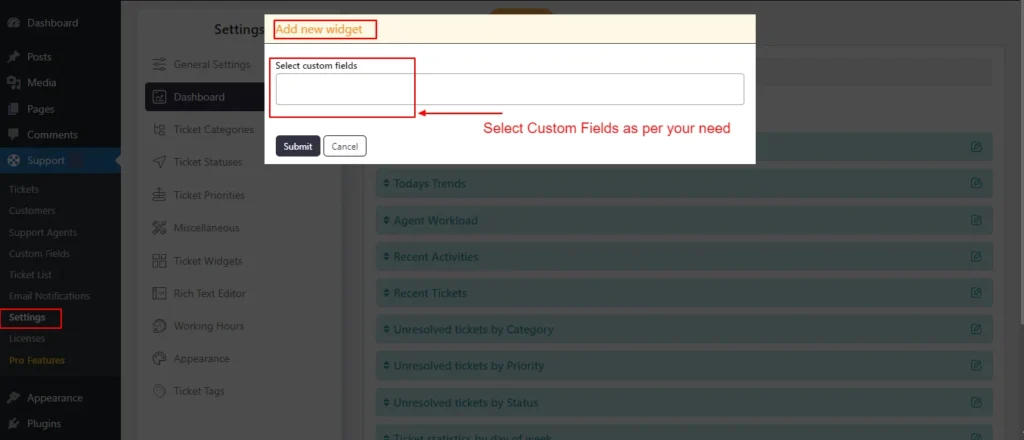
Screenshot 9: Adding a new widget
Editing the Widgets
- Click on the edit icon beside the widget name.
- You can change the title, show/hide the widget in the dashboard, and allow agent roles who see the widget in the dashboard.
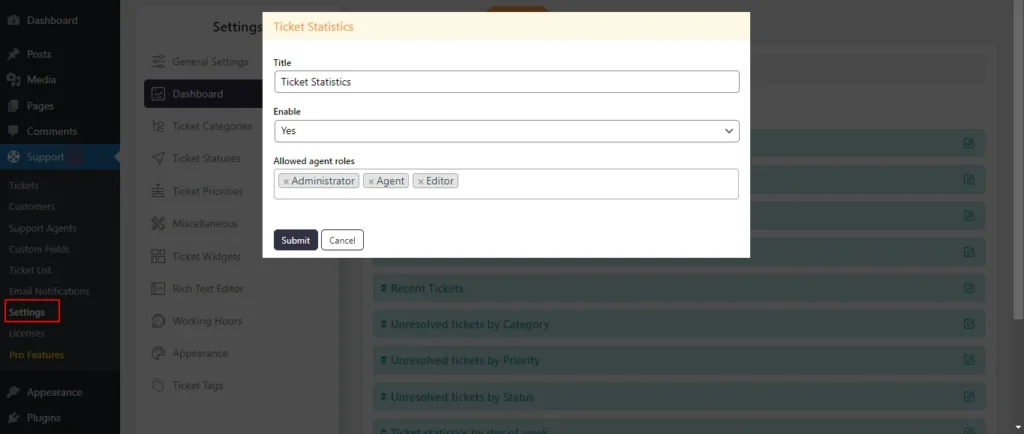
Screenshot 10: Editing Widgets
Step 3: Ticket Categories
- Ticket categories let users and agents sort tickets into groups based on what they are about, which makes it easier to communicate and solve problems.
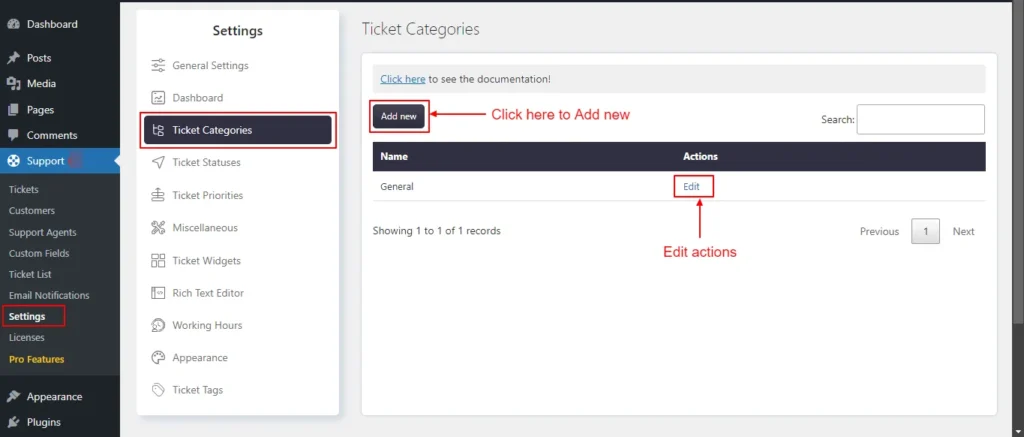
Screenshot 11: Ticket categories
Adding a New Category
- Users with the necessary permissions can create new ticket categories.
- Navigate to Support → Settings → Ticket Categories
- Click on Add New.
- Give a name to the category.
- Select the order of loading the categories by Load after dropdown.
- Click Submit
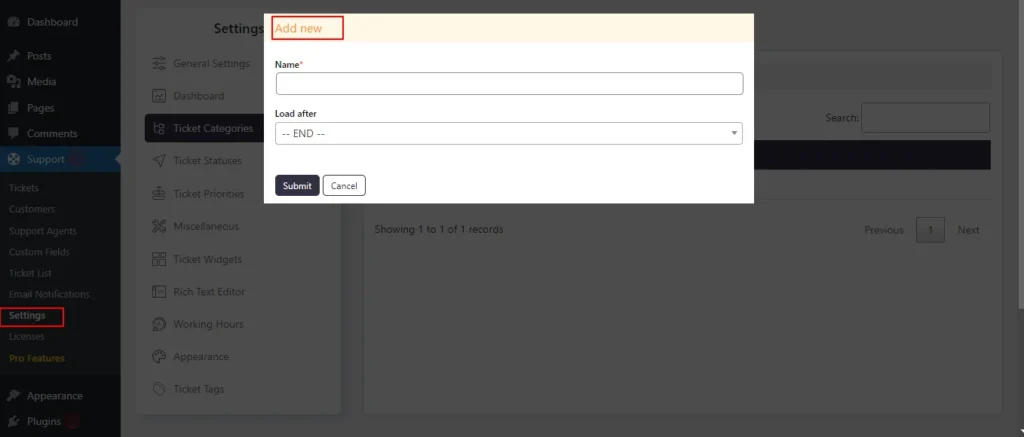
Screenshot 12: Add New Ticket Category
Edit Category
- Click on the Edit option beside the name of the ticket.
- You can change the name and loaf after settings.
- Click Submit.
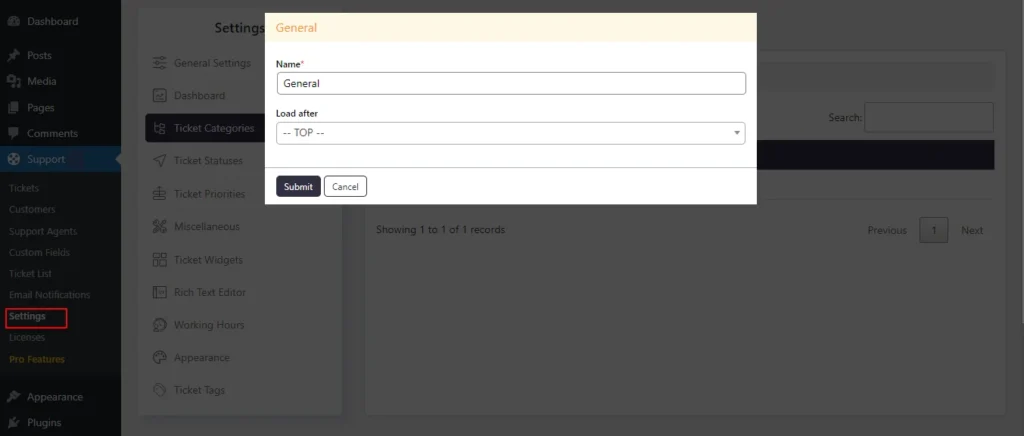
Screenshot 13: Edit Ticket Categories
Step 4: Ticket Statuses
- Under this tab you can set your own custom statuses to customize the process and life cycle of the tickets.
- Customization includes the color patterns that go with each status, which show clearly what state the ticket is in.
- Administrators can edit or delete statuses as needed.
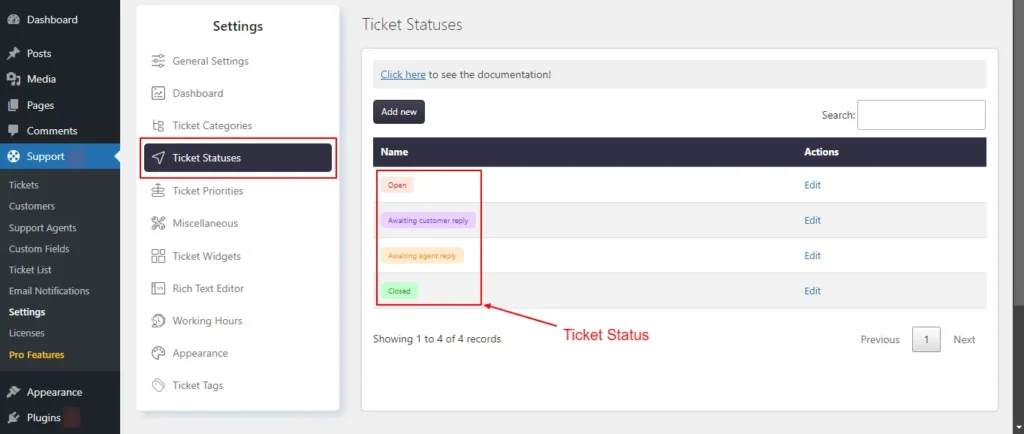
Screenshot 14: Ticket Status
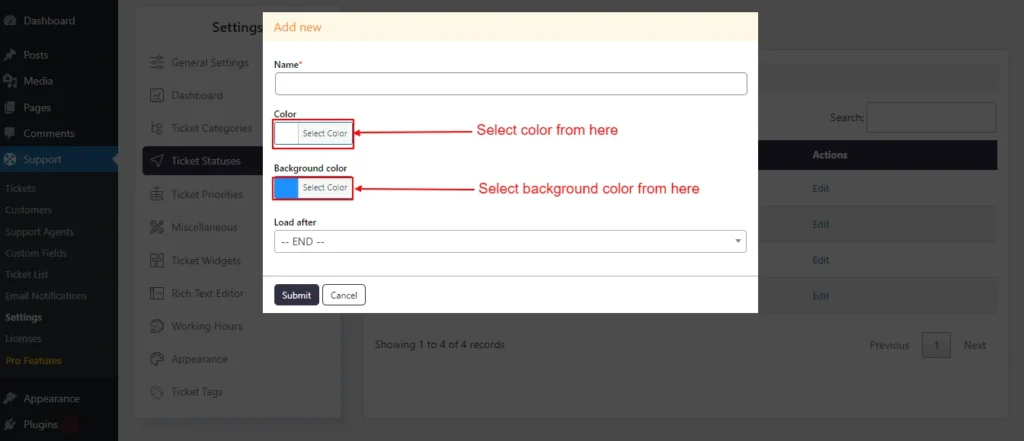
Adding Status:
- Head over to Support → Settings → Ticket Statuses.
- Click on Add New.
- Enter a suitable name for the new status that you want to add.
- Choose a color and background color for visual identification.
- Click Submit.
Screenshot 15: Adding status
Edit Status:
- Click the Edit link beside the status name that you want to edit.
- Edit the color, background color, and load after setting.
- Click Submit.
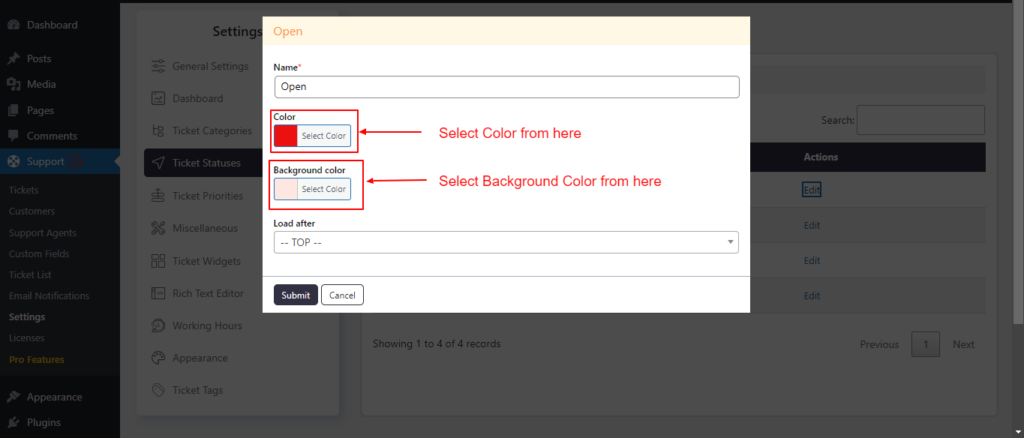
Screenshot 16: Editing a Ticket status
Step 5: Ticket Priorities
- Using this setting, you can prioritize tickets based on urgency. You can create new priorities or edit existing ones (High, Medium, Low priorities).
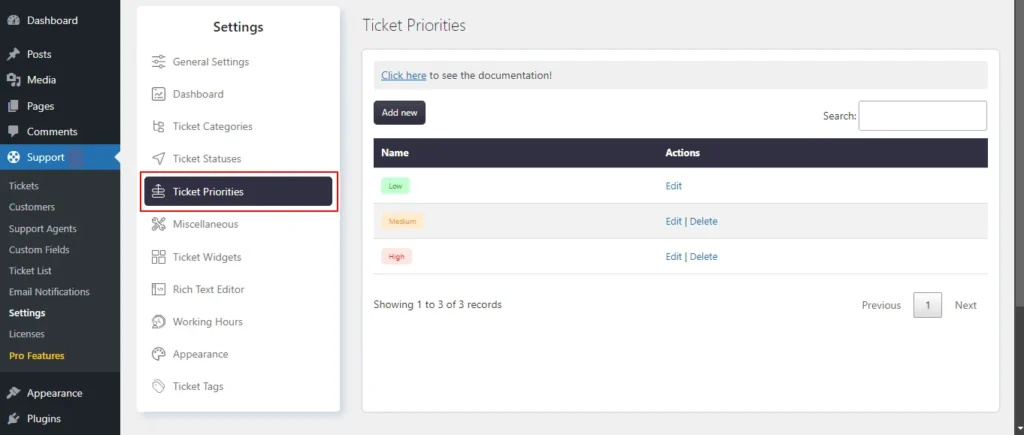
Screenshot 17: Ticket Priorities
Adding a New Priority
- Go to Support → Settings → Ticket Priorities and click on Add New.
- Enter a name and choose a color and background color for the priority based on its urgency.
- Click Submit.
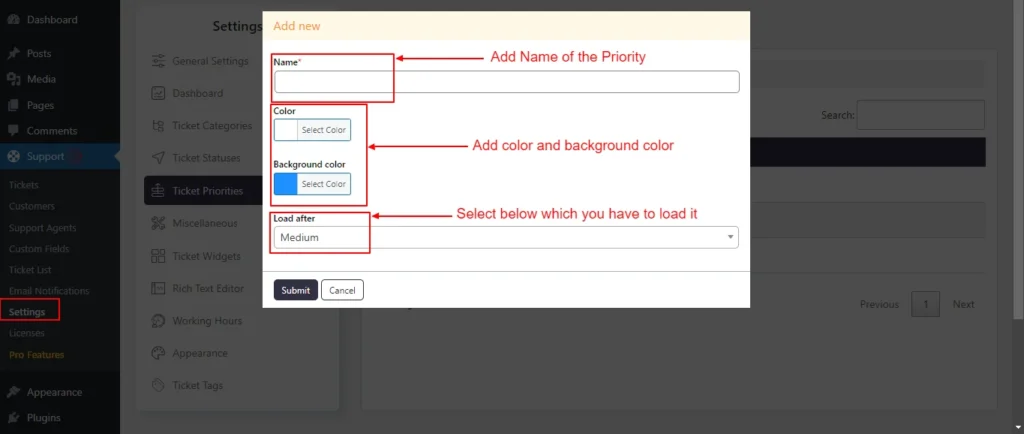
Screenshot 18: Adding a new Ticket Priority
Edit Priority
- Click on the edit link for which you want to edit.
- Click on the Edit option.
- Edit the Name, Color, or Background color, Load after settings as per your needs.
- Click Submit
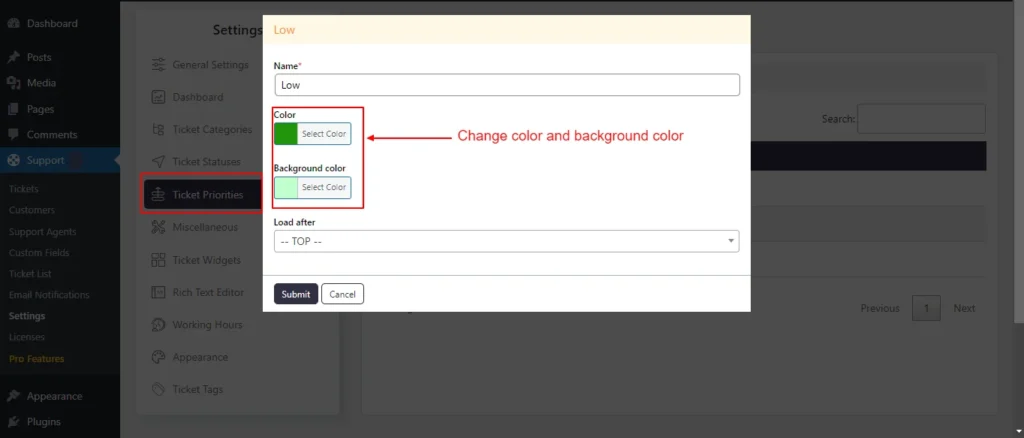
Screenshot 19: Editing Ticket Priorities
Step 6: Miscellaneous
- Under the Miscellaneous settings, you can set the following settings:
- Term & Conditions
- GDPR
- reCaptcha
- Advanced
Terms and conditions
- Enabling this feature will add a checkbox in the Create Ticket form and Registration Form prompting the user to agree to the terms and conditions.
- The terms and conditions message can be customized as seen in the below screenshot no.. You can also add to link to your terms and conditions page.

Screenshot 20: Miscellaneous → Terms & Conditions
GDPR
- If enabled, it will add a checkbox in the Create Ticket form and Registration Form with a custom message letting the user know what information will be stored in the database.
- You can also send the Personal data retention
- It specifies the duration for which the system should retain personal information within the ticket. Once the retention period has passed, the database will either delete or anonymize personal details such as Name, Email Address, IP Address, and any custom fields marked as personal information, from the date of creation.
- If you wish to retain personal information indefinitely, set the retention period to 0 days.
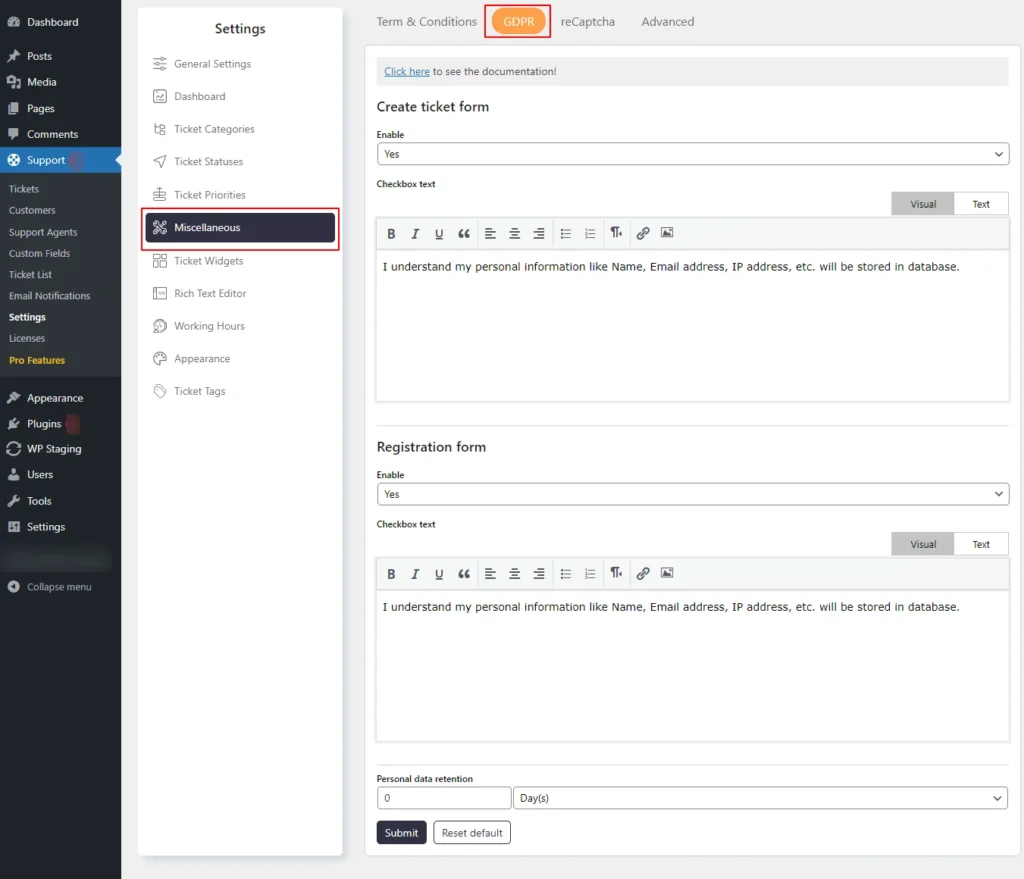
Screenshot 21: Miscellaneous → GDPR
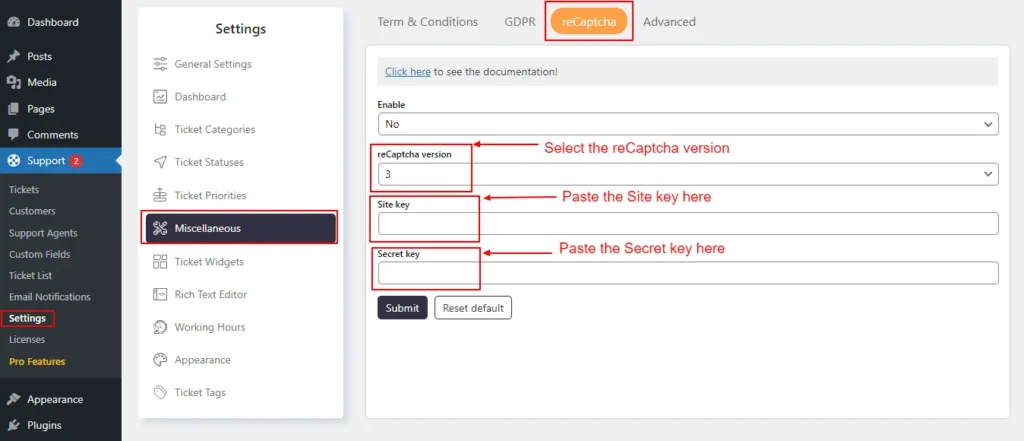
reCaptcha
- You can add Google reCaptcha to the ticket form, login and registration screen, profile screen, etc.
- For that, you need to generate the Site key and Secret key from this link.
Screenshot 22: Miscellaneous → reCaptcha
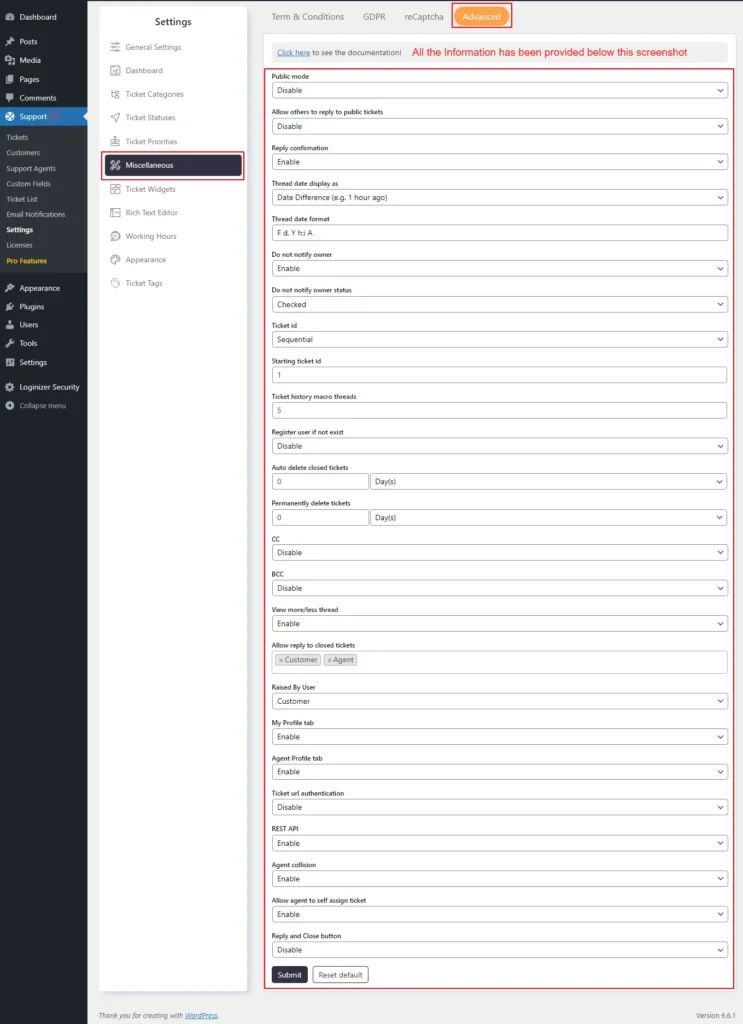
Advanced Settings
- Here you can configure 25 types of advanced settings. We will discuss the main settings for now.
- Reply confirmation: After clicking the reply button on a specific ticket, the system will prompt the user for confirmation.
- Ticket ID: In this setting, you can choose whether new ticket IDs are assigned sequentially or randomly.
- Starting Ticket ID: Within the Sequential Ticket IDs setting, you can specify the initial ticket ID to be used for new tickets.
Screenshot 23: Miscellaneous → Advanced settings
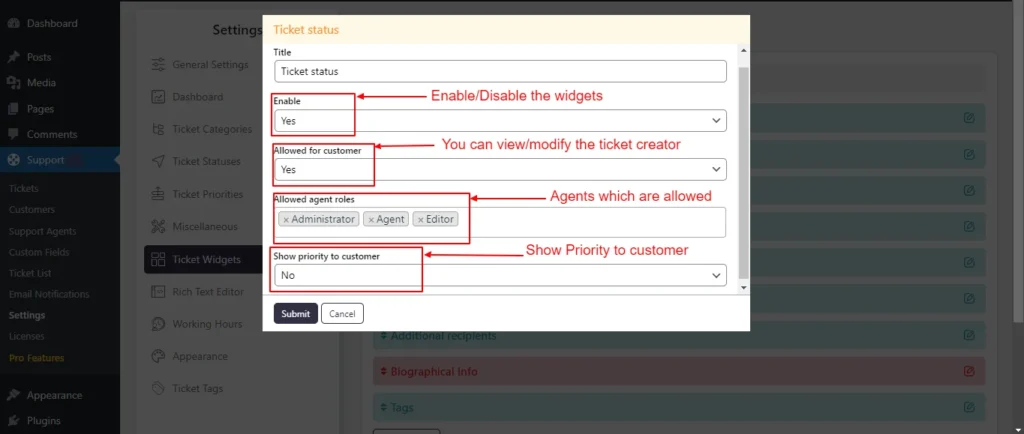
Step 7: Ticket Widgets
- The Ticket widgets are displayed on the single ticket in the backend. You can manage the access levels for each widget, determining who can view or edit them.
- Also, you can rename, enable, or disable, and change the order of the widgets from this settings tab.
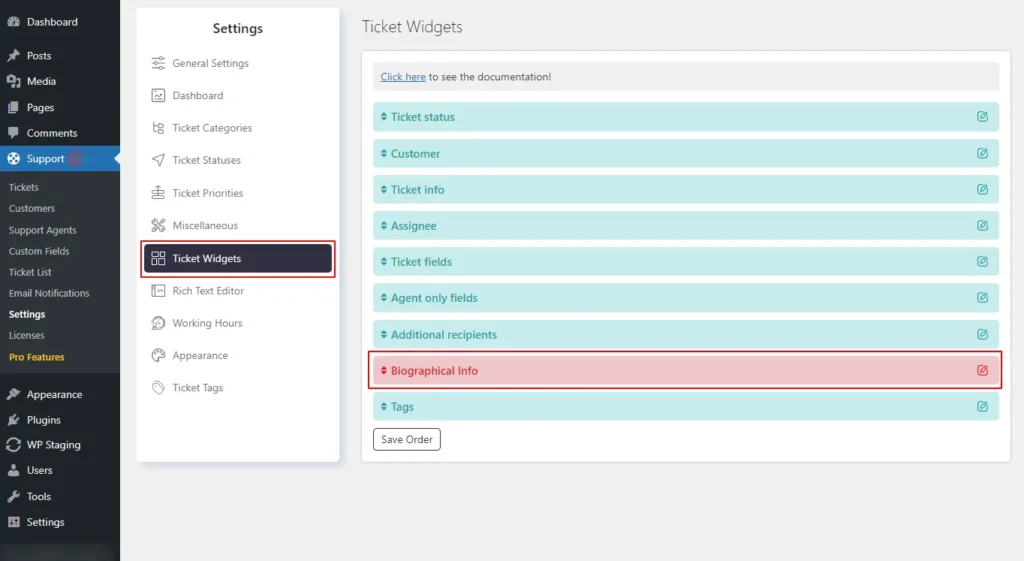
Screenshot 24: Support → Settings → Ticket Widgets
Screenshot 25: Edit Ticket Widgets
Step 8: Rich Text Editor
- This setting allows you to manage the rich text editor configurations for Agents, Registered Users, and Guest Users.
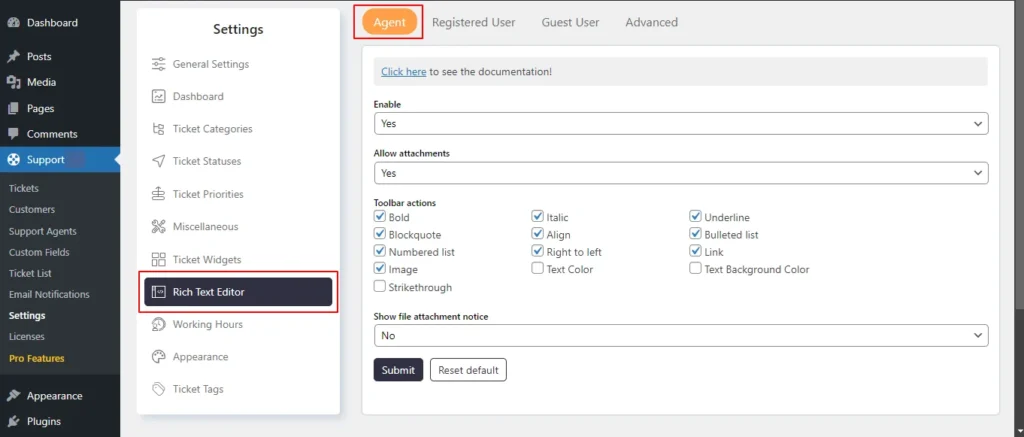
Screenshot 26: Rich Text Editor Agent Tab
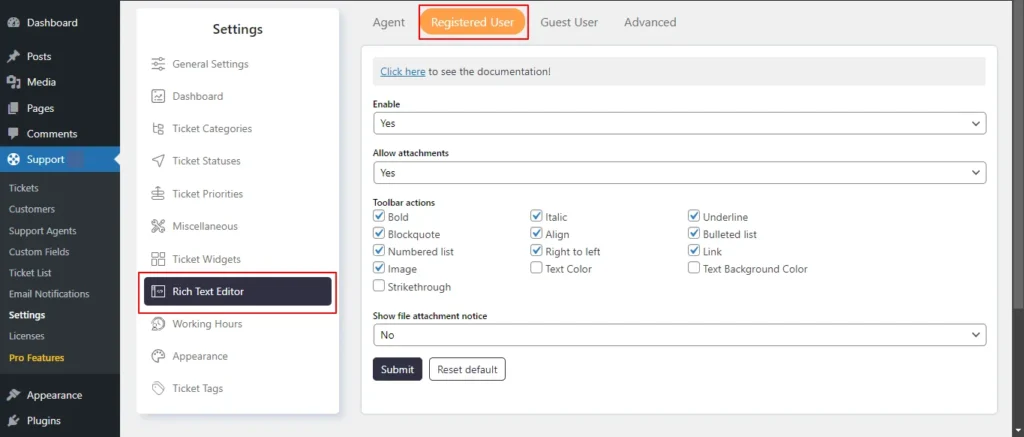
Screenshot 27: Rich Text Editor Registered User Tab
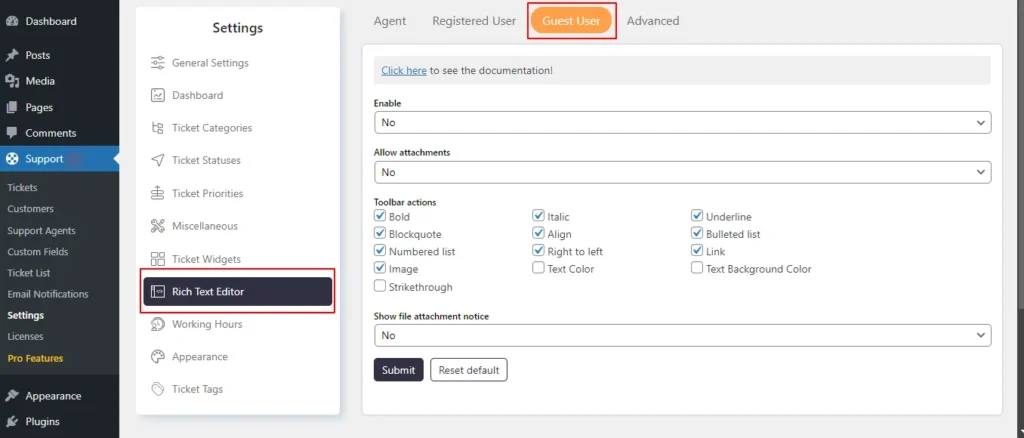
Screenshot 28: Rich Text Editor Guest user Tab
- Enable: You can enable or disable the rich text editor for users.
- Allow Attachments: You have the option to allow or disallow attachments in various areas such as ticket descriptions, reply descriptions, and note descriptions.
- Toolbar Actions: The rich text editor allows you to select which actions to enable, including:
- Bold
- Block quote
- Italic
- Align
- Right to left
- Underline
- Bulleted list
- Link
- Text background color
- Image
- Numbered list
- Strikethrough
- Show File Attachment Notice: You can choose to display information about file attachments, including allowed file types and sizes, to users. This can be configured in the user types setting.
- HTML Pasting: When activated, any text that is copied to the clipboard will be pasted with HTML.
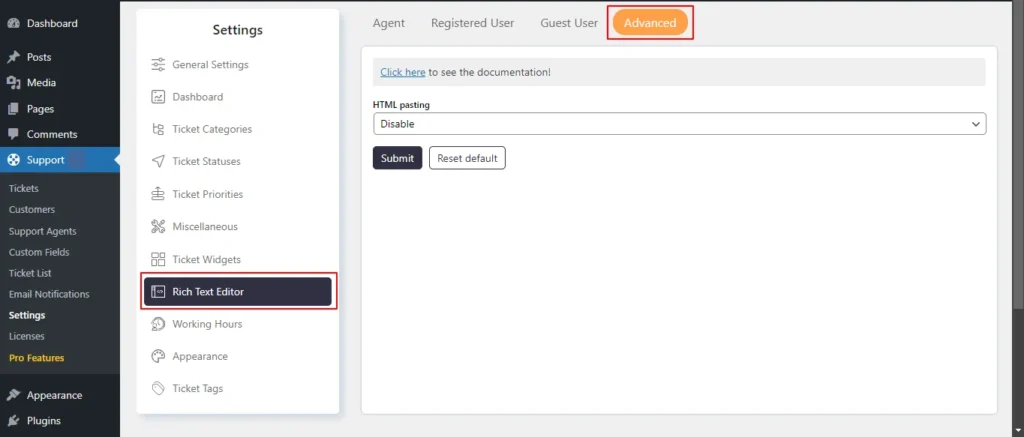
Screenshot 29: Rich Text Editor Advanced Tab
Step 9: Working Hours
- This section allows you to choose the working hours for your company or organization. These specified hours will act as a standard template for the working hours of agents.
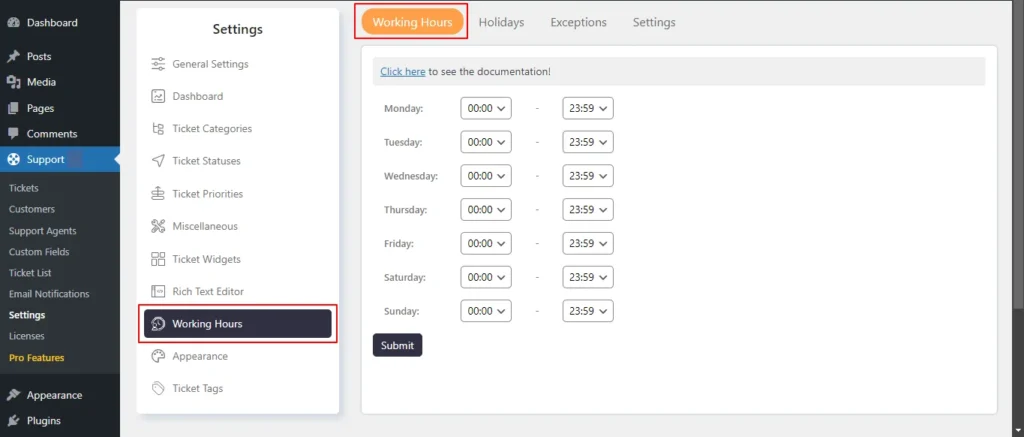
Screenshot 30: Support → Settings → Working Hours
Holidays
- In this setting, you can add holidays for your company or organization,
- You can add a single holiday by clicking on a single date or multiple holidays by date range (selecting and dragging),
- After electing choose the action Add new holidays.
- If you want this to occur annually select yes in Repeat every year drop-down.
- Similarly, you can delete holidays.
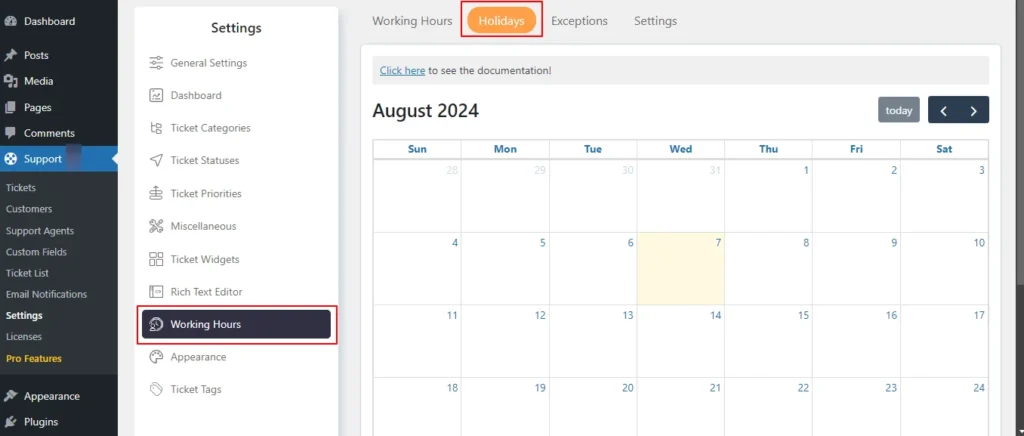
Screenshot 31: Holidays Calendar
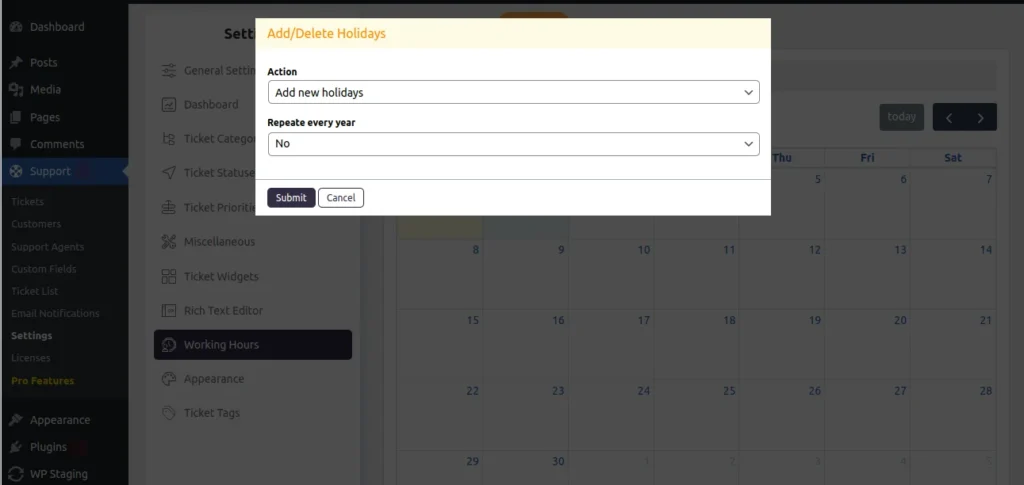
Screenshot 32: Add/Delete Holidays
Exceptions
- In some situations, you may want to modify the working hours for a specific day. You can do this by selecting that specific date and modifying the working hours.
- This exception will apply only to the working hours set at the company or organization level.
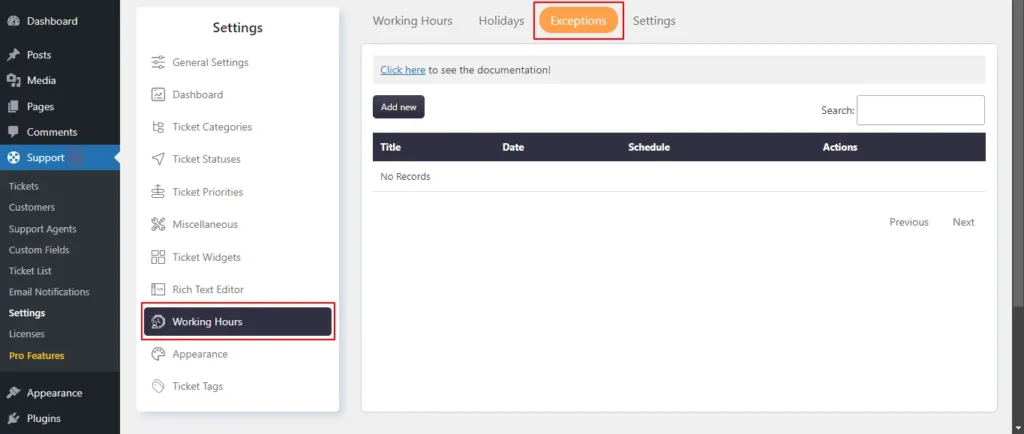
Screenshot 33: Working hours → Exceptions list
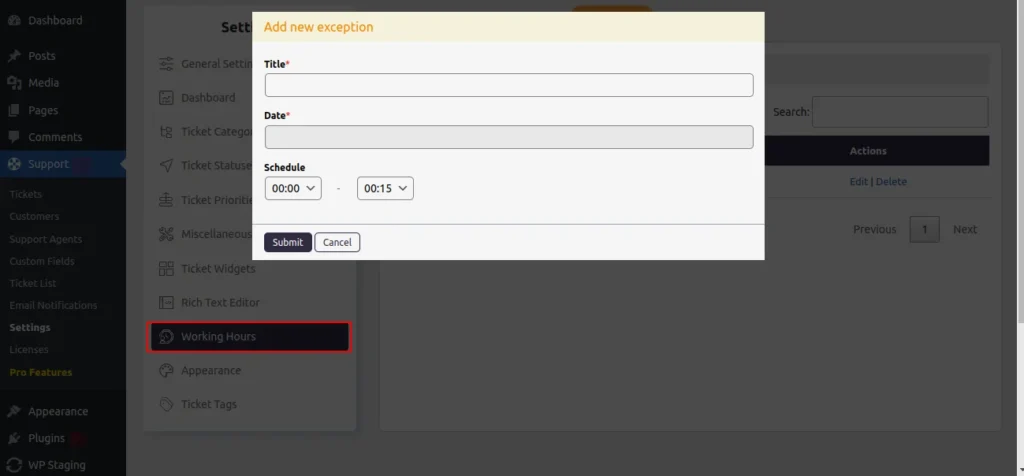
Screenshot 34: Working hours → Exceptions → Add New
Settings
- In the Settings Tab, you can Allow agents to modify working hours or you can Allow agents to modify their leaves.
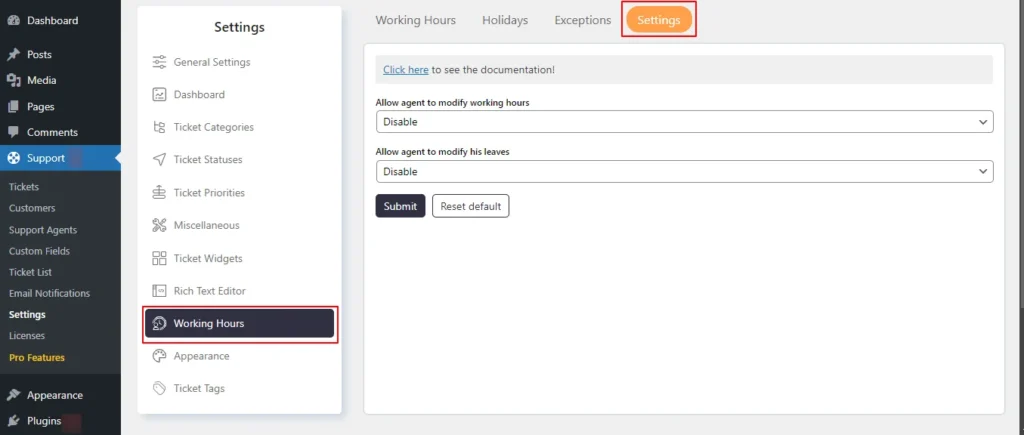
Screenshot 35: Working hours → Settings Tab
Step 10: Appearance
- You can configure the appearance of General (overall look and feel), Ticket List, Individual Ticket, Modal Popup, Agent Collision, and Dashboard screens.
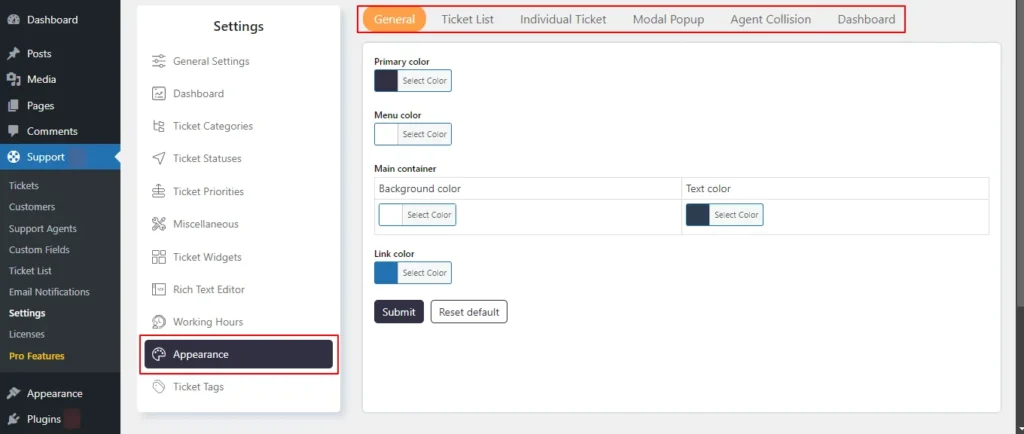
Screenshot 36: Appearance
Step 11: Ticket Tags
- The Ticket Tag Setting feature allows administrators to add tags to the tickets.
- To add a ticket tag enter its name and description, and select its color and background color.
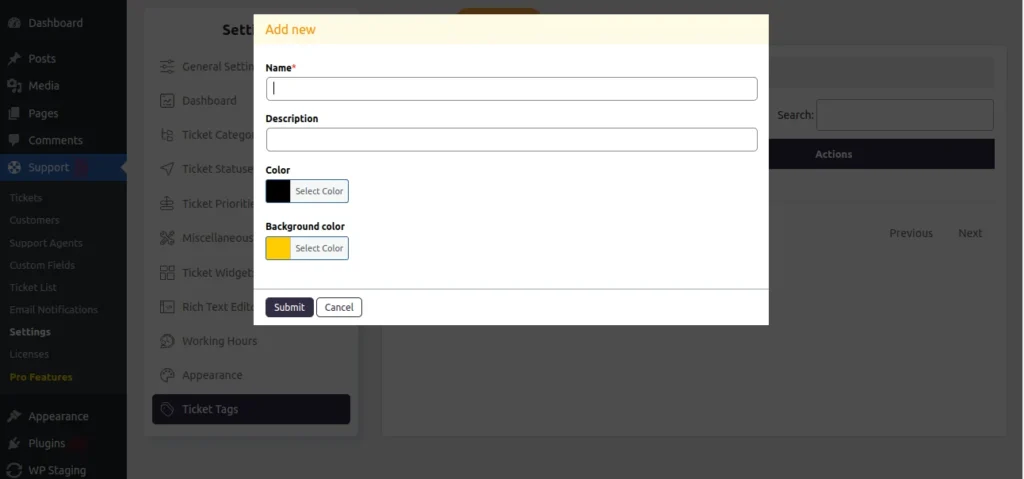
Screenshot 37: Add new Ticket tag
- Under the same screen, you can customize Tag Appearance for ticket tags.
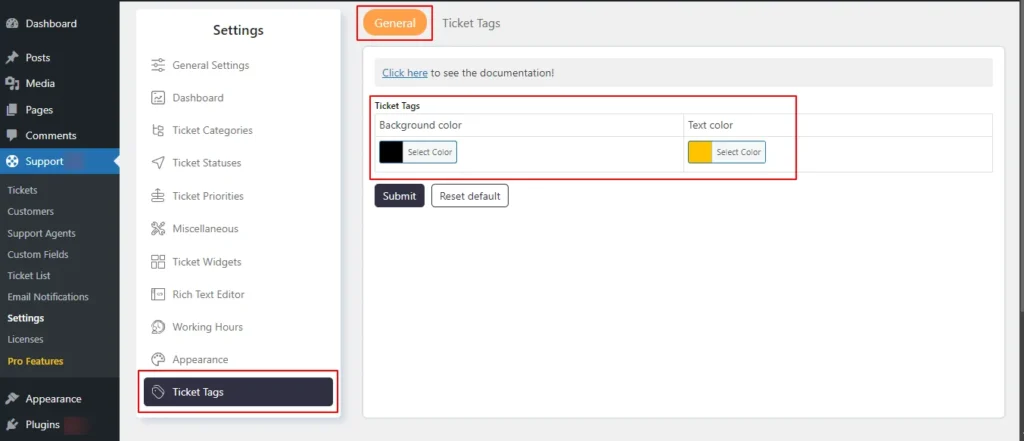
Screenshot 38: Ticket Tags General (Customizing Tag Appearance)
Conclusion
In this blog, we walked you through how to add a helpdesk and ticket system on WordPress using the SupportCandy plugin.
SupportCandy adds to your WordPress site the features of a complete help desk and customer support ticket system. It is one of WordPress’s most popular helpdesk and customer support ticketing plugins.
That’s it for this article. Do more with your website.
If you need any help related to WordPress, contact our WordPress experts.
Published on Nov 11, 2024 | Updated on Jan 16, 2026
Author

Sakina Attarwala
Author
|
Reviewer

Abhijeet Bendre
Author
|