Introduction
Google is advising website owners to upgrade to Google Analytics 4, as Universal Analytics (UA) will be discontinued on July 1, 2023. (July 1, 2024, for Analytics 360 properties).
It’s critical that you switch to Google Analytics 4 as soon as possible since UA will stop collecting data after sunset.
In this article, we’ll show you how to easily switch to Google Analytics 4 and add the tracking code to your WordPress website.
Switch to GA4 from GA3 using the setup assistant
The first step to setting up Google Analytics 4 is to create a new property in your Google Analytics account.
1. Log in to your Google Analytics account.
2.1 Once you have logged in to your account, you will see a warning message to migrate to GA4 property (from UA). As seen in the below screenshot, click on the “Manage GA4 migration” link.
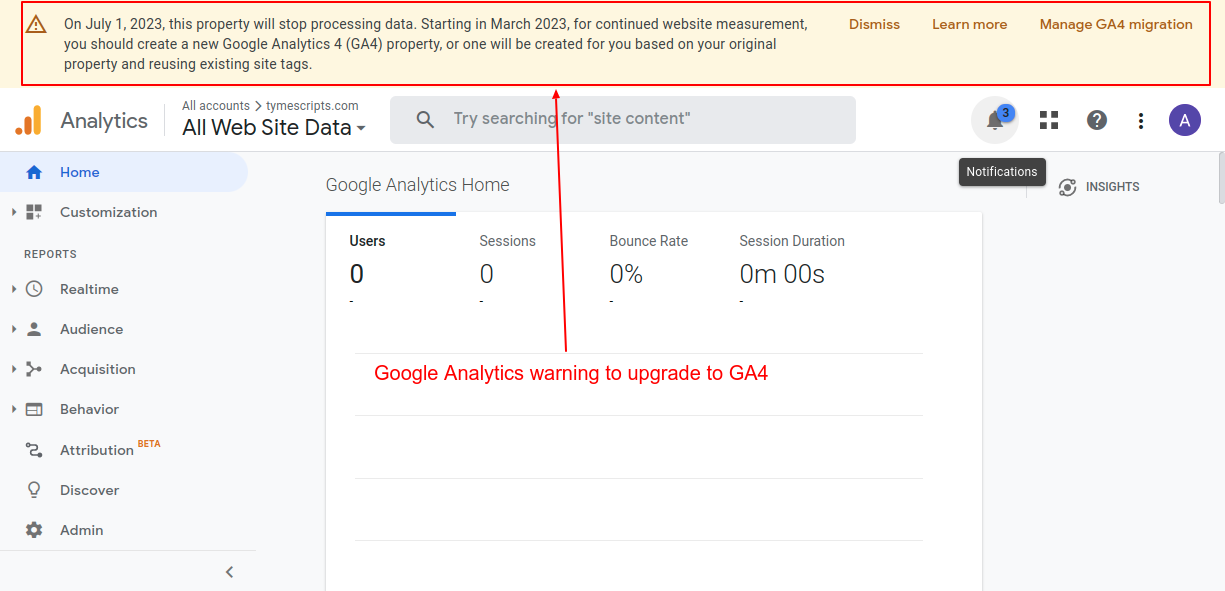
Screenshot 1: Migrate to GA4 warning message
2.2 If you don’t see any warning messages, then head over to the admin section on the bottom left.
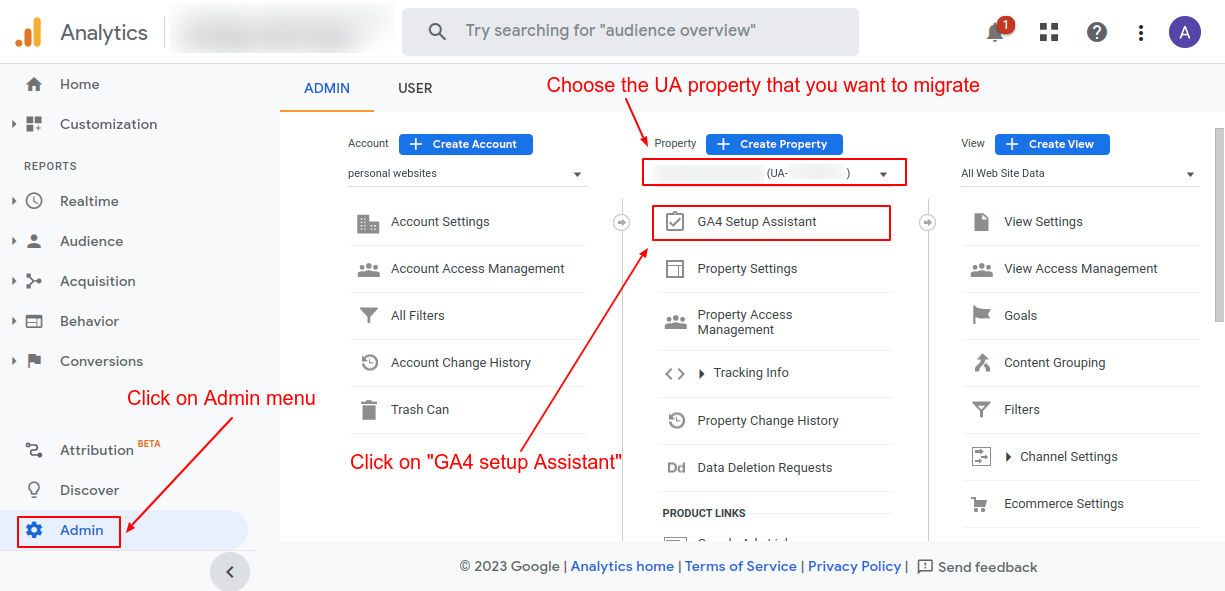
Screenshot 2: Choose the UA property to migrate
3. Choose the UA property you want to migrate, and click on the “GA4 Setup Assistant.”
4. To create a new GA4 property, click on “Get Started.”
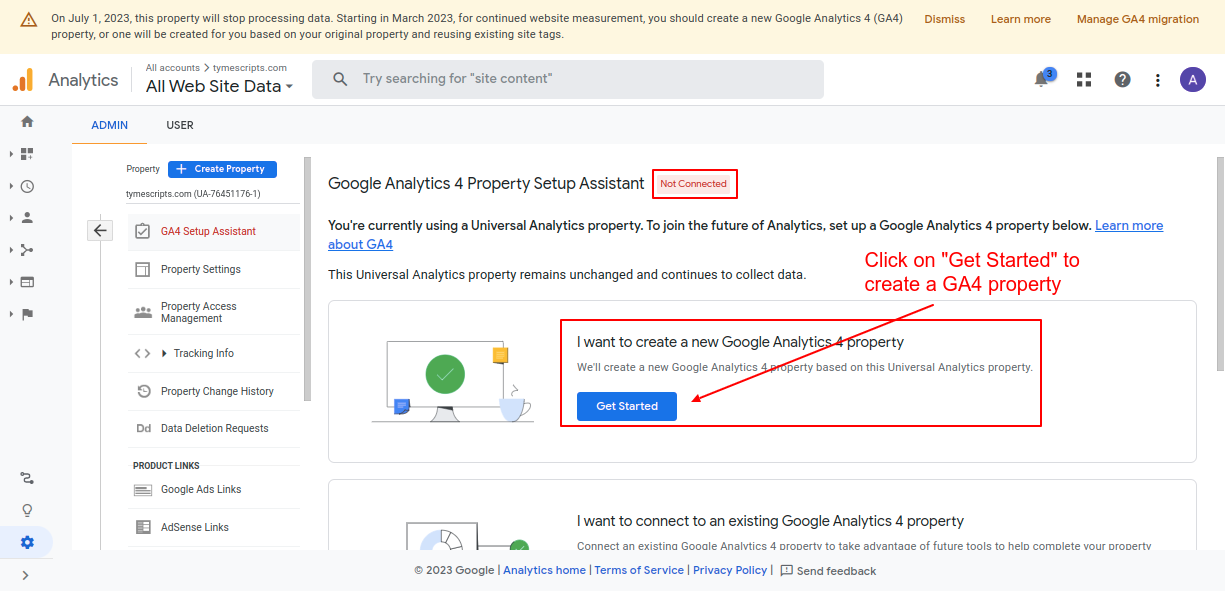
Screenshot 3: Click on “Get started” to create a GA4 property
5. The setup assistant popup will appear; click on “Create and continue.” This step will create a new GA4 property.
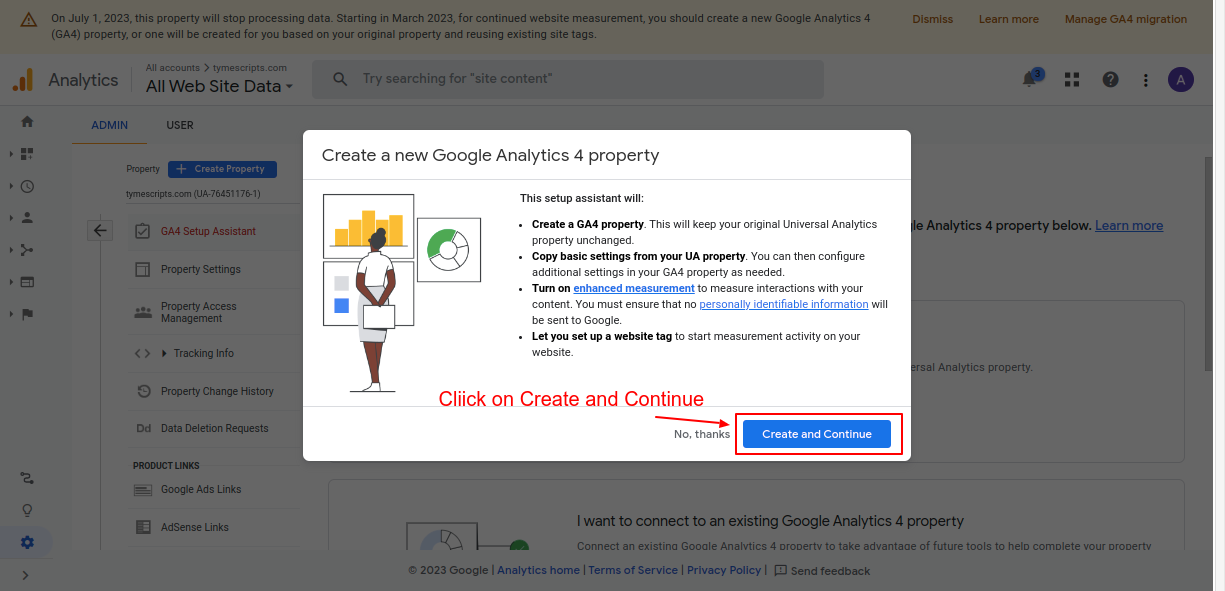
Screenshot 4: Click on “Create and continue” in the GA4 setup assistant popup
A few things to note when you are creating a new property using the GA4 setup assistant
- The setup assistant will keep your original Universal Analytics (UA) property unchanged.
- Basic settings from your UA will be copied over to the GA4 property. If you have configured advanced settings in UA, then it needs to be set up manually in GA4.
- By default, the setup assistant creates a website tag to start measuring activity
- GA4 offers enhanced event measurements, which capture all the interactions on your website as events. This new feature is enabled by default.
The following table shows, for an event trigger, which parameters are collected in GA4.
| Measurement option (event name) | Parameters collected |
| Page views (page_view) |
|
| Scrolls (scroll) | No parameters are collected |
| Outbound clicks (click) |
|
| Site search (view_search_results) |
|
| Video engagement (video_start, video_progress, video_complete) |
|
| File downloads (file_download) |
|
| Form interactions (form_start, form_submit) |
|
6. Select “Install a Google Tag” and click “Next”.
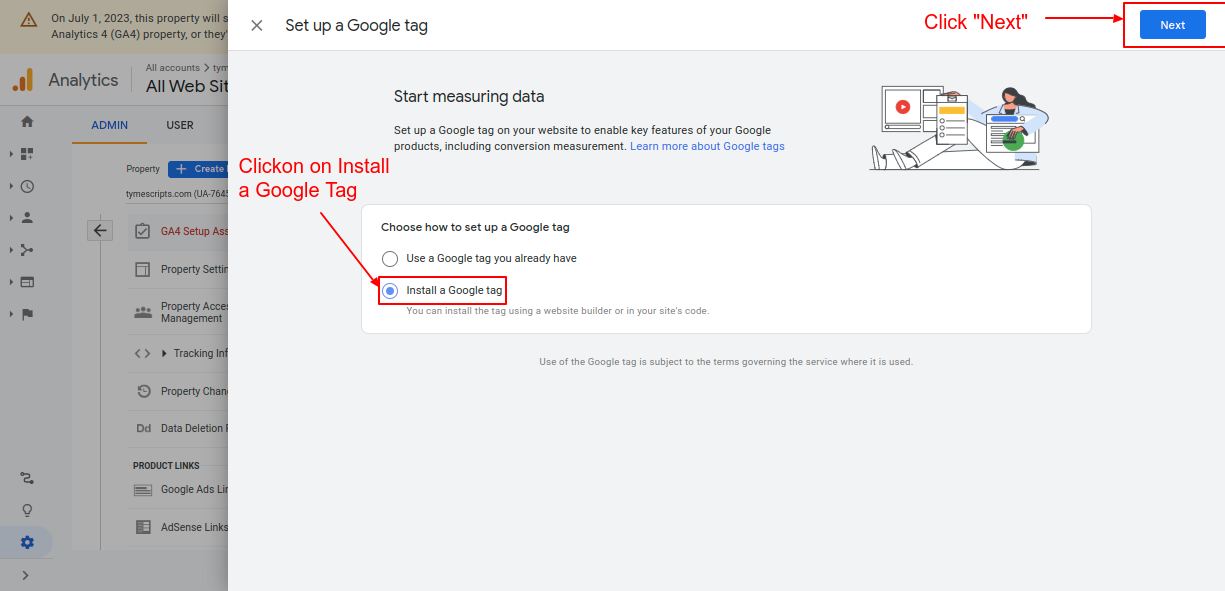
Screenshot 5: Choose how to set up a Google Tag
After that, it will give two options to configure Google Analytics 4 property
A. Install Manually: Using this approach the Google tag code is to be manually added to your website.
B. Install with a website builder or CMS: Using this option the Google tag can be added to various website builders or CMS like WordPress, Wix Squarespace, Drupal, etc.
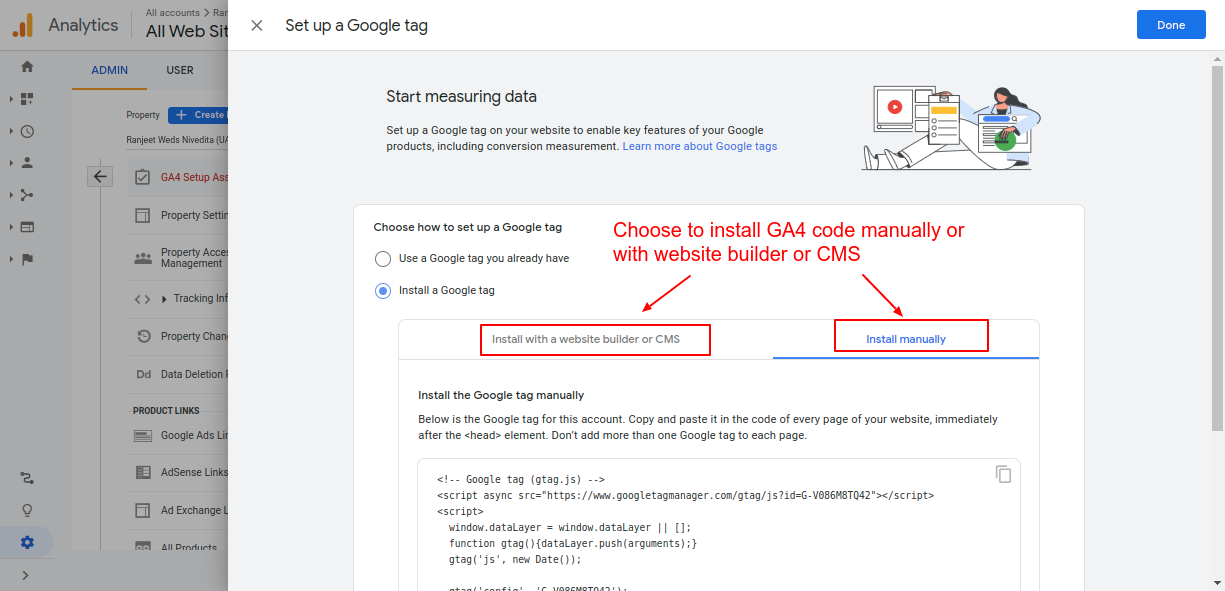
Screenshot 6: Two options to install GA4 code
7. Click on the “Install Manually” tab to copy the code that is generated. This will be later used in setting up GA4 manually.
<!-- Google tag (gtag.js) -->
<script async src="https://www.googletagmanager.com/gtag/js?id=TAG_ID"></script>
<script>
 window.dataLayer = window.dataLayer || [];
 function gtag(){dataLayer.push(arguments);}
 gtag('js', new Date());
 gtag('config', 'TAG_ID');
</script>
Code snippet 1: Sample Google Analytics 4 code
Let’s dive deeper into both options to configure GA4.
Methods for adding GA4 to your WordPress website.
Once you have created your new GA4 property, the next step is to install the tracking code on your WordPress site.
We’ll show how to do it using two different methods.
- Method 1: Manually add the GA4 code (without plugins)
- Method 2: Using Site Kit and MonsterInsights Plugins
Method 1: Install the GA4 tag manually on your WordPress website (without plugins)
A few things to consider when you are manually adding code
- We recommend adding GA4 code to the child theme instead of the Parent theme. If you don’t have a child theme installed follow this tutorial for creating a child theme.
- Before making any changes to your site we recommend, you should always back it up. Read this blog on how to back up a WordPress website. At the minimum, you should make a copy of your child theme’s header.php file or functions.php since we are modifying it. if something goes wrong during the editing process then you can restore it.
- We recommend adding the tag manually only if you have the technical expertise to do so.
Option 1: Adding a tag to the header.php file (recommended for developers)
To install the GA4 tag manually, first log into your WordPress dashboard.
1. Go to Appearance -> Theme File Editor (If you’re using a block-based WordPress theme then go to Tools -> Theme File Editor )
Because we were directly editing the theme files, you will see a warning popup message as shown in below screenshot 3. Hence, we recommend this option only for developers.
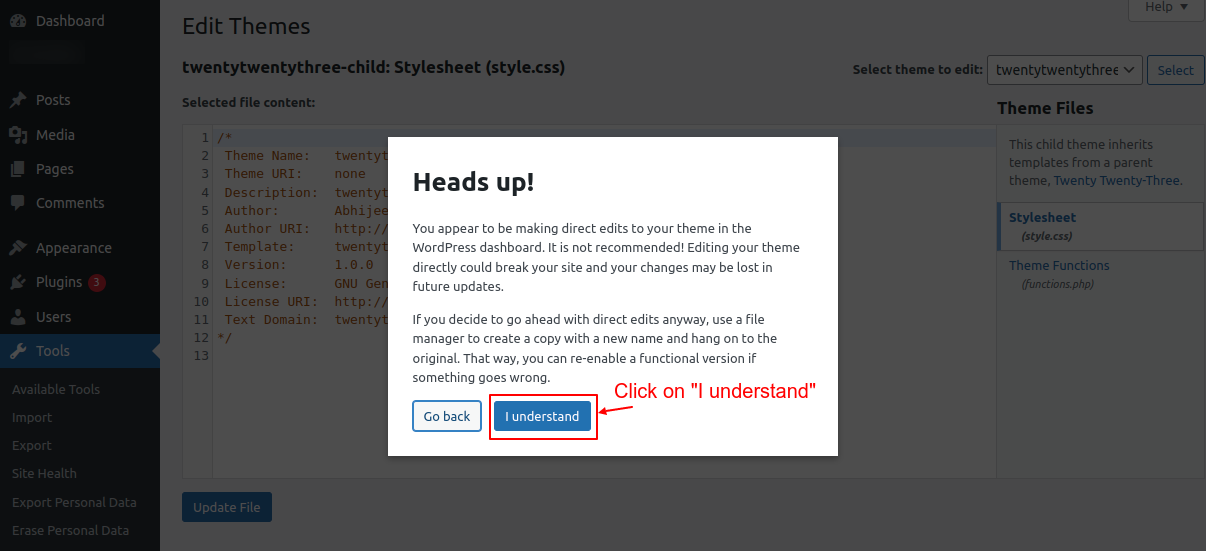
Screenshot 7: Theme editor showing a warning for making direct edits to file
2. Select the child theme to edit from the dropdown on the right. After that, select the header.php file.

Screenshot 8: Paste the GA4 code before the HTML </head> tag
3. Paste the GA4 code (that was copied from the previous step) just before the HTML </head> tag, as shown in the above screenshot.
4. Click on “Update File.”
That’s it. The Google Analytics 4 tracking code is installed, and you can view your site’s data in your analytics account.
Option 2: Add a Google tag through the functions.php file (recommended for developers)
1. Open the child themes functions.php file in the code editor. Here is a blog for more information on the functions.php file.
2. Add the GA4 code snippet (that was copied from the previous step) at the end of the file.
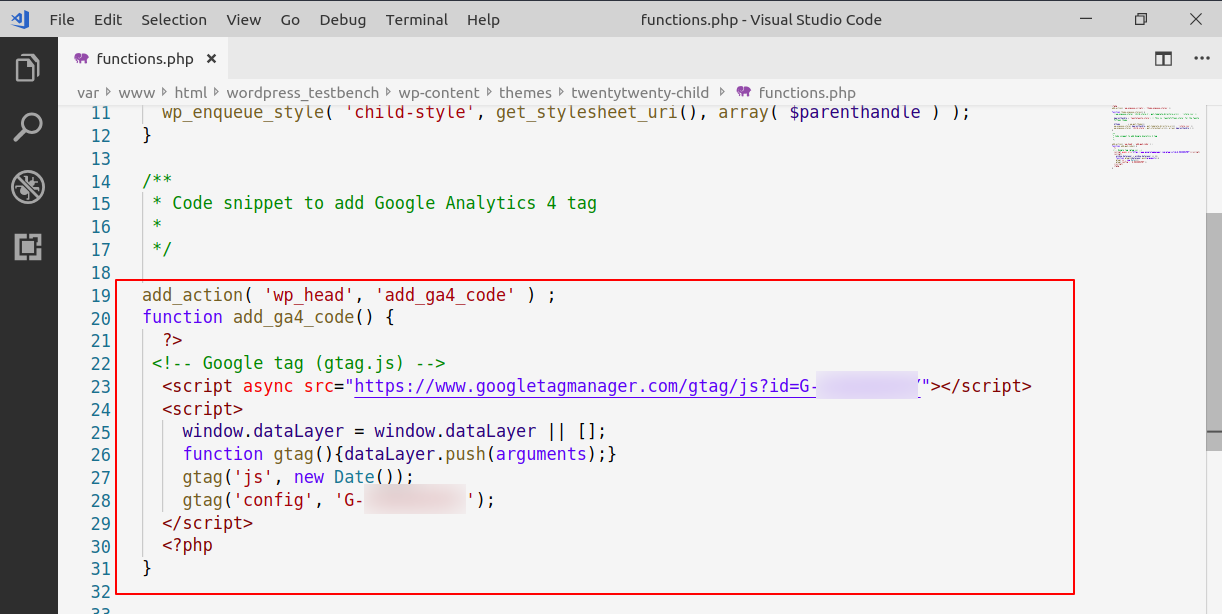
Screenshot 9: GA4 code added through functions.php file
4. Save the file and reload your webpage
add_action( 'wp_head', 'add_ga4_code' ) ;
function add_ga4_code() {
  ?>
    <!-- Google tag (gtag.js) -->
<script async src="https://www.googletagmanager.com/gtag/js?id=TAG_ID"></script>
<script>
 window.dataLayer = window.dataLayer || [];
 function gtag(){dataLayer.push(arguments);}
 gtag('js', new Date());
 gtag('config', 'TAG_ID');
</script>
}
Code snippet 2: Sample GA4 code added through functions.php file
Method 2: Using a free version of the plugins (Site Kit or Monsterinsights )
Note: In the steps that follow, we will assume that you are installing the Site Kit or Monster Insights plugin from scratch.
Option 1: Adding GA4 tag using the Site Kit plugin by Google
1. Head over to Plugins -> Add New Plugin, in your WordPress backend. Search for the keyword “google analytics”.
2. Next, install and activate the Site Kit plugin, as shown in the below screenshot.
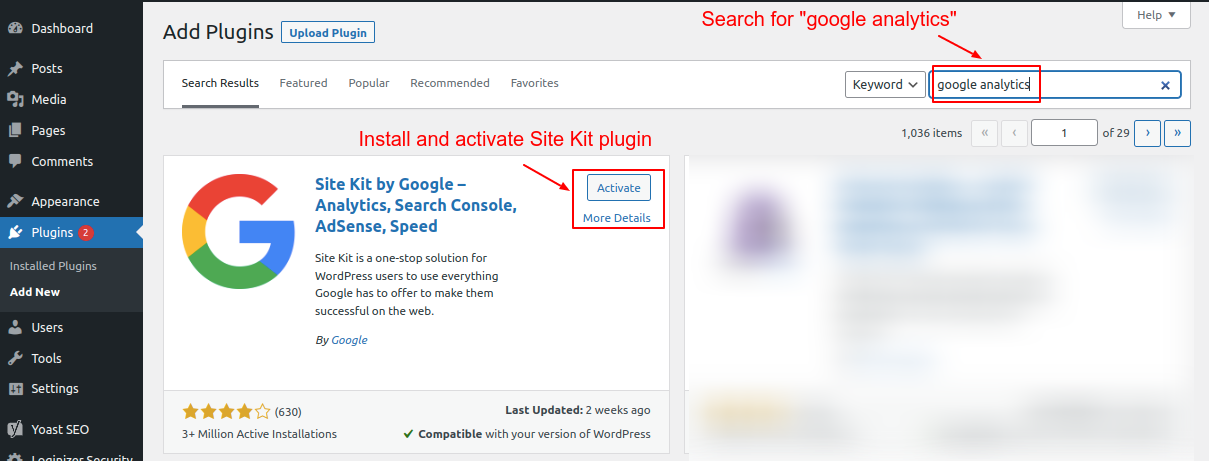
Screenshot 10: Install and activate the Site Kit plugin.
3. Once the Site Kit plugin is activated, click on “Start setup.”
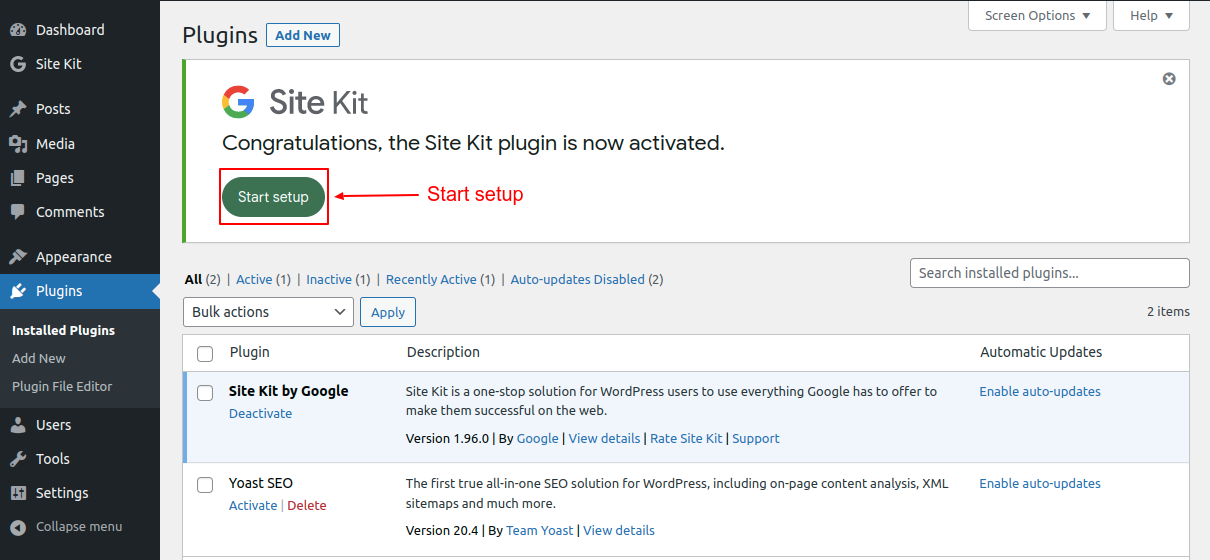
Screenshot 11: Click on “Start Setup.”
4. Select the check box ”Connect Google Analytics as part of your setup.” This step is important in configuring GA4.
5. Click on “Sign in with Google.”
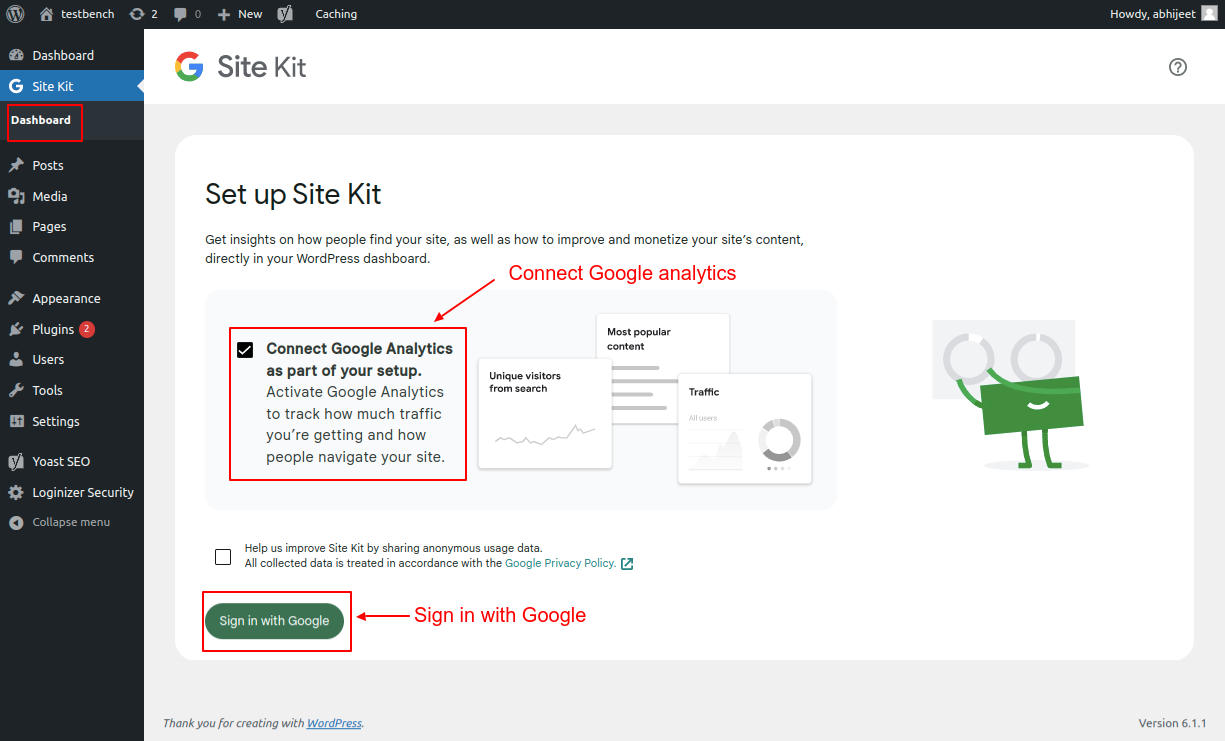
Screenshot 12: Connect Google Analytics as part of your setup
6. Choose an account that you use to login into Google Analytics.

Screenshot 13: Choose the Google account that you use to log in to Analytics.
7. Give access to the Site Kit as shown in the below screenshot and click “Continue.”
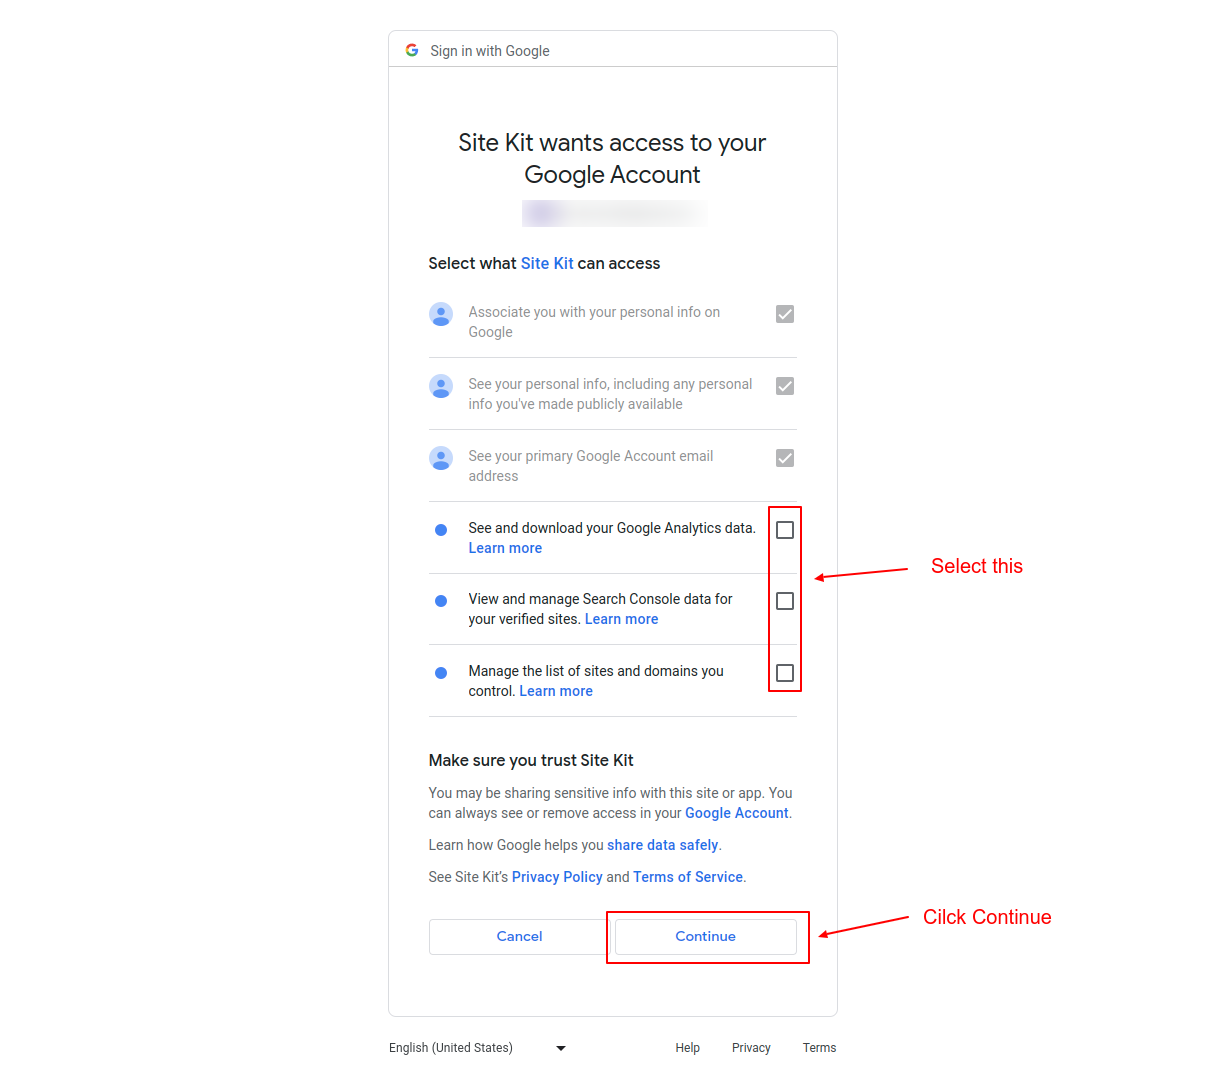
Screenshot 14: Select all the checkboxes to proceed further.
8. Click on “Verify.” This will add a verification token to your site’s HTML code.
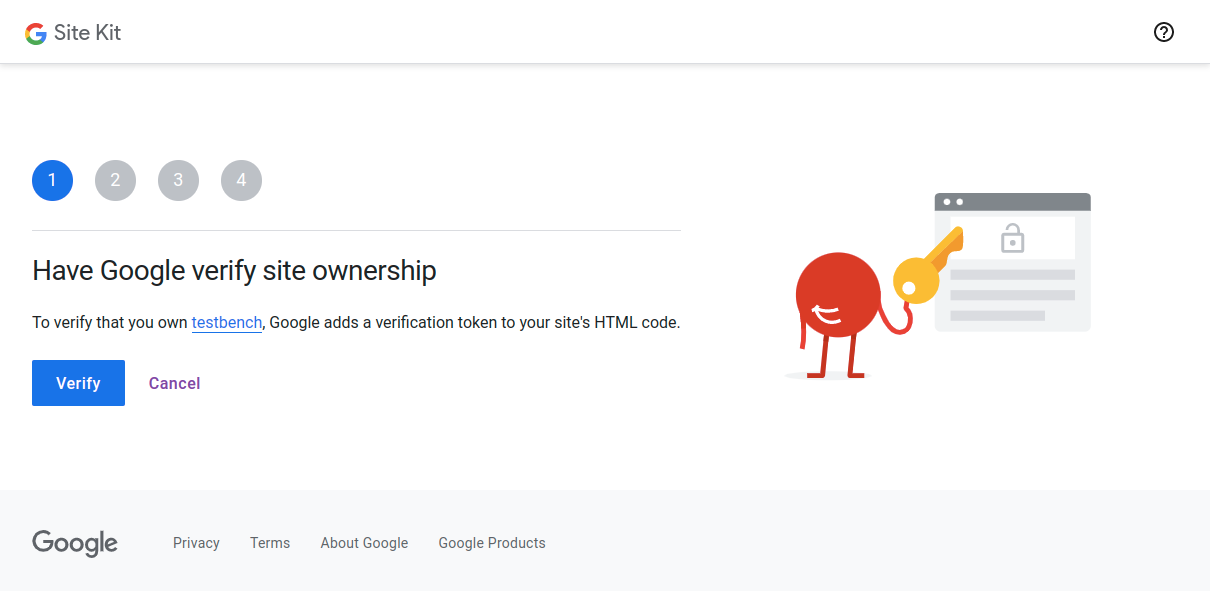
Screenshot 15: Verify site ownership
9. Click “Allow.” It will allow your website to access Google Analytics data. The metrics will be shown in the Site Kit dashboard.
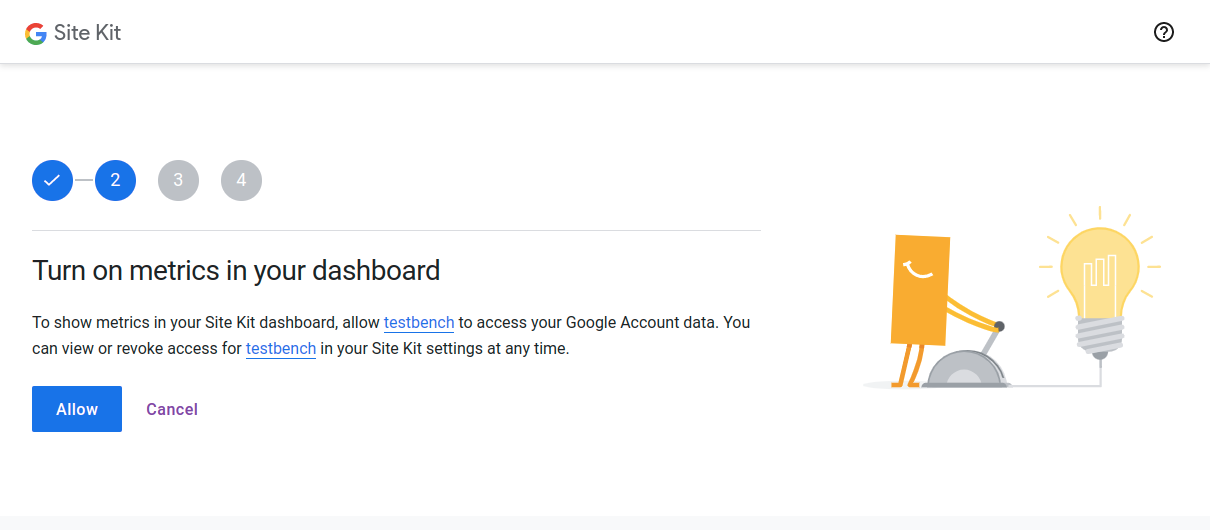
Screenshot 16: Allow your website to access Google Analytics data
10. Click on “Setup” to connect Site Kit and Search Console.
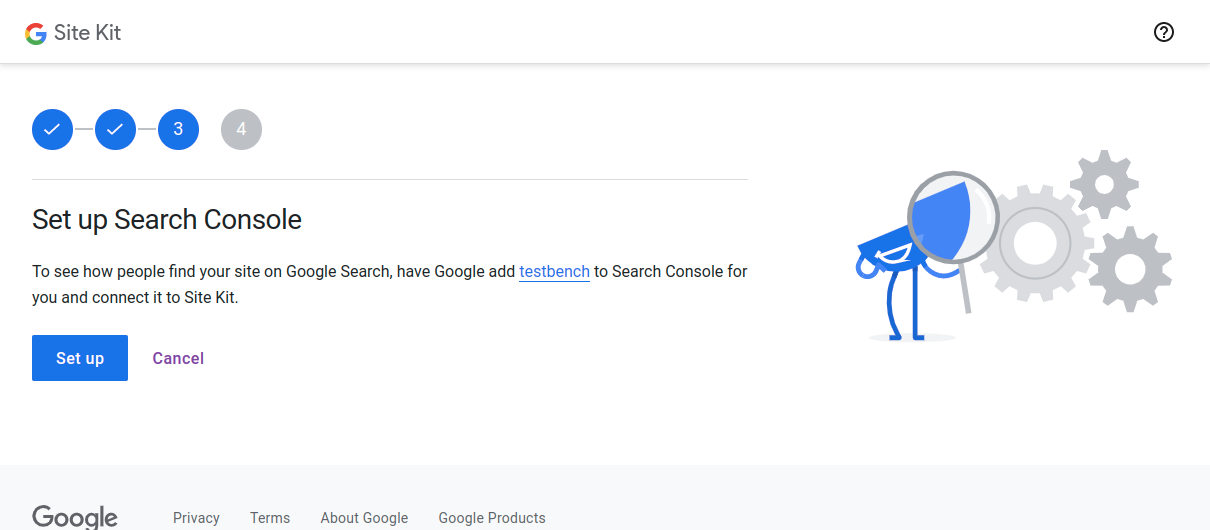
Screenshot 17: Connect Site Kit and Search Console
11. Click on “Next” to allow Site Kit to set up Google Analytics. You will be redirected to the Site Kit dashboard.

Screenshot 18: Allow Site Kit to add your website to Google Analytics
12. In the Site Kit dashboard, select the Google Analytics account and the newly created GA4 property. Also, select the associated UA (GA3) property as shown in the below screenshot.
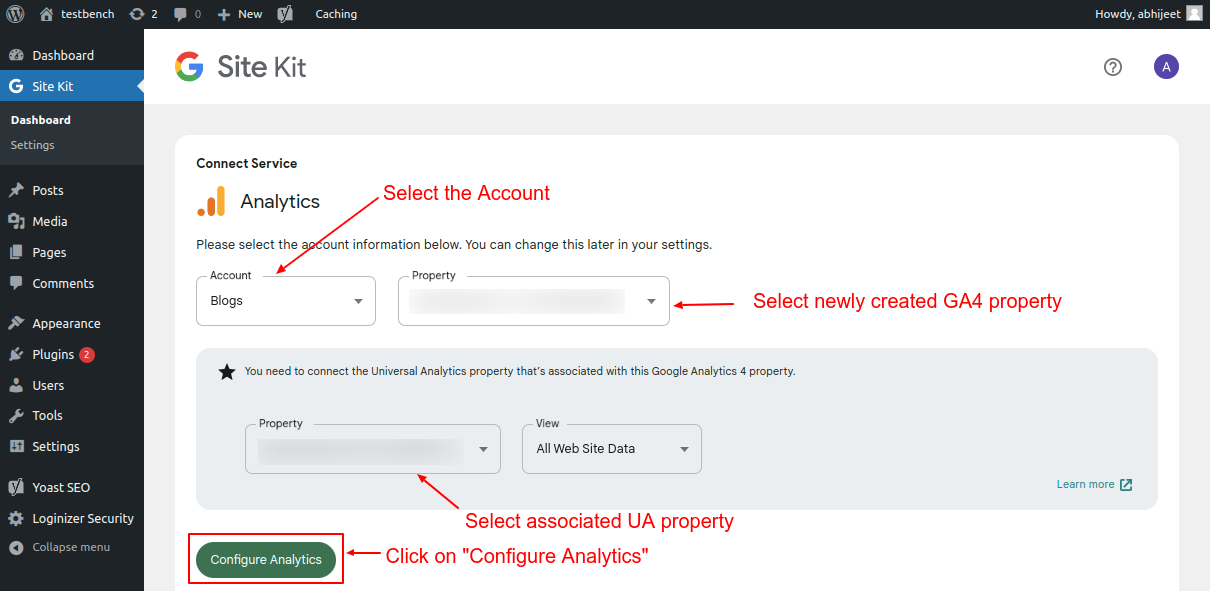
Screenshot 19: Connect Google Analytics service
13 Click on “Configure Analytics,” and the Site Kit setup is complete.
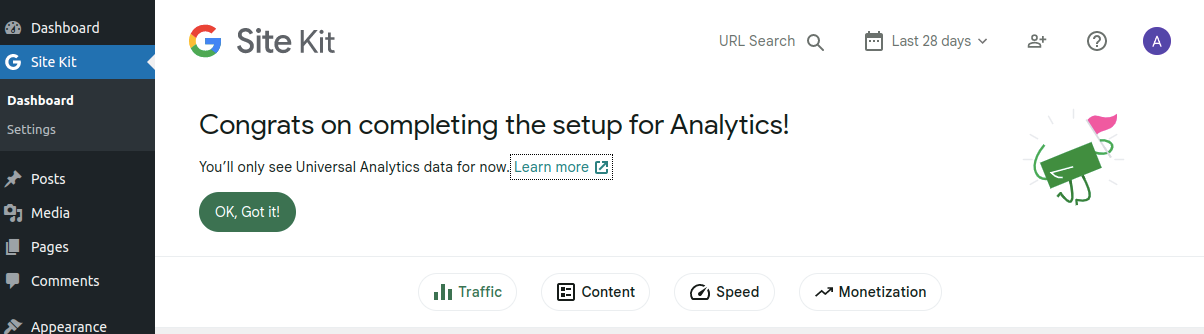
Screenshot 20: Site Kit setup completed
Here is a screenshot of the code snippet added by Site Kit.
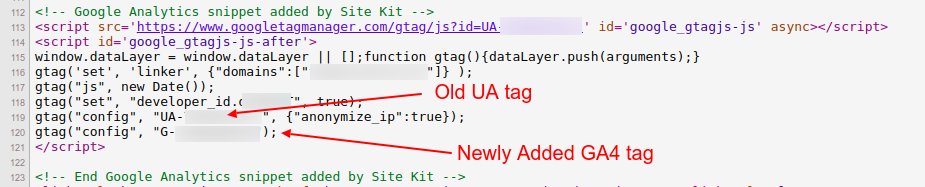
Screenshot 21: Google Analytics snippet added by Site Kit
Few things to note when you have installed the GA4 tag using the Site Kit Plugin
- If Site Kit is used to configuring UA and GA4, stats will be tracked for both properties.
- At the time of writing, GA4 statistics are not shown in the Site Kit dashboard and can only be viewed. Integration of GA4 data to Site Kit’s dashboard is not yet implemented in the current version of the plugin hence you have to view GA4 data in your Analytics account.
Option 2: Adding GA4 tag using the MonsterInsights plugin
1. Go to Plugins -> Add New Plugin, in your WordPress backend. Search for the keyword “monsterInsights”.
After that, install and activate the plugin as shown in the below screenshot.
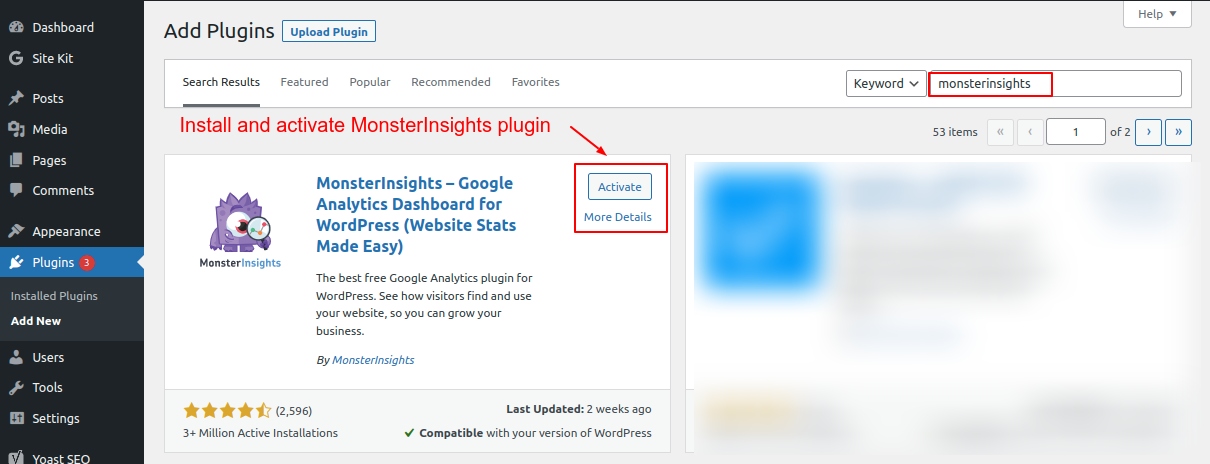
Screenshot 22: Install and activate the MonsterInsights plugin.
2. Click on “Launch the Wizard.”

Screenshot 23: Launch the wizard
3. Choose your website category and click “Save and Continue..”

Screenshot 24: Choose a category that best describes your website
5. Click “Connect MonsterInsights.” After which you will be redirected to the MonsterInsights website to connect your Google Analytics account.

Screenshot 25: Connect MonsterInsights
6. Choose a Google account to continue.
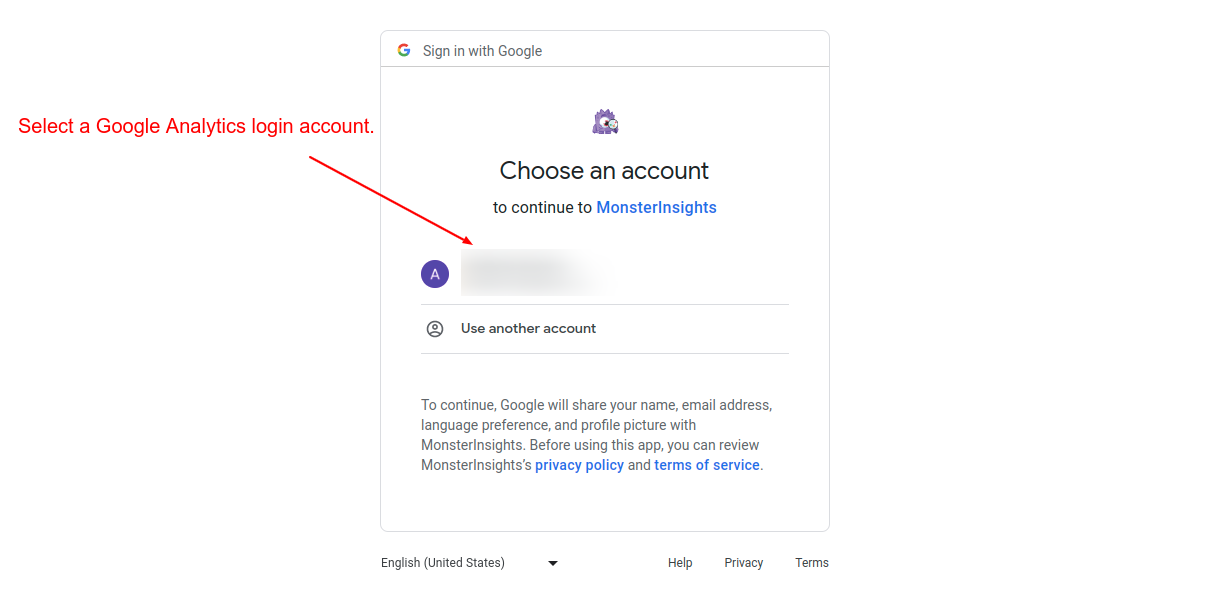
Screenshot 26: Select a Google Analytics account.
7. Click on “Allow” to give MonsterInsights access to your Google Analytics and Search Console data.
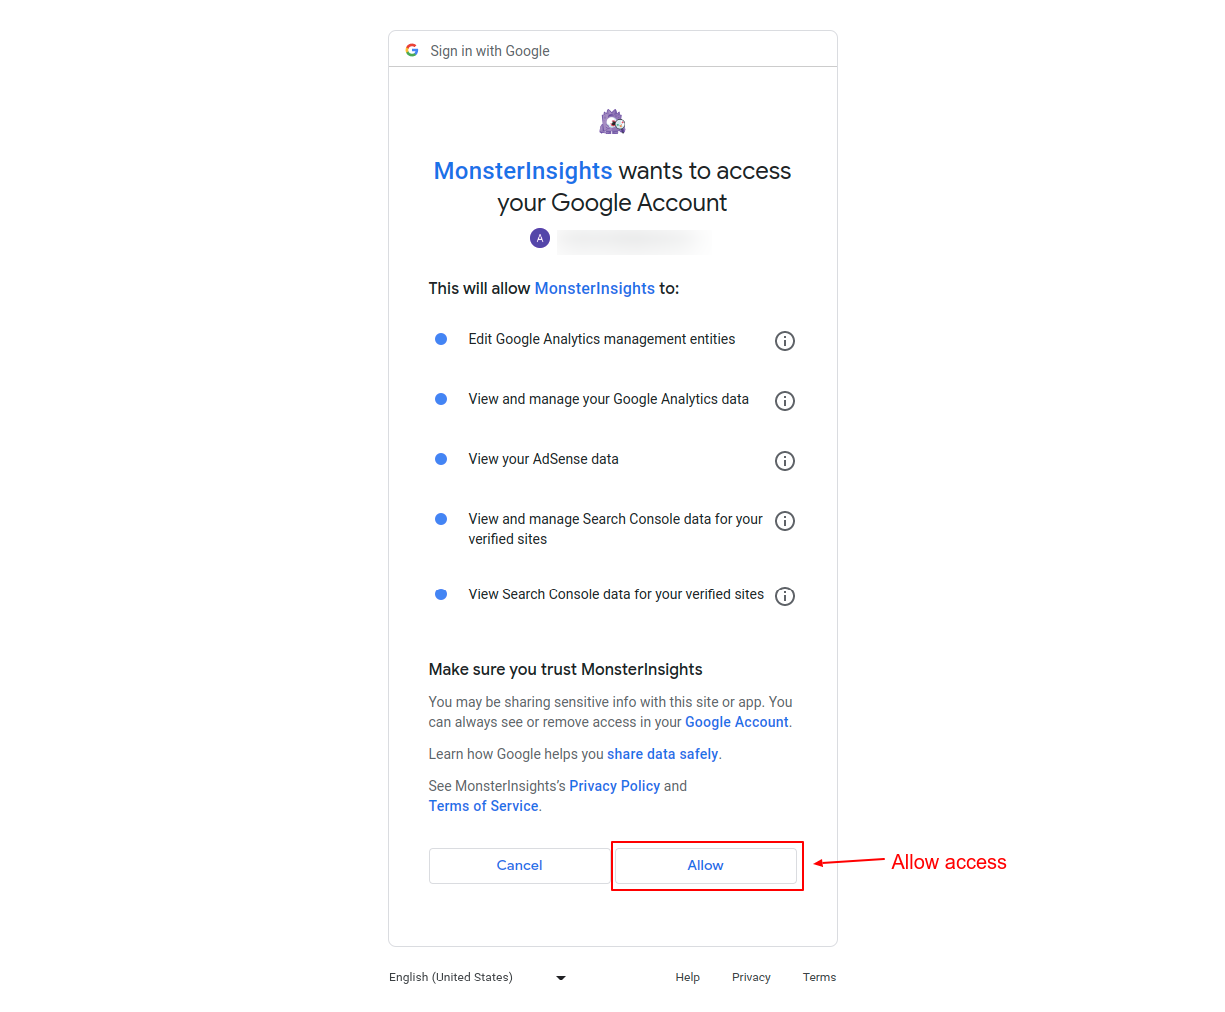
Screenshot 27: Allow Monsterinsights to access your Google account data.
8. Choose the GA4 property from the list of available properties and click on “Complete connection.”
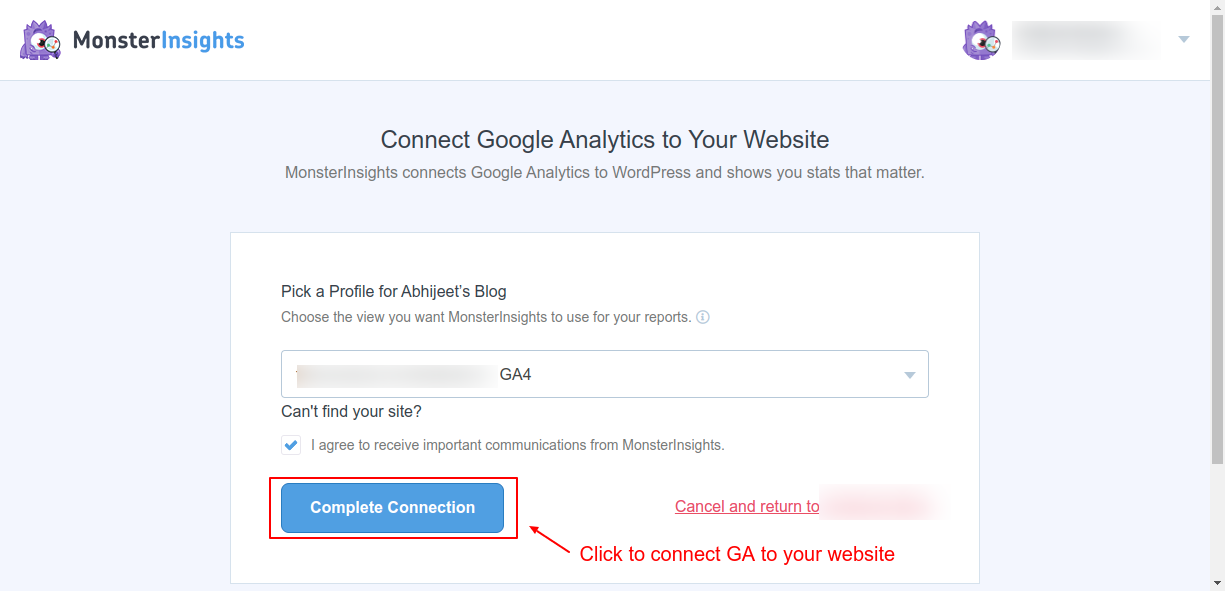
Screenshot 28: Choose the GA4 property to connect
9. Click on “Save and continue” on the recommended settings page.
![]()
Screenshot 29: Events tracking enabled by default
10. Choose which features you want the MonsterInsights plugin to enable. We recommend enabling the “Advanced Reports” and “Advanced Tracking” features.
11. Click on “Continue.”
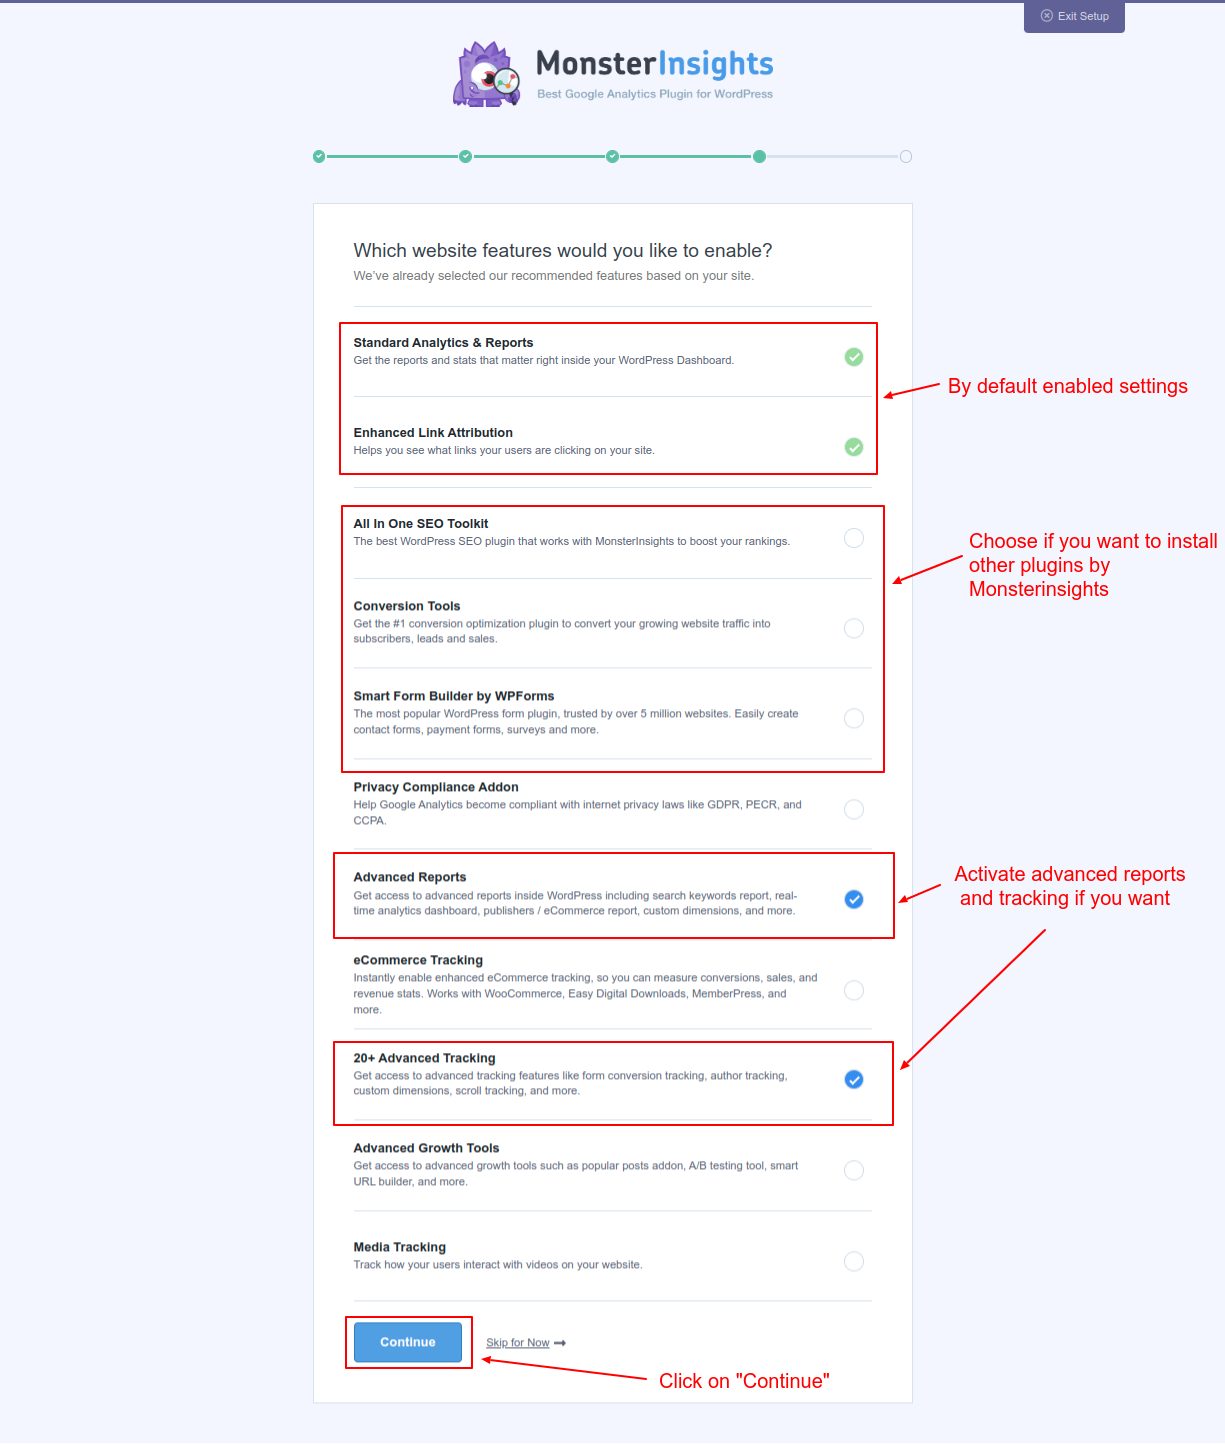
Screenshot 30: Choose which feature you want to enable.
At this point, the tracking and analytics setup is complete.
12. Next, click on “Complete setup without Upgrading.”
![]()
Screenshot 31: Google Analytics is connected, and the tracking code is installed.
You will be redirected to the settings page, which will show a success message.
13. Click on “View Reports.”
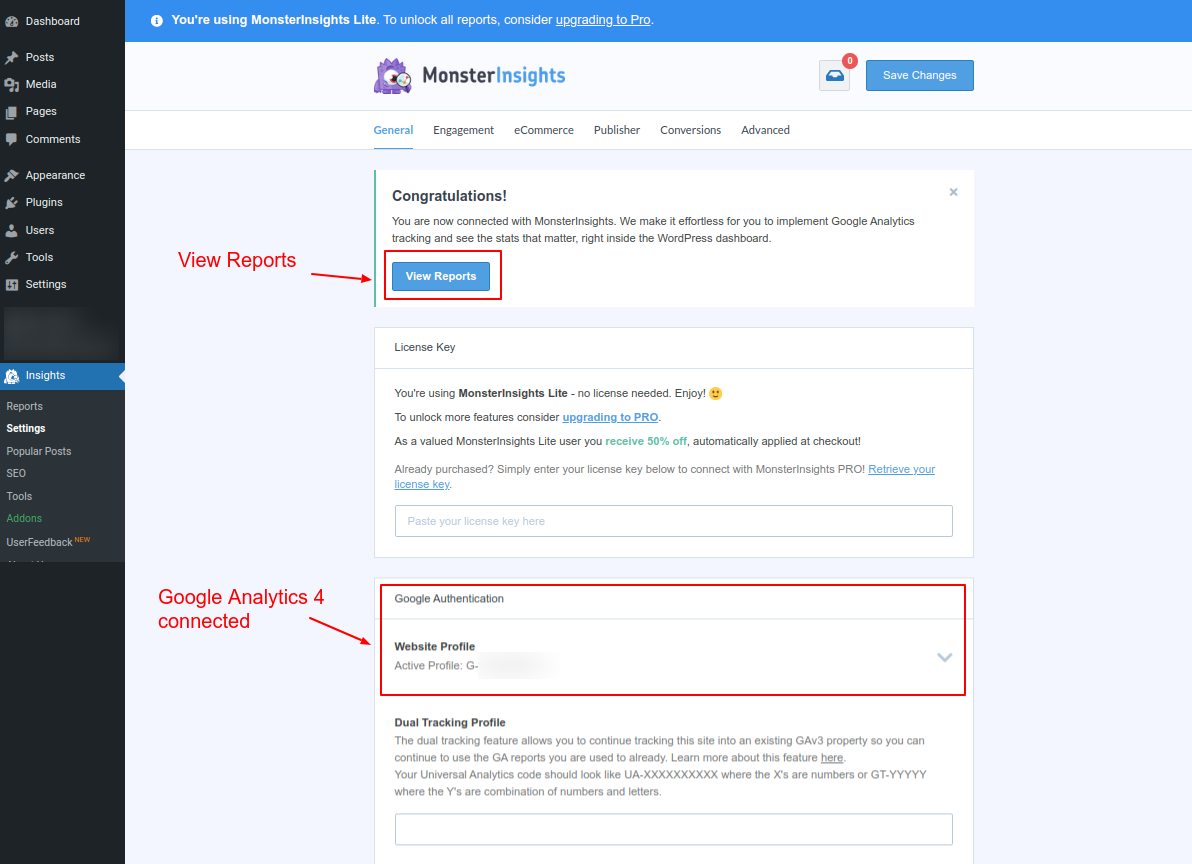
Screenshot 32: Google Analytics 4 property is connected
You will be redirected to the “Reports” menu, where you will be able to see Google Analytics 4 data in the WordPress dashboard.
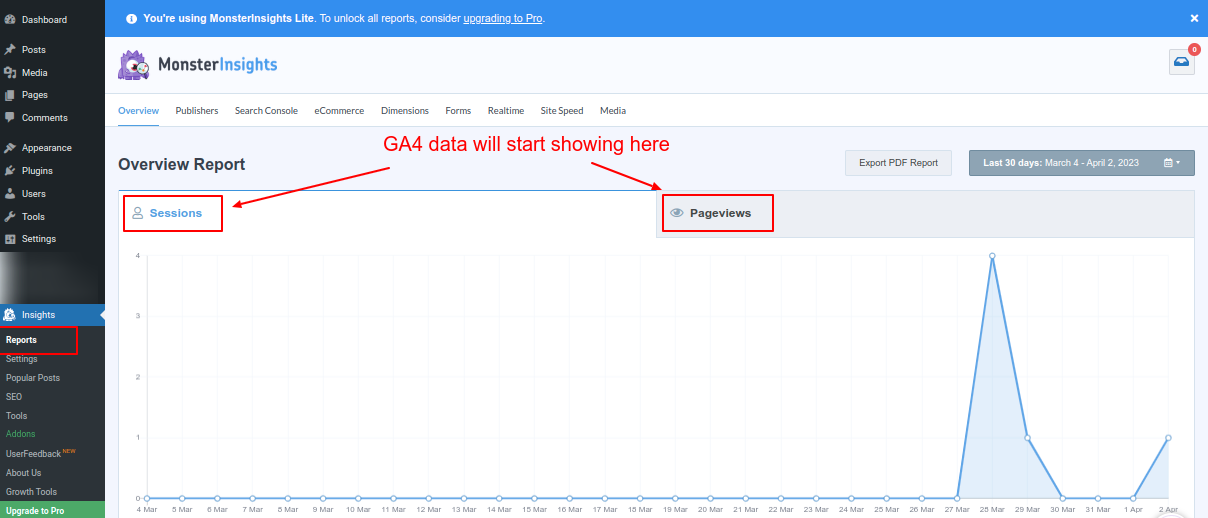
Screenshot 33: View reports to see your GA4 data flowing.
Note: It can take a few hours for the data to start appearing in GA4 and in your MonsterInsights Dashboard.
Conclusion
Google is sunsetting Universal Analytics (UA) as of July 1, 2023, which means it will stop collecting and processing new data.
In order to have a considerable amount of GA4 data tracked before UA is retired, we advise setting up Google Analytics 4 (GA4) as soon as you can. After this date, Site Kit will no longer display previous UA data.
In this blog post, we discussed in detail two methods of adding GA4 code. First, by adding code manually, and second, by using the plugins Site Kit and MonsterInsights.
That’s it for this blog, Signing off for now.
If you want experts to manage your WordPress website, then hire our awesome experts.
Published on Apr 18, 2023 | Updated on Jan 16, 2026
Author

Abhijeet Bendre
Author
|
Reviewer

Savita Soni
Reviewer
|